
Marly Bird's Blog, page 168
May 2, 2017
How to Make Stitch Markers
[image error]There is often a time when I need a larger stitch marker to fit my needles for my current knitting project than I have. Or when I want to have something that is customized to my style, not just a simple ring. I have put together a video to show you how to make knitting stitch markers and removable stitch markers for knitting and crochet. By following my video you can make your own unique stitch markers for your project.
Making your own stitch markers are perfect for your larger needles. It can be hard to find markers that will fit around your size 13 needles but if you make your own you will know that they will fit. Many of us are multicrafters and now is the time to add another craft to your tool box.
*This post contains affiliate links. By clicking on one of these links and making a purchase a small portion will be given back to the blog, the price you pay is not changed. Thank you for your support of the blog.*
[image error]NOTE: I am NOT an expert in beading and I am not claiming that I know everything about the topic. I have put together this tutorial as a novice in beading, making something simple to fit my needs as a knitter. If you are looking for more information on beading or for inspiration you can check out my two friends, who are AMAZING jewelry designers. Jill Wiseman is an amazing designer and has her own online supply store. My other friend, Candie Cooper, is also a very talented designer. She has a Craftsy class to teach you all of the basics of beading. It is a great class that even shows you how to crochet with wire.
[image error] Supplies for Knitting Stitch Markers:
Beading Mat
Crimp Tubes
Beading Wire
Wire Cutters
Crimping Pliers
Beads (light in weight)
The post How to Make Stitch Markers appeared first on Marly Bird.


Textured Triangle Shawl Knit-along Section 1
The Marly Bird Textured Triangle Shawl Knit-along Section 1 is sponsored by Red Heart.
*This post contains affiliate links. By clicking on these links a small portion of your purchase goes to support the blog. Thank you for your support.*
This is the second KAL I am hosting on my blog with Red Heart and includes a full set of HD videos of me demonstrating how to do each step of the shawl! You will find the full instructions for SECTION 1 below.
[image error] Queue it up and like the pattern on Raverly.
THE PROJECT
The spring 2017 Textured Triangle Shawl KAL is the perfect project to teach you some basic lace in knitting. Made in a bulky weight yarn it will be easier to see you stitches. I will walk you through every step of the pattern and be here to answer you questions. Join us in the Facebook KAL group to know when the new videos go live and to join in with the chatter.
Wear this oversized knit shawl bunched up; like a scarf, or wrapped around your shoulders, either way you’ll stand out in the crowd.
There are quite a few repeats in this pattern. In order to keep track of where you are in the pattern I have written out each link of the pattern for you so that you can mark them off as you go. You can also download the FREE PDF pattern from Red Heart along with my additional charts.
THE DATE
The official start date is May 3, 2017. There will be one video released each week along with the pattern instructions for that section. You will find a full schedule at the end of this post with links as they are available.
THE COMMUNITY
There is a dedicated Facebook group for this KAL that is monitored by me and several of the WONDERFUL sampler knitters that work with me. We are all there to help you with this project. Please join us!
THE PATTERN
Below you will find the instructions for SECTION 1 of the Textured Triangle Shawl.
Textured Triangle Shawl Materials:
RED HEART Soft Essentials: 3 balls in color of your choice
Susan Bates Circular Knitting Needle: 8mm [US 11], 29″ [74 cm] long
Yarn needle
Stitch markers
FREE Textured Triangle Shawl Pattern
The original shawl in the written pattern was made in the color 7420 Charcoal. For the Textured Triangle Shawl Knit-Along I am knitting one in 7520 Teal, and the Red Heart team will be sharing photos of one in 7405 Greyhound. Any color of Soft Essentials works for this shawl. I can’t wait to see what color you pick for your shawl. [image error]
Textured Triangle Shawl Measurements:
THE GAUGE: 10 sts = 4″ [10 cm]; 16 rows = 4″ [10 cm] in Stockinette stitch.
FINISHED MEASUREMENT: Shawl measures 70″ [178 cm] at widest top edge and 30″ [76 cm] at longest point at center back. 
Special Stitches:
kfb (Knit into front and back) = Knit next st but do not remove from needle, knit into back loop of same st and remove from needle.
Let’s Begin:
Starting the pattern off we will learn how to make a garter tab beginning. This is a great start for this project because the garter stitch is used to frame the entire pattern.
Through this section you will also learn about kfb (knit into front and back) as well as yarn overs. Together these two things make a lace pattern down the spine of the shawl.
Join me as we start this project.
[image error] [image error] [image error] [image error]
[image error] Homework
Finish section 1 and be ready to start section two on May 10, 2017.
Once you finish your section be sure to post pictures to the facebook group as there will be a $25 prize package given away from RedHeart.com to one lucky person (who is randomly chosen) that has finished his or her homework during the week of May 3, 2017 – May 9, 2017 @ 11:59pm. Goodluck!
Textured Triangle Shawl Video Schedule:
View all of the videos in the call on my YouTube Channel. A new video will be posted each week.
Week 1 Wednesday, May 3
Garter Tab, Set-Up Rows, Section One
Week 2 Wednesday, May 10
Section Two
Week 3 Wednesday, May 17
Section Three
Week 4 Wednesday, May 24
Section Four and Finishing
[image error]OH, One last thing!
Be sure to use the hashtag #MarlyBirdKAL when you post about it on social media
so we can find what you are saying
The post Textured Triangle Shawl Knit-along Section 1 appeared first on Marly Bird.
May 1, 2017
How to Knit Red Heart Color Block Knit Back Scrubber
[image error]Red Heart has a new collection of patterns using Scrubby Cotton, their newest addition to the scrubby line. In this collection of patterns you will find a lot of great ideas for creating a home Spa. In this post you will find a video tutorial on how to knit the color block knit back scrubber.
*This post contains affiliate links. By clicking on an affiliate link and making a purchase a small portion of the purchase will go to the blog. The price you pay will not change. Thank you for your support of the blog.*
The same Scrubby texture you love now in 100% cotton. More absorbent than the original Scrubby, this version is great for dishes as well as the bath. It gets softer when it is wet so it is perfect for washcloths. Pair it with a bar of soap and you have an awesome gift! This project requires only three balls of Scrubby Cotton.
[image error] Scrubby is also available in original Scrubby and Scrubby Sparkle. Both are great for making cute gifts. Be sure to check out Red Heart’s 7 Month of Scrubby Campaign that is currently running. Over the 7 months you will see so many great new Scrubby patterns.[image error]
7 Months of Scrubby Themes:
March: Animals
April: Food
May: Spa
June: Flowers
July: Summertime
August: Shapes
September: Holiday
May features a collection of spa related washcloths and dishcloths. The Color Block Knit Back Scrubby is one of the featured projects. These are great projects to make for mother’s day, teacher gifts or a relaxing gift for yourself.
With simple stitches and my video tutorial anyone can make this project. Even if you are new to knitting I will show you each step to complete this project that you can watch over-and-over until you feel comfortable. 
On my YouTube channel you will find an entire playlist dedicated to Scrubby patterns. Look through the videos to find something that you love. You can get all of the scrubby patterns FREE on Red Heart’s website.
The post How to Knit Red Heart Color Block Knit Back Scrubber appeared first on Marly Bird.
April 27, 2017
Thursday Trivia with Marly Bird
It’s time for Thursday Trivia with Marly Bird and Red Heart Yarns!
*This post contains affiliate links. If you click on one of the links and make a purchase a small portion will go back to the blog. Thank you for your support*
What can you win in Thursday Trivia:
For you to have a chance to win a prize package of $25 from Red Heart Yarns you must answer this week’s trivia question correctly. Make sure you read to the bottom of the post to get your clue for where to find the answer. Rafflecopter will help us choose a correct answer randomly to win, be sure you enter your email address so we can verify the winner.
Giveaway Timeframe:
You have one week to answer the question.
Winner will be announced the following Thursday at the launch of next week’s question.
Be sure to come back and see if you were the winner.
This Week’s question:
Please comment on this blog post (and enter the Rafflecopter widget)–What color of Red Heart Super Saver was used in the Granny Stitch Planned Pooling Tutorial?
Spread the word:
Help spread the word about #ThursdayTrivia. You can find each week’s question on the blog under Thursday Trivia.
[image error] FINE PRINT:
The Thursday Trivia Giveaway with Marly Bird and Red Heart Yarns is open to US and Canada addresses only. One winner will win a $25 prize package from Red Heart Yarns. This giveaway ends on 5/3/17 at 11:59 pm Mountain US time. To enter, use the Rafflecopter form below. If you are on mobile and have difficulty entering, please use a desktop computer to enter. You must enter a blog post comment on THIS post and click the Rafflecopter button to be eligible. Click the button below to enter your information to be entered to win.
[image error]
The post Thursday Trivia with Marly Bird appeared first on Marly Bird.
April 26, 2017
Multiple Sequence Planned Pooling Crochet
[image error]Today we have a special guest that is going to be telling you all about Multiple Sequence Planned Pooling Crochet. In this tutorial you will see how to work planned pooling over multiple color sequences and how to make the pooling work as you imaged. Please welcome Brenda-Leigh to the blog to teach us about multiple sequence planned pooling crochet.
[image error]Multiple Sequence Pooling:
One of the most common questions we see 0n the Facebook Planned Pooling with Crochet page is “Why can I do one sequence, but when I try to do three (four, five, six or more), it doesn’t work? What am I doing wrong?”.
Hopefully, you’ll find the answer today!
This tutorial assumes you know how to successfully pool one full color sequence. If you’re still learning how to do a single sequence, please take the time to watch Marly’s terrific video series on her YouTube Channel.
You can see from my swatch using Red Heart Super Saver in Wildflower, my stitches per color. I then use these counts to make a planning chart.
[image error]
Red Heart Super Saver Wildflower Planning Chart:
I know from my single sequence swatch that I need 19 stitches to complete one sequence. For this tutorial, I am going to demonstrate two sequences, but the process works for as many sequences as you need to achieve the desired width of your project. Let’s get started with Multiple Sequence Planned Pooling.
To do two sequences, I will need 38 stitches (19 sts x 2 sequences). To work in moss stitch, I need 2 chains for each full stitch. The last stitch in the row doesn’t get a chain one, so you need 75 chains to complete two sequences. (38 stitches x 2 chains/stitches – one chain). I also need to add three stitches for the initial turning chain. Total chain required is 78.
For your first time, I suggest you chain 78, then continue with as many as you need to start at a distinct color change. You can undo your slip knot later and take out the few extra chains. Notice the loop on my hook is lime, so that will be the first color in my sequence.
Now I am going to work through the first sequence making sure I maintain the stitch counts in my planning chart. I prefer to work around the starting chain (see Marly’s 10 Secrets to Perfect Planned Pooling in Crochet to learn how to do this), but you can work into the chain if you prefer. The important thing here is to maintain the stitch count as determined in the planning chart. You may have to work a little looser than normal to achieve this, but don’t worry, it will be worth it in the end.
The thick black arrow is pointing to the first lime stitch. I like to work the first stitch into the chain (rather than around the chain) to lock that end of the work.
Here is my second sequence and I have made sure to maintain my stitch count here as well. This is the most common mistake we see in working multiple sequences. You must have the same stitch count in all of your sequences on Row one in order for your work to pool properly.
Note: Notice at the end of the row, I have also worked the last stitch into the chain. I spread my stitches out along the chain to do this, but you don’t have to. I highly recommend that until you are sure how wide your piece will be, you leave that last stitch around the chain so it can be moved along if needed.
[image error]I am now ready to start row two and you can see I have the lime yarn ready to make my firsts stitch on row two. I know you have probably heard that at the end of row one, you remove or add one stitch before turning. I find that I have fewer tension adjustments needed by not removing or adding a stitch.
Here you can see the first three stitches on row two are lime, which is exactly how row one started.
As I continue to work across row two I am making sure to keep my stitch counts the same as they are in row one and in my planning chart. You might notice I have mentioned stitch counts a few times.
In rows one and two we don’t have other rows to look to for an offset, so this is all you to have get your pool set up for success!
[image error]You can see here as I approach the end of row two, I have the aqua ready for the final three stitches.
I’ve loosened my tension on the aqua to ensure the lime is used for the turning chains and the first two stitches of row three. You can see the last aqua stitch of row two has one leg that is lime – this is the only place where I let that go.
Now that you’ve reach the beginning of row three and your stitches have shifted over (offset) by one stitch from 2 rows below, stitch count is no longer as important as stitch placement. From here each row compares to the last one worked in the same direction as the one you are working. That is each odd row compares to the previous odd row and each even row compares to the previous even row. So 3 looks to 1, 5 looks to 3, 7 looks to 5 etc. Row 4 looks to 2, 6 looks to 4, and 8 looks to 6 and so on.
You can see on my hook I have a teal loop and you can see the first teal stitch will place on top of the last lime stitch in row one. This is exactly how you want it to work; as each new color appears on your hook, you look to the stitch immediately below the one you are working into to ensure it is starting one stitch before it did on the previous odd/even row.
I will continue to work across row three making sure that each new color lands one stitch before it did on row one. One place I have seen a few people question is when you get into rows three and beyond and the colors start to cross. When you look at the row you are working into and it has the same color you are working with, it can easily confuse your eyes. 
Here you can see I am working with the lime and if I look at row two it looks like my offset is wrong. When this happens, don’t panic – make sure you are looking at the correct row. I often go back to the previous color and count myself over to make sure I have the correct row.
[image error]Once I have worked through that lime color I can easily see it is actually falling exactly where I want it to.
[image error]As you continue working your project take care at the end of each row.
This shows the last stitch of row three, which does not yet offset with anything. When you work row 5, it will be your guide to where the first lime needs to land.
[image error]This is the same stitch from the other side. Again, you can see it has no “buddy” stitch to offset with yet. However, if you look at row four, you can see the first two lime stitches are properly offset with the lime in row two. The next stitch will be teal and it starts one place ahead of the first teal in row two.
[image error]At this point you are well on your way to a successful multiple sequence planned pooling project. If you are not yet a part of our Facebook family, we would love to see your projects on our page.
Happy Pooling!
Who is Brenda-Leigh:
My name is Brenda-Leigh and I taught myself how to knit when I was seven using a book. Shortly after I began knitting my mother wanted to learn as well so I taught her. It was a great bonding experience to be able to show her something I had learned.

When I was eleven I taught myself how to crochet and my first project was a pineapple doily made with crochet thread.
I’ve continued with both over the years and have recently fallen in love with crochet. When planned pooling became popular last fall, I caught on right away and have had to opportunity to teach others. Since that early experience with my mother, I’ve loved being able to teach others and witness their success. Nothing makes me happier than giving someone that “aha!” moment.
You can find me on Ravelry as CrochetbyAlexina.
Marly Bird’s Planned Pooling Posts:
Thanks so much to Brenda-Leigh for sharing with us her method of Multiple Sequence Planned Pooling Crochet. If you want to learn more about Crochet Planned Pooling you can view my other posts on how to use the moss stitch.
The Best Crochet Planned Pooling Argyle Tutorial
10 Secrets to Perfect Planned Pooling in Crochet
Planned Pooling-Finished Starting Chains
How to create Crochet Planned Pooling Argyle Charts
[image error]You can also head to my YouTube Channel to see all of the tutorial videos I have for Crochet Planed Pooling Argyle.
The post Multiple Sequence Planned Pooling Crochet appeared first on Marly Bird.
Fun in the Sun Cover-Up by Marly Bird
Today Only:
Through midnight MST tonight (4/26/17) you can purchase the Fun in the Sun Cover-up for only $1 in the Marly Bird Ravelry Store. Pattern must be purchase in the Marly Bird Ravelry Store. The code must be applied to the purchase before the discount will be applied. Click the image above for the code to automatically be applied to your basket. Due to the nature of digital products I will not be able to offer a refund, be sure to use the code before you purchase.
*This post contains affiliate links, which means if you click on the link and purchase something I will receive a small percentage of the value of your order. The amount you pay is not changed.*
Fun in the Sun Cover-up:
Unique crocheted blocks form a comfortable and fresh fabric perfect for fun in the sun. The brilliant shape of this simple design allows this cover-up to transform from a garment to a blanket, meaning you have one less thing to tote around.
This cover-up is a great project to start now to have ready for the summer. Made from a cotton and wool yarn, Green Mountain Spinnery Comfort Cotton, it is the perfect layer to add a little warmth when on the beach. Working with cotton for a garment, you will find that the finished piece can be heavy and stretch while worn. The wool in this yarn blend helps to keep the structure of the garment. Cotton is a great summer fabric and the Fun in the Sun Cover-up could be made completely in cotton, but be sure you swatch to see how much it will stretch.
Written with a chart this pattern helps you see every detail of what you are making. Written in one size to fit as a draping layering pice, you can adjust the size easily. Due to the simple construction as a rectangle you can easily add more motifs to make it larger, or take away motifs to make a smaller version. Motifs may seem daunting because of having to join the motifs at the end. In this pattern I use the join as you go method to combat that task. I love joining my motifs as I work a project so that once they are all constructed the project is almost complete.
Gauge is important:
As in all of the other garments that I make, I highly suggest making a hanging gauge swatch before you get started. This is important to see how gravity will alter the size of your cardigan after wearing it. Starting with a swatch will also save you the headache of making the wrong size before you even start. To make a hanging gauge swatch I start by making a swatch of the motifs. Typically I would say to make a 6 inch swatch, but in this case I would put together a few motifs to get a better feel of what will happen at the joins as well as the overall motif as it hangs. Then I hang the swatch to a hanger or cloths line and add additional cloths pins to the bottom to simulate gravity. Take a before and after measurement of your swatch to see what happens to it.
Ravelry Projects:
[image error]Be sure to add this pattern to your Ravelry Favorites and show me your version of the Fun in the Sun Cover-Up as you finish.
The post Fun in the Sun Cover-Up by Marly Bird appeared first on Marly Bird.
April 25, 2017
Caption Contest Winners
If you remember Lindsey, of ErinLane bags, and myself put together a little contest for you all to help us caption her newest sheeple pattern. There were so many great suggestions that we ended up picking FOUR winners. Each of our winners will receive their very own bird and sheeple bag. Each of the winning captions will also be put on a shirt for you to purchase. See the winners below.
All winners will be emailed. If you don’t get an email, check your spam, please email me at submissions@marlybird.com.
Thanks to everyone that participated!!!
Winning Captions:
Lindsey and I are also offering shirts with these great captions on them. You can see the shirts below. To purchase the shirts go to Erin Lane Bags website and Shop>Sheeple>Apparel.
The post Caption Contest Winners appeared first on Marly Bird.
April 24, 2017
Mosaic and Lace Knits by Barbara Benson
Mosaic and Lace Knits by Barbara Benson was the topic of our Tuesday Yarn Thing podcast with Marly Bird. [image error]
Barbara Benson says: When I was eight years old, my father gave me a camera. Photography has been a part of my life for as long as I can remember, and I am working on marrying that old love with my more recently discovered passion for knitting. In 2005 I learned how to knit and absolutely hated it. I managed to finish one project and one sock then gave up because purling was evil. In May of 2010 I decided to pick it up again, in large part due to Ravelry. And then I discovered the Norwegian Purl and life was good.
And then I learned that I am not particularly good at following patterns, so I ended up winging it. I found this creative process exceptionally satisfying and have been dreaming up new things to do with beautiful yarn ever since. My work focuses on creating detailed and beautiful accessory patterns. I tend to explore slightly unorthodox elements in knitting; be it shaping, color combinations or unusual themes. [image error]
Mosaic & Lace Knits: 20 Innovative Patterns Combining Slip-Stitch Colorwork and Lace Techniques is the result of several years developing techniques to combine slip stitch colorwork with lace I have written a book detailing what I have learned in my experimentation. You the knitter can confidently knit any of these 20 beautiful accessory patterns that play with color, drape, and form while working with only one yarn per row.
You can follow Barbara Benson at her website: www.TumpDuck.com, also her YouTube channel, her Facebook page, Instagram, Pinterest, Twitter and her designer page in Ravelry. Her book is available in Amazon, with Marly’s #affiliatecode.
If you missed getting to see this live, find the video Marly recorded for us as a Facebook LIVE video, or listen to the archived episode: http://www.blogtalkradio.com/yarnthing/2017/04/25/mosaic-and-lace-knits-by-barbara-benson
The post Mosaic and Lace Knits by Barbara Benson appeared first on Marly Bird.
Granny Stitch Planned Pooling Crochet
Today we have a special guest that is going to be telling you all about the Granny Stitch Planned Pooling Crochet. This is another variation that you can use for planned pooling. Typically I use the moss stitch as you have seen in my previous videos (which can be found on my YouTube Channel). Since the granny stitch planned pooling crochet isn’t something I typically design with I thought that I would bring in someone who has done a lot of work to perfect this style of planned pooling. Please welcome Rocky to the blog to teach us the granny stitch planned pooling to add to our tool box.
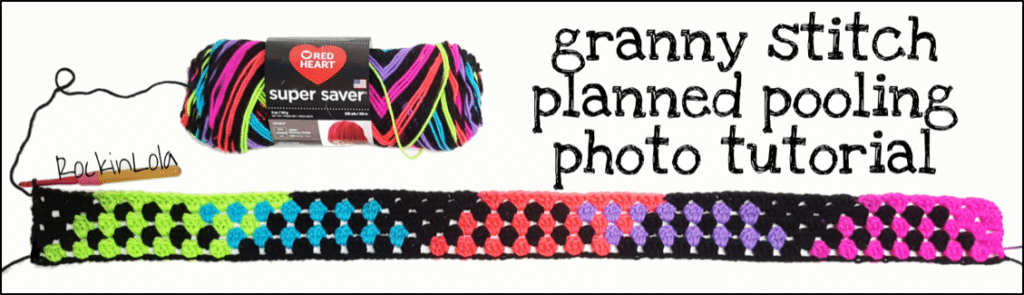
Learn about Granny Stitch Planned Pooling Crochet:
Photo Tutorial by: RockinLola
YARN: Red Heart Super Saver (RHSS) in Neon Stripes & Red Heart Super Saver in Black (or color you wish to use for border) for the starting chain
HOOK: I hook, 5.50mm (recommended hook size on yarn label)
STITCHES USED:
chain (ch)
double crochet (dc)
granny cluster (3dc in same space)
Planned Pooling Tip: your hook size and amount of clusters per color that you get may vary from person to person or may be different due to yarn dye lot.
Notes on Neon Stripes: This yarn has 10 colors in one sequence (pink, black, orange, black, green, black, blue, black, purple, black). Think of each color in the sequence as being the exact same length. There are many ways to pool this yarn which will give you a variety of outcomes. For the purpose of this tutorial and ease of capturing photos, I will be demonstrating working through half of a color sequence (5 out of the 10 colors).
[image error]Starting Notes:
Use a separate alternative color of yarn for the starting chain. It is best to think ahead to which border color you will want and use that color for the starting chain.
Determine how many granny clusters you will have by working through one color. You may need to change your hook size or adjust your tension to get the same amount of granny clusters for each color. Using an I hook (5.50mm) yielded me 7 granny clusters per color.
I worked through a half sequence (5 colors) and 7 clusters per color which gave me a total of 35 granny clusters in my first row. Estimate 3 chains per cluster plus an additional 3 chains for the extra dc at the end of the row. 35×3=105 105+3=108
Chain 108 and leave a tail. Either fasten off the starting chain yarn or keep it attached for the border.
Row 1: Using the RHSS Neon Stripes, start at the beginning of a new color. Make a stand alone dc in the start of a color by attaching the Neon Stripes to the first chain of the starting chain using a slip stitch. Chain 2 (counts as a stand alone dc). Skip 2 chains and make a granny cluster (3dc) in the next chain. Make 7 granny clusters total in each color across row 1 to the last three chains. Skip two chains and make a stand alone dc in the last chain in the next color of the sequence. Turn. (35 clusters + 1 stand alone dc at each end).
*You will be making 1 stand alone dc on each end of the odd rows (1, 3, 5, 7…). This does NOT count as a separate cluster.
[image error] 1 stand alone dc + 7 clusters in pink
[image error] 7 clusters in black
[image error] 7 clusters in orange
[image error] 7 clusters in black
[image error] 7 clusters in green and end with 1 stand alone dc in the next color
Row 1= 35 granny clusters across, plus a stand alone dc on each end
*This piece measures approximately 36 inches across. For a wider piece, work through an entire color sequence (all 10 colors and 70 granny clusters across Row 1).
Row 2: Chain 2 (counts as dc) and make 2dc in space between the dc and the first cluster of row 1. Continue working 3dc clusters across row 2 in the space between the clusters of row 1, maintaining 7 granny clusters in each color.[image error]
The last cluster on Row 2 will be the first color in the next color sequence (the color you started with on Row 1).
Odd Rows (1, 3, 5, 7…) will have 35 granny clusters across
Even Rows (2, 4, 6, 8…) will have 36 granny clusters across
*The yarn pools into a diagonal pattern because of the extra granny cluster on the even numbered rows.
End of Row 2
Row 3: Chain 2 (counts as stand alone dc), make 3dc cluster in the next space between clusters. Continue to make 7 granny clusters across until the end of row 3. End with a stand alone dc at the end of Row 3 (and every odd row).
You will now start to see the diagonal pooling on row 3! Keep the same amount of clusters per color and there will be a shift of one cluster from 2 rows below.
Remember to end Row 3 with a stand alone dc.
End of Row 3
Row 4: You will now see the shift in both directions.
End of Row 4
End of Row 5
Continue with the granny stitch pattern, repeating Rows 2 and 3 and maintaining the same amount of granny clusters per color until you reach your desired size.
End your granny stitch project after an odd row, making sure that all of your corners contain a stand alone dc. This method ensures that when adding a border, you will be able to work evenly in each corner.
Who is Rocky:
[image error]My name is Rocky and I am owner and designer at RockinLola. I taught myself how to crochet when I was in middle school by reading patterns in magazines and crochet books. I love color and find myself drawn to bright colors and rainbow themes. I began to design baby blankets and clothing for friends of mine having children and I haven’t stopped since. I work in the public school system and am able to incorporate teaching children how to crochet as part of my job. When I get home after a long day of work, I get to play with yarn and design new things. In October 2016, planned pooling became my new obsession which opened a ton of new possibilities and design concepts. I love to be able to share things that I’ve learned along the way and always hope to inspire the creativity of others.
Marly Bird’s Planned Pooling Posts:
Thanks so much to Rocky for sharing with us her method of Granny Stitch Planned Pooling Crochet. If you want to learn more about Crochet Planned Pooling you can view my other posts on how to use the moss stitch.
The Best Crochet Planned Pooling Argyle Tutorial
10 Secrets to Perfect Planned Pooling in Crochet
Planned Pooling-Finished Starting Chains
How to create Crochet Planned Pooling Argyle Charts
You can also head to my YouTube Channel to see all of the tutorial videos I have for Crochet Planed Pooling Argyle.
Be sure to join us later this week for another special Guest Post with more information on Crochet Planned Pooling.
The post Granny Stitch Planned Pooling Crochet appeared first on Marly Bird.
April 20, 2017
Red Heart Yarns New Super Saver STRIPES and OMBRE
Red Heart Yarns New Super Saver STRIPES and OMBRE was today’s hot, Hot, HOT topic on the Yarn Thing podcast with Marly Bird, and she was joined by Red Heart Yarns own Margaret Eckman. Margaret is their Social Media Specialist and she works with the bloggers (aka Joy Creators!), gets to know the new yarns as they come out. Both she and Marly have known about this new Super Saver was coming out and had to sit on their hands, almost literally!
Super Saver is the Red Heart Yarn line that most people are aware of, it’s found in most craft stores, and often times it the yarn we hand a newbie to try out knitting or crochet. This new gradient or ombre line offers slow color changes that many of us have been craving for so long. I loved how Margaret says they have been sitting around the office looking pretty. So typical of gorgeous yarns!
Marly shared just yesterday in a blog post, complete with videos from her YouTube channel and during the video feed, she showed us the crochet Isoceles Triangle Shawl (shades of purple) and a knitted Fantastic Ripple Scarf (the multicolored). There are actually two choices, there is a gradient Ombre available in 12 colors, which takes a color and changes the tone. SO beautiful and stunning! It’s available in the whopping 10 ounce sized at 482 yards. The Stripes options are added to the Super Saver selection and they’ve added that to the selection by showing a swatch of the changes, available in the 236 yards of 4 ounces and mix really well with other colors in the Super Saver lines.
If you missed getting to see this, check out the live video that Marly posted from the Birds of a Feather Studio directly to her Facebook page or the completely audio episode from the podcast link http://www.blogtalkradio.com/yarnthing/2017/04/20/red-heart-yarns-new-stripes
The post Red Heart Yarns New Super Saver STRIPES and OMBRE appeared first on Marly Bird.
Marly Bird's Blog

- Marly Bird's profile
- 19 followers


![[image error]](http://www.marlybird.com/wp-content/uploads/2017/05/StitchMarkers_Materials.jpg)
![[image error]](http://www.marlybird.com/wp-content/uploads/2017/04/KAL_4.jpg)
![[image error]](http://www.marlybird.com/wp-content/uploads/2017/05/Textured-Triangle-Shawl-Knit-along-LM5408-Red-Heart-Yarns-Sheet1_Page_1_watermark.jpg)
![[image error]](http://www.marlybird.com/wp-content/uploads/2017/05/Textured-Triangle-Shawl-Knit-along-LM5408-Red-Heart-Yarns-Sheet1_Page_2_watermark.jpg)
![[image error]](http://www.marlybird.com/wp-content/uploads/2017/05/Textured-Triangle-Shawl-Knit-along-LM5408-Red-Heart-Yarns-Sheet1_Page_3_watermark.jpg)
![[image error]](http://www.marlybird.com/wp-content/uploads/2017/05/Textured-Triangle-Shawl-Knit-along-LM5408-Red-Heart-Yarns-Sheet1_Page_4_watermark.jpg)
![[image error]](http://www.marlybird.com/wp-content/uploads/2017/05/W1-Textured-Triangle-Shawl-KAL.png)
![[image error]](http://www.marlybird.com/wp-content/uploads/2016/03/Knitaong-Facebook-Group.png)
![[image error]](http://www.marlybird.com/wp-content/uploads/2017/04/Multiple-Sequence-Planned-Pooling-Crochet.png)
![[image error]](http://www.marlybird.com/wp-content/uploads/2017/04/Multiple-Sequence-Pooling-1.jpg)
![[image error]](http://www.marlybird.com/wp-content/uploads/2017/04/Screen-Shot-2017-04-25-at-10.37.46-PM.png)
![[image error]](http://www.marlybird.com/wp-content/uploads/2017/04/Multiple-Sequence-Pooling-2.jpg)
![[image error]](http://www.marlybird.com/wp-content/uploads/2017/04/Multiple-Sequence-Pooling-3.jpg)
![[image error]](http://www.marlybird.com/wp-content/uploads/2017/04/Multiple-Sequence-Pooling-4.jpg)
![[image error]](http://www.marlybird.com/wp-content/uploads/2017/04/Multiple-Sequence-Pooling-5.jpg)
![[image error]](http://www.marlybird.com/wp-content/uploads/2017/04/Multiple-Sequence-Pooling-6.jpg)
![[image error]](http://www.marlybird.com/wp-content/uploads/2017/04/Multiple-Sequence-Pooling-9.jpg)
![[image error]](http://www.marlybird.com/wp-content/uploads/2017/04/Multiple-Sequence-Pooling-10.jpg)
![[image error]](http://www.marlybird.com/wp-content/uploads/2017/04/Multiple-Sequence-Pooling-11.jpg)
![[image error]](http://www.marlybird.com/wp-content/uploads/2017/04/Multiple-Sequence-Pooling-12.jpg)
![[image error]](http://www.marlybird.com/wp-content/uploads/2017/02/Caption-This-Contest-Banner.jpg)
![[image error]](http://www.marlybird.com/wp-content/uploads/2017/04/Caption-Contest-WInners.png)
![[image error]](http://www.marlybird.com/wp-content/uploads/2017/04/BBensonHeadshot2016.jpg)
![[image error]](http://www.marlybird.com/wp-content/uploads/2017/04/Barbara-Benson-Mosaic-Lace-and-Knits.jpg)
![[image error]](http://www.marlybird.com/wp-content/uploads/2017/04/Starting-Chain.png)
![[image error]](http://www.marlybird.com/wp-content/uploads/2017/04/Row-1.png)
![[image error]](http://www.marlybird.com/wp-content/uploads/2017/04/1-Stand-Alone-DC7-Clusters-Pink.png)
![[image error]](http://www.marlybird.com/wp-content/uploads/2017/04/7-clusters-black.png)
![[image error]](http://www.marlybird.com/wp-content/uploads/2017/04/7-Clusters-Orange.png)
![[image error]](http://www.marlybird.com/wp-content/uploads/2017/04/7-Clusters-Black-2.png)
![[image error]](http://www.marlybird.com/wp-content/uploads/2017/04/7-Clusters-Green.png)
![[image error]](http://www.marlybird.com/wp-content/uploads/2017/04/Full-First-Row.png)
![[image error]](http://www.marlybird.com/wp-content/uploads/2017/04/Start-of-2nd-Row.png)
![[image error]](http://www.marlybird.com/wp-content/uploads/2017/04/End-of-2nd-Row.png)
![[image error]](http://www.marlybird.com/wp-content/uploads/2017/04/Last-Stitch-of-2nd-Row.png)
![[image error]](http://www.marlybird.com/wp-content/uploads/2017/04/All-of-2nd-row.png)
![[image error]](http://www.marlybird.com/wp-content/uploads/2017/04/3rd-row.png)
![[image error]](http://www.marlybird.com/wp-content/uploads/2017/04/3rd-row-middle.png)
![[image error]](http://www.marlybird.com/wp-content/uploads/2017/04/all-of-3rd-row.png)
![[image error]](http://www.marlybird.com/wp-content/uploads/2017/04/All-of-4th-row.png)
![[image error]](http://www.marlybird.com/wp-content/uploads/2017/04/end-of-5th-row.png)
![[image error]](http://www.marlybird.com/wp-content/uploads/2017/04/RockinLola-Granny-Blanket.jpg)