Cindy Conner's Blog, page 7
April 21, 2015
Planning for Seed Saving

Butternut Squash–sometimes squash flowers are taped shut after fertilizing.
Saving your own seeds is a wonderful thing to do, but it is something you should plan for early in the growing season. If you know you will be saving seeds, make sure the varieties of each crop you will be saving from do not have a chance to cross pollinate with other varieties of the same crop. There are charts online and in seed saving books that give isolation distances for each crop���the distance varieties must be separated to avoid cross pollination. The distance might be shortened if there are barriers present, such as trees or shrubs and solid fences. Having a hedge as a boundary around your garden would decrease the distance you have to be from your neighbor���s garden to avoid cross pollination.
You could use time as an isolation method. Plants that have a limited blooming period can be managed so that the flowering of different varieties doesn���t happen at the same time. For example, on the same day you could plant two varieties of corn that have at least two weeks difference in their dates to maturity. The pollen from the first variety will have finished by the time the pollen is released from the later maturing variety. Or, you could plant two varieties of corn with the same dates to maturity, but space the planting times two weeks apart.
Some growers resort to using bags or screened cages to keep their crops from cross pollinating and some even resort to hand pollinating. Hand pollination is sometimes done with flowers in the squash family���the cucurbits. I���ve never had the patience to watch for female flowers to open, then pollinate them with pollen collected from the male flowers of the plant. The fertilized flowers would then be taped shut. If I intend to save seeds from squash crops I only plant one variety in each species in the genus Cucurbita. Although there are six species, I���ve only encountered four: Cucurbita maxima, C. mixta, C. moschata, and C. pepo. You can grow one variety of each species at the same time without worrying about cross pollination. A good seed catalog will indicate which species a squash variety belongs to.
Have goals in mind for what you are selecting for. When you are first starting out you might be happy to save any seeds at all. Collecting from as many plants as possible will give you a broader range of genetics; however, you might want to select for certain traits, such as earliness, lateness, taste, shape, size or color. If you save seeds from the plants that produce the first tomatoes of the season, you are selecting for earliness. Those plants may or may not be the same plants that produce tomatoes the longest into the season. Pay attention to what drives you to choose the plants to save from. Sometimes you will notice a plant that is doing exceptionally well, but it is not the right time to save seeds yet. Tag that plant that has the characteristics you want to preserve so you can identify it when the right time to save seeds occurs.

Principe Borghese tomatoes
When tomatoes and peppers are harvested at full ripeness for eating, their seeds are mature and can be readily saved. For summer squashes and cucumbers, you would need to leave the vegetables on the plant until they are overgrown and way past the time to harvest for eating. Still other crops need to be left over the winter, saving the seeds when the plants flower the following year. The extra time for these plants to be in your garden needs to be accounted for in your garden plan.

Red Russian kale gone to seed.
The kale and collards you might have harvested for food for the table through the winter will be vacating your garden bed in March when they begin to bolt. However, if you are saving seeds from them, they may occupy that space until June. Only let one variety of cabbage family plants flower and go to seed at a time to avoid cross pollination. Before the variety you are saving from begins to flower, you should have begun to choose which plants you want to save seeds from. Most likely, the first to flower won���t be among your choices, nor will the plants that produced the least foliage to harvest through the winter. Pulling those plants out first leaves more room for the others and is part of the selection process.
Seed saving is a way to deepen your gardening experience and is an adventure that you can share with others through your neighborhood seed library. If your seeds are destined to be shared through a seed library, you will want to make sure that what you are sharing is what you say it is and hasn���t cross pollinated with anything else. If you don���t have a seed library in your neighborhood you may want to start one. You will find guidance for that project in my book Seed Libraries and Other Means of Keeping Seeds in the Hands of the People.
Seed libraries have been evolving at a rapid pace. Those who have been involved in that evolution will be coming together to study the issue at the First International Seed Library Forum in Tucson, Arizona, May 3-6. I���m looking forward to being one of the panelists for that event. You never know where your seed saving hobby will take you.![]()


April 8, 2015
Upcoming Events
 I’m going to be out and about traveling to some special events in the coming months. First up is a visit to the Washington County Seed Savers Library in Abingdon, VA, then on to the Mother Earth News Fair in Asheville, NC. In early May I’ll be in Tucson, AZ for the First International Seed Libraries Forum. Find me in Vermont the first week of June at the Slow Living Summit. Here is a list of all the events on my schedule so far through June. The complete list for the year, which I’ll be updating as necessary, is at Homeplace Earth.�� Come see me!
April 9, 2015 �� Washington County Library, Abingdon, VA . Cindy will give a presentation at 7pm, followed by a book signing.
April��11-12, 2015�� Mother Earth News Fair, Asheville, NC. Look for Cindy on the speaker schedule.��motherearthnewsfair.com.
April 25, 2015 �� Spring Garden Fest, Reynolds Community College, Goochland, VA . Cindy will be in the college library signing books from noon to 1:15 pm.��
May 2, 2015�� Ashland Farmers Market, Ashland, VA. Cindy will be there signing books from 9-noon.
May 3-6, 2015�� International Seed Libraries Forum, Tucson, AZ Look for Cindy on the speaker schedule.
May 16, 2015�� Spring Conference-Master Gardener Association of Central Rappahannock Area.�� Cindy will be speaking on Grow a Sustainable Diet. University of Mary Washington, Fredericksburg, VA.
June 3-5, 2015�� Slow Living Summit, Brattleboro, VT. Look for Cindy on the schedule speaking about seed libraries. slowlivingsummit.org
![]()


April 7, 2015
Compost Piles in Your Garden Rotation
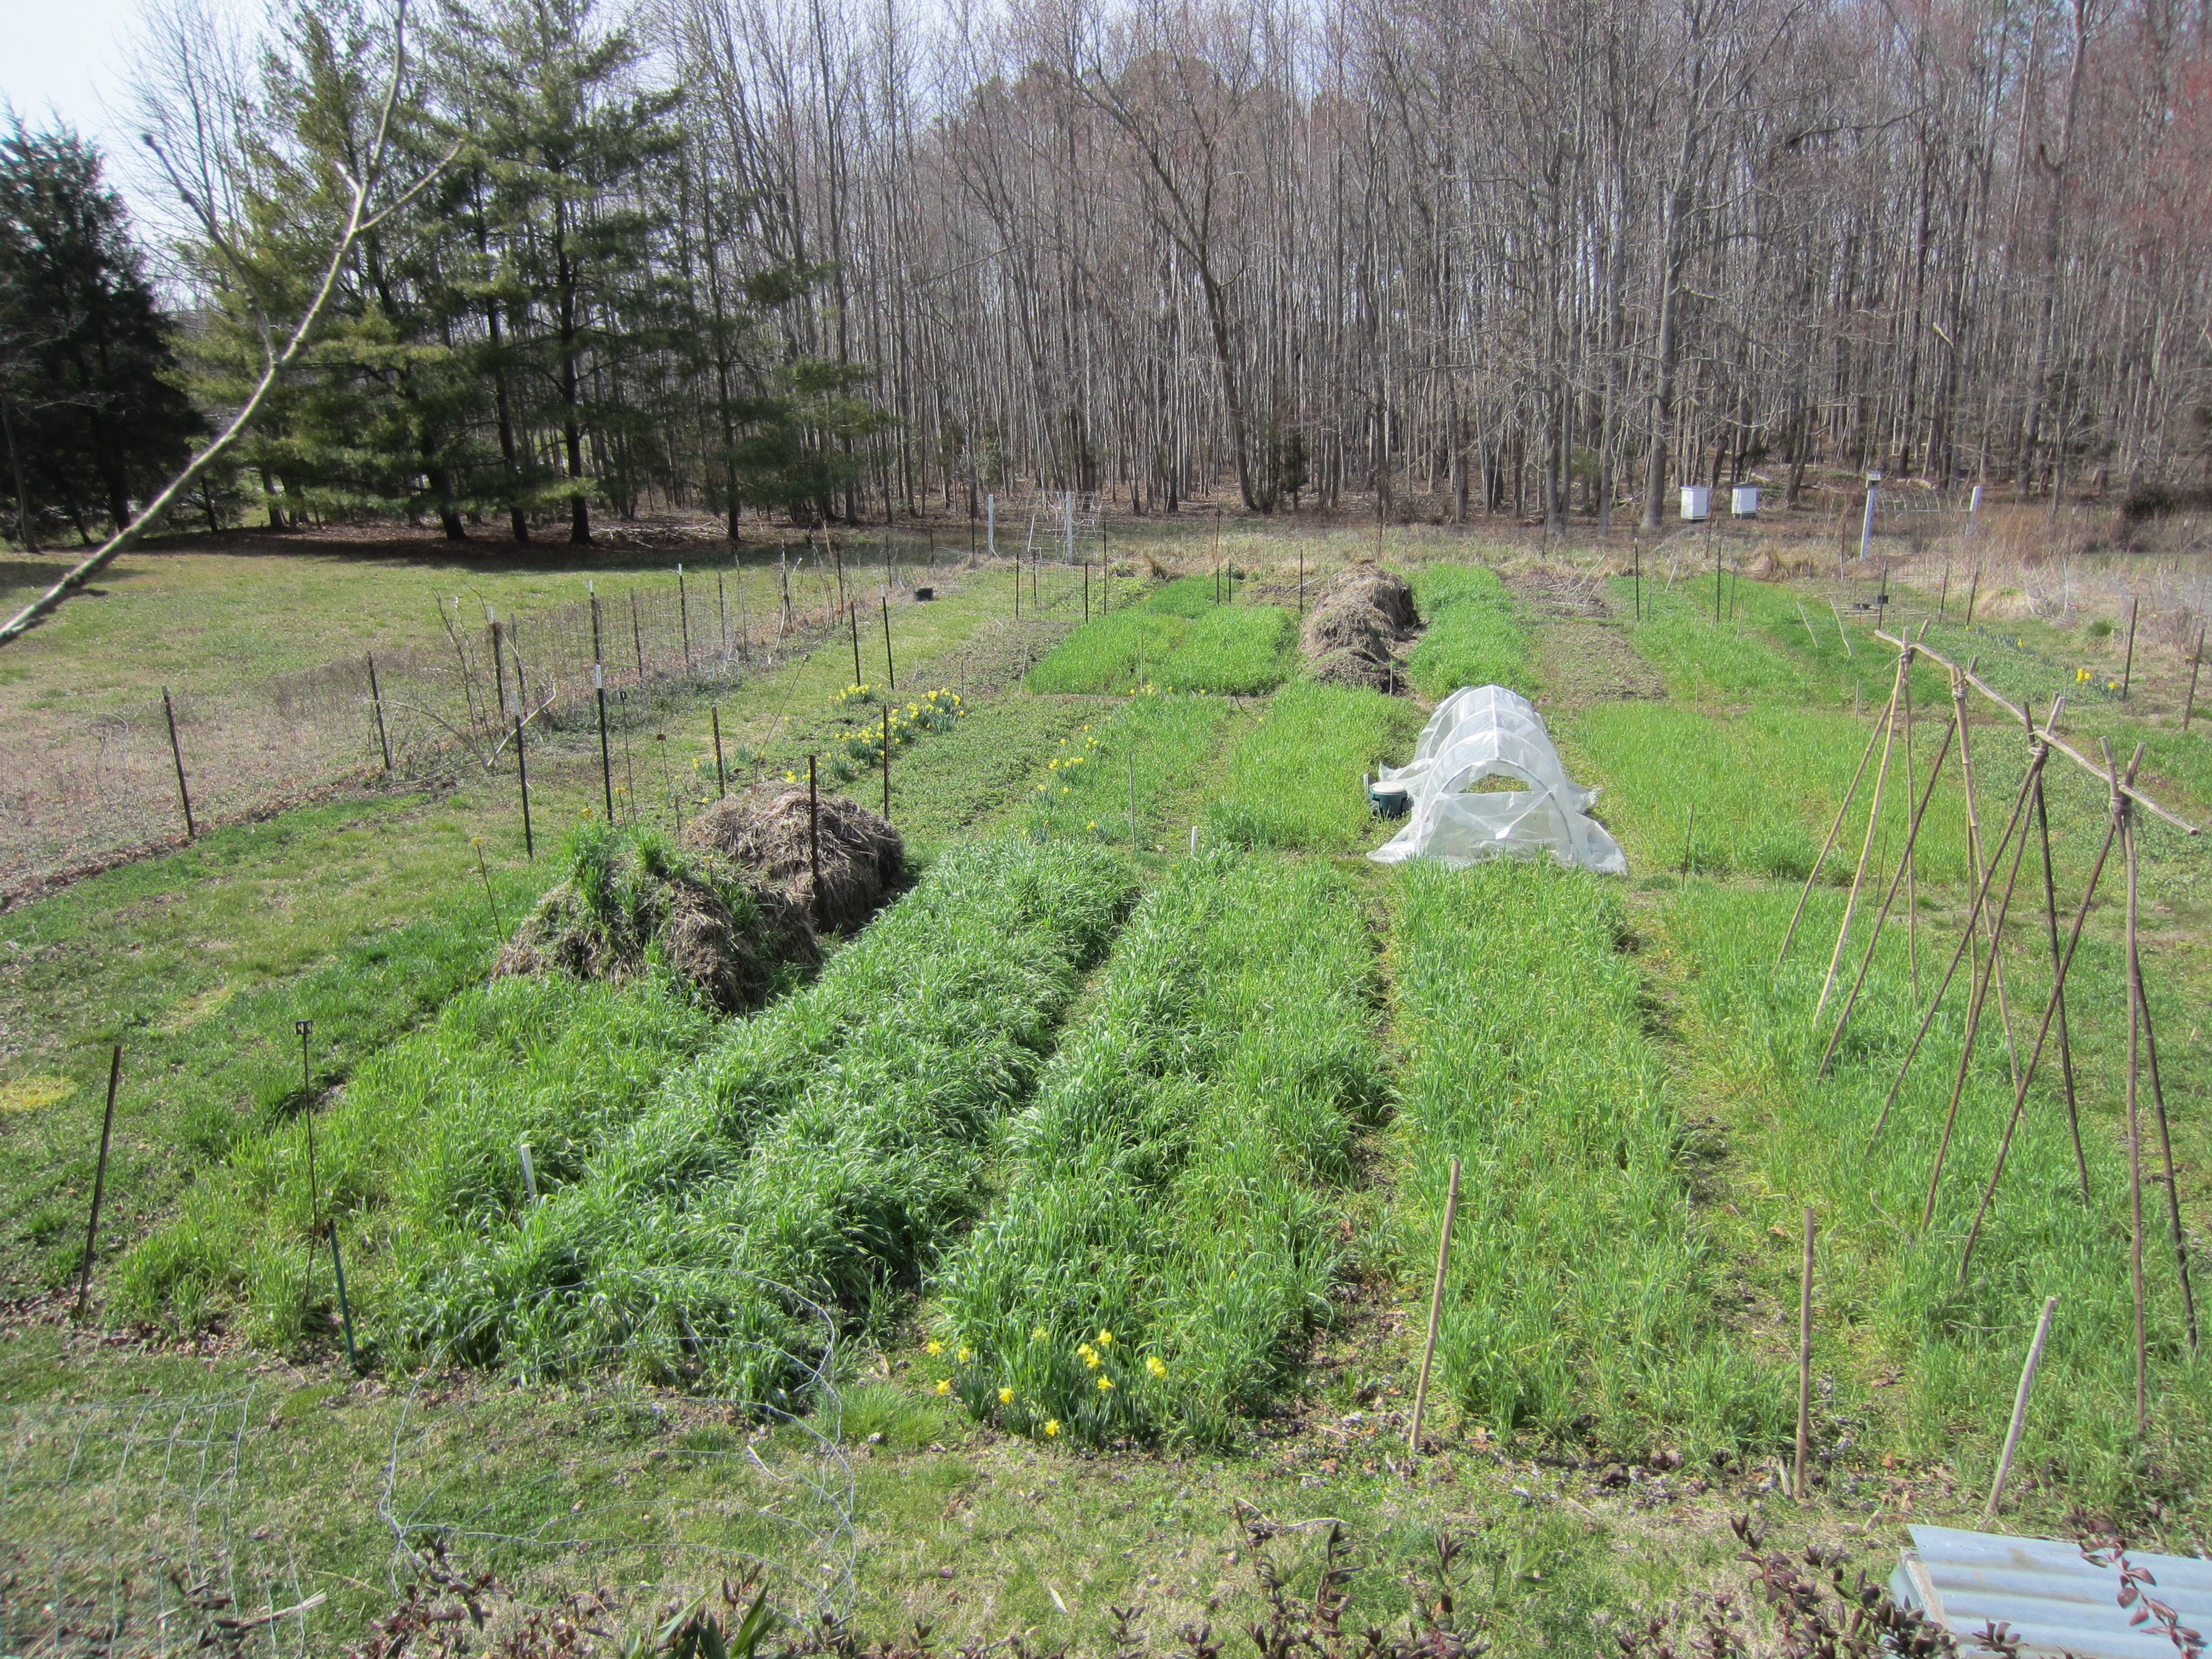
Garden in late winter with compost piles as part of the rotation.
For many years I had compost bins lined up on the edge of my garden. Discussion about compost generally included what kind of bins I used and where I sourced the materials to put in them. My bins were made from pallets I acquired for free. Each of three sides was made by pounding two t-posts into the ground and sliding a pallet over them. If one side needed to be replaced, that could be easily done, since the sides weren���t tied or nailed together. The fourth side was made by using bungee cords to hold it in place. To remove the compost, I released that side by removing the bungee cords.
The ingredients of those piles were usually animal bedding (from our animals or some I brought in from other places), leaves (from here or elsewhere), food scraps from our table, and maybe grass clippings. The compost bin was a handy place to toss garden residue���weeds and spent plants. Gradually I stopped including outside materials in my compost as I studied GROW BIONTENSIVE (GB) methods and produced more of my own compost biomass in my garden. The bulk of the material I used to bring in was for the carbon. With GB I grew more grains and corn, using the straw and stalks for carbon. Eventually, all the compost materials were coming from my own garden.

Butternut squash growing around and over the compost pile.
Rethinking the materials is only part of rethinking compost piles. If you are into tidy, and think compost requires a bin, you may have a hard time thinking outside that, but I urge you to try. Besides keeping them tidy, bins serve to keep animals out of your piles. If you include food scraps in your piles and have a dog, or neighborhood dogs frequent your place, you may want a bin. However, if your compost pile is within your fenced garden, you have already fenced out the critters. Once I put a fence around the garden I did away with the bins, but the piles were still on the edge of the garden space. It was when butternut squash grew wild around and over my pile one year that I began to think about the nutrients that were leaching into the ground each year beneath the piles and not being used.
Having to walk back and forth to the edge of the garden to put compost materials there that had grown in the garden, or to retrieve compost for the beds, also served to nudge me into planning to have my compost piles as part of my garden rotation. By the way, I did away with the notion that compost needed to be turned regularly long ago. Left to what they do best and the microbes turn all that organic matter into finished compost all by themselves. I do water occasionally to keep them hydrated.
Now I devote a garden bed, actually more than one, to compost. On my garden map, compost is shown, just as all the crops for the year are. The two biggest times for starting a new pile for me are in June when the grains are harvested and in October when the cornstalks, sweet potato, and peanuts are harvested. It is in October when the new compost bed is put to use. Whatever bed is designated to store compost for the coming year is where I start the new pile in October. The pile I created in the summer that needs more time to cure will be moved to this new compost bed. That is the only time it gets turned. If the new compost bed is part of the garden rotation it will be located next to the old compost bed, making the transition an easy one. You do not want to do any long distance hauling���just fork it from one bed to the next.

numbered compost piles
The rest of the compost in that bed, including the one started the previous October, should be ready to spread, which I do in September and October before I plant cover crops. Throughout the year there will be other materials added to the piles as weeding and harvesting is done. There will also be finished compost available to add to beds each time a new crop goes in. By following GB guidelines and having at least 60% of the garden devoted to compost crops for the year, it is easy to have an abundance of compost. To keep track of the order the piles were made, so I know which will be ready to use next and which needs to set longer, I use old smooth metal fence posts (the kind used for electric fence) with blocks of wood on top with a number painted on them. Some people have little signs for their piles that say such things as ���use me���, ���feed me���, or ���working.��� The pile that I make in the fall will not be ready to use until the next fall. Wanting to make the best use of all my resources, including space and available nutrients, I plant butternut squash around the base of that pile and let the plants grow over it. Besides soaking up nutrients from beneath, the plants shade the pile, preventing weeds from moving in. By the time the winter squash is harvested, the compost is ready to spread.
In October I plant winter rye in the bed that the compost vacated. That cover crop soaks up all the nutrients that may have leached from the piles and gives them to the corn that will go into that bed the following year. When the rye is shedding pollen (about May 7 here in Zone 7), I cut it with a sickle and leave it lie in the bed as mulch. Two weeks later I transplant corn into the mulch. Generally there is a small amount of a legume, such as Austrian winter peas, sown and harvested with the rye. I have my best crop of corn in the bed that follows the compost.
This might all seem confusing, but if you take time to think it through, it will become clear. In Grow a Sustainable Diet I explain GROW BIOINTENSIVE methods and how to plan to have 60% of your garden in cover crops for the year. In that book I also have a garden map and explanation for the Garden of Ideas that shows compost as part of the garden rotation. My DVD Cover Crops and Compost Crops IN Your Garden shows compost making in the beds and the management of the cover crops with hand tools through the growing season. Think outside the compost bin and make compost an integral part of your garden!![]()


March 24, 2015
How important is soil temperature?

20″ long compost thermometer with a 1 3/4″ face
Spring is here and I know you are anxious to be in the garden. As soon as the temperatures begin to climb it is really tempting to get seeds in the ground. Before you take that step, however, I encourage you to make sure the ground is ready for your seeds. Of course, you will loosen the soil and add compost and, if necessary, organic fertilizers, but did you take the temperature of the soil?
Seeds are naturally programmed to germinate and grow within a certain range of temperatures. Within that range they will grow faster or slower, depending on their comfort zone. It has been my experience that just because it is the right time to plant on the calendar, it may not be the right time to plant according to the soil. The temperature of the soil is more important than the date on the calendar. When I was a market gardener I would be anxious to get sugar snap peas in the ground in early March. I would put in another planting two weeks later. If the weather had been too cool, the first planting may not come into production until the second planting did. I learned to pull back the leaf mulch that covered the bed over the winter and put down a sheet of plastic two weeks before planting the sugar snaps to warm the soil. If the weather has been too cool and wet there is the danger that the seeds will rot and not germinate at all. Peas, beans, and corn are most susceptible to this, which is why you might find those seeds for sale coated with fungicide. Steer clear of fungicide coated seeds and plant at the right time. Beans and corn like the soil to be 60�� F (15.6 ��C) and cowpeas would like it if you wait to plant until it warms to 65�� F (18.3��C).
If you have mulch covering some of your garden beds, go out and stick your hand in the soil under the mulch and then put your hand in the soil in a bed without mulch. You will feel a noticeable difference in the temperature. During the winter an organic mulch such as leaves or straw does a good job of protecting the soil and providing habitat for the earthworms. However, when things begin to warm up in the spring the mulch will insulate the soil from the sun���s rays. Removing the mulch two weeks ahead of planting will help to warm the soil. I am not so much in a hurry these days, so I don���t use plastic to further warm the soil, but it is an option. With my system of cover cropping, when the cover crop is finished, it is naturally time to plant the next crop.

thermometer with a 5″ stem and 1 1/4″ face
You can monitor the temperature of the soil with a thermometer or by sticking your hand in the ground. Even better, go barefoot. There���s nothing like the whole body experience. You might want to use a thermometer until you can gauge the temperature by touch. I use either a 20��� long compost thermometer with a 1����� face (top photo) or a thermometer with a 5��� stem and 1����� face that I bought at the grocery store. I keep the long thermometer stuck in the soil somewhere so I don���t lose it. Usually it is in my coldframe, where it is right now. The nice thing about the compost thermometer is that it is easy to read without bending over too much. The small thermometer has so many uses. It comes with a plastic sleeve that has a pocket clip –handy if you are going to be carrying it around. The one you see in the photo is the one I use to monitor the temperature in my solar food dryer. It sticks through a hole drilled for that purpose with just the gauge showing on the outside of the dryer. A small thermometer such as this can be used in the kitchen, which is why you will find it in the grocery store.
You can find a chart showing a list of crops and the minimum, optimum, optimum range, and maximum soil temperature conditions for each in How to Grow More Vegetables by John Jeavons. A chart I find interesting is Days to Appearance of Seedlings at Various Soil Temperatures from Seed Planted at ����� Depth, compiled by J.F. Harrington. You can find it with an Internet search. It shows the number of days it takes for each crop to germinate at different temperatures. For example, peas will take 36 days to germinate at a soil temperature of 41��F (5��C), 13 days at 50��F (10��C) and 9 days at 59��F (15��C). You can see how warming up the soil will contribute to an earlier crop.
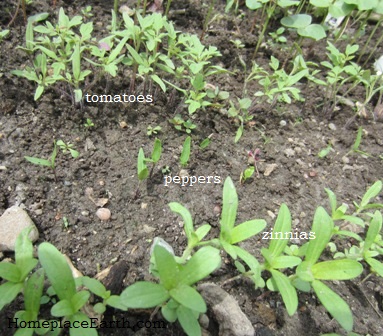
coldframe seedlings–tomatoes, peppers, and zinnias
Peppers, on the other hand, are shown to take 25 days to germinate at 59��F, 12 days at 68��F (20��C) and 9 days at 77�� F (25�� C). If you plant pepper and tomato seeds at the same time, the tomatoes will germinate first���in 14 days at 59��F, 8 days at 68��, and 6 days at 77��. I start my seeds in my coldframes, which provide cooler temperatures than starting them in the house. I put tomato, pepper, and other seeds of warm weather crops in my coldframe during the last week of March. Since I save much of my own seeds, I am developing strains of each crop that will germinate in cooler soil. The healthy plants that I take out of the coldframe are the ones that have germinated and thrived in the cooler conditions. The peppers that I have been most successful with in the coldframe are Corno di Toro and Ruffled Hungarian.
By saving your own seeds, you can develop strains of your crops that will germinate and grow under the conditions that you want to work with. Experiment with planting times and conditions in your garden. I would advise, however, to only take chances with what you can afford to lose. If you go into it with that attitude, you won���t be disappointed.
![]()


March 13, 2015
Seed Giveaway, Presentation, and Book Signing
 Come and see me at the Ashland branch of the Pamunkey Regional Library in Ashland, Virginia on Wednesday, March 18 from 7-8:30 pm! The library will be giving away new seeds from Southern Exposure Seed Exchange and I will be giving the presentation Growing to Seed to Share. My talk will include organic gardening and seed saving tips, as well as well as inform you of the seed library movement taking place around the country. Afterward, I’ll be signing my books–Seed Libraries and Other Means of Keeping Seeds in the Hands of the People and Grow a Sustainable Diet: Planning and Growing to Feed Ourselves and the Earth.
![]() My DVDs will also be for sale.
My DVDs will also be for sale.
See you there!


March 10, 2015
Ecology Action 2-Week Farmers Course

John Jeavons giving a free lecture at Eastern Mennonite University in Harrisonburg, Virginia, the evening before a 3 -Day Workshop in 2008.
Ecology Action began more than forty years ago when John Jeavons was seeking the answer to his question of how much space it would take to grow food for one person for a year. The focus on this work expanded to include also growing the crops to feed the soil. Besides researching growing a complete diet and the cover/compost crops needed for the soil, all in as small a space as possible, Ecology Action seeks to educate people worldwide to better feed themselves while building and preserving the soil and conserving resources.
Ecology Action maintains a website at www.GrowBiointensive.org where you will find information about their work, intern/apprentice opportunities, and a list of publications, some of which are in languages other than English. The outlet for Ecology Action���s research is Bountiful Gardens. There, in addition to seeds, you will find the Ecology Action GROW BIOINTENSIVE�� publications. You can also purchase the DVD Grow Biointensive: A Beginner���s Guide in 8 Easy Sessions through Bountiful Gardens or watch each session for free at www.johnjeavons.info/video.
In January 2014 Ecology Action held a 2-Week Farmers Course at their place in Willlits, California. This important event contained lectures from twelve different sustainability experts from around the world plus hands-on learning experiences. Through the wonders of the Internet, you now have access to some of the lectures in that course. Having produced two DVDs myself, I have an appreciation of what an undertaking it was to have the Farmers Course filmed, edited, and made available to you at www.vimeo.com/ondemand/ecologyaction. There are four free lectures and another seven lectures available for $1.99 each or $11.99 for all seven.
Ecology Action holds 3-Day Workshops which consist of lectures with a half-day of hands-on activities in the garden. Watching these Farmers Course lectures will give you a taste of what a 3-Day Workshop is like if you���ve never been to one. If you have, these lectures will support what you���ve already learned and supply you with new insights and knowledge. One advantage of being able to watch them on your computer is that you can stop if you need to take a break or if you want more time to take notes.
 One of the four free episodes is a 40 minute introduction to the course which is different than the paid Introduction. The free episode shows a number of speakers from throughout the course besides John Jeavons; including Steve Moore, Jake Blehm, Eric Buteyn, Jed Diamond, Patricia Mayagoitia, Juan Manuel Martinez Valdez, Samuel Nderitu, and Peris Wanjiru. The $1.99 Introduction contains John���s full lecture on the world situation (parts of it are in the free introduction). Although the world situation looks dire, John stresses that we are each the solution to a dying world, which is actually a theme throughout the course.

Ecology Action Self-Teaching Mini-Series Booklets #34, #31, and #36.
If you want to get the full benefit of these videos it is good to already be familiar with John���s book How to Grow More Vegetables (HTGMV). If you want to better understand his Diet Design lecture, it would be good to have first read Ecology Action���s Self-Teaching Mini-Series Booklet #31 Designing a GROW BIONTENSIVE Sustainable Mini-Farm. In the Diet lecture, he refers to worksheets that are found in Booklet #31. Booklets #34 Food for the Future Now and #36 An Experimental 33-Bed GROW BIOINTENSIVE Mini-Farm are also good resources. When attending an Ecology Action 3-Day Workshop it is recommended that you have read the Ecology Action publications ahead of time.

Ecology Action Self-Teaching Mini-Series Booklet #32
I consider Ecology Action Booklet #32 GROW BIOINTENSIVE Composting and Growing Compost Materials a companion to John���s Compost lecture. In that talk he speaks of the importance of building organic matter in the soil using compost, specifically compost made from materials grown biointensively in your garden. Compost holds 6 times its weight in water, which is an important consideration in times of water scarcity. You can store water in your soil by using compost to increase the organic matter in your garden. John explains why compost piles that are cool, rather than hot, contain more microbes than the hot piles and puts to rest any thought of needing to turn your compost piles regularly. It is better to let them molder in place, particularly if that place is in rotation in your garden. You can find more information about having a compost pile in your garden rotation in my DVDs and my book Grow a Sustainable Diet. The short and long range benefits of having a carbon to nitrogen ratio greater than 30:1 are also part of this lecture.
The lectures in this series include Operational Seed Security Systems by Sameul Nderitu from Kenya. He explains how his organization, G-BIACK, is encouraging farmers to save their own seeds. Just as in the U.S., farmers in Kenya tend to buy all their seeds each year from seed companies. In Kenya it is illegal for a farmer to sell seeds unless he has fulfilled all the requirements of a seed company, which is prohibitive. So, instead of selling their seeds as seeds, they sell them as food, which is legal.
Samuel���s wife, Peris Wanjiru spoke of Women Empowerment Programmes through G-BIACK . The women in Kenya are predominately illiterate and responsible for all of the household. If G-BIACK can teach the women biointensive gardening, solar cooking, and baking (to mention only a few of the subjects), they can help the whole family much more than targeting the men for education. G-BIACK stands for Grow Biontensive Agriculture Centre of Kenya. Samuel and Peris are graduates of the Manor House in Kenya, which expects its graduates to go back to their communities and make a difference. G-BIACK is the non-profit that they started and it has made a difference in the lives of so many people in Kenya. In turn, those people go back to their communities and teach others.
Steve Moore���s lecture on Farm Layout and Agroecology brings permaculture to the program and explains how a Biointensive garden needs to blend into the natural world and not be separate from it. Biointensive is actually the intensive gardening part of permaculture. Part of GROW BIOINTENSIVE teaching is that at least half of the area managed should be left to the wild. We need the wild areas of the natural world to filter our air and water, store water, and remove toxins.
There is more, but you will just have to watch these videos and check it out for yourself. I hope you take advantage of this opportunity to learn more about GROW BIOINTENSIVE, John Jeavons, Ecology Action, and the whole crew of folks you will be seeing on the screen.
![]()
��


February 24, 2015
Wood Flats for Seed Starting

Homemade wooden flats for seed starting.
If you have been following my work, you know that I start my seeds outdoors in coldframes, rather than indoors in flats. However, it was not always that way and, since I have fielded questions about seed starting lately, I thought I���d pass on the seed starting methods I employed when I did use flats.
For many years, when I started seeds for transplants I would use recycled containers or plastic flats and their inserts for the soil mix and seeds. In 1992 I became a market gardener, selling produce to two local restaurants. I knew I needed a better way to produce seedlings and followed Eliot Coleman���s advice in New Organic Grower to use soil blocks. I made wooden flats to the specifications in the book. We have a table saw and plenty of scrap wood, so the only out-of-pocket cost for the flats was for nails. The flats had only three sides to facilitate removing the soil blocks.
After a few years of working with soil blocks I decided I needed to produce more transplants in the same space, plus I didn���t want to buy sand and peat moss for the mix. In fact, I didn���t even want to bother making the mix. I did like the idea of wood flats, though. So, I turned to the advice of John Jeavons in How To Grow More Vegetables (HTGMV). The soil mix he recommends is half soil and half compost, which I already have in the garden. Fill a wooden flat, level it off, and plant the seeds���much easier than making soil blocks. I put a fourth side on all my soil block flats and made some new flats to the specifications in HTGMV. The flat on top in the first photo is a Coleman flat with the fourth side added.
You can make flats any size you want, but first think of how and where you will use them. The Coleman flats were sized specific for soil blocks with the inside dimensions 8 x 18����� and 2��� deep. That was just right for 36 two-inch soil blocks. The inside dimensions of a Jeavons flat is 14��� x 23��� and is 3��� deep. There are Master Charts in HTGMV that indicate how many transplants of each crop that can be started in a flat that size. If you depended on those Charts for your planning, you would want to make that size flat. Filled with moist soil, the Jeavons flat would weigh about 45 pounds.
The depth of the Coleman flat is 2���. The depth of the Jeavons flat is 3���. That might not seem like such a big deal, but it is. Although I continued to use the Coleman flats, I preferred the Jeavons flats for the depth and saw that the plants did better with the extra space for their roots. If I used the Coleman flats, I had to pot-on the transplants to deeper containers sooner. I think my ideal flat would be closer to the Coleman dimensions, but 3-4��� deep. However, the deeper the flat, the more soil mix is needed. Jeavons recommends making 6���deep flats half the size of his regular flat to transfer seedlings to that need to grow for a few more weeks before planting in the garden, such as tomatoes and peppers. A full size flat that was 6��� deep would be too heavy to manage easily. You could also make 3��� deep half-size flats.

Summer transplants enjoying the shade under the tree.
I stopped experimenting with flat sizes when I realized that I could just plant the seeds in the coldframes and dig up the transplants to plant in the garden. Sometimes I use wood flats to put my coldframe grown seedlings in until time to set out into the garden. I might do that if I need the space in the coldframe or to protect the seedlings from insects. Caterpillars occasionally take out my peppers in the coldframe, so I watch for the seedlings to come up, then transfer the seedlings to a flat. I want the seeds to germinate in the coldframe and begin to grow there so they will be acclimated from the beginning. When I pull out the seedlings for the flats I can choose only the best and wouldn���t have wasted flat space on ungerminated seeds or poor seedlings. Sometimes, however, if the seedlings need more space and I have it in the coldframe, I���ll spread them out there until time to go into the garden. If I do put seedlings in the flats, they stay outside until transplanting.

Peanuts started in wood flats ready to be transplanted in the garden.
I transplant corn and peanuts and have to be careful about where I start the seeds to make sure voles don���t eat them before they germinate. Sometimes I���ll use wood flats for that. The photo with the peanuts shows flats 6��� deep, but with Coleman���s dimensions. Peanuts germinate quickly and were not going to be in there long so I didn���t fill the boxes with the soil/compost mix to the full 6���. However, their roots would have quickly outgrown the 2��� deep flats. When I was selling at the farmers markets I discovered that a 6��� deep half-flat made a good container for potatoes at the market. It held about 15 pounds of spuds.
Although I no longer sell at the market, I still do quite a bit of gardening to feed my husband and me, as well as experiment with new things. I like to take advantage of the rhythms of nature and do things that involve less work and less stuff. Starting seeds in the coldframes fits in well with that philosophy. However, if I need them, the wood flats are handy in my shed. I still have the flats I made in 1992, minus the ones I passed on to my daughter and daughter-in-law to use in their own gardens.![]()


February 10, 2015
Seed Libraries is Here!
 Seed Libraries: And Other Means of Keeping Seeds in the Hands of the People has arrived! Homeplace Earth is well stocked and ready to fill orders with signed copies. Writing this book has brought me in touch with wonderful people all over North America who are making a difference in their communities by setting up programs for saving and sharing seeds. You will meet them in the pages and learn what they did and how they did it, giving you ideas to follow their lead with your own program.
Don���t really understand what the big deal about seed is? Seed Libraries will take you through how our society went from one of independent seed savers to a society dependent on corporations for its seed needs and the danger that looms if we don���t take action to change now. The reasons you should save seeds are discussed, such as preserving genetic diversity, flavor and nutrition, unique varieties, and cultural heritage. Other reasons include growing to seed to attract beneficial insects, saving money growing your own seeds, and learning new skills. It is always good to learn something new and seed saving will make you a better gardener.
Seed libraries are often located in public libraries. You will learn just how much these institutions have to offer. Having a seed library located in a public library is good for community access and good for a public library that wants to expand its programs and stay relevant to the community it serves. Whether a seed library is located in a public library or elsewhere, often it is in partnership with other groups. You will find examples of some of these groups and their projects in this book.

Mississippi Silver cowpeas with 80% germination. Two days later they achieved 100% germination.
You need seeds to start a seed share program and you need to take care of them. Where to find seeds to start, how to take care of them, and how to do a germination test to make sure the seeds are still viable is all covered. You also need people supporting your project. You will discover who would be beneficial to have on your committee and how to form a mission statement. A mission statement is one of the most important things you can have to define your project to others.
How to package the seeds, sign up seed-sharing members, and how to educate your members so they will bring back healthy seeds that haven���t cross pollinated with other varieties is all in the book. The plight of seeds is so important that everyone should be aware of seeds, not only the seed savers. This book is loaded with ideas to celebrate seeds throughout the year, keeping the excitement and momentum going for all involved.
Not all seed share programs take the form of organized seed libraries. Sometimes it starts with friends saving and sharing seeds among themselves and grows to public seed swaps. In fact, seed swaps are good ways to become acquainted with sharing seeds and are a good prelude to a seed library. You can use the ideas in this book to organize your own seed swap.
If you are already involved in a seed library, the ideas in Seed Libraries will help to energize your project. There is so much to know and think about and this book puts it all together in one place, making it easier for you to have the information at hand, and easier to explain it to others that you want to involve in your project. Just give them a copy and you can discuss the issues together. Links to Internet resources are listed, giving you access to the helpful materials there and keeping you up-to-date on the changes that seed libraries are experiencing as these new seed sharing programs continue to evolve.
We are living in exciting times and I invite you to be part of the positive changes that are coming in our society. I hope you like the book!![]()
UPDATE: In Seed Libraries I wrote about Sascha DuBrul being the one to come up with the idea for the first seed library. In his blog post http://www.mapstotheotherside.net/history-of-seed-libraries/ he tells the back story of that time. Keep reading to the end and he posts what I wrote about him in the book, which will help you to understand his story. You never know what will happen to your ideas when you follow your heart–and being a little crazy is not necessarily a bad thing.


January 27, 2015
Winter Food Crop Rotation
 In January 2013 I wrote about what I do to have winter carrots. I begin in the fall of the previous year and plant rye in rows in my future carrot bed. The rye crop is allowed to mature all the way to seed, which around here in zone 7 is mid-June. When it is cut, the harvest is seed and straw. I lightly hoe between the rows of stubble and plant carrots. I keep this bed well watered to get the carrots off to a good start and replant if there are spots lacking good germination. Once everything is growing well the only attention is to weed periodically. The stubble decomposes, gently feeding back the soil for the carrots.
With this post I thought I would show the carrots in a three bed rotation plan that provides greens and carrots for my household through the fall and winter months, while feeding back the soil with cover crops. If you have trouble reading the text on the garden map, click on it and it will open up in a new window, as will all my photos. I grow all of my compost and mulch materials in order to avoid bringing damaging materials into my garden. In the photo you can see the skeleton of this plan. The carrots and kale and collards take up 43% of the space for the year in the total of the three beds. There are 12 bed crop months in each bed for a total of 36 bed crop months. The carrots and greens use 15.5 bed crop months, or 43%. When I plan cover crops I like to have 60% of the bed crop months in the garden in soil building crops. That would mean that the rest of the space in the three beds would need to be devoted to cover crops, plus I need to have some extra in the rest of the garden to make up for the shortage here. The winter rye that is already part of the rotation is a cover crop.

Rye planted in rows in preparation for carrots to be planted into the stubble the following June.
The map you see is for the calendar year, showing the crops that are already in each bed at the beginning of the year. The green areas in the plan show when each bed is available for crops beyond the carrots and greens winter food plan. There is a lot of flexibility here. First I will give suggestions for filling those areas with cover crops. Bed 1 is already filled all twelve months, so look at Bed 2. You will harvest carrots from the fall until you have pulled them all or the weather warms in March and they start sending up a seed stalk. If you still have some then, pull them and store them in plastic bags in the fridge and you can have carrots for weeks in your kitchen. If you want to save seed, leave some of the carrots in the garden to go to seed. That might take until July so you may want to have those on one side of the bed, leaving the rest of the bed for something else. Only save from one variety to avoid crossing. My plan shows the carrots are there until March 1. That could vary and they could be there until they show signs of bolting. For a soil building crop you could plant fava beans or field peas. Favas and field pea plants can be harvested as green biomass for the compost pile when they reach full flower. In my area the blooms of fava beans tend to fall off when the weather gets hot, making it hard to save seed anyway. If you take them while blooming, you could follow with another legume, such as cowpeas or soybeans for biomass. Buckwheat can be planted anytime in there to keep the bed planted and to attract beneficial insects. The goal is to have the bed free by the middle of August for the kale and collard transplants that will overwinter. It helps to put a low tunnel on this bed then. It provides a frame for shade cloth at transplanting that is replaced by a plastic cover when the weather warrants. This low tunnel can be moved from one bed to the other to follow the brassicas crop.

Greens and roots for winter food.
In Bed 3 you can see that it begins the calendar year with kale and collards already there, left from last year���s planting. That group of crops (carrots early and kale/collards late) were planted in Bed 3 the previous year as you can see by the rotation arrows, leaving the kale/collards there to overwinter. If the harvest is for greens only, the bed will be ready for the next crop in mid-March. If you intend to save seeds from either kale or collards, those plants will be in the bed until June. Favas or field peas are an option for this bed, but so is spring wheat. That could be followed by cowpeas (or another legume), then buckwheat before it is time to plant the winter rye. In my area rye can go in anytime in October. Plant the rye in rows as to make the carrot planting easier. You can see by the rotation arrows that the crops in Bed 1 will rotate to Bed 3 in the next year and conveniently, the rye will be there, right on schedule.
If you have plenty of compost materials from the other beds in your garden you might prefer to plant crops for eating in those green spaces on the map. In that case, salad crops such as sugar snap peas, lettuce, spinach, and bunching onions could be planted after the carrots or kale and collards. Those crops could be followed by snap beans. Bed 2 needs to be open by mid-August, but you have into the fall in Bed 3 leaving the possibility of planting sweet potatoes in late May/early June after the salad crops. Winter squash is a possibility in Bed 3 and you can use the rye straw harvested from Bed 1 as mulch. Potatoes followed by snap beans could happen in either bed.
Of course, the timing of these crops depends on your location. If you enjoy going to the farmers market for fresh vegetables or belong to a summer CSA, but also like to garden, you may want to consider this winter food plan. It might do well for those of you who like to travel in the summer, as long as you are around for the key planting times. You will find other garden maps and plans in my book Grow a Sustainable Diet. Once you learn how to plan for the whole year, the possibilities are endless.
I will be talking about all of this on Saturday, January 31, 2015 in the presentation that Ira Wallace, of Southern Exposure Seed Exchange, and I are giving at the Virginia Biological Farming Conference in Richmond, VA. Come and see us!![]()


January 13, 2015
Seedy Days

Seed Swap table at VA Biological Farming Conference.
The terms Seedy Saturday and Seedy Sunday were not in my vocabulary until I was doing research for Seed Libraries and Other Means of Keeping Seeds in the Hands of the People. Seedy Saturday usually referred to an event in Canada and Seedy Sunday usually referred to an event in the United Kingdom, but not always. Seedy Saturdays, Sundays, or any day actually, are events that celebrate seeds. Seed sharing occurs there through vendors selling their seeds or individuals offering them for trade or give-away. You might also find presentations about seeds and gardening from people in the know, and maybe food for sale and music to enjoy.
The first Seedy Saturday occurred in Canada in 1990. It was a day of speakers and vendors. Sharon Rempel came up with the idea and was helped by her friends Roy Forster, Cathrine Gabriel, and Dan Jason. The goal of that day was to get the heritage varieties of seeds grown by home gardeners trialed and evaluated regionally, and a core collection of regionally adapted vegetables, fruits, and grains conserved and exchanged annually. Agronomists from the University of British Columbia were among those at the event. Seeds of Diversity Canada maintains a list of current seed sharing events here. You can find information about such events in the UK at www.seedysunday.org.

Guidelines for how many seeds to take.
With additional events scheduled besides seed sharing, Seedy Saturdays and Seedy Sundays in Canada and the UK are more than just seed swaps. It is likely that you may find very small seed companies there, as well as large well-known ones. Each seed event is operated a little differently. What I am most familiar with are seed swaps that are part of a larger event where seeds are not the main topic. I have participated in seed swaps when I have attended the Heritage Harvest Festival at Monticello, the Virginia Biological Farming Conference, and the Mother Earth News Fairs around the country. These swaps are sponsored by Southern Exposure Seed Exchange (SESE). At the Mother Earth News Fairs, additional sponsors may be High Mowing Seeds, Organic Seed Alliance, and Seed Savers Exchange. A table is set up, covered with a nice cloth, and seeds and supplies are set out. It begins with seeds that SESE has to share, but is open to seeds anyone else wants to offer for free. Conference and Fair goers can help themselves, within limits, of course, without contributing seeds of their own. There is a list of guidelines to help you decide how many to take. Here in the U.S. the last Saturday in January is designated as National Seed Swap Day. You can find a list of seed swaps around the country here. If your seed swap is not on the list, consider having it added so others in your area can find you.
Seeds are foremost in the minds of gardeners in January. The seed catalogs have been arriving for weeks and you have begun to make up your list of things you want to order. However, you need to know what you already have before you order more seeds, or acquire them in a seed swap, so take an inventory. In my book Grow a Sustainable Diet there is a link to worksheets, one of them for a seed inventory. That form is also on the companion CD that comes with my Develop a Sustainable Vegetable Garden Plan DVD. I designed it with columns for information I like to refer to, but actually, you can make an inventory by writing down on notebook paper what seeds you have on hand and how much of each variety. I did it that way for many years.

Joseph Lofthouse sharing his seeds at Seed School.
When you inventory your seeds you may find that you have too much of something or that you have seeds for things you will never get around to planting. If you have some of these extra seeds, check their germination rate, particularly if they are a few years old. If they are still viable, you have something to share and you could pass them on to someone else at a seed swap. Here in the U.S. we have opportunities to share seeds all year long through seed libraries, without waiting to attend a seed swap. Seed swaps, by the way, don���t have to be once a year events. They can be scheduled as often as you can find people who are interested in coming.
Whether you are planning on participating in a seed swap or a seed library, you will find great information to help with those activities in my upcoming book Seed Libraries and Other Means of Keeping Seeds in the Hands of the People.�� If there are no seed swaps or seed libraries in your neighborhood, consider starting one. You could get together with friends to share seeds and grow your event from there. The more we share our seeds with others, the more we are ensuring that they will stay a part of our community food systems. Like love, the more you give it away, the more it comes back to you.![]()