Cindy Conner's Blog, page 4
January 31, 2017
Deciding When to Plant
[image error]If you are new to vegetable gardening, or even if you are an experienced gardener who has moved to a new climate, it may be hard to decide when to plant. It is easy to make a list of what you want in your garden, but when to put the seeds or transplants in the ground is the conundrum. There are many things to consider, but the most important is to know the average first and last frost dates for the area you are considering. If you have been keeping temperature records, that’s great! However, not many are that diligent. Not to worry, others have that information available for you. I am sure you could find it through the weather service or your local Cooperative Extension Service, but I’ve found that a quick way to get temperature and precipitation information is through plantmaps.com. The amount of annual rainfall is important, also.
Seed catalogs are a great help when deciding plant dates. At the beginning of each crop section in the catalog there is generally an information box that will guide you on planting. It might indicate that you should wait until after the last spring frost to plant a particular crop, but start the seeds about six weeks before you expect to put the transplants in the ground. So, count back six weeks from the date you have chosen to indicate your last expected frost and you know when to start the seeds in your house or in your coldframe. At the resource page of my website you can download a free Plant / Harvest Schedule to help you with your planning. You fill in your own crops and dates. [image error]
More confusing is when the planting information directs you to plant as soon as the soil can be worked. In that case I would look to what the soil temperature should be and the seed catalogs will indicate that. FYI, the soil temperature is generally about 60° around the date of your last expected frost in the spring. Find more information at my post How Important is Soil Temperature. You can use a compost thermometer or a household kitchen thermometer to take the temperature of your soil several inches deep.
[image error]The catalogs I have are Southern Exposure Seed Exchange (Virginia and local to me), Sow True Seed (North Carolina), Fedco (Maine), Johnny’s (Maine), High Mowing (Vermont), Seed Savers Exchange (Iowa), Territorial (Oregon), and Bountiful Gardens (California). I like to source my seeds as close to home as possible, but sometimes there are items or varieties that are available further away that I seek out.
It is good to have an overall reference book in your home library that you can consult for growing information for specific crops. In my early gardening days I was given a copy of How to Grow Vegetables and Fruits by the Organic Method edited by J.I. Rodale and the staff at Rodale Books. I still look to that when I have questions about a crop. In fact, I wore the binding out on my first copy and now use a copy I found in good condition at a used book store. A more recent book that is a terrific reference and one I turn to, also, is Pam Dawling’s Sustainable Market Farming. Pam is growing in the mid-Atlantic region but much of her information is applicable to a wider geographical area. You can find books specific to your region. Ira Wallace, of Southern Exposure Seed Exchange, authored The Timber Press Guide to Vegetable Gardening in the Southeast. Timber Press has published growing guides for seven regions of the U.S.
Here in Virginia, some crops, such as kale, can be planted in both the early spring and in the fall. It is too hot for these crops in mid-summer. My main crop of kale is planted in late summer for a fall and winter harvest. About March, as the days begin to warm up, overwintered kale will bolt, meaning it will send up a seed stalk that will flower and, if left alone, will produce seeds. Generally you would clear out those plants to make room for spring and summer crops, unless you plan on saving seeds. Seeds for my spring crop of kale will go into the coldframe sometime in late February, to be planted out in the garden when the seedlings are big enough—late March or early April.
A friend recently asked about growing in North Dakota, specifically at the Standing Rock Indian Reservation. She will be visiting there in late July and wanted gardening information. According to plantmaps.com, the last spring frost there is the first week of May and the first fall frost is late September. I consulted The Old Farmer’s Almanac gardening calendar at http://www.almanac.com/gardening/planting-dates/states and found that when she gets there it will be time to plant lettuce, radish, spinach, and Swiss chard for a fall harvest.
In Zone 7 we can harvest lettuce until about Christmas and kale and collards all winter under a single layer row cover. The temperature rarely dips into the single digits, and then not for long. According to plantmaps.com, at Standing Rock in Zone 4b the temperature could go as low as minus 25°. Only the most cold hardy of greens could survive, and then with multiple layers of cover. It is important to research what varieties would do best under those conditions. For extended fall planting and harvesting times under rowcovers, consult Table 16 pages 205-207, in Eliot Coleman’s Four Season Harvest, 2nd edition. It helps you determine your planting times according to your first expected fall frost and, also, if you have one or more covers over your crops.
The summer nights are cooler in Standing Rock than they are here in Virginia. Besides warm nights, we have high humidity here. Our rainfall, about 44” annually, occurs fairly evenly throughout the year. Standing Rock gets only about 14.5” per year, mostly from April through October. Other places might get the bulk of their rainfall in the winter. More plays into your success in your garden than just knowing the frost dates, but that is a good place to begin to know your climate and when to plant. If you want to start keeping temperature and precipitation records for your garden, I have worksheets for that on the CD that comes with my DVD, Develop a Sustainable Vegetable Garden Plan. There is also a download code for these record sheets in my book, Grow a Sustainable Diet. Getting better acquainted with your garden this way will help you understand what Mother Nature is saying to you when you are there. Listen carefully
.[image error]


January 17, 2017
Fibersheds
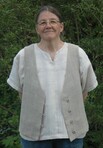
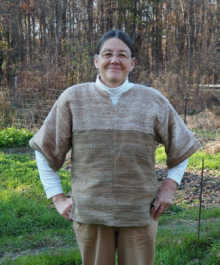
Homegrown cotton vest with black walnut-dyed shirt.
Fibershed is the name of a non-profit organization started by Rebecca Burgess in 2010 in California. Her goal was to “develop and wear a prototype wardrobe whose dyes, fibers and labor were sourced from a region no larger than 150 miles from the project’s headquarters.” Since then her work has expanded and other Fibershed groups around the world have signed on to explore textile production in their own regions. You will find their Facebook pages and activities on the Internet. It is a fitting name for a group looking close to home for their fiber sources. Just like watershed is concerned with where the water comes from for a region, and foodshed looks at our local food systems, I can see the word fibershed becoming a buzz word anywhere someone is talking about clothing themselves locally.
On the Fibershed website I found the term soil-to-skin. I have often used the term seed-to-garment, but I like soil-to-skin, since it takes the concerns further. I also found soil-to-soil used on the website. If your clothes will compost, just bury them at the end of their useful life and let them replenish the soil. Twenty years ago not so many people were as concerned about the source of their food as they are presently. Now, I hope they start talking more about where their fiber comes from—their fibershed. As with their food, it all starts with the soil to produce cotton, flax/linen, and wool. Synthetic fibers are not part of this conversation.
[image error]
brown cotton boll
Many of the Fibershed groups deal heavily with wool. That could be because there are more farmers with small herds of fiber animals than there are farmers with small plots of cotton. I don’t say much about wool because I have my hands full with the cotton and flax/linen from my garden. So much of the cotton grown worldwide is genetically modified that you might think that non-GMO organic cotton is not available to the consumer. I sew my own clothes and set out to see what I could find. It would be wonderful to have sewn a whole wardrobe by now from my homegrown cotton and linen, but so far I have only a vest and a shirt. Spinning the fiber takes time, but it is mindful and enjoyable work. I have learned about the toxic effects of textile dyes and have been exploring those, also. There is a black walnut tree in my backyard and I eat lots of onions from my garden. Walnuts and onion skins are both terrific for dyeing.
[image error]
Shirt dyed with onion skins.
I like to use Kona cotton for shirts because it wears so well. When I did some checking I found that it met the Standard 100 by OEKO-TEX certification for human-ecological requirements. That doesn’t mean it is organic, but they are moving in the right direction. You’ll find Kona cotton in fabric stores and quilt shops. I wanted to make a shirt to wear with my homegrown cotton vest, but couldn’t find a color in my fabric store that would do. However, this fall I had experimented with the black walnuts and realized that produced just the color I needed. Furthermore, I discovered that Dharma Trading Company sold Kona Cotton PFD (prepared for dyeing); meaning that it was not treated with optical whiteners. I bought enough for two shirts. You can see the black-walnut dyed shirt in the first photo at the top of this page and the shirt dyed with onion skins here. Obviously, this shirt took the color well from the onion skins. I’ve already rinsed out any extra color, but it may fade a bit over time. The buttons were in my stash from previous projects or cut from old clothes.
I needed a new turtleneck shirt to wear with my new homegrown cotton shirt. It is hard for me to find cotton turtlenecks in the weight of fabric I want (they all seem to be too thin) and ones that have cuffs and enough length in the body and in the sleeves. My search for organic cotton led me to Organic Cotton Plus, a company started in Texas by organic cotton farmers to sell directly to people like you and me. It has since entered the global marketplace. I found nice organic cotton interlock for my turtleneck shirts! You can order swatches (99 cents each) of the fabrics you are interested in if you want to see and feel it first, like me. I bought enough fabric for two shirts and made a pattern from an old turtleneck that fit me best, making adjustments as necessary. I love this new shirt. It is a recent project, so sorry, I have no photo to show you of the turtleneck I made, but you’ll see it eventually. I will make the second shirt when I decide what I want to dye it with. Organic Cotton Plus had this interlock in colors, but none that matched what I needed.
I initially took an interest in Organic Cotton Plus because I was looking for organic cotton grown in the U.S. I had already bought naturally brown denim for jeans from Sally Fox at Vreseis.com. Although that’s how it started out, not all the cotton for fabrics sold through Organic Cotton Plus comes from this country. I see that the organic fabric for my turtlenecks came from India. Maybe I’m helping to support the Indian farmers that Vandana Shiva worked with to overcome their experience with Monsanto and GMOs. That would be a good thing.
[image error]
I knitted three pairs of wool socks this past year from yarn I bought from Kathy Oliver of Sweet Tree Hill Farm. Kathy is a shepherd and we are both members of the same handspinning group. I bought the first two skeins at the Powhatan Fiber Festival in April and knitted the first pair in the natural color. I grew Japanese indigo last summer and used it for my first dyeing adventures, resulting in the blue socks. It was so much fun I bought a third skein when I saw her at the Fall Fiber Festival in October. I used that skein to play with indigo, onion skins, and black walnuts to make variegated yarn.
I applaud the groups that are working to develop textile systems that are environmentally safe and people friendly. It is when we take a closer look at our systems that we can detect ways we can change them—or, maybe do without. You probably know that I’ve worked with growing food and looking closely at what it would take to grow a complete diet. In my blog posts on Homegrown Fridays I share my experiences of limiting what I consumed on the Fridays in Lent to only what I grew myself. That was definitely an eye-opener, so I can see that if someone decided to limit their clothes to what could be produced naturally in their region, they have an adventure ahead of them. Rebecca and her group are working to change the system. I am on a personal journey to produce my own clothes as close to home as possible. If I have to buy fabric or yarn I want my purchases to do the most good they can. Meanwhile, I hope that by sharing my experiences, others will start a journey of their own. There is so much fun stuff to do in this world on our way to making it a better place![image error]


January 3, 2017
Keep a Seed Inventory
[image error]Gardeners who plant from seed, generally have some seed left at the end of the season. Knowing what kind of seed, how much, and where it is stored will help you plan your seed order for the new year. Having an inventory of your seeds could save you money by not buying more than you need, and lessen frustration when it comes time to plant, since you will know what you have and how much. If you store your seeds in more than one place, indicate where your seeds are.
For many years, I used a piece of notebook paper for my seed inventory. I listed all the seeds I had on hand and made columns for how much, the source of the seeds, and the year they were bought, or the year saved if I grew them out myself. Remember, that was before computers were routinely used in the home and things weren’t so easily copied. Eventually, I developed a seed inventory form. You can see the heading for that here and you will find the form on the CD that comes with my garden plan DVD. It is also in my book Grow a Sustainable Diet. There is a link in the book that allows you to download PDFs of all the forms shown. Now I print off as many copies of the seed inventory form as I need. This year it was 11 pages! When you save seeds it is easy to accumulate a lot of seeds from different years.
[image error]
A coffee filter was used for this germination test with cowpeas.
I try to inventory my seeds before the end of the growing year. This year I managed to get that completed in early December, but if times are busy, it is January before it happens. If you haven’t inventoried the seeds you have, do it now before you order new ones. As you go through your seeds, purge the ones that you know you will never plant or that you know have poor germination. Now would be a good time to do a germination test on the questionable varieties in your stash. If the ones you intend to get rid of pass the germination test, consider taking them to a seed swap, donating them to a seed library, or passing them on to your friends or new gardeners. If they don’t pass the germination test, throw them in the compost or your chicken pen, providing they are not treated, of course.
As you can see, my seed inventory has columns for Crop, Variety, Amount, Source, (empty), Don’t Buy, Do Buy, Source, Amount, and $. If you take your time with this form, you could use it to develop your seed order as you go. The Don’t Buy column is probably not necessary and you could use that space for something else. The column I left empty is sometimes used to record the days to maturity of the variety. It facilitates garden planning if that information is at your fingertips. That column could also be used to record the germination rate, if a germination test is done that year. If you know you are short on something, check the Do Buy column. Later you can go back, armed with your seed catalogs, and put in the amount of seeds you will need to buy, where you will get them and how much they will cost. Imagine, all your seed records in one place!
[image error]
I list the vegetables, then the flowers and herbs, then the grains and cover crops. Each section has the crops in alphabetical order, making it easier to find things later. Each variety of a crop that I have seeds for is shown and sometimes I leave spaces for additional varieties that I intend to order. When my seed order comes in, I add those varieties to the crop inventory, and put the new seeds with my stored seeds so everything is in one place. If you don’t get around to actually recording your new acquisitions on the inventory form, put the seed order form in your garden notebook with your seed inventory.
The Garden Notebook! I assume you have put together a binder with tabs for your garden map, plant and harvest record sheets, seed inventory, and other important information. My DVD Develop a Sustainable Vegetable Garden Plan takes you through what is necessary to keep your garden records organized. You can refresh your memory be reading my blog post Keeping Garden Records.
I refer to my seed inventory throughout the year. It is easy to forget what you have. A seed inventory helps to ensure that the seeds you have purchased or saved will get planted. The seed catalogs have arrived and can be alluring, causing you to order more than you need. Before you order seeds, make your garden plan for the year so you will know just how much you need of each crop according to the space in your garden. Actually, I begin planning my garden in the fall for the coming year so that I know which cover crops go where, in preparation for the main crop in the spring and summer. Start wherever you are and go from there.
Wishing you well on your 2017 gardening year.[image error]


December 20, 2016
Homegrown Cotton Shirt
[image error]I have completed another garment with my homegrown cotton! You may recall that I made a vest from my homegrown, handspun, handwoven, naturally-colored cotton in 2015. For the vest I used my green cotton. I had grown green and brown in separate gardens, but they crossed. There was some brown and a bit of white (although I wasn’t growing any white) mixed in with the green and I spun it all together. It was easier that way since I was spinning it off the seed.
[image error]
Indian book charkha
This time I carefully separated out the colors and took the seeds out by hand before spinning. Examining the seed and noticing the feel of the fiber helped with identification, since sometimes the colors are so faint at harvest that it is hard to tell them apart. Once the fiber is spun and boiled to set the twist, the color pops. As for feel, the green feels a bit silky compared to the brown. The green fiber is also a little longer than the brown. The Nankeen brown seed I was working with is naked seed with no lint on it. Everything else had fuzzy seeds. I spun all the cotton for the shirt on my Indian book charkha that I bought from Eileen Hallman at New World Textiles. I plied the singles on my Louet10 wheel. I had Nankeen Brown, Erlene’s Green, and light brown. When I got right down to it, I didn’t have enough green and brown fiber for my project, so I used the white cotton I had grown in the late 1990s. I didn’t know how to spin then and had put it away in a box, seeds and all. That first homegrown cotton is now in my new shirt.
[image error]
My loom with fabric for the shirt on it.
I spun the brown, green, and white separately, then plied brown and green together and brown and white together. I used the same 12″ table loom as I used for my vest, resulting in 9½” wide panels of fabric to work with. There are 2 panels on each front and back and ½ panel on each side. Each sleeve is made from 2½ panels. I wanted to conserve as much of the fabric as I could, cutting only the lengths apart. The only shaping was for the neck. The color of the cotton that had crossed expressed itself as light brown, whether it was in the brown bed or the green bed. I used the light brown for my warp. My loom has 8 spaces per inch on the beater bar and enough string heddles for 8 ends per inch (epi). I could have made more heddles and doubled up the warp ends through the beater bar, but I didn’t. The 8 epi made for a weft faced fabric like my vest. I used my homegrown 2-ply cotton throughout.
[image error]I wove four full length (30½”) panels for the front and back. The change of color from brown/white to brown/green is woven in, not pieced. The side panel was woven at 22” long. The sleeve panels were woven at 14” (10½” brown/white ply and 3½” brown/green). The hem is 1” plus an additional ⅜” turned in from there. I had to make sure to allow for shrinkage when I determined my measurements for weaving. Shrinkage in the length amounted to about 8%.
Most of the seams were ¼”. I made facing for the neckline from cotton fabric that had been dyed with black walnuts. There is a ⅜” seam at the shoulders. I designed this pattern myself and made a shirt from pieces of denim saved from old jeans to try it out before cutting my homegrown cotton. The shirt fit beautifully. To make more room in my hips, especially when putting my hands in my pockets, I did not bring the seams where the front and back panels connect to the side panels down all the way to the hem, leaving a few inches open. Those edges were faced with the walnut dyed cotton.
[image error]
Cotton used in my shirt. I didn’t need the green/white ball.
The hardest part of this project was estimating how much fiber I needed. I had the calculations of how much 2-ply yarn it took to make my vest, but now I was using a charkha to spin. That, combined with having more spinning experience, my yarn was finer, requiring more yards per woven inch. I needed to calculate carefully because I had a limited amount of fiber. By keeping careful records and weaving a sample, I estimated that I needed 43.65 yards of raw singles for each 1” of weaving. This cotton would get boiled twice—once after spinning into singles and again after plying. I estimated about 12.5% total shrinkage for that. Once everything was plied, I needed a figure for how much 2-ply yarn necessary to finish my project. I estimated 22.2 yards of 2-ply yarn for each inch of weaving. My calculations from actual weaving were 18.1-22.2 yards of 2-ply for each inch of weaving. Thinking back to the 43.65 yards of raw singles, taking out 12.5% for shrinkage and dividing it by 2 to make the 2-ply yarn, I would end up with 19 yards of 2-ply per inch of weaving. There are many ways to calculate and I wanted to use generous estimates to make sure I had enough fiber. Periodically I checked my 2-ply yarn for wraps per inch (wpi) and found it to vary from 29-35 wpi.
I loved doing this project, although, at times I thought I would go crazy doing the calculations. I wanted something appropriate to wear it with, so I made a pair of jeans from naturally brown denim I bought from Sally Fox at Vreseis.com. I’m wearing those jeans in the top photo.
I am enjoying wearing this shirt everywhere I can. It is so comfortable! The design allows freedom of movement and that contributes to the comfort, but I think all the good energy it embodies contributes even more. Knowing I grew it from saved seeds, spun, wove, and sewed it gives me a great feeling of satisfaction. I want to encourage other spinners out there to do the same. This shirt weighs 14 ounces. To give you an idea of how much space you would need to grow that much, in my Grow and Spin Cotton post I gave yields of 12-16 ounces per 100 sq. ft. Your yield could be higher or lower, depending on where you live. I hope you give it a try![image error]


December 6, 2016
Seed Libraries And The Law
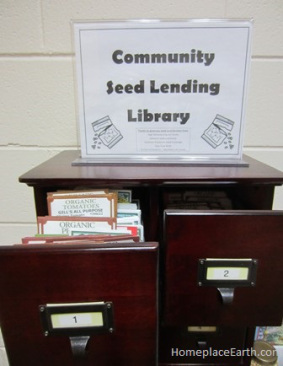 Good news for seed libraries! In July 2016 the American Association of Seed Control Officials (AASCO) added an amendment to the Recommended Uniform State Seed Law (RUSSL) to exempt seed libraries and other non-commercial seed sharing initiatives. The RUSSL is the guide that state legislatures look to when setting their own seed laws. The AASCO is made up of seed control professionals from each state department of agriculture. Making this amendment a reality is the result of work done by a committee composed of representatives from AASCO, the American Seed Trade Association, seed librarians, and others active in the seed world. Granted, this doesn’t mean it is a part of all state seed laws now; however this recommendation will influence those seed laws.
Minnesota, Nebraska, Illinois, and California have already passed laws exempting seed libraries from their state seed laws. Sometimes it is just a matter of interpretation when applying the existing laws. The Pennsylvania Department of Agriculture has now decided that seed libraries and other non-commercial seed exchanges are exempt from regulation without requiring an act of congress. What it did require is action by a statewide group led by the Pennsylvania Association for Sustainable Agriculture (PASA), Grow Pittsburgh, the Public Interest Law Center and members of the Pittsburgh Food Policy Council. Individuals and other organizations were also involved in this effort to work with the Pennsylvania Department of Agriculture to change their interpretation of their seed laws, which is all very interesting because it is their original interpretation that brought up the issue of seed libraries being in violation of state seed laws in the first place.
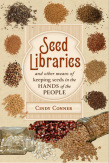
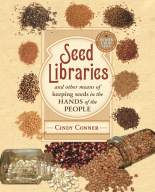 I am the author of Seed Libraries and Other Means of Keeping Seeds in the Hands of the People, published by New Society Publishers in early 2015. During the year I spent writing that book, I tracked down every seed library I could find evidence of for information. Although much of this work was done by computer, I was able to physically visit some of them. My years of experience as a seed saver contributed to the book, also. Seed libraries were popping up all over the country and changing constantly. I contacted all the seed libraries I wrote about to confirm my information. As much as I found out about seed libraries, nowhere was there any mention about their legality until just before I sent my finished manuscript to the publisher. In late June 2014 I started receiving emails about the Simpson Public Library in Pennsylvania being approached by the Pennsylvania Department of Agriculture and told that it couldn’t distribute seeds as planned, which is the same plan that I had written about. You can find more about that in my post Seed Libraries: Challenges and Opportunities. The world of seed libraries was in an uproar. I included an afterword in the book to address the situation, being pretty sure that things would settle out, and they seem to be doing that, but not without the efforts of seed library activists. You can find more information about the Simpson Seed Library and their legal issues on their updated webpage.
 What does this all mean for seed libraries in states that haven’t exempted them from the state seed laws yet? To answer that question I consulted Neil Thapar, food and farm attorney with the Sustainable Economies Law Center. I met Neil at the International Seed Library Forum in Tucson, AZ in May 2015 and he has been at the forefront of the effort to work through the legal issues of seed libraries. Neil and I both agree that you should proceed with your seed library plans, but to be 100% sure that your seed library will not be challenged by the laws in your state you would need to contact the Department of Agriculture in your state. It may be that there is no issue with seed libraries because of how the existing seed laws are worded. If it is questionable and you are told there is nothing to worry about, get that in writing. There are actions currently being taken in some states to have the AASCO amendment on seed libraries adopted.
The AASCO recommendation is a template for language that the states can use for t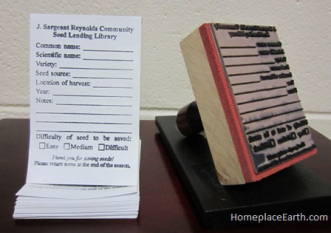 heir own laws. You can view the seed library amendment here. To receive updates about what is going on in the seed library world go to seedlibraries.net. The amendment is for “non-commercial seed sharing”, which means that no money should change hands for seeds. It also means that the seeds are freely shared and that there is no expectation of seeds being brought back. Some seed libraries may have had their patrons sign a paper pledging to bring seeds back. That should be changed. In reality, though, even if they signed the paper, that doesn’t mean that they actually brought seeds back. Lots can happen between planting seeds and having a harvest of viable seed, no matter how good your intentions are when you start. Other specifics concern label requirements, which are easy enough to comply with. In fact, having good information on the packages of seed offered has been encouraged with seed libraries early on and you will find examples of labels in my book. Since these seed sharing initiatives are non-commercial, “no distributed container shall hold more than eight (8) ounces of agricultural seed or four (4) ounces of vegetable or flower seed.”
If you use the AASCO amendment as a guideline for your seed library I would think you should have no problems. Do check with your state if you have concerns. Seed libraries should communicate with each other, particularly ones in the same region. Join The Seed Library Social Network. The seed library movement is so much more than just the sharing of seeds. It is the celebration of seeds. I see education about seed saving and sharing to be the most important aspect. No matter how many seeds you distribute, if those who receive them don’t grow them and save the seed properly, you are not moving forward. With enough education and celebration about seeds, growing and saving them will follow naturally. For more ideas on forming a seed library and keeping it going, consult Seed Libraries and Other Means of Keeping Seeds in the Hands of the People, which is sale-priced at Homeplace Earth through January 1, 2017. Happy seed sharing!


November 29, 2016
I’m Back!
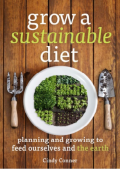 After being away from this blog since I broke my wrist in March, I’m back! To celebrate my return, I am offering a 25% discount through January 1, 2017 on my cover crop and garden plan DVDs and on my books Grow a Sustainable Diet and Seed Libraries. As always, shipping is free in the US. My DVDs and Grow a Sustainable Diet are educational tools and used in the sustainable agriculture program at Reynolds Community College in Goochland, VA where I used to teach. When I produced them, I had in mind those who couldn’t take my classes in person. So, if you have been wanting to learn more about cover crops, garden planning,
 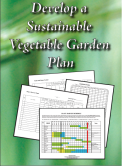 planni
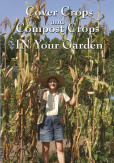 ng your diet around your garden, and planning your permaculture homestead, take advantage of this opportunity to purchase an educational program that will walk you through the process and help you apply your new found information to your own situation. Or, you may have someone on your holiday gift list that would benefit from these materials. You’ll find these sale prices on my website at www.HomeplaceEarth.com, along with deals for a few great books that I didn’t write.
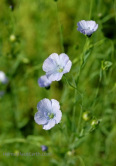
flax flowers in the garden
I did enjoy my time off from writing. No matter what you are involved in, it is always good to step back now and then. My wrist has healed nicely, although I am still a bit careful with it. My husband and I took a long-awaited trip to Ireland in May and it was nice not working blog posts around that. In spite of working slower due to my injury, I grew several new crops this year. Flax for linen has been harvested and retted and is
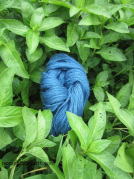
wool yarn nestled among the Japanese indigo plants it was dyed with
waiting for me to build some fiber tools to process it (next on my to-do list). I trialed two kinds of rice this year. I also grew Japanese indigo and used it for some dye work, part of my new focus on fiber and textiles. Once I was sufficiently recovered, I was back to spinning my homegrown naturally-colored cotton for a shirt that I intended to make, weaving the fabric on my small table loom. It’s finished and I wore it for the first time on Thanksgiving.
Working with homegrown fiber is important to me in so many ways. Of course, there was the challenge to see if I could grow, spin, weave, design, and sew garments for myself to wear, and now I have a vest and
 a shirt. Hurray! I’ve used my time away from this blog to read and learn more about the history of textiles. What was once local production fueled the industrial revolution and the exploiting of people and resources has continued ever since to bring us cheap clothes—way too many cheap clothes. When you shop for clothes I would like you to consider how the people who produced them and the earth that provided the raw materials were compensated to bring you such bargains. There is much to talk about on this subject, so stay tuned. I will be telling you all about my new homegrown, handspun, handwoven, naturally-colored cotton shirt in a future post. I will also be sharing my adventures with the flax, rice, Japanese indigo and other natural dyeing, while I continue addressing the many topics you have enjoyed in this blog.
Learning about my new shirt, however, will have to wait until I fill you in about what has been happening in the seed library world. Seed libraries have been deemed exempt from state seed laws, by the way. You can learn more about that in my next post, which should appear next week. After that I will go back to my old schedule of posting every two weeks.
The video Seed: The Untold Story has been making the rounds and will be shown in Charlottesville, VA on December 8. You need to reserve your ticket ahead of time and you can do that here. After the film there will be a question and answer period with a panel staffed by folks from Southern Exposure Seed Exchange and ME. If you go, be sure and catch me afterwards. I’m always happy to meet the people who read my words.


March 22, 2016
Accidents Happen
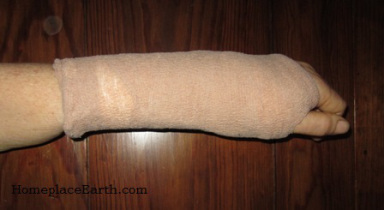 Life can change in an instant. That became all too clear to me on March 11 when I fell and broke my left wrist. It was a great day to be outside and I had already accomplished things in the garden when I turned my attention to the tree cutting job my husband was doing. I was looking up at the branch he was cutting on, while slowly walking backwards, when down I went. My right heel had bumped the lawn mower, throwing me off balance. I stuck out my left arm to catch myself and knew immediately upon landing that something drastic had happened. I now have a t-shaped titanium plate with multiple pins holding the bones together in that wrist.
This hurts, for sure, and I plan on doing everything I can to promote fast and complete healing. Of course, since I use that hand a lot, I’ll have to alter my activities for awhile. In the big picture of things, this is small potatoes. I expect to recover and go on with my life. I know that others live with pain and immobility daily with no relief in sight and I have thought a lot about them since my accident.
You probably already know that I view everything as an opportunity, and this is no exception. It is an opportunity for my husband to show his love for me by picking up my workload around the house—and he is doing a fantastic job! Sudden changes can be overwhelming on a household, so it is also an opportunity for our family and friends to pitch in. Dinner arrived yesterday, enough for a few meals (thanks Molly), and volunteers are coming Wednesday to make sure the garden is in good shape until I am back out there (thanks Betsy and Ben). Just as important, however, it is an opportunity for me to let them help. It is sometimes harder to accept help than to give it.
I believe sometimes things happen to slow us down, make us more fully appreciate what we have, and maybe steer us in a different direction. I can take a hint and am thankful that it is not something worse. With that in mind, I am taking a step back, beginning with this blog. I’ve got some interesting projects going on for 2016, including heritage wheat, flax (for linen), and colored cotton, in addition to my regular work with cover crops and diet crops. I will still be out and about and you can keep track of me on the events page at HomeplaceEarth.com. There are five years worth of posts here for you to enjoy, plus my books and DVDs, until I write again (no promises when that will be). Meanwhile, I will keep my senses open to what else the Universe has in store for me. Be well and enjoy each moment.


March 8, 2016
Visit to Texas, Mother Earth News Fair, and Ploughshare Institute
 A couple weeks ago I made my first visit to Texas for the Mother Earth News Fair. Wanting to make the best use of my time and the rental car, I scheduled my flights so that I would arrive by noon on Friday and leave close to 5pm on Monday. Since I have an interest in fiber, I checked ahead online to see if there were any interesting yarn shops near where I would be traveling and found Yarnorama. Their website indicated that it was in an old renovated store and that the owner, Susan Fricks, had grown cotton. It sounded like my kind of place.
I flew into Austin and drove 40 miles east to Paige, TX and found Yarnorama. I had envisioned it to be in a town with other shops. That store might have been part of a going town at one time, but there wasn’t much there now, except for Yarnorama, of course, which is hopping when spinning, weaving, and knitting groups meet there regularly. I enjoyed chatting with Susan and she did know about cotton. She told me that I could bring out more color in my vest by washing it in an alkaline solution, suggesting washing soda. Well, I bought a small box of baking soda on the way to the hotel and added some to the water when I washed one side of the front of my homegrown cotton vest in the sink in my room to try out the idea. It is a pH thing and you could tell the difference! I hadn’t realized you could change the color of cotton by changing the pH. Thanks Susan!
I made it to the hotel that evening and met up with my friends. Besides the wonderful people I meet at my talks and around the Fair, these events are an opportunity to hang out with other authors and speakers, publishers, and the Mother Earth News staff in the off hours. Where else could we have that kind of opportunity? Besides the chance to get to know one another better, a lot of information gets passed around during these times.
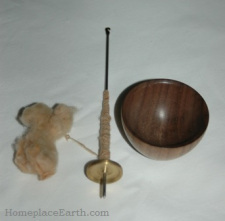
tahkli spindle and wooden bowl from Ploughshare Institute with my homegrown cotton
I gave three talks in two days at the Bell County Expo Center in Belton, Texas—From Seed to Garment, Planning for Cover Crops in Your Garden Rotation, and Seed Libraries and Other Seed Share Initiatives. I was delighted to see that the Ploughshare Institute had a number of booths there, in particular one about fiber arts, complete with spinning wheels and looms. They also had kits for sale that included tahkli spindles (the kind I use for my cotton) and support dishes for them in either pottery or wood, all made by folks in their community. I enjoy it when I can let those who attend my presentations know where they can get supplies or seeds related to my talk. Southern Exposure Seed Exchange and Brim Seed Company had cotton seeds for sale.
When preparing this year’s talks I had to find information to make my cover crop presentation relative to the Texans with a very different climate than mine. The last spring frost in Belton, TX is around March 11-20 (my date is April 25) and the first fall frost can be expected about November 21-32 (I usually expect it toward the end of October). Gardening slows there in the hot dry days of August. If you understand the concepts in garden planning, you can adapt the information to your climate. I really like the Plant / Harvest Schedule that I offer as a free download on my website, but when playing with it to see how some crops would look using Belton’s frost dates, I had to do some cutting and taping on the worksheet I was using to add more weeks on both ends of the season. You can grow some of the same crops there as you could grow in Virginia or even Maine, but you would want to look for different varieties that do the best in each climate.
The fairgoers were wonderful! They were so appreciative that the Mother Earth News Fair finally came to Texas. I enjoyed meeting them and had some great conversations, including one with a woman I met in the line at the MEN bookstore who told me she had my cover crop DVD and it changed her life. Now that she knew about my books, she added them to her purchases. Besides the presentations and the books, there are vendor booths that offer so many great things—things you may have heard about, but hadn’t actually seen, and things that are new to you. Attending a Mother Earth News Fair is like walking into a place where the magazine opened up and the writers, advertisers, and everything else came to life.
That Saturday I attended a brunch sponsored by Purina to showcase their new line of organic poultry feed. The spokeswoman was pretty proud of helping bring that project to the public. If there is enough interest, Purina will expand their line of organic feed. I am a Mother Earth News blogger and on Sunday I attended a blogger lunch, along with two people who each blog about cooking—one was a cookbook author and the other a rocket scientist. Yes, it was an interesting time.
I had much of the day on Monday to enjoy before my flight home, so I drove an hour north to Homestead Heritage Craft Village, which is where my new friends from the Ploughshare Institute were. To quote from their website, “Homestead Heritage is an agrarian-and craft-based intentional Christian community. Its literature stresses simplicity, sustainability, self-sufficiency, cooperation, service, and quality craftsmanship.” The Craft Village is open to the public and has a fiber arts cottage, blacksmith shop, pottery house, grist mill, cheese-making house, and a woodworking and fine furniture-making shop. There is also a restaurant and General Store on the property. Classes are given in each of these areas through the Ploughshare Institute. If you can’t make it there, you could bring the classes to your home through their online program.
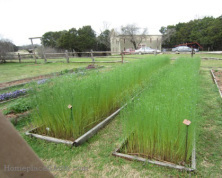
flax growing at Homestead Heritage
I was met by Sue who heads up the fiber arts department and given a great tour. It turns out that they are experimenting with growing flax and planted it in the fall, since it gets too hot, too fast to plant it in the spring. It was flowering now. Quality craftsmanship was evident throughout the Village.
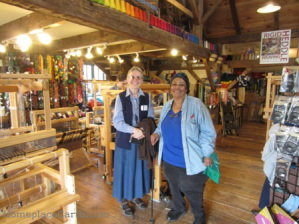
Sue and Ira in the Fiber Arts Cottage
I wasn’t the only one involved with the Mother Earth News Fair who was there that morning. E.J., Ingrid, and two authors from New Society Publishers, Jerome Osentowski (Chelsea Green author), Ira and Gordon from Southern Exposure Seed Exchange, and Joel Salatin and his wife Theresa were there. We were being shown around by different people we had met at the Fair and our paths kept crossing. The New Society folks had to head to the airport, but the rest of us stayed for lunch.
Jerome and I had lunch in the restaurant with the weaving class. Over lunch I had an opportunity to talk with Kay, who I had become friends with over cotton spinning at the Fair. I only had the briefest time to talk with Butch who is involved with their gardening program. Their gardening practices are very much like mine. Butch already knew me through my DVDs and has now become familiar with my books. I hope to make it back to Texas to the Mother Earth News Fair and to Homestead Heritage. I didn’t know what to expect on my first visit to the Lone Star state, but I felt welcome wherever I went.


February 9, 2016
Becoming a Market Gardener
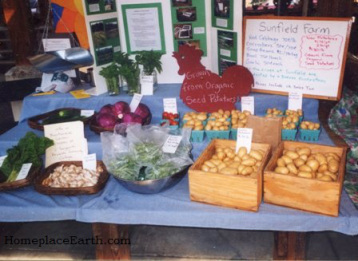
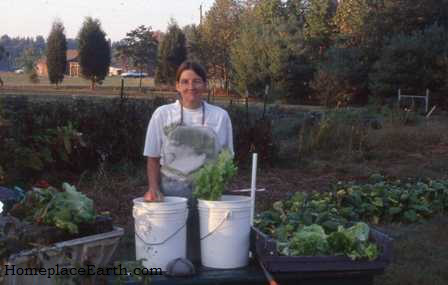 Once you have gotten quite good at producing food for your table, it is natural to think of providing for others. You could casually share with your neighbors and the local food bank, but many want to take it further and exchange their extra veggies for cash. If that is where your thoughts have been leading you, I would like to offer some things for you to carefully consider before becoming a market gardener. There is a big difference between doing what you love when you have the time and turning doing what you love into a business. During my time as a market grower I grew and sold a lot of lettuce. This photo shows me washing it for a restaurant delivery.
On January 29 I gave the presentation Scaling Up from Homestead to Market Garden at the Virginia Biological Farming Conference. It was well received and people who heard me speak approached me that evening and the next day to thank me for the presentation. Those who had already been selling said that my points hit home. I became an organic gardener so that I would have a healthy family. In order to also have a healthy community I became a market gardener in 1992 and sold to area restaurants. The farmers market network was not yet established at that time. In 1997-98 I had a small CSA in addition to the restaurant sales and in 1999 I was a founding farmer at our local farmers market. I left selling produce and eggs for others after the 2001 season to concentrate on teaching and researching so that I could put more knowledgeable consumers and producers at the markets.
Selling to others on a regular basis highlights the need for good record keeping. You need to plan for how much to grow and to plan for how much money it will bring to your business. No matter how good you are at growing some crops, such as broccoli and cabbage, the income from the same amount of other crops, such as specialty lettuce mixes, will exceed it every time. If you have already been a home gardener and have kept some records of your yields you will be able to anticipate how much you can produce from the space you have. Keep in mind, however, that if you have to break new ground for this endeavor, it may not be as productive as the garden you have been building the soil in for years. Some crops might surprise you. Onions turned out to be a good crop, as well as potatoes, winter squash and garlic—all crops that are not as labor intensive as lettuce.
You need to know what your crops will sell for before you even grow them. Notice what they are being sold for in area grocery stores and farmers markets. Start now and make a chart of the stores and markets in your area with a list of vegetables you might want to sell. Record the prices for them each week throughout the year, noting if they are sold by the piece, pound, bunch, etc. If by the piece, how many pieces make a pound? If by the bunch, how many items make a bunch and how heavy is it? Also record the origin of each crop. This list will be invaluable to you as you move forward with your plans.
Potatoes in wooden boxes were sold by the pound. Small potatoes in pasteboard containers were sold by container.
Although prices might fluctuate in the greater marketplace, I decided on a price that was fair for both myself and for my customers for each crop and kept it the same throughout the season. That said, there are a number of things you could do to vary the price. If you have an abundance of something, you could offer a larger quantity of seconds at a cheaper price per pound. I sorted my potatoes and displayed the smaller ones in pint and quart containers at a higher price per pound than the larger potatoes that were sold by the pound. The price displayed for the containers was by the container size, not by the pound. Nevertheless, the prices remained the same for the abundant seconds (cucumbers), the pints and quarts of potatoes, and everything else for the duration of that season.
Know your produce. People often comment on how much more expensive the colored peppers are in the grocery store compared to the green ones. Well, you need to leave the green peppers on the plant for a few additional weeks to ripen to red, yellow, or orange and anything can happen during that time. I priced my colored peppers at twice as much per pound as the green ones and had no complaints. Besides the prices, you need to know the nutritional value of everything you have and what to do with it in the kitchen. The more information you can pass on to the buyers, the more sales you will make.
I sold a limited variety of produce to the restaurants; primarily leaf and romaine lettuce, tomatoes, peppers, and onions and the chefs did not need me to suggest what to do with it. For the farmers market I needed a larger variety of things for my booth and my customers welcomed my suggestions. The greater population has gotten away from cooking from scratch at home and need some instruction as they move back to that. If you package all the ingredients for salsa, for example, plus the recipe, many are more likely to try it. Packaging all the colors of the peppers you have together will entice your customers to buy the package, rather than just the one or two peppers that they had in mind.
Your passion and enthusiasm will go a long way to making sales, but keep in mind that you need to tend to your family first—and to your soil. If you feel you can grow more than you alr eady do, maybe it is time to expand what you are growing for your own table, rather than grow for others. How much of your staple crops, such as potatoes, sweet potatoes, onions, garlic, and grains do you grow? Are you growing enough cover crops to feed back the soil and provide all your own compost?
The first DVD I produced was Cover Crops and Compost Crops IN Your Garden and I was excited that I could show people how to manage cover crops in their gardens with hand tools. I knew it would be a tremendous help to small scale market gardeners—those gardeners moving from growing for their family to growing for others. The garden plan DVD followed which shows how to put together a notebook with your complete plan. I wanted gardeners to have a good foundation to help them plan to feed their families and others. Through my teaching I met folks who were ready to jump into growing for the markets with little experience of getting their hands dirty, let alone an understanding of what is going on in the soil when things grow and in our bodies when we eat the food. By the way, you will get dirty, sweaty, and tired. So tired that you will fall into bed at night thoroughly exhausted, only to get back up early in the morning to do it all again. It is not an occupation for the fainthearted.
I want gardeners to understand all of that before they ramp up to feed others. I expanded on what was in the DVDs when I wrote Grow a Sustainable Diet. It includes an additional worksheet (How Much to Grow), and information on nutrition, food processing and storage, garden washing stations, sheds, fences, and more on garden rotations with cover crops. With that book and the DVDs it is like taking a class from me. No matter how many people you are growing for or how much land you are using, my teaching materials apply. I’ve been talking here about determining how much money you could make, but sometimes the profit in this is not so much about the money you make, but the life you make. You become an integral part of the community around you and you can’t put a dollar value on that.


January 27, 2016
Let it Snow!
We were recipients of some of the snow that fell on the east coast over the weekend. It was 14” deep at our house. It isn’t the most snow that I remember having here, but it is the most since January 1996 when we had 20”. We still had our milk cow then and I remember shoveling a path to the barn when the snow was at 10”, knowing I would be shoveling again. The path had to be a wide one—wide enough for me to walk with two five-gallon buckets of water.
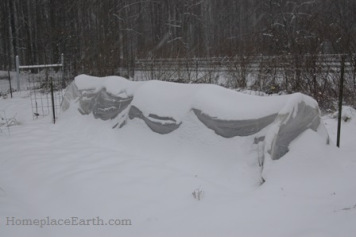
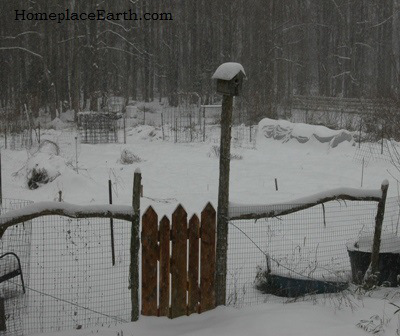
snow covered low tunnel
This time around I have kept busy finalizing my presentation for the upcoming Virginia Biological Farming Conference, shoveling snow, and knitting a sweater. Snow like this disturbs everyone’s schedule, for sure. But, as bothersome as that is, it presents a lot of opportunities. Of course, if you have been following my blog, you would know that I look at everything as an opportunity. It is when our structures are tested and we find out how well we’ve done. If you planned your low tunnels, coldframes, and greenhouses to withstand your usual conditions, you might find them collapsed in the snow. This snow reveals if they were built beyond the usual conditions.
It is good to know. This is the sort of thing you have to plan for from the beginning. Yes, it doesn’t happen very often and may not occur again for another twenty years, but the way the weather has been in recent years, I would build with the assumption that it could happen every year. That will put you at ease whenever severe weather strikes again.
As the kids were growing up, whenever we had a big snow that shut things down my husband would take them for late night walks down the road for at least a half-mile or more. Well, the kids are grown and establishing their own snow traditions and now it is me accompanying my husband on those moonlight walks. We went out on Friday and Saturday nights under the full moon and it was wonderful. Since the power hadn’t gone out, which was surprising, noisy generators didn’t disturb the silent night.
The first night it was still snowing when we went out and there was quite a bit of wind. We were walking in the road on snow. The plows had been out, but that didn’t mean the roads were fit to drive on. The next night I could feel the difference in the surface beneath my boots. Although not much traffic had been on them, the surface had turned to ice and there were lots of drifts across the road. So much so that the drifting snow and icy road had caused a snow plow to get stuck. He was waiting for a tow when we came upon him about midnight.
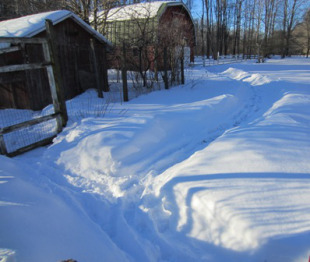
paths to the chicken house and barn
That walk brought to mind how important it is to get out and walk the ground to really know how it is; although, I’m usually referring to walking in gardens, possibly in your bare feet, when I talk about that. Looking out my window, either from my house or a vehicle, couldn’t have told me the road conditions like walking on the ice and through the drifts.
The roads in our area are full of curves and wooded areas. Even when the roads are clear after a snow, we know to look out for the areas where there are trees on the south side. Their shade keeps ice on the road in spots long after it has melted elsewhere. We can learn about where the cooler areas due to shading are in our gardens by watching the snow melt. I wrote a blog post about that in February 2014.
I hope you have enjoyed the winter weather at your place. It reminds us not to take ourselves too seriously. Things we have planned to do get changed, and that’s okay. It is an opportunity to slow down and check on our neighbors. Sitting by the woodstove is great, also. And about that snow shoveling—welcome it as a needed winter workout and be thankful that you are healthy enough to do it.