
Michael Matthews's Blog, page 142
September 28, 2013
Recipe of the Week: High-Protein Mac & Cheese
Ever since I was little I’ve always loved a good mac & cheese (oh the good old days of eating an entire box of Kraft made with extra butter).
This recipe is from my cookbook, Eat Green Get Lean, and I particularly like it because you get a lot of taste out of a high-protein, moderate-carb, low-fat dish.
Portions are quite filling as well, so you can even use 1/2 or 3/4 as a side. And if you add a little protein, a full portion actually makes a great post-workout meal.
Hope you enjoy!
Servings
4
Calories Per Serving
359
Protein Per Serving
22 grams
Carbohydrates Per Serving
61 grams
Fat Per Serving
7 grams
Ingredients
1 cup (dry) whole grain elbow macaroni noodles, cooked
1 tablespoon butter
1/4 cup whole grain flour
2 1/2 cups skim milk
2 ounces light pasteurized processed cheese, cubed
1/2 cup low-fat cheddar cheese, shredded
1 teaspoon Dijon mustard
salt and ground black pepper, to taste
2 tablespoons plain bread crumbs
Instructions
Preheat oven to 350°F.
Place a medium-sized saucepan over medium-low heat. Add the margarine and melt, once melted add the flour and cook for 1 minute, stirring constantly.
Stir in the milk and heat to boiling. Stir constantly, until thickened, about 1 minute. Add the processed cheese, cheddar, and mustard, continue to stir until cheese is melted.
Place macaroni in a 2-quart casserole dish. Pour the sauce over and mix. Season with salt and pepper, then sprinkle bread crumbs over.
Place in oven and bake for 30 – 40 minutes, or until cheese is bubbly and crust is golden brown.
What You Get to Eat


September 27, 2013
Cool Stuff of the Week: Enter the Dragon, Secrets of Mental Math, Masterful Misdirection, and more…
I’m not ashamed to admit that I’m kind of a sucker for cool stuff. I like nifty gadgets, quirky decoration pieces, nice clothes (and shoes!), good books, and fun games.
In this series of weekly posts, I share whatever currently has my fancy. Maybe some of it will catch yours as well!
VIDEO OF THE WEEK:
THE ART OF MISDIRECTION
In this short, entertaining TED talk, master thief Apollo Robbins gives a fascinating insight into the power of misdirection.
TOPPS ARCHIVE PRINTS

Topps’ Archive Prints are wall-sized art prints of some of baseball’s greatest players when they were in their prime.
Perfect for the walls of your man cave, each print is a high-quality replica of the original baseball card design, and the material even looks the part (down to the worn edges).
Buy now
Topps
ENTER THE DRAGON: 40TH ANNIVERSARY EDITION

Like many people, I’m a big admirer of Bruce Lee, and this is my favorite movie of his.
In this 40th anniversary Blu-ray release, you’ll find three new featurettes, commentary from the producer, and a newly re-mastered video and soundtrack that looks and sounds outstanding.
Buy now
AmazonAmazon UK
NIKON 1 AW1

The Nikon 1 AW1 is the world’s first waterproof and shockproof interchangeable lens camera.
Here are the highlights:
It’s waterproof to a depth of about 50 feet, and can survive a 6-foot fall.
It comes standard with an 11-27.5mm f/3.5-5.6 lens, and a wide angle 10mm f/2.8 lens is also available, both waterproof.
It features a 14-megapixel sensor, and can take HD video.
It has some features specifically for the more adventurous, like an altimeter, depth gauge, GPS, and a compass.
If you bring a camera to places where it gets wet and dirty, or you’d like to, then the Nikon 1 AW1 might be a perfect fit.
Buy now
AmazonAmazon UK
BOOK OF THE WEEK:
SECRETS OF MENTAL MATH
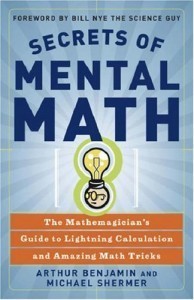
Want to impress your friends and family by solving seemingly complex math problems in seconds? Things like…
Multiplying and dividing triple digits.
Computing with fractions.
Figuring out squares, cubes, and roots.
Remembering long strings of numbers.
And more.
Well, these things aren’t nearly as hard as people think–they only require that you learn and practice various simple number tricks.
For example, let’s say you want to multiply a two-digit number by 11, such as 72 x 11. To quickly solve this, simply add 7 + 2, and place that number in between 7 and 2, for 792. (And if the sum of these numbers is 10 or larger, there’s another little trick for handling that.)
Secrets of Mental Math is fun and easy to work through, and the number skills you learn actually have some practical applications in everyday life.
Buy now
AmazonAmazon UK
What do you think of this week’s picks? Have anything you’d like to add? Let me know in the comments below!
September 25, 2013
Get Strong Fast With the 5/3/1 Strength Training Program
There’s a reason why many experienced bodybuilders include powerlifting in their routine.
Not only is a great way to skyrocket your strength and break through bodybuilding plateaus, it’s just plain fun.
You regularly hit personal bests, you feel like superman lifting huge weights, and it’s the best adrenaline rush weightlifting has to offer.
If that sounds like a blast to you, then you should give a pure strength training routine a go for a few months and see how you like it, and how your body responds.
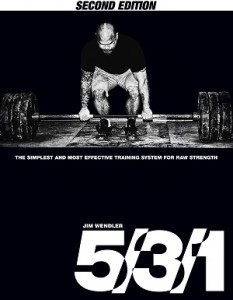
In this article, I’m going to explain how to follow one of the most popular strength routines out there: Jim Wendler’s “5/3/1″ system, which is my favorite due to its simplicity, time efficiency, and overall effectiveness.
Introducing the Wendler 5/3/1 System
Several years ago, the Westside Barbell program was it when it came to powerlifting. Nothing else was even worth considering.
That changed when Jim Wender’s “5/3/1” program hit the scene.
Wendler’s system is one of the only strength routines that has escaped Westside’s shadow and built a following. It’s now one of the most popular strength programs out there because it’s easy to understand, it doesn’t require any special equipment, the workouts are relatively short, and it’s very effective.
Let’s first take a look at the nuts and bolts of the system.
How 5/3/1 Works
You train 3 – 4 times per week.
You perform one of four workouts on your training days:
Workout A
Squat and assistance work.
Workout B
Bench Press and assistance work.
Workout C
Deadlift and assistance work.
Workout D
Military Press and assistance work.
You perform each of these workouts 4 times to complete what is known as a “mesocycle,” which is a fancy sports training term that refers to a training phase that lasts 2 – 6 weeks. That is, you will have 4 Squat, Bench Press, Deadlift, and Military Press workouts per mesocycle.
Your training frequency will determine how long each mesocycle lasts. If you train 4 times per week, it will last 4 weeks. If you train 3 times per week, it will last 5 weeks and 1 day (you’ll see why in a moment).
You perform each of these workouts in “waves,” which look like this:
Wave A
Warmup, 75% x 5, 80% x 5, 85% x 5
Wave B
Warmup, 80% x 3, 85% x 3, 90% x 3
Wave C
Warmup, 75% x 5, 85% x 3, 95% x 1
Wave D
Deload wave – 60% x 5, 65% x 5, 70% x 5
(In case you’re wondering, the percentages refer to percentage of your one-rep max, which we’ll talk more about in a minute, and “x #” means “for # reps.”)
The first week of your mesocycle involves Wave A workouts, the second week Wave B, and so forth. As you can see, each mesocycle ends with a “deload” wave, which is meant to give your body a break.
Here’s how it looks visually for a 4-day split:
4 Days Per Week
Week
Monday
Wednesday
Thursday
Friday
1
Squat – A
Bench Press – A
Deadlift – A
Mil Press – A
2
Squat – B
Bench Press – B
Deadlift – B
Mil Press – B
3
Squat – C
Bench Press – C
Deadlift – C
Mil Press – C
4
Squat – D
Bench Press – D
Deadlift – D
Mil Press – D
And here’s how it looks for a 3-day split:
3 Days Per Week
Week
Monday
Wednesday
Friday
1
Squat – A
Bench Press – A
Deadlift – A
2
Mil Press – A
Squat – B
Bench Press – B
3
Deadlift – B
Mil Press – B
Squat – C
4
Bench Press – C
Deadlift – C
Mil Press – C
5
Squat – D
Bench Press – D
Deadlift – D
6
Mil Press – D
As you can see, both the 4- and 3-day splits have you performing each of the workouts 4 times, and have you working through the 4 waves.
How to Calculate Your One-Rep Maxes
Your “one-rep max,” or “1RM,” is the amount of weight that you can lift for one, and only one, rep with while maintaining proper form. These are real, right now numbers—not past accomplishments or current wishes.
To follow the 5/3/1 program, you’ll need to know your 1RMs for your Squat, Deadlift, Bench Press, and Military Press.
Fortunately, you don’t have to find them through trial and error—you can simply calculate them based on how many reps you can perform with a lighter weight. The math is simple too.
To find your 1RM for a given lift, use an amount of weight that allows for about 4-6 reps, and use the following equation:
Weight x Reps x .0333 + Weight = Estimated 1RM
For example, if I can squat 335 for 5 reps, then the equation looks like this:
(355 x 5) 1775 x .0333 = 53 + 355 = 408
Practically speaking, I would round that number either down to 405 or up to 410, but that’s the simplicity of it.
Now, manually calculating all your 1RMs can be quite tedious, so I recommend that you use this great online application, which does it all for you.
Beginning the Program
Wendler recommends using 90% of your 1RMs, as calculated above, for your first 4 weeks (your first mesocycle).
For instance, if your 1RMs are as follows:
Deadlift: 400
Squat: 400
Military: 225
Bench Press: 300
You would use the following weights for your calculating your 5/3/1 lifts:
Deadlift: 400 x .9 = 360
Squat: 400 x .9 = 360
Military: 225 x .9 = 200
Bench Press: 300 x .9 = 270
And this is how Wave A would look using the above calculations (with “x #” referring to reps here):
Deadlift: 300 x 5, 320 x 5, 340 x 5
Squat: 300 x 5, 320 x 5, 340 x 5
Military: 150 x 5, 160 x 5, 170 x 5
Bench Press: 200 x 5, 215 x 5, 230 x 5
The Wendler 5/3/1 Warm-Up
You probably noticed that workouts start with a warm-up routine. This is simple, but particular. It works like this:
Warm-Up Set #1
40% of your 1RM x 5
Warm-Up Set #2
50% of your 1RM x 5
Warm-Up Set #3
60% of your 1RM x 3
You rest for 60-90 seconds in between each warm-up set.
Once you’ve performed these warm-up sets, you are ready to begin your heavy lifting.
How to Progress on the 5/3/1 Program
Slow, steady progression is the name of the game with 5/3/1, and Wendler keeps progression very simple.
You begin each new mesocycle by increasing your 1RM weights by 5 pounds for upper-body lifts, and 10 pounds for lower-body lifts.
Note that I said “your 1RM weights,” not your weights in the gym. That is, you’re increasing the numbers that you’re using to calculate your 5/3/1 lifts, not the amounts of weight you’re actually lifting.
For example, let’s say you used the following 1RM numbers to calculate your mesocycle:
Deadlift: 400
Squat: 400
Military: 225
Bench Press: 300
For your next mesocycle, you would calculate your lifts using the following 1RM numbers:
Deadlift: 410
Squat: 410
Military: 230
Bench Press: 305
You keep on increasing weights this way until you get stuck, which Wendler says will happen. When you finally do stall, he simply recommends that you drop to 90% of your current working 1RM, re-calculate, and continue on.
For example, if, over the course of several months, you’ve increased your Squat 1RM from 400 to 430 and get stuck, then you simply recalculate your next mesocycle using 90% of 430 (390) instead of trying to move up to 440.
By following this “two steps forward, one step back” approach, you’re able to keep your weights moving up over time and avoid the dreaded long-term plateau.
5/3/1 Assistance Work
“Assistance work” refers to exercises done other than the four the program is built around. How much assistance work you do is up to you, but it’s done for one or more of the following reasons:
Strengthen weak parts of the body.
Help increase the four core lifts.
Ensure your body develops in a balanced and symmetrical fashion.
Build more muscle.
If you’re familiar with my Bigger Leaner Stronger program, you’ll feel right at home with almost every assistance exercises that Wendler recommends:
Dips, weighted if possible.
Chin-ups or pull-ups.
Dumbbell Rows.
Barbell Rows.
Barbell Shrugs.
Dumbbell Bench Press.
Dumbbell Military Press.
Lunges.
Leg Press.
And more.
In fact, Wendler’s recommendations are so similar to my list of “approved exercises” in Bigger Leaner Stronger that you can just use it as a guide.
In terms of programming your workouts, the most popular assistance routine is one Wendler calls “Boring But Big.” It involves performing the sets and reps dictated by the program, followed by the same exercise for 5 sets of 10 reps, and by another assistance exercise for 5 sets of 10 reps.
For example, your Squat day might go like this:
Squat – 3 sets of 5 reps (or whatever you’re currently doing for your wave)
Squat – 5 sets of 10 reps
Lunge – 5 sets of 10 reps
In terms of how much weight you should use for the 10-rep sets, Wendler recommends that you start with light weights—40-50% of your 1RM—and gradually work up from there. How high you ultimately go is up to you, but I would recommend working up to using an amount of weight that allows for at least 8, but no more than 10 reps.
Wendler gives several other assistance routines as well as advice on how to program them properly in his book, which I highly recommend you read if you’re going to do his program.
It’s a great read, you’ll learn more about the ins and outs of the system, and you’ll support his work.
Buy now
AmazonAmazon UK
What do you think about Wendler’s 5/3/1 system for strength training program? Have anything else to add? Let me know in the comments below!
September 23, 2013
How to Build the Ideal Male Body
Let’s face it: a big reason why many of us work out every day is to look as awesome as possible. And for most of us, that doesn’t mean looking like a hulking bodybuilder.
Sure, it means being muscular, but it also means having a lean, proportional physique that still looks athletic. The type of body that other men wish they had, and women swoon over, not frown at.
When us fitness folk talk about acquiring an aesthetic physique, this is what we’re talking about. A body that just looks damn good.
You know it when you see it:
Broad shoulders with bulging biceps and triceps extending below.
A big, flat chest on top of a clear V-taper that ends with a narrow waist and defined core.
Developed, striated legs that end in bicep-like calves.
And all wrapped in very little fat, giving it all a tight, hard look.
Whereas bodybuilding today is all about packing on freakish amounts of mass, it used to place an emphasis on aesthetics.
For example, look at the following shots of the legendary Steve Reeves, whose physique is actually attainable naturally.


Reeves would be considered a scrawny, fat weakling by today’s professional bodybuilding standards, but damn, he looked good, right?
Well, it turns out that there’s a mathematical symmetry underlying his physique, which we’ll talk more about in a minute.
So how do we actually get a body like that?
Workouts of the week for a “massive chest” and “shredded arms” won’t cut it. It requires a deeper understanding of what exactly creates that look, and what you need to do with your body to get there.
And it’s not dependent on genetics, either.
While we don’t have Reeves’ genetics, and we can’t make our bodies carbon copies of our physical role models because muscle shape, length, and insertion points vary from person to person, we can achieve the same types of proportions and improve the overall look of our physiques.
Building an aesthetic physique is formulaic, and anyone can do it.
In this article, I’m going to show you how to take stock of your current physique and determine which parts need work to achieve the type of physique that makes people say “wow.”
Let’s start with the theory of ideal physical size and proportions, which is more of a science than many people realize.
In fact, it has its roots in a fascinating ratio underlying much of the beauty and symmetry we find in nature…
The Golden Ratio and the Body
In the first century BC, at the dawn of the Roman imperial age, the architect Marcus Vitruvius published one of the most important sources of modern knowledge of Roman building methods, planning, and design.
It covers almost every aspect of Roman architecture, from town planning, to building materials, to the construction of temples, civil and domestic buildings, pavements, aqueducts, and more.
Vitruvius’ publication also describes what he felt were the ideal human proportions, and that sacred temples should conform to these proportions. In fact, he believed that the human body was imbued with the hidden geometry of the universe itself, and thus was a microcosmic representation of the physical realm.
Over fifteen hundred years later, sometime around 1487, Leonardo da Vinci drew the human figure in accordance with Vitruvis’ observations, and named it the Vitruvian Man. He had the same particular fascination with human anatomy as Vitruvius: he believed that, in his own words, “man is a model of the world.”
The story behind that enigmatic statement brings us to what’s known as the divine proportion or golden ratio. For over two thousand years, esteemed mathematicians and scientists have studied, pondered, and debated this ratio and its ubiquity in nature, mathematics, architecture, and art.
So, what is this ratio? Euclid first defined it in his tour de force Elements, published in 300 BC.
The concept is simple: two quantities are in the Golden Ratio if the ratio of the sum of the quantities to the larger quantity is equal to the ratio of the larger quantity to the smaller one.
Visually, it looks like this:

And numerically, it’s expressed like this: 1:1.618 (1 to 1.618). In the case of the above image, b is 1 unit long, and a is 1.618 units long.
Now, the fascinating thing about the Golden Ratio is its plausibility as a natural law.
Scientists have found its expression in the arrangement of branches along the stems of plants and in the veins of leaves, in the skeletons of animals and the disposition of their veins and nerves, and in the composition of chemical compounds and the geometry of crystals. Researchers have recently reported the ratio present even at the atomic level.
Nowhere is the Golden Ratio more exemplified than in the human body, however, as da Vinci knew so long ago. In fact, he found that the more the body reflected this proportion, the more beautiful it was.
The human face, for instance, abounds with examples of the Golden Ratio. The head forms a golden rectangle with the eyes at its midpoint. The mouth and nose are each placed at golden distances between the eyes and the bottom of the chin. The spatial relationship of the teeth and the construction of the ear each reflect the ratio too.
Further, the Golden Ratio is found in the overall proportions of the human body: the different lengths of the finger bones, the makeup of the feet and toes, and even the structure of DNA.
When various parts of the body are in the Golden Ratio to others, a beautiful symmetry and proportion is created. Artists have known this for centuries. Modern plastic surgeons and cosmetic dentists use this knowledge to create beautiful faces and mouths.
When we apply the Golden Ratio to our purposes, we find that by adjusting the size of various body parts in relation to others, we’re able to immediately improve visual attractiveness.
The first person I know of to successfully put this theory into practice was Eugen Sandow, the legendary strongman from the late 1800s and “father of bodybuilding,” who called it the “Grecian Ideal.”
Achieving the “Grecian Ideal”
The ancient Greeks were known for their portrayal of what they felt was the ideal male physique. Statues often featured men with small waists, broad, muscular shoulders, and developed, defined legs.
Eugen Sandow was renowned for his resemblance to the classical Greek and Roman sculptures. It was no accident.

Sandow actually measured the statues in museums and found that certain proportions remained constant (and as you now know, these proportions have their roots in the Golden Ratio).
This led to the development of “Grecian Ideal” as a formula for building the “perfect physique,” and Sandow’s goal was to embody it.
Sandow’s body and principles served as the model for future bodybuilders that became known for their beautifully balanced physiques, like Steve Reeves, Frank Zane, Danny Padilla, Serge Nubret, Bob Paris, and Arnold Schwarzenegger.
So, then what are these proportions? How can we too look like a Greek sculpture?
Well, it starts with establishing reference points—parts of the body whose sizes will determine how large other parts must be to achieve an overall aesthetic physique. Some of these reference points, such as the wrist and knee, don’t change in size as you age or as your conditioning changes. Others, such as the waist, do.
For example, by measuring your wrist size, you can determine how large your upper arms should be, and from that measurement how large your calves should be. Your knee size determines how large your upper leg should be, and your waist size tells you how broad your chest and shoulders should be.
The “perfect” physique can be reduced to a simple relationships of body part measurements. And here they are.
Your flexed arms should be 150% larger than the circumference of your non-dominant wrist (wrist measurement x 2.5).
Measure the smallest part of your wrist with a measuring tape, and measure the largest part of your arm (the peak of your bicep and middle of your triceps).
It’s worth mentioning that some people will say that such formulas apply to an unflexed arm, I disagree.
My wrists are 7 inches and arms are just over 17 inches flexed, and 14.5 inches unflexed, and they almost look too large. Getting them up to 17 inches unflexed and 20+ inches flexed would look absolutely ridiculous. Even if you lack bicep peak, stick with flexed measurements.
Your flexed calves should match your flexed arms.
The general rule is your calves should match your arms, and if we’re talking flexed arms, then we should be talking flexed calves.
You measure this by flexing your calf (raising your heel off the ground), and wrapping a measuring tape around the largest part.
Your shoulder circumference should measure 1.618 times larger than your waist (waist x 1.618).
You measure waist by circling your waist with a measuring tape (sort of like a belt would) at your natural waistline, which is located above your belly button and below your rib cage. Don’t suck in your stomach.
You measure your shoulder circumference as follows:
Stand upright with your arms comfortably at your sides (no flaring your elbows or spreading your lats), and have a friend wrap a measuring tape around your shoulders and chest at its widest point. This is usually right around the top of your armpits.
Your chest circumference should be 550% larger than the circumference of your non-dominant wrist (wrist measurement x 6.5).
There are other ways to reach the ideal chest measurement, but this is the easiest and most reliable.
To take your chest measurement, stand upright with your arms comfortably at your sides (no flaring your elbows or spreading your lats), and have a friend place a measuring tape at the fullest part of one of your pecs and wrap it around the other, under your armpits, across your shoulder blades, and back to the starting point.
Your upper leg circumference should be 75% larger than your knee circumference (knee measurement x 1.75).
To measure your knee circumference, place the measuring tape at the tip of your kneecap and wrap around.
To get your upper leg measurement, wrap a measuring tape around the biggest part of your thigh and hamstring. This can vary from person to person depending on how the muscles develop.
Alright then. Are you ready to see how you measure up?
Comparing Your Body to the Ideal Body
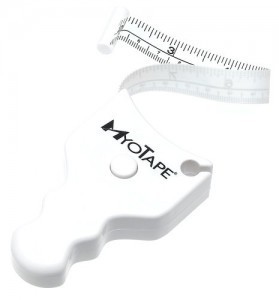
Tape measuring each part of your body is the most accurate method, and while any old tape measure will do, I like the Myotape best.
Another important point to consider is your body fat percentage. If you’re carrying excess fat, measurements will be skewed, with some affected more than others (waist, for example, will be greatly affected, whereas calves will not).
So if you want to truly know what needs improving, you need to get lean first.
How lean?
That’s up to you, really, but I would say no higher than 10% body fat. Personally I like to maintain a leaner look than that (7-8%), and thus that’s the point from which I base all readings.
Let’s now get to the measuring. Take and note down the following measurements (do both sides of your body where applicable so you can assess symmetry):
Your non-dominant wrist circumference.
Your arms.
Your shoulder circumference.
Your chest circumference.
Your waist.
Your upper legs.
A knee.
Your calves.
Once you know these measurements, you can simply compare them against the formula given earlier.
For example, here are my current measurements, at 7% body fat:
7-inch wrist
17-inch arms
51-inch shoulder circumference
43-inch chest circumference
32-inch waist
24-inch upper legs
14-inch knee
15-inch calves
And here are my “ideal” numbers:
17.5-inch arms
52-inch shoulder circumference
45.5-inch chest circumference
25-inch upper legs
17.5-inch calves
According to the above, I need to increase my shoulder, chest, and calf measurements, and I completely agree. My shoulders are a bit small for my arm size, my chest is actually okay but I need more lats (which will expand my chest measurement), and my calves definitely need some size.
And my training reflects these goals. I train shoulders twice per week, calves three times per week, and I do a bit of extra work on my lats on my back day.
So, take your measurements, see where you’re strong and where you’re lacking, and I bet you’ll agree.
And even if you don’t want to match the numbers exactly—maybe you’d prefer your arms or upper legs an inch smaller or larger—it helps point you in the right direction.
What do you think of the formula for the ideal male body? Have anything else to add? Lemme know in the comments below!
September 21, 2013
Recipe of the Week: Carrot Fries
While I’m not a fan of raw carrots, I love how they cook. Roasting and boiling always works, but sometimes I like to do something different.
This recipe is from my new cookbook, Eat Green Get Lean, and it’s a tasty, low-calorie, easy-to-make snack.
I like to pair mine with a bit of mustard. Delicious! Enjoy!
Servings
1
Calories Per Serving
101
Protein Per Serving
1 gram
Carbohydrates Per Serving
7 grams
Fat Per Serving
5 grams
Ingredients
2 large carrots, cut into fry shape wedges
1 teaspoon coconut oil
1/4 teaspoon salt
1/8 teaspoon ground black pepper
Instructions
Preheat oven to 450°F. Coat a baking sheet in cooking spray.
In a large mixing bowl add all of the ingredients. Toss until well combined. Spread the carrots out on the baking sheet and bake 25 – 30 minutes, or until lightly browned.
What You Get to Eat

September 20, 2013
Cool Stuff of the Week: Eagle POV, Grand Theft Auto V, Braun Cooltec, and More…
I’m not ashamed to admit that I’m kind of a sucker for cool stuff. I like nifty gadgets, quirky decoration pieces, nice clothes (and shoes!), good books, and fun games.
In this series of weekly posts, I share whatever currently has my fancy. Maybe some of it will catch yours as well!
VIDEO OF THE WEEK:
FLYING LIKE AN EAGLE
Holy crap, I want to be a bird for a day…
GRAND THEFT AUTO 5

Are you ready to have your mind blown?
Grand Theft Auto V did $800 million in first-day sales.
And why was it so hotly anticipated?
Well, it’s the most ambitious installment in the franchise, with an absolutely massive (and gorgeous) world that you get to experience from the viewpoints of three wildly different and entertaining characters.
The main storyline is great fun, and all the classic GTA elements are out in full force: customizable cars, a TON of guns, a huge variety of side missions (ranging from yoga to tennis to hunting to strip clubbing), and excessive vulgarity and violence.
Believe the hype–this game really is something special.
Buy now
AmazonAmazon UK
PIMSLEUR LANGUAGE COURSES
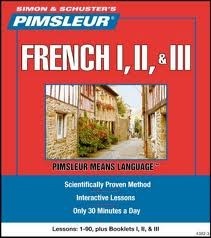
I recently decided to start learning other languages (beginning with German), and after trying a couple products (Michel Thomas, Rosetta Stone, and Pimsleur), I like Pimsleur the most.
Here’s why:
The lessons are short (30 minutes) long, so you can get through at least one per day.
You start out by learning essential grammar and vocabulary, as opposed to random nouns and verbs.
The repetition is just enough to maximize retention without boring you to death.
The MP3 format is great–I upload the courses to my Google Music account and use my phone to go through them while I drive, do cardio, etc.
I’m about 100 hours into learning German and am at a point where I can understand and participate in basic conversations. I figure 300-400 hours will achieve fluency, and Pimsleur has courses to take me all the way up to that point.
If you’ve been wanting to learn a language, I highly recommend you give a Pimsleur course a go.
Buy now
AmazonAmazon UK
BRAUN COOLTEC SHAVER
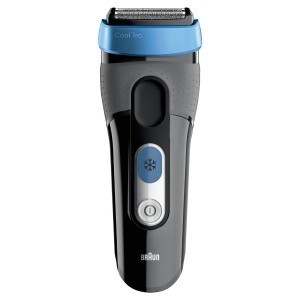
As far as high-tech shavers go, the Braun Cooltec is the king.
Its big innovation is an active cooling element that helps soothe your skin while you shave, and thus reduce skin irritation (it’s particularly good for people with sensitive skin). Its blades are also configured to deliver a close shave without actually touching your skin, further reducing irritation.
It can be used in or out of the shower (dry/wet), the docking station also cleans the device, and it fully charges in about an hour.
Buy now
AmazonAmazon UK
BOOK OF THE WEEK:
THE GEOMETRY OF PASTA
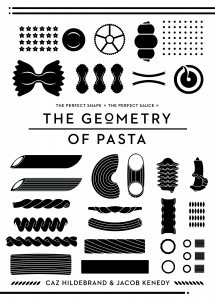
A good pasta is one of my favorite types of entree, and this is just an awesome pasta cookbook.
It not only has over 100 delicious recipes, it also teaches you everything you didn’t know you didn’t know about pasta.
It begins with an introduction to ingredients, recipes for a few types of pasta and several sauces), and then delves deep into a huge range of pastas.
For each pasta, you’re given a brief history lesson, a detailed description, and ideal sauce pairings, and in some cases recipes and black and white illustrations.
This is just an all-around slick product, and I’ll be getting a lot of mileage out of it.
Buy now
AmazonAmazon UK
What do you think of this week’s picks? Have anything you’d like to add? Let me know in the comments below!
September 19, 2013
How I Naturally Increased My Testosterone Levels 100x (Yes, 100x…)
I stood next to my bags on the sidewalk, looking down at the ground.
Humiliated and confused.
As my parents pulled up in front of my dormitory, I picked up my stuff and carried it over to the truck, shuffling awkwardly from the exertion as 30 lbs of foreign body fat tried to squeeze its way out of my clothes.
I smelled funny, I was a sweaty, anxious mess, and I had no idea what was wrong.
24 hours earlier, my academic dean explained to me how medical leave works.
You simply take a year off from school to address a medical issue, then return when you’re feeling better.
Sounds simple enough.
I sure as hell wasn’t feeling great, and I had no idea why.
Heck, I was damn near non-functional, spending most of my time holed up in my dorm room, depressed and lonely. I was missing homework assignments and skipping class. And it wasn’t because I was some ‘cool kid’ truant – I just could. not. think.
It was as if my body and brain were broken.
So I made the decision to go on a leave to try and figure things out – away from the incessant stress of university, the classes, the social interaction, the drinking and partying.
I was headed home and I didn’t even know why.
Fast Forward 8 Months…
Everything in my life is great. I’m lean and fit, with the body of a Greek god, I qualified for two national championship races – one in duathlon and one in triathlon – I’m sleeping like a baby, and my brain is functioning again.
And no more depression.
But something still isn’t right.
For a 21 year old kid, I had a problem. I had zero libido – no sex drive or interest whatsoever.
Zilch.
So since everything else was feeling great, I figured I may as well go in for a routine checkup with my primary care doctor to see if he could figure things out.
I went and got my blood drawn then returned to his office for the results.
He looked at the numbers for a minute or two, then looked up at me and said, “something’s wrong – I need to send you to a specialist.”
Three days later I saw a hematologist/oncologist in Potomac, VA. He ran comprehensive blood and hormone panels on me. One look at the results and he said, “I think you have a brain tumor.”
Boom. There you have it.
One MRI later and I had the verdict.
The silent source of all my misery.
A tumor, sitting in my pituitary gland – the “master gland” of the endocrine system – blocking the secretion of a handful of major player hormones. The big takeaway (or at least the only thing I cared about as a guy)… I hadn’t produced testosterone in years.
My levels were literally next to nothing (11 ng/dL at the time of diagnosis, where 300-1100 is the normal range for men).
After making the decision not to operate and to shift the monitoring of the tumor’s growth activity to a local endocrinologist in Durham, NC near my university, I was written a handful of prescriptions and sent on my way.
Just like that.
It only took me a few weeks on the medications before I made the decision to throw it all in the trash. I felt like a zombie. The doctors didn’t seem to care a whole lot beyond just giving me a diagnosis and writing a script, so I made the decision to stop playing the victim and to figure this out on my own.
Without medications.
By the time I’d returned to school that fall I declared neuroscience as my degree and began down my intellectual warpath, devouring textbooks and research papers on the brain and the endocrine system. I was (and some could say, still am) obsessed with the pursuit of truth when it comes to natural hormone optimization.
So what happened?
Where do I stand today?
Since that diagnosis I’ve naturally raised my testosterone levels above the medical reference range (1192 ng/dL at last check-up), using nothing but the knowledge I’ve accumulated over the years (via experience and lots of reading) with regards to proper training, nutrition, and lifestyle.
Heck, I didn’t even use “T-Boosting herbal supplements.”
Just training, nutrition, and lifestyle tweaks, when combined and executed over a period of time, ended up overriding the tumor’s effects on my endocrine system to the point where I was naturally able to raise my T to gorilla status.
And I still have the tumor.
Technically it should be functioning in the same manner, but since learning about how the endocrine system really works, in a complex series of positive and negative feedback loops, I was able to continually reinforce enough of the right feedback to first loosen, then overcome its effects.
And I’m really pumped because that means I can teach others to do the same.
If I can do it, any guy can do it.
So that’s what this article is about… how I did it.
The fitness industry is a barren landscape of scams and shams, glitter and polish but no substance. Most of the claims and recommendations made by ‘professionals’ are really nothing more than hearsay, or the viral spread of “the one magic pill to rule them all.”
C.S. Lewis puts it best when he says, “The task of the modern educator is not to cut down a forest, but to irrigate a desert.”
The “hormonal health” landscape in the health & fitness blogosphere is that desert, especially with respect to testosterone enhancement. And I’ve got the hose.
Don’t waste your money on another pill or herb. It’s all pointless. You can do this naturally, with training, nutrition, and tweaking your lifestyle.
How to Increase Your Testosterone With Training
Over the years, I’ve learned to challenge conventional wisdom, especially when it comes to fitness.
As an overtrained triathlete, I prescribed to the old-fashioned “more is better” formula of chronic cardio training and a sugar-and-grain heavy diet.
While I appeared fit and healthy on the outside, my endocrine system was completely ravaged, and my sexual health and overall well-being suffered greatly because of it.
This outcome may not surprise Muscle For Life readers today, but just a handful of years ago, the common paradigm in fitness involved high volume training, for both endurance athletes and weightlifters.
Thankfully, that paradigm has shifted mightily in the opposite direction for most savvy lifters and trainees, but when it comes to optimal endocrine system training, there is still very little knowledgeable prescription in the fitness landscape.
In terms of optimal training for testosterone production, information is usually regurgitated from one blogger to the next, or links to Pubmed findings are shot around forums. But nothing new has been insightfully drawn from the body of research beyond generic “lift heavy” prescriptions.
Now, the first thing to understand in terms of testosterone training is that MANY different types of training will stimulate transient testosterone production in men. High reps, low reps, sprinting, jumping, even some endurance training.
When these findings are not viewed in the context of an overall goal, they can be misleading, and quite confusing, considering most fitness bloggers will take an isolated finding and run with it as fact, as dogma.
Context is everything.
In my own health journey, as I tried to figure out how to both optimize my T and not lose my entire life to training and “perfect” eating strategies, I noticed that, at first, rejuvenative movements were very effective.
When the body is overtrained and chronically stressed, it really just needs rest – not necessarily some super-advanced, scientific training paradigm. So I gave it rest, for several months, in the form of a daily walk for anywhere from 30 minutes to a couple hours, depending on how I felt, and some calisthenics exercises several times a week.
As I dropped fat (I ended up gaining an additional 50 lbs of body fat while on the meds and transitioning back into my university environment – quite the rollercoaster), I began feeling more athletic so I decided to sprint one day per week.
And as I got even lighter, calisthenics became a major, and very fun, part of my overall fitness regimen.
Coincidentally, as I dug further into the research on training for endocrine response, I began to notice how effective calisthenics really were for triggering testosterone production, based on some standard principles that I unearthed when looking at the body of knowledge on the subject of training and testosterone.
Within a few short months of rejuvenative movements, coupled with a solid nutrition strategy, my T levels noticeably jumped back out of nowhere. I first realized the positive change upon waking one morning (any guy knows what happens below the belt every morning when you wake up and have normal T levels).
So at my next check-up I got my hormones tested and sure enough, my T was around 400 ng/dL. Wow. Just a few short months and some minor, but important changes, and my testosterone jumped into the normal range, albeit still on the low side.
Being a competitive person, I naturally wanted to increase it even more, and to see how high I could get it.
Looking at the research on training, I noticed that the vast majority of training for testosterone-induction was neuromuscular-style training. Neuromuscular training is designed to specifically illicit a response from the motor neuron units and their corresponding innervated muscle fibers.
Being a neuroscience geek, I was all over this idea.
Looking at the body of research, I noticed a gap in what researchers have found to be optimal, and what the fitness industry prescribes. The discrepancy is small, but important.
The first thing to understand is that a training threshold exists.
As the neuromuscular (NM) system adapts to certain training stimuli, hormonal responsiveness becomes less sensitive. Research in elite sprinters shows us that average Joes will elicit a larger testosterone response to the same intervals, despite the fact that the elite sprinters will output more power over the same distance.
When the power output is measured relative to the neuronal adaptation and desensitized hormonal response, the average Joes end up eliciting a far higher testosterone response. This is because their bodies react to the training bout as a foreign stimulus that needs support, so androgen receptors are increased in concentration and sensitivity to compensate.
This tells us that beyond a certain threshold of training adaptation, the body becomes desensitized to androgen receptor activity and/or has increased sensitivity to glucocorticoids (stress hormones, which act antithetically to testosterone), which is incredible news if you are not an Olympic level athlete – with the correct training you will see a noticeable T response rather quickly.
Secondly, in terms of the threshold, considering the interplay between cortisol and testosterone, the training stimulus must not be chronic; it needs to cause just enough stress on the system to stimulate positive NM adaptations and elicit androgenic activity, but not so much that it becomes stressful.
This is where prolonged endurance training completely screws the pooch. Chronic training exposure skews the cortisol:testosterone ratio to the left, allowing cortisol to exert suppressive effects on testosterone production.
The same can happen for any type of training stimulus (not just endurance exercise), both during the session itself (transient influence) and over the course of a periodized program or competitive season.
To make sure cortisol stays low enough to not hamper testosterone production, the optimal way to train is in explosive movements that cannot possibly be carried out long enough to cause long-term stress. Intensity needs to be high, but controlled.
The prescription is to train with fatigable bouts of resistance movements, but in low enough quantity to keep cortisol elevation at bay.
So now we understand: explosive resistance training is optimal, as long as it is performed under the training threshold, which is the point after which negative adaptations occur in terms of glucocorticoid receptor sensitivity.
But that’s not the entire picture, and not entirely different from what pop-fitness promotes (though, they mostly just say “squat more”).
There’s another element.
And that’s the idea of workload and its relationship to muscle volume activation (MVA) relative to intensity.
It has been demonstrated that the magnitude of the hormonal response to training is proportional to the size of the muscle volume activated. This is why we hear the old paradigm of “squat, squat, squat” to increase testosterone. Big leg muscles = more muscle tissue activated.
However, this MVA-dependent hormonal response is relative to the intensity of the movement performed.
Researchers have also found that the hormonal response to training is dependent on the amount of work done in the session, with work defined classically as W = Fd (magnitude of the force x displacement).
So when we combine MVA and its relation to intensity with the work principle, and respect the importance of the training threshold, we’re left with the following algorithm for optimal testosterone-inducing training…
W (MVA * i) < Training Threshold
… where W is work, MVA is muscle volume activated, and i is intensity.
The takeaway: High workload, with a high proportion of muscle volume activated relative to intensity of the stimulus on said muscle volume, which should be performed via explosive resistance training done under a performance threshold (ie. self-limiting) = optimal.
This might seem complicated at first. It really isn’t, luckily.
It’s the principle upon which we can build a sensible training program, either with calisthenics (and weighted calisthenics, my preference) or weight training.
Let’s break it down quickly:
MVA:
Since we’re looking to activate a large volume of muscle tissue, we need to perform compound movements, not just movements that isolate large muscles. The big lifts like deadlift and squats work quite well, along with muscle-ups, weighted pull ups and chin ups, weighted dips, weighted box jumps, and levers.
Explosive intensity:
But it’s not enough to just do compound movements. You can take it to another level and add the appropriate intensity to those movements to optimize your hormonal response to the training.
This is where I prefer calisthenics, though I am sure experienced lifters can elicit good responses with deadlifting and squatting. You just need to be rather well-trained as a heavy squatter or deadlifter in order to get the intensity super high, but the fact that you are very well-trained may, as pointed out previously, indicate a desensitized effect of the training stimulus.
Calisthenics, however, and especially the muscle-up and weighted muscle-up, give you the opportunity to apply a large force and displace it over a sizable distance, along with keeping the fatigable effort under a self-limiting threshold (for example, if you cannot do another muscle-up then you have to stop, unlike barbell lifting where you can take a plate off the bar and lift a lighter weight to exhaustion).
When I began taking calisthenics seriously, I also noticed a sizable increase in my testosterone levels over the following months.
My T level was at ~600 ng/dL when I first learned to muscle-up. Within 6 months it was just under 1200 ng/dL.
During this period of time I trained with muscle-ups, calisthenics, and wind sprints, and ate according to the rough nutrition principles I’m about to outline.
This was the period of time during which I also saw the major changes in body composition, eventually dropping back into single digit body fat.
How to Boost Your Testosterone With Nutrition
Nutrition is arguably just as important as training in the testosterone equation.
And interestingly enough, what I’m about to tell you is probably going to fly directly in the face of any assumptions you might have about it.
Protein is not that important. Fat and carbohydrate consumption are.
Adequate protein consumption is necessary only to support your muscle tissue and the training load you place upon it. Beyond that, extra dietary protein comes at the cost of neglecting either fat or carbohydrate intake, or both.
High protein diets are notorious for resulting in low testosterone in men. And that’s because the excess protein causes the individual to eat too little fat or carbohydrate.
Low fat diets are synonymous with low testosterone. And low carb diets have also been found to decrease testosterone levels.
Macronutrient profile of the diet matters quite a bit, and men need to be sure and get adequate levels of carbohydrates and fats, along with sufficient protein to support the training load on their muscles.
They also need to be sure and consume enough calories, as low calorie diets have also been shown to decrease testosterone. If you are dieting with the aim to lose body fat, I recommend a small weekly deficit of 10-15%, which is enough to not cause physiological stress from too much restriction.
Micronutrients matter, but in the same way that getting adequate vitamins and minerals always matters for general health and overall well-being.
I consume a diet wherein I get my vitamins and minerals and fiber from fruits and vegetables (just don’t eat too much fiber), and get my protein and much of my fat from animal sources (meats, cheeses, butters, etc). My carbohydrate sources are potatoes, white rice, and sweet potatoes.
The type of fat you consume matters a lot as well. You should aim to get most of it from saturated animal fats and monounsaturated fats (like from avocados and olives) and limit the amount of polyunsaturated fats you consume, as the PUFA:MUFA ratio has been shown to correlate with testosterone levels.
Animal protein is superior to plant protein when it comes to testosterone production. With routine consumption of meats and animal products, you get the added benefit of cholesterol, quite possibly the most important molecule for your reproductive health, along with plenty of B-vitamins, zinc, and magnesium.
Also, a key element in my nutrition habits is intermittent fasting. And over time, I truly believe that IF played a major role in bringing my health from mediocre, to very solid.
In nonobese men, the effects of a short-term fast were staggering, with a 67% increase in LH (luteinizing hormone) response and a 180% increase in testosterone.
With this in mind, doing a short-term fast daily may have profound, almost immediate effects on your endocrine balance, especially because LH pulsing needs to spike regularly in order to have a noticeable effect on your overall T levels. This is something that regular daily intermittent fasts can have a positive effect on.
I’ve fasted daily since beginning this journey back to health, and I credit the habit with much of my success and with helping to rejuvenate my endocrine system.
Usually the fast ends up being quite simple: I just skip breakfast and I limit my late night eating. Sometimes I train fasted, sometimes I train fed.
Optimizing Your Testosterone Levels
All-in-all, if you put all of this simple knowledge into action, and take your program seriously for the next 3-6 months, you could very likely double your testosterone levels, depending on where you begin.
Your current body fat level, training experience, exposure to chronic stress and environmental toxins, nutrition habits, and training style all have a profound impact on your endocrine system, so you need to take it all seriously if you want to be hormonally healthy into your old age.
If you’re interested in learning a bit more, I’ve got a free video series on natural T production here, starting with a tutorial on body fat and how losing body fat is the most important thing you must do before anything else to increase your testosterone levels.
I’m also launching a step-by-step program in October about how to naturally increase your testosterone, complete with training plans, menus, an audiobook version, videos, and a complete pdf guide. It’s available for pre-order currently, until 9/22/2013.
Endocrine health is horribly under-addressed in the fitness industry, yet it is of utmost importance: without a healthy endocrine system, nothing else functions properly.
And you can optimize yours naturally with smart training and nutrition. There is no need for gels and injections.
So take a look in the mirror and ask yourself if you want to rely on a pharmaceutical for your overall well-being and sexual health.
If not, put these training and nutrition principles into practice in your life right now and within a few short months you’ll see some encouraging, and possibly profound, improvements.
Christopher Walker is a blogger at NoGym.net and author of Testosterone I/O, the guide to naturally increasing your testosterone. He loves startups and calisthenics and is the co-host of the Road To Ripped podcast.
September 18, 2013
How to Prevent and Recover From Workout Injuries
Like much of the advice in the world of health and fitness, the subject of avoiding and treating working injuries is full of broscience and gymlore.
Some people will say squatting past parallel puts your knees at risk. They’re wrong.
Others will say touching the bar to your chest on the bench press is bad for your shoulders. They’re wrong, too.
We’ve all heard that deadlifting is a surefire way to wreck our lower backs. Wrong, wrong, wrong.
Nevertheless, as with any physical activity, the risk of injury is there. If you’ve lifted weights for any amount of time, you know someone that has gotten hurt.
Shoulder injuries and back injuries seem to be the most common, but there are many other strange types of injuries that leave us scratching our heads (“how the HELL did he/she manage to do that??”).
Well, in this article I want to talk about common mistakes that increase your risk of injury, and how to speed recovery if you’re currently injured, or sustain an injury in the future.
How Likely Are You to Sustain a Workout Injury?
The truth is many people use the boogieman of injury as an excuse to train improperly–to not push themselves, to use poor form, and so forth.
You see, weightlifting just isn’t a very dangerous activity. One study found that injuries sustained during recreational and competitive weightlifting are substantially lower than injuries from other sports such as football, gymnastics, and basketball.
Weightlifting injuries are on the rise, however, which is most likely because the number of people doing it are also on the rise. Mass movements like CrossFit don’t help either, as a bad instructor is all it takes for a large group of people to increase the risk of injury.
So, the good news is this: if you train with proper form and avoid the mistakes discussed below, your risk of injury is actually quite low.
Let’s now look at the 4 most common mistakes people make in the gym that increase the risk of injury.
Injury Risk Mistake #1:
Lifting More Weight than You Can Handle
According to research conducted by the Center for Injury Research and Policy, the most common way people injure themselves while weightlifting is dropping weights on themselves.
And how do people increase the risk of dropping weights on themselves?
They ego-lift. They stack the plates and just hope for the best.
I actually cringe when I see skinny guys load 3-4 plates on either side of the squat bar, only to perform shaky quarter reps with a spot. All it will take is a slightly too fast descent, or a momentary tweak of the back or knee, and Humpty Dumpty will have a great fall.
Trying to lift too much weight also puts excessive strain on your joints, tendons, and ligaments. By working with weights that you can properly handle, however, and by doing full, controlled reps, you not only avoid that problem, you also make better gains, and improve flexibility.
Here’s the bottom line: if you can’t get full reps, you’re using too much weight, and you’re increasing your risk of injury. Simply lighten the load, do full reps, improve your strength, and only move up in weight when you can keep it fully under control.
Injury Risk Mistake #2:
Using Bad Form
This is similar to the first mistake, but not the same.
Form mistakes go far beyond the heavy half repping that give a bad name to the big compound lifts like the squat, deadlift, bench press, and military press. You can work with proper amounts of weight and use a full range of motion and still put yourself at a considerable risk of injury.
For instance…
If you round your back during a deadlift, or hyperextend it too far at the top, you’re asking for a lower back injury.
If you flatten your back and round your shoulders at the top of a bench press, or flare your elbows out too much, you will probably have shoulder problems at some point.
If you let your knees bow in when you squat, or extend them too far past your toes, you can really hurt them when going heavy.
If you do your overhead/military presses behind your neck, and your body is built like most people’s, you’re increasing your risk of injury. (Strangely enough, some people’s bodies just mechanically can handle this type of movement, but most don’t do well with it.)
Most exercises have little quirks like these, which is why you should take the time to learn proper form on everything you’re doing, and make sure to stick to it.
Bodybuiling.com’s videos are a great resource for this, and you may also like my articles on how to deadlift and how to squat, as these are two vitally important lifts that many people do incorrectly.
Injury Risk Mistake #3:
Failing to Warm Up Properly
Many people’s warm-up routines consist of a few minutes of static stretching.
This is a bad way to go about it.
Static stretching before exercise has been shown to impair speed and strength, and not only fail to help prevent injury, but possibly increase risk of injury due to the cellular damage it causes to muscle and its analgesic effect.
A proper warm-up routine should bring blood to the muscles that are about to be trained, increase suppleness, raise body temperature, and enhance free, coordinated movement.
The best way to do this is to move the muscles repeatedly through the expected ranges of motion, which does reduce the risk of injury.
That’s why I recommend a simple, short, multi-set warm-up routine in my books Bigger Leaner Stronger and Thinner Leaner Stronger, that goes like this:
First Warm-Up Set
12 reps with 50% of your working set weight
Rest 60 seconds
Second Warm-Up Set
10 reps with 50% of your working set weight
Rest 60 seconds
Third Warm-Up Set
4 reps with 70% of your working set weight
Rest 60 seconds
Fourth Warm-Up Set
1 rep with 90% of your working set weight
Rest 120 seconds and then start your workout
By doing this warm-up routine, you will not only help prevent injury, but you will probably actually find that you can lift more weight while maintaining proper form.
Injury Risk Mistake #4:
“NO PAIN NO GAIN BROOOOO!!!!!”
This might be obvious, but many people don’t quite get it:
If something is hurting, stop your set. Don’t try to push through pain.
If you experience pain, stop your set. If an exercise always bothers you, do something else.
Realize that pain is a warning that something is wrong, and if you don’t heed it, serious injury can follow.
Probably the worst injury I’ve witnessed was a guy in his 60s at a bench meet. He had just barely struggled out one rep with about 350, and then started rubbing his elbow. He then told the guys to load more weight so he can go for a PR. Everyone was rooting him on.
He gets under the bar, unracks it, gets halfway down and we hear a POP above the noise of the crowd. Fortunately, the spotters were on the ball and saved him from what looked like a near decapitation. His elbow blew out, and I overheard an idiot telling him to just ice it and he’ll be fine. Solid advice.
The point is don’t be stupid.
Aches and stiffness and such are common enough and usually go away once you warm up, but ignore and try to “alpha” your way through pain, and you’re asking to get hurt.
How to Recover From Workout Injuries
If you avoid the above mistakes, your chances for injury are quite low. But stuff can happen, so let’s talk about how to recover from workout injuries.
First, if the injury is serious, you should see a doctor. But the most common injuries are strains, and those are fairly easy to recover from if you take the following actions.
Rest
The most important part of recovery is rest.
Don’t put any stress on the affected body part(s) until they’re fully healed.
People that violate this simple principle can wind up with chronic injuries that become quite a problem.
Once the injured area feels healed (no more pain through a full range of motion), start slowly in training it again. Work with lighter weights and see how you feel the next day, and gradually work back into your normal routine.
Ice
Ice helps you recover by reducing inflammation and swelling and internal bleeding from injured capillaries and blood vessels. As long as there is pain and inflammation, ice will help.
You should begin treatment with ice, not heat (which we’ll talk about in a minute), and I recommend keeping a damp cloth between the ice pack and your skin to avoid discomfort.
Don’t apply ice for more than 15-20 minutes at a time, but you can rotate on and off all day.
Compression
Like ice, compression helps you heal by reducing swelling and inflammation.
Use elastic bandage or a compression sleeve, and wrap the injured part tightly, but not so tight as to impair blood flow.
You can combine compression with ice by wrapping over the ice pack.
Elevation
By raising the affected part above your heart, you speed the blood’s journey back to your heart, which reduces swelling and aids in removing waste products from the area.
Heat
Heat stimulates blood flow, which helps your body bring more nutrients for healing and remove waste products.
You don’t want to use heat right away, however, because it aggravates inflammation.
The general advice is to use only ice for the first 3 days to reduce swelling, and then to introduce heat, and alternate between the two (heat for 15-20 minutes, followed by ice, followed by heat, and so forth).
Are there any other mistakes or recovery methods that I missed? Have anything else to add? Lemme know in the comments below!
September 16, 2013
The Worst Way to Lose Weight
Muscle loss…horrible food cravings…metabolic damage…depression… All this and more is possible when you do all the wrong things to lose weight.
What does this fabulously bad weight loss method entail exactly?
Well, it’s recommended by “experts” around the world, including bestselling authors, celebrity trainers, and fitness “gurus.” We all know someone that has used these terrible weight loss methods, and maybe even have tried a few ourselves.
It’s this article I want to share with you how to lose weight in the worst possible way, explain why it’s the worst, and help you understand what to do instead.
So, let’s get started with step 1…
Step 1:
Severely Restrict Your Calories
To lose weight very quickly, and unhealthily, you should severely restrict your caloric intake. (In case you don’t know, a calorie is simply a measurement of energy in food.)
What is a severe caloric restriction?
When you feed your body less than 70% of the energy it burns daily (create a caloric deficit over 30%), the problems can begin. The lower you go, the worst things get.
To put this in perspective, consider the following:
A 140-lb woman exercising 3-5 times per week will burn approximately 1,600-1,700 calories per day.
If such a woman ate less than, ~1,100 calories per day, she would be entering the problem area.
A 200-lb man exercising 3-5 times per week will burn approximately 2,500-2,600 calories per day.
Anything less than ~1,900 calories per day would be under-eating for such a man.
Many starvation diets have you eating anywhere from 30-50% of the energy you burn daily, and these qualify as severe caloric restrictions.
Why is this bad, you ask? Don’t you lose weight quickly when you do this?
Yes, you do…BUT…
Much of the weight initially lost is water, which goes…and comes…very quickly.
When someone loses 6 pounds in a week, at least 50%, and as much as 75-80% of it is water, and could actually be gained back within 1-2 days of overeating.
You also lose muscle, and the less you eat, the more you lose.
As you lose muscle, your body not only begins to take on that amorphous “skinny fat look,” but your metabolism slows down, your bone health decreases, and your risk of disease increases.
You feel progressively worse and worse.
Your energy levels plummet, you battle intense food cravings, you become mentally clouded and even depressed, and more.
So, while severely restricting calories is great for losing weight quickly…it’s ultimately a bad way to go about losing weight.
Much better is to maintain a moderate caloric restriction of about 20% (eat about 80% of the energy your body burns every day).
By doing this, you’re able to lose 1-2 lbs of fat per week while preserving your metabolic health, energy levels, mental balance, and mood.
Step 2:
Remain in a Caloric Deficit For Too Long
The longer you remain in a caloric deficit, the more weight you can lose.
But it also means…
The more your metabolism slows down.
The more muscle you lose.
The more your body becomes stressed.
The more your anabolic hormones decrease.
I often get emailed by people that lost significant amounts of weight using severe calorie restrictions, and because they have been eating too few calories for too long, their metabolisms adapted to that low level of intake. This, then, created the frustrating situation wherein they are currently eating very little every day, yet not losing weight anymore.
They then have a dilemma of either further reducing calories or increasing exercise, and both would simply exacerbate the problems they’re already having.
The priority with these people is always to increase caloric intake and repair the metabolism, not further restriction calories to induce more unhealthy weight loss. And you avoid this problem altogether by not remaining in a caloric restriction for too long.
Generally speaking, I recommend that people diet to lose weight for up to 10-12 weeks at a time, and then increase calories to a maintenance level (eat 100% of the energy your body burns every day) for 2-3 weeks.
By doing this, the metabolism is sped back up, the hormone profile improves, cortisol levels come down, and the body can generally just “reset” from the negative effects of calorie restriction.
If, after the first 10-12 weeks of weight loss and 2-3 weeks of maintenance, one wants to lose more weight, he/she can then go for another 10-12 weeks (if necessary), and repeat this cycle over and over until the desired weight is achieved.
Step 3:
Don’t Eat Enough Protein
A low-protein diet is great for accelerating muscle loss while in a caloric deficit.
High-protein diets, on the other hand…
Are more effective at reducing body fat, including abdominal fat in particular.
Help preserve lean mass.
Increase satiety, helping you avoid hunger pangs and cravings.
The abundance of research available on high-protein dieting makes it very clear that it’s simply a superior way to diet for weight loss, and especially if you’re exercising as well.
How much protein should you be eating, then?
Research has shown that protein should comprise approximately 30% of your daily calories, but going as high as 40-50% is okay as well. For most people, that comes out to be about 1 – 1.2 grams of protein per pound of body weight.
(In case you’re wondering if a high-protein diet is bad for your kidneys, this myth has been thoroughly debunked.)
Step 4:
Don’t Do Any Resistance Training
Resistance training while dieting to lose weight preserves, and can even build, lean mass.
This is why it should be part of every weight less regimen, even if you’re not concerned with building your muscles.
You want to minimally retain the muscle you have while you lose fat, and resistance training plus a mild caloric deficit and a high-protein diet accomplishes this.
Step 5:
Do a Ton of Cardio
Many people equate cardio with weight loss, and figure the more they do, the more weight they lose.
While cardio does help burn calories and thus fat, and while doing more will result in more calories burned, it’s a big mistake to do an excessive amount of cardio while dieting to lose weight.
Why? There are two primary reasons:
Because your body is already under stress due to the caloric deficit, it’s easier to overtrain when you’re dieting to lose weight.
We experience overtraining in several ways: “burnout,” general fatigue, depression, decreased immunity, and more. It’s no fun.
Well, research has shown that intense, prolonged endurance training is a particularly effective way to induce overtraining.
You’re more likely to experience excessive metabolic slowdown, which can persist long after weight loss is stopped.
These reductions in metabolic rate are one of the things that makes it hard for many people to maintain their new weight after losing a significant amount of fat.
Because their metabolisms have slowed down, and sometimes by quite a bit, they can no longer eat as much as they were used to eating before dieting without gaining weight.
This negative “metabolic adaption,” as it’s known, is accelerated by doing excessive amounts of exercise, and particularly cardio, when you’re in a caloric deficit.
So, while cardio is an effective tool for aiding weight loss, doing a lot of long-duration, steady-state cardio is not the best way of going about it.
Much better is to focus on “high-intensity interval training,” which has you perform shorter, higher-intensity exercise. It’s not only more effective than steady-state cardio for losing fat, but also for preserving muscle.
Personally, I never do more than 4, 25-minute sessions of HIIT per week when I’m in a caloric restriction, and I usually keep it to 3.
What do you think about these weight loss mistakes? Have anything else you’d like to add? Lemme know in the comments below!
September 14, 2013
Recipe of the Week: Cranberry Quinoa Salad
I love the grain quinoa (pronounced keen-wah in case you were wondering). It’s a high-carb, high-protein, nutrient-dense grain that cooks and tastes great.
This is a very popular recipe from my cookbook, The Shredded Chef, and is one of my favorite ways to prepare quinoa.
If you’re sick of brown rice and sweet potato, give this a go. I think you’ll fall in love with quinoa like I have!
Enjoy!
Servings
4
Calories Per Serving
287
Protein Per Serving
51 grams
Carbohydrates Per Serving
45 grams
Fat Per Serving
7 grams
Ingredients
1 cup quinoa, rinsed
1 1/2 cups water
1/4 cup red bell pepper, chopped
1/4 cup yellow bell pepper, chopped
1 small red onion, finely chopped
1 1/2 teaspoons curry powder
1/4 cup fresh cilantro, chopped
1 lime, juiced
1/4 cup sliced almonds, toasted
1/2 cup carrots, minced
1/2 cup dried cranberries
salt and ground black pepper, to taste
Instructions
Pour the water in a large saucepan, cover with a tight fitting lid, and place over high heat.
Once water starts to boil, pour in the quinoa, reduce heat to low and cover. Simmer until the water has been absorbed, about 15 – 20 minutes. Transfer the quinoa to a large mixing bowl and place in the refrigerator until cold.
Once the quinoa is chilled, stir in the bell peppers, red onion, curry powder, cilantro, lime juice, sliced almonds, carrots, cranberries, salt, and pepper.
What You Get to Eat


