
Michael Matthews's Blog, page 129
March 1, 2014
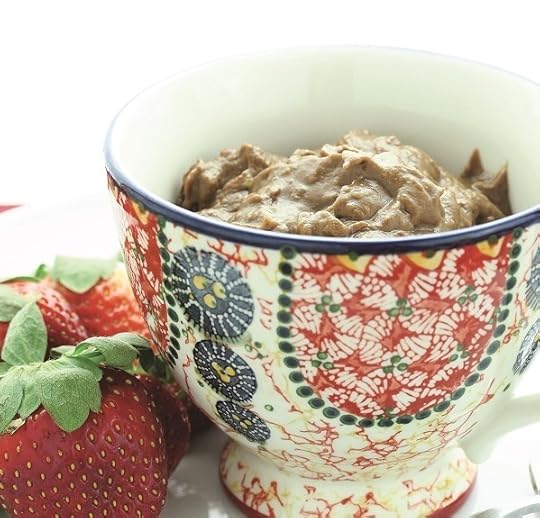
Recipe of the Week: Chocolate Sweet Potato Pudding
This recipe is from my cookbook Eat Green Get Lean, and I love it because it’s extremely easy to make and downright delicious. And if the inclusion of avocado throws you off, trust me–it adds a nice touch! Enjoy!
Servings
2
Calories Per Serving
253
Protein Per Serving
4 grams
Carbohydrates Per Serving
37 grams
Fat Per Serving
13 grams
Ingredients
1/2 medium sweet potato, cooked
1 medium avocado
5 dates, pitted and soaked
2 tablespoons carob or chocolate powder
1/4 cup water
Instructions
In a food processor or blender add all of the ingredients and pulse until ingredients are mostly mixed. Turn on high and slowly add any additional water until the pudding is smooth
What You Get to Eat
What did you think of this week’s recipe? Let me know in the comments below!
Want more delicious, easy-to-make recipes like this?If you like this recipe, then you’ll love the bestselling cookbook it came from: my own Eat Green Get Lean! It contains 100 vegetarian and vegan recipes specifically designed for high-protein, healthy dieting.
And even if you’re not a vegetarian or vegan eater, you will find plenty of delicious “add-on” dishes, as well as breakfast, lunch, and dinner recipes that you can easily add meat or other forms of protein to.
Buy this book now to forever escape the dreadful experience of “dieting” and learn how to cook nutritious, delicious vegetarian and vegan meals that make building muscle and burning fat easy and enjoyable!
Buy now
AmazonAmazon UKAmazon AUAmazon CABNiBooksKoboGoogle Play
You might also like my other bestselling cookbook, The Shredded Chef.
In this book you’ll find 120 healthy, flavorful recipes specifically designed for athletes that want to build muscle or lose fat. Regardless of your fitness goals, this book has got you covered.
Buy now
AmazonAmazon UKAmazon AUAmazon CABNiBooksKoboGoogle Play


February 28, 2014
Cool Stuff of the Week: Ninja Sphere, Sherlock, Death Star Silicone Mold, and More…
I’m not ashamed to admit that I’m kind of a sucker for cool stuff. I like nifty gadgets, quirky decoration pieces, nice clothes (and shoes!), good books, and fun games.
In this series of weekly posts, I share whatever currently has my fancy. Maybe some of it will catch yours as well!
VIDEO OF THE WEEK:
CELEBRITIES READ MEAN TWEETS ABOUT THEMSELVES
Gotta love it when celebs make themselves the butt of jokes and roll with the punches. Pretty hilarious.
NINJA SPHERE

I’m not sure if I love or fear the Ninja Sphere, but I have to say, it’s pretty damn cool.
It uses internal sensors to track and report all kinds of goings on in your home, and with that data it does many things:
It helps locate various types of objects (and even people and pets)
It informs you if something is out of its normal place
It connects to various appliances to monitor status and usage and give you remote control of everything
It can automatically turn off appliances that you accidentally leave on
And more.
Orwellian baby steps? Maybe, but it’s still pretty awesome. And the NSA would never be able to access such devices, right? ….Right?
GIANT CHESS SET WITH GIANT MAT

If you like the idea of turning chess into something of an outdoors workout, then this giant chess set is for you.
While it may seem ridiculously unnecessary, it’s actually pretty cool for parties, and for getting your kids out of the damn house for a bit.
Buy now
Amazon
DEATH STAR SILICONE MOLD

Death Star ice cubes, chocolate balls, candles, and even soaps? Yes, please!
This silicone Death Star mold is freezer and oven safe, so you can freeze and bake to your heart’s content. And if you want to go all out, you can have even more fun with the rest of the company’s molds:
R2D2 (including this enormous deluxe version)
Carbonite-Frozen Han Solo (including this enormous deluxe version)
Darth Vader
Storm Trooper
Boba Fett
Millennium Falcon (including this enormous deluxe version)
X-Wing
JURA AUTOMATIC MILK FROTHER
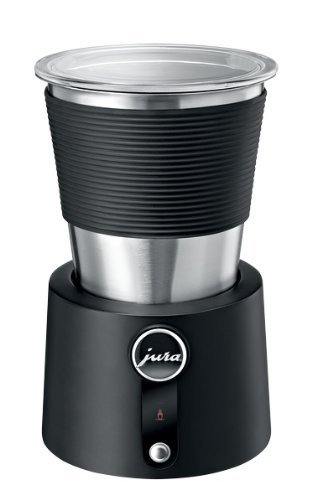
This milk frother from the Swiss company Jura lets you prepare the perfect milk for your beverages with the simple flip of a switch–no dealing with squealing steam wands and burnt fingers. A worthwhile purchase for coffee and tea lovers!
BOOK OF THE WEEK:
THE EMPIRE STRIKETH BACK

Okay I’m on a bit of a Star Wars kick again, but when I saw this book was releasing in a couple of weeks, I had to include it. (And The Jedi Doth Return is right on its heels.)
The Empire Striketh Back is the sequel to the incredibly well-executed Shakespearean adaption of A New Hope, and I’m sure it’s just as entertaining.
The premise of this series of books is simple: retell the story of Star Wars using authentic Elizabethan grammar and diction while remaining true to the jargon and story dynamics of the original trilogy. And the books aren’t just written for laughs–the attention to detail is brilliant and bestows true literary value.
If you’re into iambic pentameter just as much as you’re into the battle between the Light and Dark Side, buy this book now. You’re going to love it.
TV SHOW OF THE WEEK:
SHERLOCK

When I first heard of Sherlock, I was skeptical. Another rendition of this beaten-to-death franchise? Especially after Guy Ritchie’s turds of movies? Good luck.
Well, I was very pleasantly surprised. Sherlock is a smart, emotionally engaging, fast-paced, and downright fun. You can’t help but like Cumberbatch and Freeman and the very human feel of their characters, which are much more than walking soundboards of purple dialogue and snarky witticisms, and the blending of modern forensic science and Sherlock’s extraordinary powers of observation and deduction.
Give Sherlock one episode of your time and I think you’ll be hooked.
Buy now
AmazonAmazon UK
Watch now
Amazon US Instant VideoAmazon UK Instant VideoVudu
What do you think of this week’s picks? Have anything you’d like to share? Let me know in the comments below!
February 27, 2014
7 Healthy Muffin Recipes That Make Awesome Snacks
Muffins are the ultimate convenience food. But thanks to the mass-produced, plastic-wrapped garbage that masquerades as muffins, these baked goods have gotten a bad reputation.
When you make your own at home – subbing protein powder for half the flour, plus mashed fruit or Greek yogurt for the butter and oil – you’ll end up with something that resembles cake but has ingredients you actually should be eating.
Each of these healthy muffin recipes makes one dozen muffins in a standard pan. Share the extras with gym buddies, or freeze them to defrost later. They’ll keep well in the freezer for two to three months; although they can potentially get dry that way, a spread of nut butter, fruit spread (in other words, jam without added sugar), or melted coconut oil will take care of that.
Enjoy the muffins!
Apple Cinnamon Pork Muffins
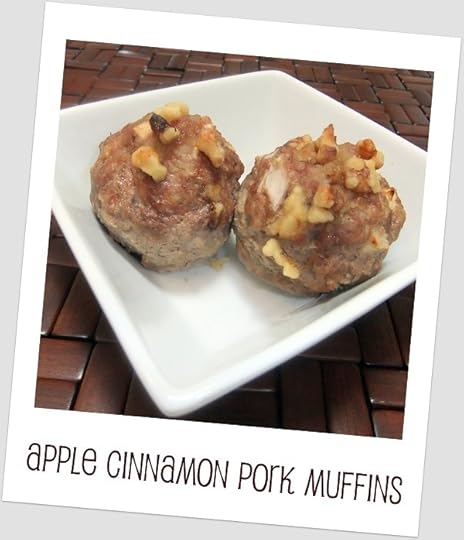
Picture courtesy of Mealpod
Muffin don’t have to be all carbs from flour and fruit. If you’re not afraid of enjoying savory and sweet in one bite, try these muffins.
Packed with pork, one muffins makes a delicious, well-balanced breakfast, lunch, snack, or side. And they really couldn’t be easier to make.
Directions
Preheat the oven to 375˚F.
Using your hands, mix together all the following ingredients, except the topping, in a large bowl:
2 lbs. extra-lean ground pork
1 egg
2 diced green or yellow apples
1/2 cup diced onion
1/2 cup chopped walnuts (setting aside a few first)
1/4 cup coconut milk
1/4 cup white wine vinegar
1/2 cup almond meal
1 Tbsp. cinnamon
Divide mixture into a greased 12-cup muffin tin, and bake for 30 minutes.
Drain liquid before spooning 3 Tbsp. unsweetened applesauce on top. Sprinkle with remaining walnuts. Bake for another 15 minutes.
Nutrition Facts (Per Serving)
Calories: 205
Protein: 26 grams
Carbs: 7 grams
Fat: 10 grams
Clean Blueberry Protein Muffins
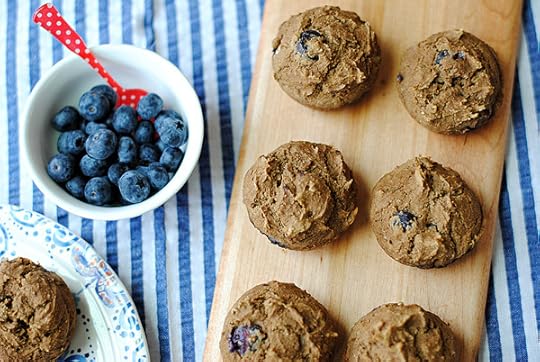
Picture courtesy of Eat Yourself Skinny
It’s not always possible to swap out all the flour in a recipe for protein powder because it can heavily (and I mean heavily) affect the texture, making muffins too dense to eat.
And that’s what makes this recipe so great. With one muffin packing a total of 17 grams of protein, this is an awesome homemade replacement for store-bought protein bars.
Directions
Preheat the oven to 350˚F.
Then in a large bowl, mash 1 ripe or brown banana with 3 Tbsp. unsweetened almond milk. Add 2 1/2 cups of unflavored whey protein powder, 1 1/2 cups egg whites, 2 Tbsp. ground flaxseed, 2 Tbsp. water, 1/4 cup unsweetened applesauce, 2 Tbsp. melted coconut oil, 1 tsp. vanilla extract, 3 tsp. baking powder, 1 1/2 tsp. cinnamon, and a pinch of salt. Gently fold in 1/2 cup blueberries.
Grease a muffin tin with coconut oil, and divide mixture between the 12 standard-sized cups. Bake for 15 to 20 minutes. When finished, they will be browned and should pass the toothpick test (no wet batter, only crumbs). Sprinkle with powdered stevia, and allow to cool.
Nutrition Facts (Per Serving)
Calories: 154
Protein: 17 grams
Carbs: 7 grams
Fat: 8 grams
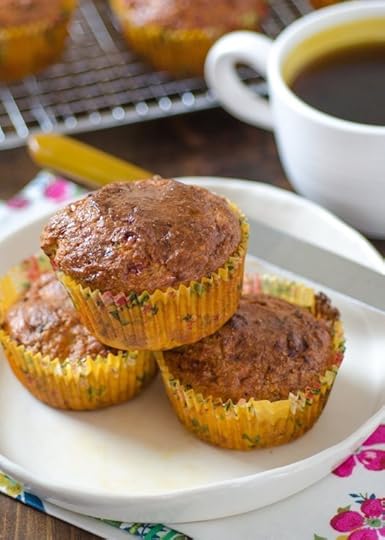
Banana Brownie Muffins
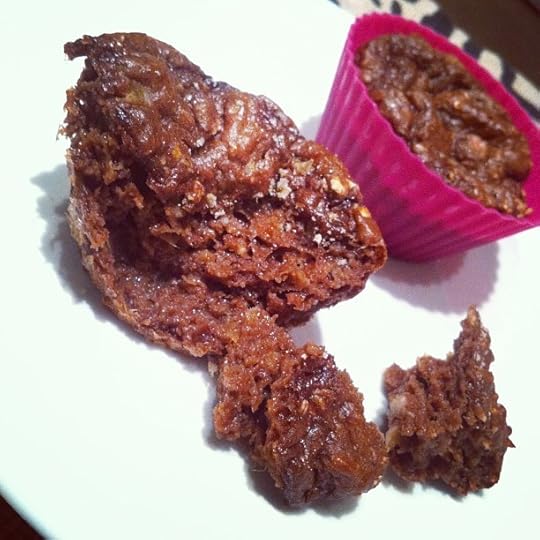
Picture courtesy of Petite Athleat
I don’t know about you, but I love the taste and texture of good brownies, And these muffins really hit the spot.
They’re naturally sweetened with bananas and also get dessert-like flavor from coconut flour, cocoa powder, vanilla, and cinnamon.
Directions
To make the most of the few indulgent ingredients in these good-for-you protein muffins, caramelize the sugar in the bananas by baking 2 in the oven first. As the bananas bake, mix your dry ingredients in a large bowl:
1/2 cup rolled oats
2 Tbsp. coconut flour
2 scoops Legion WHEY+ chocolate protein powder
1 Tbsp. unsweetened cocoa powder
1 tsp. baking powder
1 tsp. baking soda
1/2 tsp. cinnamon
In a medium bowl, combine 3/4 egg whites, 1/4 cup unsweetened almond milk, 1/2 cup non-fat plain Greek yogurt, and 1/2 tsp. vanilla extract. Slowly fold together the dry and wet ingredients, pouring the egg and almond milk mixture in half at a time.
Line a muffin pan with silicone or foil baking cups. Divide the mixture evenly among the 12 muffin cups, and bake for 18–20 minutes.
Nutrition Facts (Per Serving)
Calories: 75
Protein: 9 grams
Carbs: 6 grams
Fat: 1 grams
Sweet Potato Almond Butter Muffins
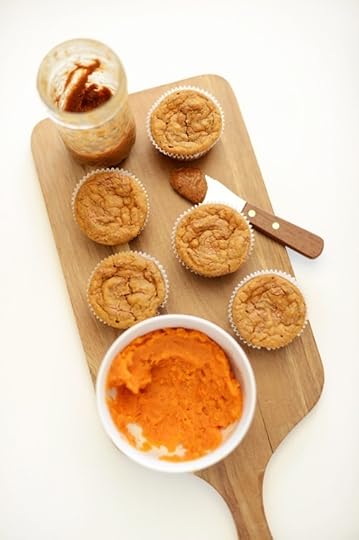
Picture courtesy of Minimalist Baker
These vegan treats have an equal amount of fat and protein – 8 grams apiece. However, all the fat comes from healthy sources: flax seed, coconut oil, and almond butter. Throw in some sweet potato puree, and the final result is a great muffin to toss in your gym bag as pre-workout fuel.
Directions
Start by preheating the oven to 375˚F.
Then, prepare a vegan egg replacer by mixing 4 tsp. ground flaxseed with 3 1/2 Tbsp. of water. After that sits in a large bowl for a few minutes, stir in 1 cup sweet potato puree, 1/2 cup loosely packed brown sugar, 1/2 Tbsp. vanilla extract, and 2 1/2 Tbsp. melted coconut oil. Add 1 1/3 cup unsweetened almond milk.
Use a separate bowl to mix the dry ingredients: 1/2 cup whole wheat pastry flour, 1 cup (3 scoops) unflavored whey protein powder, 1 rounded tsp. baking powder, 1/2 rounded tsp. baking soda, 1/2 tsp. salt, and 3/4 tsp. cinnamon. Sift over the sweet potato mixture, and then gently stir in 1/2 cup oat flour.
Line a 12-cup muffin pan with paper cups, and fill 2/3 of the way with batter. Gently spoon 1 tsp. almond butter in the middle of each one; you’ll need about 1/3 cup total.Swirl the topping ever so lightly with a toothpick or the edge of a knife. Bake for 20 to 25 minutes.
The muffins should be golden brown when finished. Let them cool in the hot pan for 5 minutes, and then remove to a wire rack (or countertop) to cool completely.
Nutrition Facts (Per Serving)
Calories: 179
Protein: 8 grams
Carbs: 19 grams
Fat: 8 grams
Carrot Raisin Quinoa Muffins
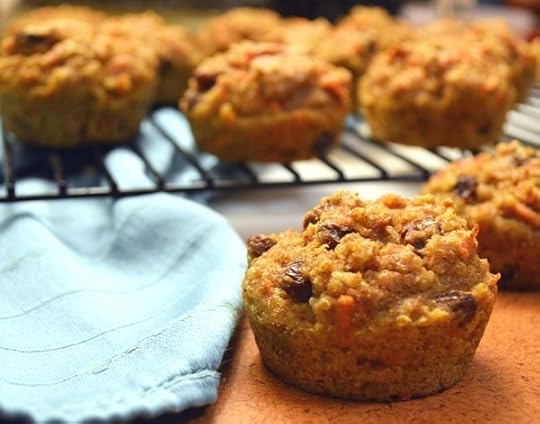
Picture courtesy of The Law Student’s Wife
Ok, these don’t have a ton of protein, but they have so many other good ingredients they had to make the list.
The whole batch is sweetened with just 1/4 cup brown sugar thanks to the natural sugars of apples, oranges, carrots, and raisins. And they get a little protein boost by replacing half the flour with whey, a trick you can use with pretty much any muffin recipe you want to bake.
Directions
You’ll need to make the quinoa first. Rinse 1/3 cup of uncooked quinoa for a minute, and then bring it to a boil in a pot on the stove with 2/3 cup water. Cover, reduce heat to low, and simmer quinoa for 15 minutes.
Once you remove it from the heat, keep it covered so it can continue to cook for 5 more minutes. Use a fork to gently fluff the quinoa. Let cool completely.
Preheat the oven to 350˚F.
Pour boiling water over 1/2 cup raisin. Meanwhile, in a large bowl whisk together 1/2 cup whole wheat flour, 1/2 cup (1.5 scoops) unflavored whey protein powder, 1 tsp. ground cinnamon, 1/2 tsp. baking powder, 1/4 tsp. baking soda, and 1/2 tsp. salt.
In a stand mixer with paddle attachment, or a large bowl with a sturdy spoon, beat together 2 eggs and 1/4 cup packed light brown sugar until light and fluffy. Add in 3/4 cup unsweetened applesauce, 1/4 cup fresh orange juice, 1 tsp. orange zest, and 1 tsp. vanilla extract. Slowly stir in 1 cup shredded carrots, followed by the quinoa, added in batches.
Add the wet mixture to the flour mixture until just combined, and then gently fold in the plumped raisins. Divide into a well-greased standard 12-cup muffin pan. Bake for about 20 minutes, until a toothpick inserted in the middle comes out clean (crumbs only). Remove from pan to cool.
Nutrition Facts (Per Serving)
Calories: 134
Protein: 6 grams
Carbs: 24 grams
Fat: 2 grams
Prosciutto, Cottage Cheese & Chives Muffins
Picture courtesy of The Kitchn
Two muffins with pork? Yes, but this one is entirely different, and it gets an extra boost of protein from cottage cheese. With lots of eggs and cheese, this little pastry is a lot like a quiche. Sounds like a delicious, portable breakfast to me!
Directions
Preheat the oven to 400˚F.
Line a standard muffin pan with paper cups, and grease with cooking spray. Next you’ll be putting everything together in a big bowl, so it helps to have it all at the ready.
First whisk together 1 cup cottage cheese, 1/2 cup grated Parmesan, 4 large eggs, and 1/4 cup water. Stop mixing to add 1/4 cup whole wheat flour, 1/2 cup almond meal, 1/2 cup (1.5 scoops) unflavored whey protein powder, 1 tsp. baking powder, 1/2 tsp. smoked paprika, and 1/4 tsp. salt. Whisk until dry ingredients are fully integrated.
Fold in 2 oz. roughly chopped prosciutto and 1/4 cup finely chopped chives. Divide batter between prepared muffin cups, and bake or 30 to 35 minutes. The muffins will be golden brown on top with the centers set.
Nutrition Facts (Per Serving)
Calories: 108
Protein: 11 grams
Carbs: 4 grams
Fat: 6 grams
Zucchini Banana Walnut Muffins
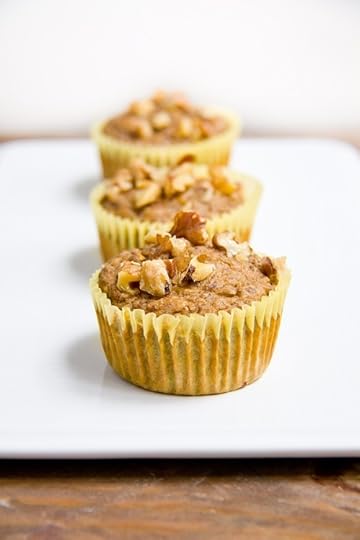
Picture courtesy of Martha Stewart
Zucchini and banana are both classic quick breads in their own right, but they’re even better when paired together. Crushed walnuts make the muffins richer and add a bit of protein and healthy fat.
Directions
Preheat oven to 375˚F,and prep a standard muffin pan by spraying or greasing with oil. Grate one large zucchini, yielding about 1 1/2 cups shredded, and mash one large over-ripe banana.
In a large bowl, add 3/4 cup whole wheat pastry flour, 1 cup (3 scoops) unflavored whey protein powder, 1/2 cup ground flaxseed, 1 cup lightly packed brown sugar, 2 tsp. baking soda, 1 tsp. baking powder, 1/2 tsp. coarse sea salt, and 1 tsp. ground cinnamon. Use a whisk to stir until well combined. Add zucchini and banana, and stir again.
In a small bowl, lightly beat one large egg. Whisk in 3/4 cup low-fat milk and 1 tsp. vanilla extract. Pour half the liquid into the dry mixture, and fold in before adding the rest. Mix gently until the batter is mostly smooth. Divide among the muffin pan, and bake for 20 to 25 minutes. Let cool completely before eating, about a half hour.
Nutrition Facts (Per Serving)
Calories: 152
Protein: 8 grams
Carbs: 22 grams
Fat: 3 grams
What do you think of these healthy muffin recipes? Have anything else to share? Let me know in the comments below!
Want more delicious, easy-to-make recipes like these?If you like these recipes, then you’ll love my bestselling cookbook The Shredded Chef!
In this book you’ll find 120 healthy, flavorful recipes specifically designed for athletes that want to build muscle or lose fat. Regardless of your fitness goals, this book has got you covered.
Buy this book now to forever escape the dreadful experience of “dieting” and learn how to cook nutritious, delicious meals that make building muscle and burning fat easy and enjoyable!
Buy now
AmazonAmazon UKAmazon AUAmazon CABNiBooksKoboGoogle Play
Vegan and vegetarian dishes are great sources of micronutrients, and even if you’re a meat eater, they’re great for changing things up in your meal plan.
And in my cookbook, Eat Green Get Lean, you’ll find 100 of my favorite vegetarian and vegan dishes, carefully balanced for our high-protein, healthy needs!
Buy this book now to forever escape the dreadful experience of “dieting” and learn how to cook nutritious, delicious vegetarian and vegan meals that make building muscle and burning fat easy and enjoyable!
Buy now
AmazonAmazon UKAmazon AUAmazon CABNiBooksKoboGoogle Play
February 26, 2014
The Mind-Muscle Connection: Mindfulness and Strength, Intensity, and Muscle Growth
The mind-muscle connection has been popular for decades, and the phrase is common when referring to the 70’s bodybuilding greats such as Arnold, Frank Zane, and Mike Mentzer.
Today, some folks take a more evidence-based approach to movement as opposed to relying on how the muscles feel and seeking the pump. While I agree that we shouldn’t always aim for the pump as our number one goal, it shouldn’t be completely overlooked for various reasons.
Today we’re going to talk about the concept of mindfulness, and how to apply it to your training for more muscle, higher intensities and better workouts.
What is mindfulness?
To put it as simply as possible, mindfulness means to be consciously aware of the present moment.
I don’t mean to sound new-age-y, but this is a concept most people do not talk much about. It’s not because it’s unimportant, but mostly because it’s something we rarely ponder.
Mindfulness is about paying attention to whatever you’re doing, and being sold out to that activity in that very moment, not doing 3 tasks at once. It’s not writing an email while listening to the radio, and switching back and forth between your Gmail, Facebook and Twitter tabs, while washing the dishes, and vacuuming.
Mindfulness, for most Westerners, is a foreign concept due to the constant distractions we face.
But I come bearing good news – if you’re reading this, you’re probably in the gym regularly, and if you have any interest in improving your physique, and getting stronger, the gym is a great place to practice mindfulness in the way I’m about to explain.
In short, mindfulness + a good training program = better results. Period.
If you’ve ever found yourself going through the motions, especially in the gym, this one simple concept can make your workouts infinitely more enjoyable, and more beneficial.
Let’s first talk about how to apply mindfulness in the gym in 3 simple steps.
Pick a movement you’re proficient at. It can be anything – the bench press, squats, tricep extensions, wrist curls, it doesn’t matter; just make sure you know it well.
You’ll select a weight you can perform at least 12-15 times.
Cut your rep speed by about one half of what you normally do. Yes, I’m talking to all of you who’ve gotten used to using momentum to sling that bar up to your belly during rows, or bouncing the bar off your chest for a brag-worthy bench press. This may mean doing about 70-80% of the loads you’re used to.
Now you’ll perform the movement with a focus on getting at least 12 reps while paying attention to every little aspect of how it feels.
Let’s say you’re doing an EZ bar curl. How does the bar feel in your hands? As you contract your biceps, where do you notice the most tension? Do notice how the bar speed slows as you get closer to failure? How does the stretch at the bottom position feel?
See what I’m getting at here? I want you to pay attention to everything happening during the movement, but in particular, the fatigue, tension and quality of contraction.
Don’t pay attention to anything else at this point except for how the movement feels. Notice how pumped your arms get as you near the 12th rep, and then keep going if you can. Go until failure, and can’t hit another rep with full range of motion.
NOTE: This is obviously a BAD idea for movements like heavy squats, presses, and deadlifts. For these movements, I recommend avoiding maximum failure, and stopping just short of the moment when you have one rep left. Hang it up at that point. TL;DR = keep one rep in the tank.
If you can do this without thinking about anything else, you’ve successfully made the mind-muscle connection, and alas, practiced mindfulness with movement.
Okay, okay so why does any of this matter?
Idea #1 – Strength Doesn’t Always Equal Size
I’ll preface this statement with the obvious. Most beginners need to focus on getting stronger, and more efficient with their workouts. The beginner wanting to get bigger can almost always rely on the fact that adding weight to the bar will help them gain more muscle.
However, this isn’t true forever and here’s why.
Raw strength is about moving as much weight by any means possible. Many people will tell a beginner to add 100 pounds to their squat over the next 6 months and guarantee they’ll have gained more muscle as a result. While this is often true, there are many ways to add weight to the bar without creating any differences in the amount of lean body mass you carry.
For instance, most people can pull more weight from the floor when using a trap bar, or sumo-style stance as opposed to a conventional style deadlift. But why? The difference in leverages, hand placement, and other factors affect how much weight you can lift.
So let’s go back to my point above. If a beginner starts with full range of motion back squats, and transitions over to low-bar box squats halfway through their training over 6 months, they’re not truly adding 100 pounds to the same lift. A low-bar squat typically allows you to lift more weight due to the change in angle and leverage. This also goes for the guy who starts with a full squat and ends up with a half squat from trying to add weight too quickly.
This is also why a trained powerlifter can out lift a bodybuilder of the same height and physical traits (similar joint size and muscle belly length) by a few hundred pounds and be much smaller in comparison of lean body mass levels.
Power lifters and strength athletes find ways to move the most weight, and bodybuilders find ways to recruit the most muscle through short rest periods and volume, regardless of the weight lifted.
The take-home point: Strength is a good indicator of progress, but only when it’s done through a full range of motion, and with great form.
If you want to be bigger, and stronger, you should learn to be patient, and focus on great movement quality as opposed to lifting as much weight as soon as possible.
With intelligent training and time, both muscle and strength gains will be yours.
Idea #2 – If You Have An Activation Problem, Be More Mindful With Your Movement
Time and time again, I hear people complaining that a certain muscle isn’t as shapely as they’d like, while the other muscle groups seem to be growing just fine. This usually comes down to one of two things. It’s either their ability to activate the muscle properly, or genetics.
Most often, it’s the first part, and once that’s learned, genetics will determine the shape and size you can achieve with great training, a lot of food, and time (I know, I’m hitting on this again). Activating any particular muscle takes practice, and paying close attention – which is all the more reason to practice mindfulness with your training.
For some, other muscles compensate for weaknesses. It’s not uncommon for people to have weak glutes from too much sitting, or a weak upper back causing rounded shoulders due too much pressing as opposed to pulling.
If these weaknesses are not addressed, the surrounding musculature will continue to take over, and leave the unactivated muscles as they are, weak and small. To combat this, we must take the right course of action to activate said muscles, and relearn the motor patterns necessary to get them working how we want them to.
For the person with a weak set of buns, heavier deadlifts, or squats is rarely the answer. Rather, a more focused approach and movement selection to focus on the glutes is a better use of time, at least until they’re proficient at firing that paltry pair of love muffins (glutes for the those with no humor).
So how do we do this? Specific activation drills, better movement selection, and alas… patience.
Getting someone to activate their glutes can be problematic if they’re not used to flexing them bad boys. So you must focus on the lighter, more isolated movements such as single leg glute bridges, hyperextensions, and kick backs.
Movements that force one to pay attention to the muscles they’re using, and concentrating on that feeling, as opposed to something external like a particular load they’re aiming to hit, can help one learn how to properly fire and activate a dormant muscle group like the glutes (or anything in particular).
The same goes for a weak upper back, or a chest (or shoulders) that fails to be activated during a bench press.
Finding a movement that allows you to remove your ego, and focus purely on the muscles being worked is a good first step in learning how to get the activation needed for full recruitment, which usually results in a fully worked, and exhausted muscle.
Idea #3 – Making sense of all this with your current routine
Okay, so I’ve harped on some ideas for being more mindful, but how can you put it all together and get something out of it?
Like this: Let’s take your current routine. It doesn’t matter how long you’ve been doing it, but the longer, the better because the newness will have worn off, and you’ll be in a routine of going through the movements.
I want you to pay attention to your next training session more so than ever before. Instead of focusing on how much weight you’ll lift, I want you to dial it back to about 80-90% of the planned loads. Remember what I said at the beginning of this piece about paying attention to how that curl bar felt in your hands? Well this is what I want you to do with every movement in your session.
Slow down, and pay attention to how the muscles feel as you perform the movements. If it’s a leg press, notice how your quads and hamstrings feel as they fatigue. If you’re doing a bench press and notice you get little to no chest activation, swap movements to something like a neutral grip dumbbell press, or even better, get on the cable flies before the main movement. Pump out sets of 15-20 until you feel those chesticles burning. THEN, move onto the main lift and see if you notice a difference in muscle recruitment.
Force yourself to slow down and pay attention. If you continue to do the same thing and expect a different result, well, you probably know how that will end for you.
February 25, 2014
3 Strategies for Failing in Business and Life
I recently finished reading Don Keough’s (former President of Coca Cola) The Ten Commandments for Business Failure and there were three points in particular that resonated with me. I think you may get something out of them too.
The tongue-in-cheek premise of the book is “if you want to fail in business, absolutely make sure you do these things” so that’s how I’ll write this article.
Strategy for Failure #1:
Quit Taking Risks
“He that is overcautious will accomplish little.”
-Friedrich von Schiller
Risk aversion has been the prevailing mood for mankind throughout history. The hunters and gatherers of old roamed far and wide in order to survive, but the agricultural revolution allowed us to settle down and most people did. People chose to live as their fathers and grandfathers before them, never venturing far from the village.
And it made sense. The world was dangerous. Just look at the old maps with vast areas labeled “terra incognita”—unknown lands–and even drawings of serpents and monsters. Who would want to sail to such places?
Many of history’s great achievements, however, started with a great risk. Look at the formation of America. It was about risk taking from the beginning. From Columbus to Jamestown to the Second Continental Congress to the seminal Declaration of Independence, this country was built on one huge risk after another.
How does this apply to business? Well, many people are prone to achieving something–sometimes very little–and quit taking risks altogether. I guess it’s human nature. “I’ve got something. Why risk it? Who knows what’s on the other side of that mountain?”
“The world belongs to the discontented.”
-Oscar Wilde
My career as an author and entrepreneur started with a risk. I had a comfortable job making a comfortable income. I had job security and could provide for my family, but I wasn’t content with it. I knew that the only way for me to really achieve the success I wanted was to own my own business…something I had never done before.
One side of me was saying that it wasn’t worth the risk–that things were nice as they were, and that I didn’t really need more. Why risk losing that? The other side, though, was telling me that I had everything it took to build a business myself and that I wasn’t achieving my full potential. It wasn’t about simply acquiring more money or stuff–it was about self-actualization.
I went with my gut and decided to quit my job and pursue my writing full-time. I figured that the worst case scenario is the business fails and I had the skills and resume to find another good job. The risks, when viewed objectively, weren’t that outrageous after all. The prospects of failure were just uncomfortable.
Well, that was just about a year ago and it’s been a rocket ride. Muscle for Life has exploded in popularity, I’ve sold over 100,000 books, and my latest venture, Legion, will do seven figures in sales in its first year.
The moral of the story is don’t be so afraid of taking risks that you miss any and all opportunities. Be smart with your time and money; don’t just throw either at every glimmering promise of success, but don’t instinctively back away from anything that carries calculated risks.
Strategy for Failure #2:
Be Inflexible
Not taking risks and being inflexible are close relatives, but not the same.
Inflexible people aren’t necessarily avoiding risks; they are just so set in their ways, so sure that they have the formula for success that they simply can’t see any other way of doing things.
“For this is the tragedy of man–circumstances change, but he doesn’t.”
-Machiavelli
Flexibility as I’m referring to it means the ability to quickly adapt to changing circumstances. About six years ago I was working in my father’s company, and he had to drastically adapt to save it from dying a slow death.
In 2003, when the DNC Registry was instituted, his business—an energy consulting company–was severely impacted. For nearly 7 years, he specialized in residential sales and all of a sudden, his lead pools were cut by as much as 70% in certain markets. Sales crashed to an all-time low. He could either severely downsize and play the drastically reduced residential game–which many companies did—or he could completely alter the course of the ship and go into his own “terra incognita”…commercial sales.
He knew very little about building a successful commercial sales team in this industry. He was an expert at the residential side, and his previous business was all residential sales too. But, just like when he started his first business, he knew the risk had to be taken.
He formulated a plan to transition the entire company–about 130 salespeople at the time–into commercial sales. The transition was rough and required a complete revamp of his training, but to make a long story short, it actually unlocked the real potential of the company and now it’s doing better than ever before.
Inflexibility and aversion to risk would’ve prevented him from making that transition. It would’ve led to him taking the “safe” route of “what he always had done,” which probably would’ve killed the company in the end.
Strategy for Failure #3:
Be Afraid of the Future
This is especially relevant in these tough economic times. The most debilitating malady out there is fear. Nothing shuts a business or economy down faster than overriding fear of what might happen.
“The only thing we have to fear is fear itself.”
-Franklin D. Roosevelt
The pessimism industry has grown exponentially as time has gone on.
It really got kicked into high gear with Thomas Robert Malthus’s An Essay on the Principle of Population. In it, he predicted that all of mankind was doomed because population would inevitably outrun food supply. He thought it would happen sometime within 100 years of his time. Many “Malthusians” welcomed famines and epidemics because they felt it was population “correcting itself.”
To this day, Malthus is the foundation and inspiration for much of the contemporary pessimism industry. Paul R. Ehrlich, the author of The Population Bomb, predicted in 1968 that hundreds of millions would die of starvation in the ’70s and that life expectancy would plummet in the ’80s. It didn’t happen. The infamous Club of Rome report in ’72 said we’d run out of raw materials by the ’90s.
Wrong. These people were assuming that human beings were like sheep, grazing on the grass until it’s all gone. Well, we’re a bit smarter than sheep.
The best example is Chris Goodall, the British author of How to Live a Low-Carbon Life and prominent member of the Green Party. He informed us that if we walk to the store, we create more CO2 than if we drive because we have to eat in order to walk and raising the food consumes so much energy that–well, I guess the only solution to the ever-weakening theories about man-made global warming is that we all sit in dark rooms with everything unplugged and the air conditioning off, doing nothing and eating nothing.
The point is, there is always a ready supply of despair and more often than not, it never turns out as bad as people want us to believe. You would think that we would simply grow tired of it all.
Well, I say that we need to be aggressively pessimistic about the pessimism industry. Turn off the news. Stop focusing on failures. (Click here to tweet this!)
The old couplet comes to mind: “Two men looked out through prison bars. One saw mud one saw stars.” (Click here to tweet this!) A tilt of your head, an attitude, it can make all the difference how you shape your world.
If you believe the fearmongers, there never is a good time to start anything. Something is always wrong. There are always holes in the business model, always problems lying below the surface.
But if you believe in the essential creativity of entrepreneurs, then almost any time is a good time. Just ask, “Are there people there? Is there some kind of economic activity going on? Is there any means of exchanging goods and services?” If so, then that’s a good time to start a business!
Be an optimist and get pessimistic about the pessimism industry.
What’s your take on these business strategies for failure? Have anything else to add? Let me know in the comments below!
February 24, 2014
8 Proven Ways to Increase Your Deadlift
The Deadlift is one of the all-around best you can do. It’s vital for building a big, thick, strong back, and it trains just about every major and minor muscle group in the body.
It’s also one of the toughest exercises, and one that many people get stuck on. It requires extraordinary effort to perform correctly and as you get stronger, technique matters more and more both in terms of preventing injury and continuing to make progress.
In this article, I want to share with you 8 proven ways to increase your Deadlift while preventing injury. Let’s get started.
Tip #1 to Increase Your Deadlift:
Check Your Technique
As you get stronger, form becomes more and more important for preventing injury and continuing to add weight to the bar. As Dave Tate says, one inch can make all the difference in the world.
This is why it’s smart to do a “form check” now and then by having someone record you performing a set of deadlifts (don’t try to use mirrors to check while lifting as it will throw you off).
Here’s how a perfect Deadlift looks:
The Deadlift Set Up
1. Position your feet so they’re slightly narrower than shoulder-width apart.
2. Place the bar somewhere between against your shins and at the middle of your foot.
The key here is that your shoulders are in line with the bar, or even slightly behind it, which allows for maximum leverage as you pull the bar up and back. For taller or skinnier lifters, this will probably place the bar against their shins. For shorter or thicker lifters, this will place it somewhere around the middle of the feet.
If the bar is too close to your body and your shoulders are too far in front of it, you’ll have to move the bar forward on the way up to get it over your knees. If it’s too far from your body, you’ll feel like you’re going to fall forward and won’t be able to drive upward through your heels.
3. Stand up tall with your chest out and take a deep breath of air into your diaphragm (not your lungs), bracing your abs as if you were about to get punched in the stomach.
4. Move down toward the bar by pushing your hips back, not by squatting straight down. Arch your lower back and keep your shoulder blades pinched.
Don’t make the newbie mistake of bringing your hips too low with the intention of “squatting” the weight up. The lower your hips are below optimal, the more they will have to rise before you’re able to lift the weight off the floor when you pull, which is just wasted movement.
Instead, you should feel tightness in your hamstrings and hips as you wedge yourself into what’s essentially a “half-Squat” position, and as soon as your hips rise, you want your shoulders to follow and the weight to start coming off the floor.
5. Place your hands on the bar, with either a double-overhand or and over-underhand grip, just outside your shins and squeeze it as hard as you can. Keep your shoulders back and down and engage your lats.
6. Don’t look up at the ceiling or down at the ground–keep your head in a neutral position.
Here’s a good video that shows the above points:
The Deadlift Pull
7. Drive your body upward and slightly back as quickly as you can by pushing through your heels, and keep your elbows locked in place and your lower back slightly arched (no rounding!).
Ensure that your hips and shoulders move up simultaneously–don’t shoot your hips up without also raising your shoulders.
8. As you approach the top (the lock-out), squeeze your glutes to push the hips through the final phase of the movement.
The Deadlift Descent
9. Many people break the lockout with their knees, and this is incorrect. Instead, you want to break with the hips, sitting back just as you did when you were setting up. The bar should slide down your thighs.
10. Maintain a stiff arch in the lower back and keep the shoulders down and back.
It’s also worth noting that you should make sure each rep is separate. Don’t try to bounce the bar off the ground to propel you into progressively sloppier and sloppier reps. It’s called the deadlift for a reason–you’re supposed to be picking up dead weight, not using the momentum of a bounce.
So, once the bar is back on the ground, adjust your setup position if necessary (suck in air, tense your abs, ensure your spinal position is good, puff your chest out, pinch your shoulder blades, and so forth), and hit the next rep hard.
Tip #2 to Increase Your Deadlift:
Increase Your Grip Strength
Grip weakness doesn’t just make the bar harder to hold, it actually makes the entire lift feel significantly harder. And if you don’t ensure your grip is continually improving, your deadlift will stall.
Fortunately, improving grip strength is very easy when you go about it correctly. Check out my article on how to increase grip strength to learn more.
Tip #3 to Increase Your Deadlift:
Pump Yourself Up
If you an experienced weightlifter, you know the importance of being mentally prepared for heavy lifts. You can psych yourself out or up and hit or miss a lift accordingly.
You’ve undoubtedly seen powerlifters go through what sometimes looks like a ridiculous, satanic ritual before attempting a lift, but did you know that pumping yourself up like that has been scientifically proven to work?
A study conducted by researchers at AUT University with elite rugby players found that when they pumped themselves up for a Bench Press set, force production increased by 8%. Researchers also found that distraction significantly decreased force production–there was a 12% difference in force production between the pumped-up and distracted lifters.
The takeaway here is pump yourself up your for heavy lifts and concentrate on each rep as your perform it–no talking, being talked to, or mental wandering.
I don’t stomp around the gym like a madman to get pumped up. I find that the right workout songs helps dramatically for getting pumped up, and before I grab the bar, I like to take 10 to 15 seconds to focus on the lift I’m about to perform and visualize myself performing it successfully. Sounds silly? Research has shown that visualizing a successful lift before performing it can increase strength.
Tip #4 to Increase Your Deadlift:
Focus on Heavy Lifting
The subject of “ideal” rep ranges is complex, so I won’t dive into it in this article. (I do talk a bit about it on my article on hypertrophy, though.)
Instead, I’ll keep this short and sweet:
If you’re new to weightlifting (you’ve been lifting for less than a year), you should be doing all deadlifting in the 4 to 6 rep range (guys) or 8 to 10 rep range (girls).
That means you use a weight that you can do at least 4 by not more than 6 reps with, and once you hit 6 reps, you add weight for the next set. If you want to see how this fits into an actual workout, check out my article on the ultimate back workout.
If you’re an experienced weightlifter, you can benefit from working in different rep ranges, or periodizing your training.
I will be discussing periodization in more detail in my next book, Beyond Bigger Leaner Stronger (which will be out in a month or two), and will be sharing a full periodized program for advanced lifters, but here’s a simply way to go about it for your deadlifting:
Week 1′s Deadlifts: 2 sets of 2 to 3 reps (~90% of 1RM) + 1 sets of 4 to 6 reps (~80% of 1 RM)
Week 2′s Deadlifts: 2 sets of 2 to 3 reps + 2 sets of 4 to 6 reps
Week 3′s Deadlifts: 2 sets of 2 to 3 reps + 3 sets of 4 to 6 reps
Week 4′s Deadlifts: 3 sets of 2 to 3 reps + 3 sets of 4 to 6 reps
Week 5′s Deadlifts: 4 sets of 2 to 3 reps + 2 sets of 4 to 6 reps
As you can see, the above program has you deadlifting once per week (per 5 to 7 days), and involves working in the 2 to 3 range, which provides maximal overload, and the 4 to 6 rep work is the “sweet spot” for myofibrillar muscle growth.
Once you’ve finished the 5-week cycle, you should deload for a week (or take a week off the weights), after which you can start again from week 1.
Tip #5 to Increase Your Deadlift:
Work On Your Lower-Body Mobility
Chances are you’re like most of us and you sit in a chair all day staring at a screen. This often causes tight hips, hamstrings, and glutes, which in turn impairs our ability to Deadlift.
The fix is easy: implement a weekly lower-body mobility routine to limber up and you can dramatically improve your Deadlift.
Tip #6 to Increase Your Deadlift:
Give Your Deadlift Priority in Your Workouts
If you want to keep progressing on your Deadlift, you should begin your workouts with it.
The reason for this is simple: studies such as this and this have shown that the order in which you do your exercises has a significant impact on your strength and overall performance capacity on each.
This is why my Bigger Leaner Stronger and Thinner Leaner Stronger workouts always begin with big, compound lifts like the Bench Press, Deadlift, Military Press, and Squat, and then move on to more isolation-type exercises like Dips, Dumbbell Rows, Side Lateral Raises, and Lunges.
Start your back (or pull) workouts with the Deadlift and you’ll be most likely to make progress.
Tip #7 to Increase Your Deadlift:
Utilize Rest-Pause Training
As you probably know, I’m not a fan of fancy set schemes like supersets, drop sets, and giant sets, nor am I a fan of nontraditional training protocols like super-slow training, super-fast training, negatives, and the like.
Many of these techniques have been scientifically proven to be no more effective than traditional set schemes and rep rhythms, and my experience is in line with the research (I used to do all kinds of fancy stuff and made poor progress with it).
That said, there is one “special” type of training that has both anecdotal and scientific evidence on its side, and that’s the Rest-Pause Set. This is an old school powerlifting method for breaking through plateaus, and researchers from the University of Western Sydney recently studied it. They found it to be an effective way to increase strength via greater muscle fiber recruitment.
The Rest-Pause Set is very simple. You perform an exercise to failure (the point where you can’t get another rep without help) and then rest for a short period before performing the exercise to failure again, followed by a short rest, and another set to failure, and so forth.
When incorporating this into your deadlifting routine, I recommend you do Rest-Pause sets in the 2 to 3 or 4 to 6 rep ranges, and that you limit it to 3 to 4 Rest-Pause Sets per workout.
If you’re doing Rest-Pause sets with ~90% of your 1RM (2 to 3 rep range), rest 45 to 60 seconds in between set. If you’re doing them with ~80% of your 1RM (4 to 6 rep range), rest 20 to 30 seconds in between each set.
Tip #8 to Increase Your Deadlift:
Make Sure You’re Not Under- or Over-Training
Like “ideal” rep ranges, optimal training frequency is a hotly debated subject. The bottom line is it boils down to workout intensity and volume.
The lighter the weights and fewer the sets per workout, the more often you can train the muscle group. And, as a corollary, the heavier the weights and greater the sets per workout, the less often you can train the muscle group.
I’ve tried many different splits and frequency schemes, and what I’ve found works best is in line with an extensive review on the subject conducted by researchers at Goteborg University:
When training with the proper intensity (focusing on lifting heavy weights), optimal frequency seems to be about 40 – 60 reps performed every 5 – 7 days.
While training each muscle group 2 to 3 times per week is trendy right now, and while it’s workable (if volume is programmed correctly), it’s not necessarily more effective than training each muscle group once per 5 to 7 days, at the right volume.
The bottom line is when it comes to muscle and strength gains, research shows that proper workout volume appears to be more important than frequency.
If you do less than the optimal volume, as given above, you will be leaving some gains on the table. If you do more, you’ll probably end up overtraining.
What did you think about these tips on how to increase your Deadlift? Have anything else you’d like to share? Let me know in the comments below!
February 23, 2014
How to Avoid Jet Lag and Stay Fit
When it comes to inflammation, production of free radicals, wrenches in your recovery process, and an inhibition of everything from muscle-building protein synthesis to muscle-repairing circadian rhythm, not much beats airplane travel.
And it doesn’t matter how many body weight squats and calf raises you do in the back of the airplane–the jet lag can still hit you hard.
When you’re on an airplane, you’re inside a tiny metal tube bombarded by solar radiation and completely disconnected from the planet Earth’s natural magnetic field. This is compounded by WiFi signals, people talking on their phones and checking e-mail inside that metal tube (which happens for the entire gate to takeoff and landing to gate phase), dehydration from altitude and dry filtered air, toxin-laden airplane food and bad water, and germs and airborne pathogens in tight spaces.
I don’t know about you, but as a competitive triathlete and exercise enthusiast who also speaks at health events around the globe, I simply can’t afford the loss of fitness and health that can potentially occur every time I hope on a flight. So what do I do about?
Here are 11 ways to keep airplanes from destroying your fitness.
How to Avoid Jet Lag Tip #1:
Use Grounding/Earthing
Grounding (also known as earthing) is exposing your body to the natural magnetic frequencies released by Earth. To delve into the science of grounding, watch this free grounding film.
At no time does grounding become a more effective strategy than when you’re traveling in an airplane, since hurdling through space 40,000 feet above the planet in a metal tube is about the most disconnected with the earth you can get. The basic idea is that you aren’t able to discharge all the positive ions that build up via cellular metabolism, so you get net body acidity and inflammation.
How do I personally ground?
As soon as I land in my destination I make it a point to either A) put on a pair of Name Your Link Pluggz or Earthrunners as fast as possible, or B) go outside in my barefeet (yes, I’m the guy in the grassy lot behind the airport hotel doing morning barefoot yoga). I also take an Earthpulse everywhere I go.
How to Avoid Jet Lag Tip #2:
Exercise
Multiple studies have shown that exercise can regulate circadian rhythms – but this doesn’t mean you have to do a monster workout when you get to your destination.
However, as lousy and miserable as you may feel training after a long day of travel or a long few days of international travel, the sooner you move after arriving at your final destination, the sooner you can bounce back from jet lag and normalize your circadian rhythm and sleep.
The top three choices if you’re feeling a bit blah are: walking in the sunshine, swimming in somewhat cold water, and outdoor barefoot yoga.
How to Avoid Jet Lag Tip #3:
Avoid Caffeine
It’s a relativel common recommendation to see the consumption of caffeine, alcohol and other stimulants discouraged for managing jet lag, and I 100% agree.
Aside from the trace amounts of caffeine in the Chinese Adaptogenic Herbs and 85%+ dark chocolate I occasionally consume while traveling, I simply do not go near caffeine or any other central nervous system stimulant while in route to my final destination.
How to Avoid Jet Lag Tip #4:
Take Melatonin
I do not use melatonin unless I’m traveling, in which case I take 1-3mg of a liquid melatonin 30-60 minutes prior to bed can be useful for re-booting the circadian rhythm upon arriving at the final destination. Melatonin is also a potent anti-inflammatory, which will help decrease the loss of fitness and presence of inflammation.
How to Avoid Jet Lag Tip #5:
Take No-Jet-Lag
I discovered No-Jet-Lag at a Chinese herbal store in the Hong Kong airport when traveling home from an Ironman triathlon, and upon inspecting the ingredients to verify there was nothing in it that would kill me, I trialed it – following the instructions to take 1 tablet upon take-off, 1 every 2-4 hours while on the plane and then 1 upon landing. And the stuff works wonderfully, both east-to-west and west-to-east.
There are five homeopathic remedies listed as the active ingredients in No-Jet-Lag: Arnica Montana, Bellis Perennis, Chamomilla, Ipecacuanha and Lycopodium. I’m no homepathic expert, but both my wife and I now use this stuff when we are traveling internationally, and have found it to be extremely effective in eliminating jet lag symptoms, especially when combined with the other strategies in this article.
Remember – the better you feel when you get where you’re going, the more likely it is that you can keep up your fitness routine.
How to Avoid Jet Lag Tip #6:
Drink Plenty of Water
You’ve no doubt heard that you lose more water flying in the dry air at altitude – so you need to drink more water to stay hydrated and beat jet lag.But I’ve been going beyond the normal recommendations and experimenting with very high water intake – and finding that this helps out quite a bit.
Try to drink closer to 12-16 ounces of water each hour (nearly a full water bottle), and make sure if you’re seated in a window seat that your aisle-based airline partner is spry and willing to move every time you need to pee – or just ask to switch spots with them.
How to Avoid Jet Lag Tip #7:
Eat Circumin
Curcumin – which is found in turmeric and curries – is a very strong antioxidant which helps tremendously when taken on an empty stomach both before and after flying.
It is a potent brain anti-inflammatory and may also boost testosterone and growth hormone. I’ve been using about 1000mg of natural curcumin.
How to Avoid Jet Lag Tip #8:
Take Cold Showers
Cold showers decrease inflammation and cause a rebound hormone response (release of adrenaline) quite favorable to fitness gains.
I’ve been going so far as to actually go into the airline lounge in the airports I’m at if I have a long layover for a 10-15 minute cold shower, and/or doing that same cold shower in the hotel when I finally get where I’m going.
Splashing lots of cold water in your face is OK, but not quite as effective as immersion or showering. Cold showers also have very good blood vessel expanding properties (they release more nitric oxide into your blood vessels) which dramatically helps beat jet lag.
How to Avoid Jet Lag Tip #9:
Completely Eliminate Processed Sugars and Vegetable Oils
I mean completely eliminate them. That includes seeds and nuts, stir fries, boxed foods and just about anything else with canola oil, soybean oil, or any other oils, as “healthy” as the food may be advertised to be.
These are some of the best foods to cause full body inflammation, which you especially don’t want when flying.
So while the 80/20 rule may work most of the time, I follow the 100/0 rule with these foods when traveling – they make up 0% of my diet (and yes, that usually means no airplane food for me, and lots of raw seeds, nuts, chlorella, spirulina, raw fruit, etc.!).
How to Avoid Jet Lag Tip #10:
Increase Sulfur Intake
Sulfur-containing foods are very good antioxidant precursors, especially for the type of inflammation that can occur when you’re on an airplane, and include compounds like broccoli, cauliflower, garlic, onions and Brussels sprouts.
Supplements containing “MSM” or “DMSO” are also effective, but can have a nausea producing detox effect, so be careful with them. I don’t recommend more than a teaspoon, max.
If you opt for the garlic and onions route, you may need to brush your teeth afterwards if you plan on talking to your seatmate on the airplane, but if you squeeze in a few meals with these foods in the days leading up to the flight, you’ll feel much better when you land!
How to Avoid Jet Lag Tip #11:
Get the Oxytocin Flowing
Finally, oxytocin is an extremely powerful hormone that acts to lift your mood, but also acts as a potent antioxidant, antidepressant and antinflammatory.
Although it’s most commonly known as a hormone that is released after sex, one of the interesting things about oxytocin is that you can get your hormone fix anywhere and at any time – including when you’re traveling. To do this, all you need to do is simply hug someone or shake their hand. The simple act of bodily contact will cause your brain to release low levels of anti-inflammatory, mood-boosting oxytocin.
So find the first person who’s OK with it when you get to your final destination and give them a big, loving bear hug – or do some partner carries up the stairway in the hotel (incidentally, that’s a great travel workout).
What did you think of these tips on how to avoid jet lag? Have any others you’d like to share? Let me know in the comments below!
Author, ex-bodybuilder and Ironman triathlete Ben Greenfield blogs and podcasts about biohacking, muscle gain and fat loss at BenGreenfieldFitness.com. He has just written the book “Beyond Training”, which teaches you how to achieve amazing feats of physical performance without destroying your body or metabolism.
February 21, 2014
Recipe of the Week: Supremely Spicy Chili
Delicious chili is one of my favorite “one-pot” dishes. It’s easy to make and you get a ton of flavor for a relatively small number of calories, and you stay full for hours.
This recipe is from my cookbook The Shredded Chef and it’s one I come back to again and again. It’s hearty, extremely tasty, and gets better as it sits in the fridge (it’s perfect for bringing to work and reheating every day).
Servings
12
Calories Per Serving
474
Protein Per Serving
44 grams
Carbohydrates Per Serving
38 grams
Fat Per Serving
15 grams
Ingredients
2 pounds extra-lean ground round
1 pound boneless chuck, trimmed of fat, and cut into 1/4-inch cubes
1 pound bulk Italian sausage
2 tablespoons unsalted butter
1 tablespoon canola oil
2 red bell peppers, diced
2 jalapeño peppers, finely chopped
3 Anaheim chilies, roasted, peeled, and chopped
3 poblano chilies, roasted, peeled, and chopped
2 yellow onions, diced
4 tablespoons garlic, minced
2 teaspoons granulated onion
2 teaspoons granulated garlic
3 tablespoons chili powder
2 teaspoons hot paprika
2 teaspoons ground cumin
2 teaspoons cayenne pepper
2 teaspoons ground coriander
2 teaspoons salt
2 teaspoons ground black pepper
1 cup tomato paste
2 cups tomato sauce
12 ounces lager beer
1 cup low-sodium chicken stock
2 cans (15.5 ounces) pinto beans, with juice
2 cans (15.5 ounces) kidney beans, with juice
1/2 cup scallions, thinly sliced

Instructions
Place a large stock pot or Dutch oven over high heat, add the butter and canola oil. Once butter has melted, add the bell pepper, jalapeño, chilies, and onion and cook until tender, about 5 minutes.
Add the chuck cubes and brown on all sides. Mix in the ground round, sausage, and minced garlic, gently stir, trying not to break up the ground meat too much. Cook until meat is browned and cooked through, about 7 – 10 minutes.
Stir in the granulated onions, granulated garlic, chili powder, paprika, cumin, cayenne, coriander, salt, and pepper and let cook for 1 minute. Stir in the tomato paste and sauce and let cook for 2 minutes. Pour in the beer, chicken stock, and beans. Thoroughly mix together, lower heat to medium-low and simmer for 2 hours, stirring occasionally. Serve with scallions on top
What You Get to Eat

What did you think of this week’s recipe? Let me know in the comments below!
Want more delicious, easy-to-make recipes like this?If you like this recipe, then you’ll love the bestselling cookbook it came from! My own The Shredded Chef!
In this book you’ll find 120 healthy, flavorful recipes specifically designed for athletes that want to build muscle or lose fat. Regardless of your fitness goals, this book has got you covered.
Buy this book now to forever escape the dreadful experience of “dieting” and learn how to cook nutritious, delicious meals that make building muscle and burning fat easy and enjoyable!
Buy now
AmazonAmazon UKAmazon AUAmazon CABNiBooksKoboGoogle Play
Vegan and vegetarian dishes are great sources of micronutrients, and even if you’re a meat eater, they’re great for changing things up in your meal plan.
And in my cookbook, Eat Green Get Lean, you’ll find 100 of my favorite vegetarian and vegan dishes, carefully balanced for our high-protein, healthy needs!
Buy this book now to forever escape the dreadful experience of “dieting” and learn how to cook nutritious, delicious vegetarian and vegan meals that make building muscle and burning fat easy and enjoyable!
Buy now
AmazonAmazon UKAmazon AUAmazon CABNiBooksKoboGoogle Play
Cool Stuff of the Week: Game of Thrones, Callaway Big Bertha, Freakonomics, and More…
I’m not ashamed to admit that I’m kind of a sucker for cool stuff. I like nifty gadgets, quirky decoration pieces, nice clothes (and shoes!), good books, and fun games.
In this series of weekly posts, I share whatever currently has my fancy. Maybe some of it will catch yours as well!
VIDEO OF THE WEEK:
CARDBOARD WARFARE 2.5: WORLD OF WARPLANES
An example of a great viral promotion of a video game. Very creative!
ZERO FX STEALTH FIGHTER

The Zero FX Stealthfighter Motorcycle is the ultimate minimalist bike. And it doesn’t just look slick, it also delivers: it has an underwhelming 44 horsepower electric engine but weighs a mere 280 pounds, giving it a power-to-weight ratio that lets you have all kinds of fun, whether on the street or in the dirt.
GERBER ZOMBIE APOCALYPSE SURVIVAL KIT

The name pretty much tells you exactly what you’re getting here. This “zombie apocalypse kit” includes everything you need to survive the impending zombie outbreak: machetes, axes, knives, and a few more knives for good measure. Basically anything bladed that’s remotely useful is packed into this baby.
It’s also worth noting that this doesn’t just have novelty appeal–Gerber has been making knives for more than 70 years and is one of the premier manufacturers in the USA.
Buy now
Amazon
CALLAWAY BIG BERTHA ALPHA

I used to be big into golf and the original Big Bertha was the first driver that impressed me. Well, Callaway has brought it back in style.
The Big Bertha Alpha comes with adjustable weights, adjustable lofts, adjustable face angle, which are pretty standard these days when it comes to adjustable drivers, but the adjustable center of gravity is new. Callaway calls it the ”Gravity Core,” and it allows you change the vertical center of gravity of the head, which is another useful way to customize your club to your swing and setup.
Buy now
Amazon
VOLT HEATED SLIPPERS

With General Winter waging war across the world, I thought this would be a timely recommendation.
The Volt Heated Slippers feature an electrically heated insole and a built-in, auto-adjusting thermostat that keeps your feet from getting too hot, as well as a rechargeable battery that saves you money on replacing batteries. They’re perfect for keeping you feet cozy no matter how cold it is outside.
Buy now
Amazon
BOOK OF THE WEEK:
FREAKONOMICS
If you’d like to get an interesting, statistical analysis of how to catch cheating sumo wrestlers and teachers, what online daters lie most about, why prostitutes earn more than architects, or why the 1960s were a great time to be a criminal, then read this book.
It’s an entertaining romp through our culture and sheds a new light on many intriguing phenomena that only mathematics can reveal. While some cases were more convincing than others, all were fun to read and thought provoking. I particularly enjoyed the stories about the dangers of guns vs. swimming pools, why parenting experts like to scare parents, and eight things that help a child in school and eight things that don’t.
TV SHOW OF THE WEEK:
GAME OF THRONES

There’s a reason why just about everyone is talking about Game of Thrones these days: it’s just that damn good.
For me, it’s in my list of top 5 best TV show experiences (I say experiences instead of shows because some shows, like Lost and 24, delivered an outstanding experience in their first seasons but only got worse and worse as they went on).
The plots are intricate, but not confusing; the character development is some of the best I’ve ever seen; the acting is masterful; the suspense never lets up (you never know who’s going to die next); and the production values are feature-film level.
The first season starts out a little slow (normal for the genre), so be patient for a few episodes and if it hooks you like it hooked me and millions of others, you can binge-watch everything online (season 3 was just released in its entirety so no waiting for new episodes each week!).
Buy now
AmazonAmazon UK
Watch now
Amazon Instant VideoVudu
What do you think of this week’s picks? Have anything you’d like to share? Let me know in the comments below!
February 20, 2014
5 Post-Workout Meals That Blow Protein Shakes Away
While a trusty protein shake always works for post-workout nutrition, lets face it: it’s not very satisfying. When it comes to post-workout meals, nothing hits the spot like a big pile of food.
Well, in this article, I want to share 5 ideas for post-workout meals that not only taste great, but provide plenty of protein and carbs for stimulating protein synthesis and replenishing muscle glycogen stores.
Enjoy!
Edamame Mac & Cheese

Picture courtesy of The Toasted Sprinkle
This high-protein recipe for mac and cheese is a healthy meal, and with only five ingredients, it’s almost as easy to make as the processed stuff in the blue box. You’ll need 4 oz. each of gruyere and low-fat sharp cheddar cheese, which means the final dish will be big on flavor.
Directions
Start by boiling 1 lb. whole-wheat macaroni for 5 minutes in boiling water and immediately draining and rinsing with cool water. It will cook the rest of the way in the casserole.
While you wait for the broiler to preheat, warm 2 cups low-fat milk on the stove. Stir in 3/4 cup of grated cheddar and 3/4 cup of gruyere, keeping 1 oz. of each cheese reserved. Once the mixture melts into a sauce, add the cooked pasta and 1 cup edamame. Mix well.
Pour into a rectangular baking dish and top with reserved cheese. Broil until bubbly and brown.
Serves 6
Nutrition Facts (Per Serving)
Calories: 514
Protein: 30 grams
Carbs: 66 grams
Fat: 17 grams
Steak & Sweet Potato

Picture courtesy of The Yuca Diaries
Sometimes it’s nice to just go back to basics. A choice cut of steak with a sweet potato on the side is a comforting post-workout meal, and it’s also packed with all the protein, vitamins, and just enough fat to fuel your body for recovery.
Directions
For an easy steak seasoning, mince one garlic clove and mix with 1 tsp. olive oil and 1/4 tsp. salt; rub two 8 oz. sirloin steaks on both sides. Grill for 2 to 4 minutes per side, until medium-rare.
You can make two medium sweet potatoes the long way, in the oven, or the short way, in the microwave. Top each one with a dollop of non-fat Greek yogurt and a dash of your choice of seasoning (paprika, cayenne, sumac, etc.). Or, if you want to bump the calories up even more, upgrade to this Fully Loaded Sweet Potato with mushrooms, kale, and eggs.
You can add even more fresh greens with a side salad tossed in a simple vinaigrette.
Serves 2
Nutrition Facts (Per Serving)
Calories: 452
Protein: 56 grams
Carbs: 28 grams
Fat: 12 grams
Sausage-Kale Strata

Picture courtesy of The Pioneer Woman
There are a lot of great ways to enjoy eggs as a meal – omelettes, frittatas, and the ubiquitous Benedict – but the all-American strata has all the makings of a hearty dinner: eggs, meat, bread, and fresh produce.
It’s essentially a cross between bread pudding and casserole, it’s indulgent but can be made healthily – well, healthy enough, at any rate.
Directions
In a medium bowl, mix together 4 large eggs, 8 egg whites (1 cup), 1 cup low-fat milk, 2 Tbsp. minced fresh herbs of choice, and salt and pepper to taste. Drizzle 1/2 Tbsp. olive oil over 8 oz. of halved white mushrooms, sprinkle with salt and pepper, and roast them in a hot oven until golden brown, about 15 minutes.
In a skillet over medium-high, heat 1/2 Tbsp. olive oil and toss in 1 bunch torn kale until wilted, 2 minutes tops.
Cut up 1/2 loaf of crusty bread, for example a few days’ old baguette. Now you’ll layer everything in a square baking dish, using half the ingredients at a time. Start with the bread, followed by kale, then mushrooms. Repeat. Pour the egg mixture all over the dish, and top with 2 oz. grated Parmesan cheese.
Cover the dish and leave in the fridge overnight, or at least 8 hours. That’s right: You’ll need to make it the day before or at least in the morning. Remove from the fridge and let it sit for 20 minutes. Bake in a 350-degree oven, covered with foil, for 30 to 40 minutes. Remove the foil and finish for 5 to 10 more minutes, until brown and slightly crisp.
Serves 6
Nutrition Facts (Per Serving)
Calories: 441
Protein: 29 grams
Carbs: 37 grams
Fat: 21 grams
Thai Roast Duck Salad

Picture courtesy of To Food With Love
Duck is delicious but hard to cook so skip the work and pick up a whole one already roasted. Then simply slice the meat off of it for an easy post-workout salad.
Directions
When you’re not worried about prepping the protein, it’s not hard to invest the time in making dressing from scratch, either by hand with a mortar and pestle or in a food processor. Start by grinding 6 chopped garlic cloves into a paste, and then add 3 Tbsp. chopped scallions, 3 birds eye chilies, 8 Tbsp. lime juice, 3 Tbsp. fish sauce, 3 Tbsp. grated palm sugar, and 3–4 Tbsp. Thai sweet chili sauce.
In a large bowl, toss together 8 oz. baby spinach or salad mix, 1 handful fresh coriander, 1 bunch fresh mint, 1 sliced cucumber, 1/2 sliced red onion, and 1/2 cup halved cherry tomatoes. Toss together with the dressing, and top with sliced duck meat.
Serves 3
Nutrition Facts (Per Serving)
Calories: 320
Protein: 22 grams
Carbs: 40 grams
Fat: 9 grams
Grilled Chicken Pita

Picture courtesy of Cooking With Sugar
When you need a quick meal, nothing beats a good sandwich. With grilled chicken and Greek yogurt in a whole-wheat pita, this has almost as much protein as carbs and very little fat. And since putting this together takes only a few minutes more than stopping by a restaurant to order one, you may as well make it from scratch.
Directions
Slice one boneless, skinless chicken breast in half lengthwise, and pat dry. Make a rub by combining 1/2 tsp. ground cumin, 1/2 tsp. paprika, 1/2 tsp. coriander, 1/2 tsp. dried oregano, 1/8 tsp. of cayenne, and 1 tsp. olive oil. Coat chicken and let marinate.
Meanwhile, combine 1/2 cup fat-free Greek yogurt, 1/4 tsp. salt, and 1 Tbsp. fresh lemon juice. Cover and set aside. Then make a tomato relish in a food processor, using 2 plum tomatoes, 1 large garlic clove, 1 tsp. salt, and 1 cup loosely packed parsley.
On medium heat, place a large skillet to heat 1 tsp. olive oil. Then cook the chicken for 2 to 3 minutes on each side, until cooked through. Warm 2 whole-wheat pitas in the hot pan briefly, and flip. Place the chicken in the pita, top with yogurt sauce and tomato relish, and enjoy.
Serves 2
Nutrition Facts (Per Serving)
Calories: 419
Protein: 41 grams
Carbs: 44 grams
Fat: 10 grams
What did you think of these post-workout meals? Have anything else to share? Let me know in the comments below!
Want more delicious, easy-to-make recipes like these?If you like these recipes, then you’ll love my bestselling cookbook The Shredded Chef!
In this book you’ll find 120 healthy, flavorful recipes specifically designed for athletes that want to build muscle or lose fat. Regardless of your fitness goals, this book has got you covered.
Buy this book now to forever escape the dreadful experience of “dieting” and learn how to cook nutritious, delicious meals that make building muscle and burning fat easy and enjoyable!
Buy now
AmazonAmazon UKAmazon AUAmazon CABNiBooksKoboGoogle Play
Vegan and vegetarian dishes are great sources of micronutrients, and even if you’re a meat eater, they’re great for changing things up in your meal plan.
And in my cookbook, Eat Green Get Lean, you’ll find 100 of my favorite vegetarian and vegan dishes, carefully balanced for our high-protein, healthy needs!
Buy this book now to forever escape the dreadful experience of “dieting” and learn how to cook nutritious, delicious vegetarian and vegan meals that make building muscle and burning fat easy and enjoyable!
Buy now
AmazonAmazon UKAmazon AUAmazon CABNiBooksKoboGoogle Play


