
Simon B. Jones's Blog: Slings and arrows
March 2, 2016
Carpet Sahib
This month the wife and I are off to India for a jolly adventure which will, we hope, include the tremendous privilege of seeing a tiger in the wild. It is something which features high on my bucket list and something which, given the state of the world, we felt was better done sooner than later. That India still has an albeit dwindling population of wild tigers at all is thanks to the efforts of those dedicated to the protection of their habitat. For inspiration, those dedicated souls look to the pioneering efforts of the man for whom India's first national park was named; Jim Corbett. Without his rallying cry for the preservation of India's tigers, it is almost certain that by now they would be long extinct. There are some upsetting pictures in this blog for Corbett was a famous hunter, but it as a saviour and champion of wildlife that he is remembered and celebrated today.
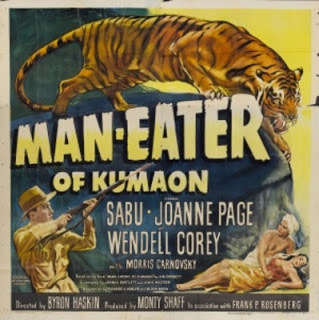 1948 movie poster
Corbett was a second-generation Indian-born Englishman. He was born at the height of the Raj in 1875 in Naini Tal, in the Himalayan foothill district of Kumaon. His father was the district post master. Corbett grew up as one of sixteen children with the jungle as his backyard. As a boy of eight he ventured out with increasing confidence into the jungles, accompanied sometimes by his younger brother Archie. Young Corbett's taste for jungle exploration was indulged by his mother, his father having died when he was only four, and encouraged by his eldest brother Tom, who had succeeded to their father's old position. With a native escort, he was permitted to head out for adventures that lasted for days, sleeping out in the jungle. Here he learned to recognise the tracks and calls of the forest animals and became an expert tracker and a gifted mimic; both skills that would serve him well in his career as the archetypal great white hunter. The young hunter, having already proved a good shot with both catapult and bow, was charged by his ornithologist cousin with collecting specimens and entrusted with a shotgun. He was able to further improve his shooting skills when he became the youngest cadet with the Naini Tal Volunteer Rifles, aged just ten.
The Bengal and Northwestern Railway provided Corbett with employment from the age of 19 as a fuel inspector. Three years later however in 1907 he cemented his reputation as a hunter when he killed the Champawat Man-eater. This, the first of 19 tigers which would be shot by Corbett, had been terrorising villagers across the border in Nepal, where she had killed and eaten some two hundred people and managed to evade the pursuit of the Nepalese army. Crossing the border into Kumaon, the tigress continued her bloody progress, accounting for another 236 people, fearlessly approaching villages in broad daylight. Corbett, with his reputation for being a fine shot was called upon and following the killing of a sixteen year old girl outside the town of Champawat, he followed the bloody trail to track down and shoot the tigress.
 Corbett's best selling account of his exploits was published in 1944
Upon inspection, the dead tiger had lost most of her teeth and this, Corbett concluded, had been the cause of her turning man-eater. Tigers do not naturally pray upon humans and as Corbett's experience as a hunter grew, he came to understand that tigers were only turned into man-eaters through desperation following injuries that prevented them from hunting their natural pray, or sheer old age. Unarmed villagers, usually young women, since they were charged with chores that took them out into the forests were easy prey. They tasted a bit like chicken and were a good option for tigers with compromised hunting ability. In 1910 Corbett was charged with the killing of the man-eating Leopard of Panar. This beast had accounted for four hundred people by the time Corbett tracked it down and put an end to its activities. The leopard had, Corbett believed, obtained a taste for human flesh following a major cholera outbreak. Large numbers of bodies had been dumped in the jungle and having fed on the flesh, the leopard developed a preference for human prey. For leopards it seems, once you've tasted human you never look back. This was born out by the case of the Rudraprayag man-eater, which emerged in the aftermath of the Spanish flu outbreak and went on an eight year killing spree before finally being killed by Corbett in 1926.
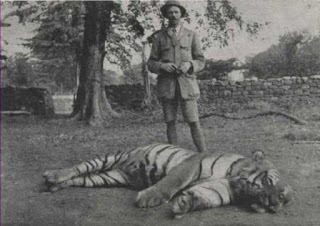
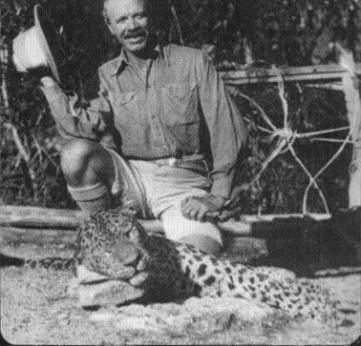
 Corbett poses with the slain Panar Leopard
Corbett continued to work for the railways, ultimately ending up with responsibility for the ferrying of goods and people across the Ganges at Mokhameh Ghat. He also invested in property and bagged profitable bounties from his man-eater killing activities. During the First World War he was responsible for raising a labour force to serve on the western front and thereafter moved back to his hometown of Naini Tal where he settled down as a local official and landowner. Unlike most Englishmen in India during the Raj period, Corbett enjoys a reputation as man free of prejudice or condescending paternalism. He treated all Indians, even the very poorest and those of the lowest caste with a respect and dignity that marked him out as an exceptional man for his times. Upon discovering that an old 'untouchable' who was too frail to work at Mokhameh Ghat was in fact literate, Corbett promoted the man in spite of India's social taboos and wrote; For the first time, the man held his head high and left his office with a book tucked under his arm and a pencil behind his ear.
Corbett continued to find himself called upon to deal with man-eaters and in 1929 set out to hunt down a tigress and her sub-adult cub known as the Chowgarh man-eaters. Between them they had killed sixty four people in three years, with the cub learning to kill humans from the aging mother, whose hunting ability was compromised. Corbett killed the cub on his first expedition but it took a further two hunts to track down the mother, with which he came to face to face, shooting her in April 1930 at a distance of just eight feet.
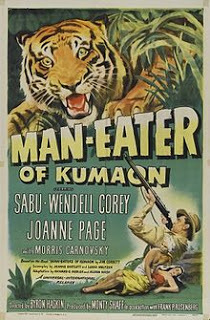 Corbett's best seller inspired a Hollywood movie in 1948
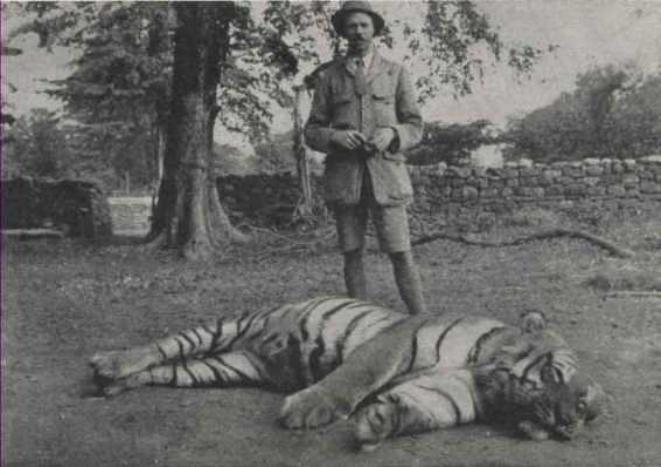
Corbett was unfortunately a man of his times and he also killed for sport. Late in 1930 he killed an enormous tiger known as the Bachelor of Powalgarh. The sheer size of the beast, at ten feet eight inches from its snarling jaws to the tip of its tail, doomed the magnificent tiger, as India's top hunters vied to be the one to put a bullet in it. Corbett was lucky not to end up being killed by the tiger since it survived being shot through the head on their first encounter and was merely enraged. Having extricated himself, Corbett was able to finish the job the following day. This was the last big cat Corbett would shoot for sport and in future he restricted himself to taking care of man-eaters when requested. The killing of the Bachelor represented something of a road-to-Damascus moment for the great hunter. Thereafter he committed himself to the preservation of India's wildlife and wrote of the lasting satisfaction of photographing tigers far outweighing the fleeting atavistic pleasure to be had from shooting them. That he had to shoot over 30 tigers and leopards before coming to this conclusion has to count against his reputation somewhat but, once he had seen the light, Corbett became a passionate defender of the forests he had loved since boyhood and the creatures that dwelt in them.
 Corbett with the murdered Bachelor of Powalgarh Corbett set out to educate both locals and officials in the importance of preserving the natural habitats of India's wildlife. He campaigned against the encroachment of farming and logging and unrestricted hunting. Tigers were at the time perceived as a menace to humanity. Locals saw them as devils in feline form whilst the British elite saw them as fair game and a must-have trophy. From his experience Corbett was able to argue that tigers did not naturally prey upon humans and were only driven to this extreme through injury or old age. As the world authority on man eating tigers, he was listened to. In every case he had encountered, Corbett could point to an injury that had caused the change in behaviour, often inflicted by hunters. The locals, who loved and respected 'Carpet Sahib' listened attentively and Corbett lectured in schools to win young hearts and minds to the cause of conservation. The tiger, Corbett warned, was doomed to extinction, perhaps within a decade, unless steps were taken for its preservation. He was the very first to speak out for the protection of the tiger in India and was insistent that action was needed urgently. His efforts saw him involved in the establishment in 1936 of India's first national park in Kumaon. It is now named after him.
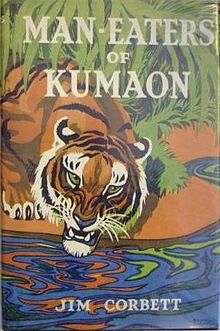
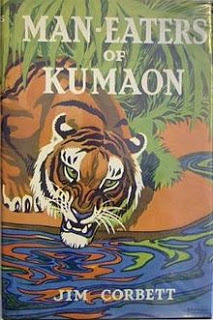 Despite its Boy's Own appeal, the book appealed for the preservation of tigers. The Second World War saw Corbett pressed into service to provide jungle training for British forces fighting the Japanese. He found time in between teaching soldiers jungle survival skills to write his best selling book, Man-eaters of Kumaon, which was published to great acclaim in 1944. Its Boy's Own appeal saw it made into a movie four years later but its introduction contained an appeal for the preservation of the tiger: The tiger is a large hearted gentleman with boundless courage and when he is exterminated - as exterminated he will be unless public opinion rallies in his favour - India will be the poorer by having lost the finest of her fauna.
Corbett shot his last man-eater in 1946 at the age of 71. He had lured the tigress to her death by imitating the mating call of a male tiger. Upon inspection of the carcass, he found two old bullet wounds from a careless hunter - the cause once again of the tiger turning man-eater. He left India the following year, taking independence as his cue to emigrate to Kenya with his sister, sensing that his era was over. He had never married. Corbett was present at Tree Tops Hotel when Princess Elizabeth visited and dined with her on the very night that she discovered that she had become queen. He died in Kenya in 1955.
Man Eaters of Kumaon
https://archive.org/details/maneatersofkumao029903mbp
 1948 movie poster
Corbett was a second-generation Indian-born Englishman. He was born at the height of the Raj in 1875 in Naini Tal, in the Himalayan foothill district of Kumaon. His father was the district post master. Corbett grew up as one of sixteen children with the jungle as his backyard. As a boy of eight he ventured out with increasing confidence into the jungles, accompanied sometimes by his younger brother Archie. Young Corbett's taste for jungle exploration was indulged by his mother, his father having died when he was only four, and encouraged by his eldest brother Tom, who had succeeded to their father's old position. With a native escort, he was permitted to head out for adventures that lasted for days, sleeping out in the jungle. Here he learned to recognise the tracks and calls of the forest animals and became an expert tracker and a gifted mimic; both skills that would serve him well in his career as the archetypal great white hunter. The young hunter, having already proved a good shot with both catapult and bow, was charged by his ornithologist cousin with collecting specimens and entrusted with a shotgun. He was able to further improve his shooting skills when he became the youngest cadet with the Naini Tal Volunteer Rifles, aged just ten.
The Bengal and Northwestern Railway provided Corbett with employment from the age of 19 as a fuel inspector. Three years later however in 1907 he cemented his reputation as a hunter when he killed the Champawat Man-eater. This, the first of 19 tigers which would be shot by Corbett, had been terrorising villagers across the border in Nepal, where she had killed and eaten some two hundred people and managed to evade the pursuit of the Nepalese army. Crossing the border into Kumaon, the tigress continued her bloody progress, accounting for another 236 people, fearlessly approaching villages in broad daylight. Corbett, with his reputation for being a fine shot was called upon and following the killing of a sixteen year old girl outside the town of Champawat, he followed the bloody trail to track down and shoot the tigress.
 Corbett's best selling account of his exploits was published in 1944
Upon inspection, the dead tiger had lost most of her teeth and this, Corbett concluded, had been the cause of her turning man-eater. Tigers do not naturally pray upon humans and as Corbett's experience as a hunter grew, he came to understand that tigers were only turned into man-eaters through desperation following injuries that prevented them from hunting their natural pray, or sheer old age. Unarmed villagers, usually young women, since they were charged with chores that took them out into the forests were easy prey. They tasted a bit like chicken and were a good option for tigers with compromised hunting ability. In 1910 Corbett was charged with the killing of the man-eating Leopard of Panar. This beast had accounted for four hundred people by the time Corbett tracked it down and put an end to its activities. The leopard had, Corbett believed, obtained a taste for human flesh following a major cholera outbreak. Large numbers of bodies had been dumped in the jungle and having fed on the flesh, the leopard developed a preference for human prey. For leopards it seems, once you've tasted human you never look back. This was born out by the case of the Rudraprayag man-eater, which emerged in the aftermath of the Spanish flu outbreak and went on an eight year killing spree before finally being killed by Corbett in 1926.
 Corbett poses with the slain Panar Leopard
Corbett continued to work for the railways, ultimately ending up with responsibility for the ferrying of goods and people across the Ganges at Mokhameh Ghat. He also invested in property and bagged profitable bounties from his man-eater killing activities. During the First World War he was responsible for raising a labour force to serve on the western front and thereafter moved back to his hometown of Naini Tal where he settled down as a local official and landowner. Unlike most Englishmen in India during the Raj period, Corbett enjoys a reputation as man free of prejudice or condescending paternalism. He treated all Indians, even the very poorest and those of the lowest caste with a respect and dignity that marked him out as an exceptional man for his times. Upon discovering that an old 'untouchable' who was too frail to work at Mokhameh Ghat was in fact literate, Corbett promoted the man in spite of India's social taboos and wrote; For the first time, the man held his head high and left his office with a book tucked under his arm and a pencil behind his ear.
Corbett continued to find himself called upon to deal with man-eaters and in 1929 set out to hunt down a tigress and her sub-adult cub known as the Chowgarh man-eaters. Between them they had killed sixty four people in three years, with the cub learning to kill humans from the aging mother, whose hunting ability was compromised. Corbett killed the cub on his first expedition but it took a further two hunts to track down the mother, with which he came to face to face, shooting her in April 1930 at a distance of just eight feet.
 Corbett's best seller inspired a Hollywood movie in 1948
Corbett was unfortunately a man of his times and he also killed for sport. Late in 1930 he killed an enormous tiger known as the Bachelor of Powalgarh. The sheer size of the beast, at ten feet eight inches from its snarling jaws to the tip of its tail, doomed the magnificent tiger, as India's top hunters vied to be the one to put a bullet in it. Corbett was lucky not to end up being killed by the tiger since it survived being shot through the head on their first encounter and was merely enraged. Having extricated himself, Corbett was able to finish the job the following day. This was the last big cat Corbett would shoot for sport and in future he restricted himself to taking care of man-eaters when requested. The killing of the Bachelor represented something of a road-to-Damascus moment for the great hunter. Thereafter he committed himself to the preservation of India's wildlife and wrote of the lasting satisfaction of photographing tigers far outweighing the fleeting atavistic pleasure to be had from shooting them. That he had to shoot over 30 tigers and leopards before coming to this conclusion has to count against his reputation somewhat but, once he had seen the light, Corbett became a passionate defender of the forests he had loved since boyhood and the creatures that dwelt in them.
 Corbett with the murdered Bachelor of Powalgarh Corbett set out to educate both locals and officials in the importance of preserving the natural habitats of India's wildlife. He campaigned against the encroachment of farming and logging and unrestricted hunting. Tigers were at the time perceived as a menace to humanity. Locals saw them as devils in feline form whilst the British elite saw them as fair game and a must-have trophy. From his experience Corbett was able to argue that tigers did not naturally prey upon humans and were only driven to this extreme through injury or old age. As the world authority on man eating tigers, he was listened to. In every case he had encountered, Corbett could point to an injury that had caused the change in behaviour, often inflicted by hunters. The locals, who loved and respected 'Carpet Sahib' listened attentively and Corbett lectured in schools to win young hearts and minds to the cause of conservation. The tiger, Corbett warned, was doomed to extinction, perhaps within a decade, unless steps were taken for its preservation. He was the very first to speak out for the protection of the tiger in India and was insistent that action was needed urgently. His efforts saw him involved in the establishment in 1936 of India's first national park in Kumaon. It is now named after him.
 Despite its Boy's Own appeal, the book appealed for the preservation of tigers. The Second World War saw Corbett pressed into service to provide jungle training for British forces fighting the Japanese. He found time in between teaching soldiers jungle survival skills to write his best selling book, Man-eaters of Kumaon, which was published to great acclaim in 1944. Its Boy's Own appeal saw it made into a movie four years later but its introduction contained an appeal for the preservation of the tiger: The tiger is a large hearted gentleman with boundless courage and when he is exterminated - as exterminated he will be unless public opinion rallies in his favour - India will be the poorer by having lost the finest of her fauna.
Corbett shot his last man-eater in 1946 at the age of 71. He had lured the tigress to her death by imitating the mating call of a male tiger. Upon inspection of the carcass, he found two old bullet wounds from a careless hunter - the cause once again of the tiger turning man-eater. He left India the following year, taking independence as his cue to emigrate to Kenya with his sister, sensing that his era was over. He had never married. Corbett was present at Tree Tops Hotel when Princess Elizabeth visited and dined with her on the very night that she discovered that she had become queen. He died in Kenya in 1955.
Man Eaters of Kumaon
https://archive.org/details/maneatersofkumao029903mbp


February 13, 2016
Rise of the Ghulams
Brrrrghhh. After three posts on the Northwest Passage lets get back to the balmy medieval Middle East. This post follows on from Of War and Wisdom, which ended with the death of the caliph Mamun in 833. The new caliph Mutasim was an entirely different prospect to his cultured brother. He had little time for scientists and would rather go out for a vigorous ride than peruse a treatise on astronomy. He liked the military life and his primary diversion before coming to power had been the creation of his own private army. In the long term Mutasim’s actions in creating a new military class of powerful men would prove the undoing of the institution of the caliphate but in the short term it had made him a man to be reckoned with. Mutasim’s collection of imported Turkish slaves, known as ghulams, young men all, obtained from the markets of Khurasan grew from a bodyguard into a formidable force of several thousand mounted archers, who owed loyalty only to their master Mutasim. Their leaders, men of humble beginnings, were at a stroke amongst the most powerful in the caliphate with the ear of the caliph himself. The possession of this private army had strengthened Mutasim’s hand in claiming the caliphate and dissuading Mamun’s son Abbas and his supporters from mounting a challenge.
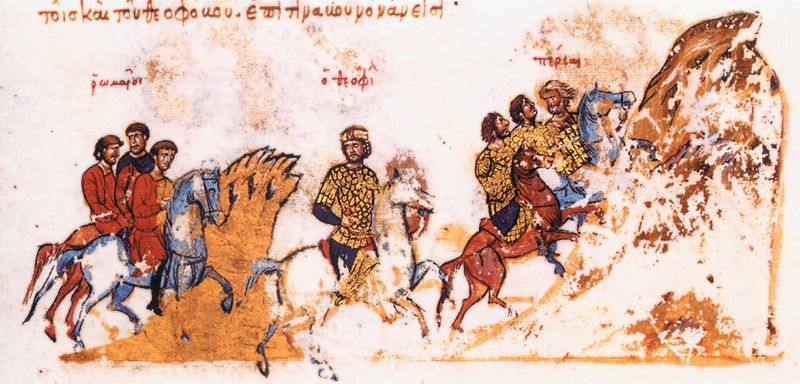
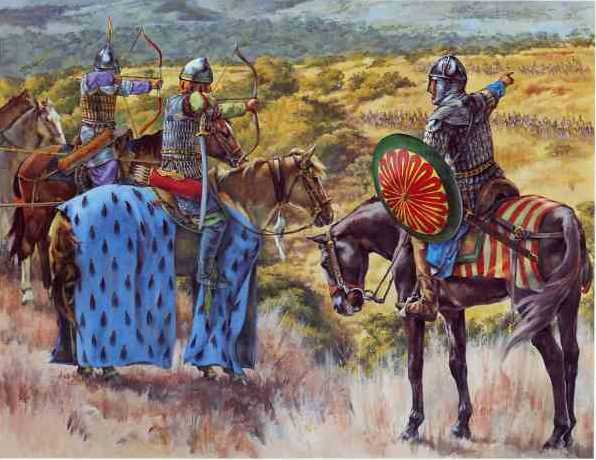 Ghulam warriors doing their stuff As might be expected, the caliph’s swaggering new Turkish entourage did not make many friends in Baghdad, where they were sneered at by the bureaucrats as illiterate barbarians, hated by the existing military as new-comers and foreigners and feared by the populace as brutal enforcers of the caliph’s rule. There were many violent clashes and complaints to the caliph increased but in the end Mutasim preferred his loyal Turks and decided that if they were not welcome in the capital, then he would build a new one.
 In 835 the caliph decided to withdraw to a new purpose-built capital at Samarra. Large quantities of land were cheaply bought up on this virgin site on the east bank of the Tigris close to the Nahrawan canal eighty miles north of Baghdad. Much of this land was later sold on at a great profit as men of means looked to move north and obtain property close to the new seat of power. A new city of broad streets and open spaces took shape at Samarra, where the caliph settled down the following year, accompanied by his court and protected by his Ghulams.
Once ensconced in Samarra, Mutasim turned his mind to military matters. First on the agenda was the crushing of the rebel Babak, whose Khurramite followers had resisted the caliphs from their mountain strongholds for too long. The caliph entrusted the destruction of Babak to another outsider who had gained his trust. Far from being a nobody he was the former ruler of a small Soghdian principality named al-Afsin. Appointed as governor of Azerbaijan, al-Afsin would prove equal to the task of rooting the rebel out. He adopted a methodical approach and moved forward steadily into the mountains, taking control of one rebel stronghold at a time. Babak attempted to counter the invasion by targeting al-Afsin’s supply lines but al-Afsin succeeded in inflicting a series of significant defeats upon Babak who retreated back to his seemingly impregnable mountaintop fortress of Badd.
 Babak's fortress still stands
Babak’s revolt came to its bloody end in 837. Despite the difficulties of reaching the fortress of Badd which could only be approached in single file through a narrow defile, al-Afsin’s soldiers succeeded in storming the stronghold and overcoming its defenders. Babak and his few remaining followers slipped away into the forests but he was ultimately betrayed and run to ground. Paraded through the streets of Samarra on an elephant, Babak had his hands and feet cut off before being beheaded. His body was then publically displayed on a gibbet.
Whilst he had been consolidating his power, moving to his new capital and dealing with Babak, Mutasim had been intially receptive to Byzantine Emperor Theophilus’ overtures for peace that had fallen on the deaf ears of his brother. Theophilus had made use of the truce to renew hostilities with the Bulgars. Having achieved his objectives here however, the emperor had decided once more to go on the offensive. Theophilus had crossed the frontier in the summer of 837 at the head of an invading army. The former Khurramite rebel Theophobos and his Persian brigade marched with the emperor. Theophilus was eager to avenge his humiliation at the hands of Mamun and may also have been responding to a call for aid from Babak, although his intervention came too late to save the doomed rebel leader. The emperor’s forces reached the upper Euphrates and put the cities of Arsamosata and Zosopetra to the sack. Following this victory and in the aftermath of Babak’s defeat another sixteen thousand Khurramites fled to the empire and were both converted to Christianity and enrolled in Theophobos’ Persian brigade, bringing its total strength to thirty thousand men.
Mutasim vowed revenge upon Theophilus and in the following year led his armies in a campaign of reprisal, aimed at the destruction of the emperor’s ancestral hometown of Amorion. Whilst the caliph led his forces towards his target of Amorion, a second army under al-Afsin, fresh from his victory over Babak which had seen him showered with honours by the caliph, marched into Cappadocia.
 Battle of Anzen - Madrid Skylitzes
 The armies of Theophilus and al-Afsin met in battle at Anzen. At first the battle went the way of the Byzantines as their right wing made progress and forced their enemies back. A well timed counterattack by Afsin’s Turkoman horse archers however threw the Byzantine right wing into chaos and, thinking themselves abandoned by their emperor, they routed. Theophilus found himself isolated and retreated to a hill top protected by those soldiers of the imperial Tagmata who had not fled along with some of the troops of Theophobos. Al-Afsin brought up his siege engines to batter at the defenders who were also showered by arrows by the horse archers. The wretched Byzantines were saved by the elements as it began to rain and at last night fell. In the night they slipped away.
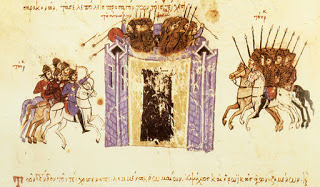 Siege of Amorion from Madrid Skylitzes
 Mutasim meanwhile had advanced to his primary objective of Amorion, which he placed under siege. The victorious Al-Afsin joined him later. The city was well defended by a determined garrison and protected by a substantial moat. Mutasim ordered each soldier to kill a sheep and then stuff the skin with earth and rocks before hurling them into the moat. The soldiers enjoyed the roast mutton but were less keen on the barrage of missiles from the walls as they completed their task as swiftly as possible. The resultant filling in of the moat was somewhat haphazard and Mutasim’s siege engines sank into the ground when they attempted to approach the walls, to the delight of the defenders who promptly burned them. The caliph then received intelligence from a treacherous element within the city of a stretch of wall which had been poorly repaired with rubble and was not as solid as it appeared from the outside. Concentrating his artillery fire on this section, the caliph soon had his victory as the wall crumbled despite the defenders’ efforts to reinforce it. Amorion was brutally sacked, with some of the terrorised citizens burned alive in the church where they had sought refuge. On the long march home, laden down with booty and with the extra burden of thousands of captives taken as slaves from the populace, the army ran short of supplies, especially water. Six thousand low value captives are said to have been executed, whilst many more fell by the wayside and were abandoned. These poor buggers of little account were largely forgotten by posterity although another group of higher status prisoners who survived the death march but were later beheaded beside the Tigris for refusing to convert to Islam would be celebrated by the Byzantines as the 42 Martyrs of Amorion.
 The 42 martyrs are remembered by the Orthodox Church to this day
 As the army made its way back into Syria details emerged of a plot against the caliph and his Turkish favourites Itakh and Ashinas. The plan had been hatched amongst a number of commanders in the existing military to kill Mutasim and his Turkish commanders and to place Mamun’s son Abbas on the throne in his place. The conspirators took too long to act and their plot was betrayed to the caliph who took delight in having them all rounded up and given slow and unpleasant deaths; burying alive, drowning and starvation all featured. Abbas himself died of thirst in captivity. It was a bad business and the Turks, having had a narrow escape, appear to have resolved to get rid of anyone else who might pose a threat to them. This included Al Afsin; defeater of Babak, victor over the emperor himself. A rival of such standing and reputation could not be tolerated. A whispering campaign of rumours and accusations was started against him: He planned to murder the caliph, he planned to steal a vast sum of money and return to the east, he planned to overthrow the Tahirids in Khurasan and set himself up in their stead. In all likelihood none of it was true but the Turks finally turned the caliph against his best general. With no real evidence of any wrong-doing against him Al-Afsin was accused in 840 of apostasy; a capital crime. As a foreigner and recent convert to Islam it was an easy slur to make stick and Al-Afsin was found guilty despite demolishing the prosecution case. He died in custody and his body was exhibited on a gibbet outside the main gate of Samarra, another victim of poisonous intrigue at the Abbasid court.
 A depiction of Afsin at the height of his powers Theophilus and Mutasim died just two weeks apart in January 842. Mutasim was aged forty six. He was succeeded by his thirty year old son Harun who as caliph Wathiq would rule isolated from his subjects in the new capital, dependant for his security upon the Turks, who would grow ever more powerful. After a reign of only six years, Wathiq died from natural causes in 847. Affairs of state during Wathiq’s reign had been dominated by an alliance of senior bureaucrats and Turkish commanders and these men had decided amongst themselves to appoint his brother Jaffar, who took the caliphal name of Mutawwakil – ‘reliant upon God’. Jaffar had been an easy going character and was most likely seen by those who selected him as a suitable replacement puppet. If Caliph Wathiq had been the creature of his courtiers however then Caliph Mutawwakil was most certainly not and he soon moved against them, determined to assert the power that had been thrust upon him. The two most powerful, the vizier al Ziyyat and the Turkish general Itakh received comeuppances of poetic justice in keeping with their own vile deeds. Itakh had been enthusiastically involved in dishing out nasty deaths to those implicated in the plot against Mutasim and had subsequently had Mamun’s grandsons walled up and left to starve. His downfall was facilitated by the Tahirid governor of Baghdad, to whom the caliph had reached out as a powerful counter the Samarra cabal. Arrested in Baghdad on his way back from making the pilgrimage, Itakh had been loaded down with eighty pounds of chains like a Turkish Jacob Marley and left to die.
  Uday's crude imitation left, the Nuremburg Maiden right The proudest possession of the vizier Muhammed ibn al Zayyat was a device known as atannur, used for persuading wealthy men who had fallen out of favour to part with their wealth. An oven-like wooden box with iron spikes, it featured a strangling cord which was placed around the prisoner’s neck to prevent him from wriggling around too much. In an ironic twist of fate, when al Zayyat fell from favour in 849 AD he was placed inside his own creation until he expired. Incidentally, the earliest surviving example of the medieval iron maiden was first used in Nuremburg in 1515 to extract a confession from a forger of coin. In a grim case of history coming full circle, a copy of the Nuremburg iron maiden was found amongst the possessions of Saddam Hussein’s sadistic son Uday. It was allegedly used as one of his motivational tools when in charge of the national football team. Whether Uday had ever heard of ibn al Zayyat is anyone’s guess.
Mutawwakil then, was a man determined to assert his own power and his agenda was truly sweeping. He embarked on a major shakeup of the political-religious landscape of the caliphate. The question of whether the word of God is eternal or created seems like an obscure point of theological debate to be mulled over by long bearded clerics in some shady corner of a mosque courtyard. Much like the monophysite and iconoclastic controversies across the border in the Byzantine Empire however, it had the capacity to mobilise large numbers of the populace onto the streets in riotous disorder. In reversing his official position from that of his predecessors, he appealed to many ordinary civilians who had resisted the imposition of the doctrine by his father and uncle. All at once those who the day before had been branded as heretics found themselves once more in tune with the establishment and vice versa with fortunes changing accordingly.
 Destruction of the tomb of Husayn
The new caliph went further still in 851 when he ordered the destruction of the shrine on the site of the tomb of Husayn, the martyred son of the fourth caliph Ali. The caliphs had maintained a tolerant attitude towards the Alids since Mamun’s murder of the eighth imam Ali al Ridha. Now that attitude hardened. Mutawwakil would no longer tolerate the Shia viewpoint of condemning the first three caliphs for usurping the rights of Ali and neither would he permit the veneration of Husayn’s memory. He ordered the site of Husayn’s tomb to be obliterated and the land to be ploughed. The schism in Islam had been there from the moment that the Prophet’s cousin had been passed over as his successor but with this act it yawned wider than ever. The monument would be restored shortly after the caliph’s death. A series of petty decrees against Jews and Christians followed, including requiring them to identify themselves by yellow patches on their clothing. Mutawwakil was perhaps courting the support of the orthodox masses but certainly he intended to fulfil his job description. He was the Deputy of God and he was going to Command the Faithful.
Mutawwakil’s true passion however was building on a Ramses-esque scale. A vast extension of Samarra including no less than twenty palaces and the largest mosque yet built failed to satisfy his ambitions and construction of a whole new capital bearing his own name was begun to the north. A surveying error ensured that the canal upon which twelve thousand workers toiled in order to bring water to the new city was ineffectual and the construction was doomed to be consumed by the desert. Mutawwakil has left posterity one monument. The fortress-like outer walls, bristling with forty four towers and unique spiral Malwiya minaret of his great mosque in Samarra still stand. The minaret is fifty two metres tall and remains an iconic piece of architecture. It survived a bomb blast in 2005 which damaged the upper storey.
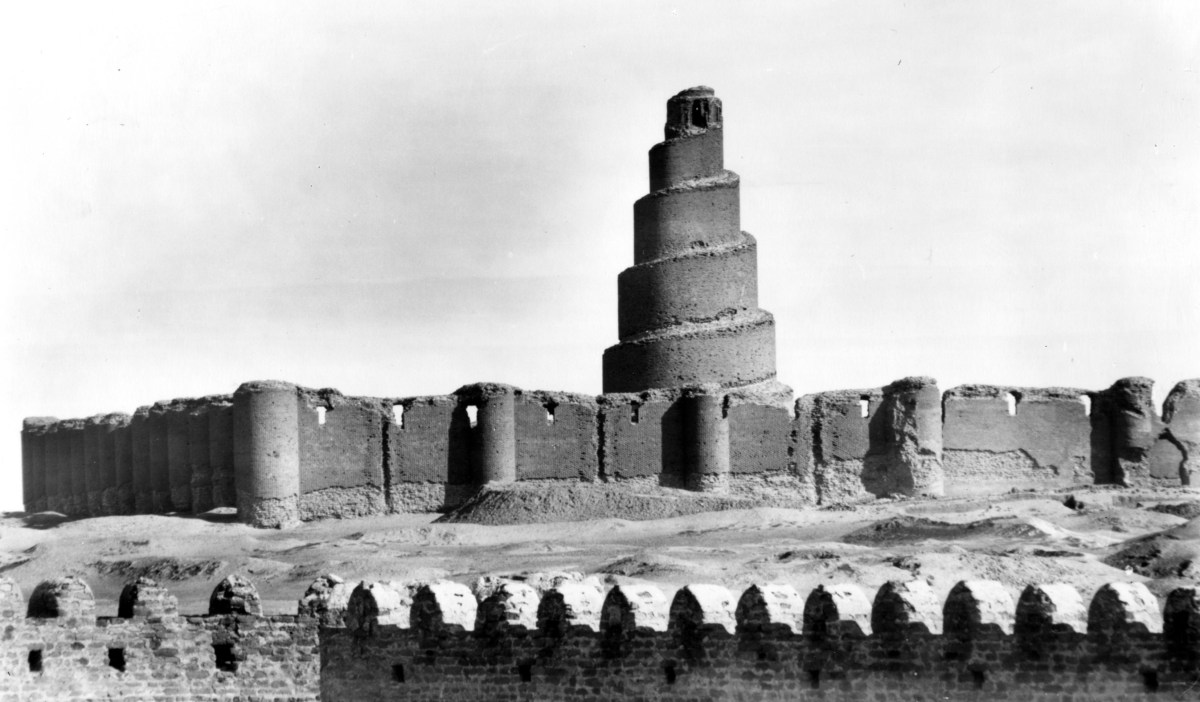 The Great Mosque at Samarra
 The caliph had made some bold decisions but in the matter of the succession he made the same mistake as Harun al-Rashid; the calamitous consequences of which would fall upon his own head. Quite why Mutawwakil failed to heed the lessons of his own family history is a mystery. Doubtless he intended to live for much longer than he did. He had three sons whom he considered worthy and like al-Rashid he determined that they would succeed each other in turn, with each taking control of large territories during their father’s lifetime, which they would hold onto thereafter. Each brother naturally swore to respect the rights of the others. It was, of course, a recipe for a repeat disaster and this time had the added factor of the rapacious Turks.
The caliph had done little in real terms to reduce the power of the Turks and they still controlled the military and the palace guard. In Samarra the caliph was dependent upon them for his safety and therefore also at their mercy. Mutawwakil’s father Mutasim had raised up his private army of Turkish former slaves safe in the knowledge that they would be fools to bite the hand that fed them and so he had been able to depend upon their loyalty and sleep well at night. Like the Praetorian Guard of old Rome however, the Turks would find it a short step from trusted guardians to kingmakers. The surviving member of the Turkish old guard Wasif had reason to fear that the caliph might move against him and Mutawwakil had by his succession arrangements created factions in his court which the crafty Turk could exploit. The caliph sealed his own fate when he began to change his attitude towards his eldest son and heir Muntasir who, for whatever reason, had fallen out of his father’s favour. Muntasir had been publically mocked by his father and when his younger brother Mutazz, whose mother was the caliph’s favourite and well placed to advance her son’s cause, was preferred to lead the Friday prayers the writing appeared to be on the wall. Mutazz was known to be closer to the anti-Turkish faction at court, who had also lobbied the caliph for his preferment. Those Turks who either feared losing the caliph’s favour or looked to Muntasir as the guarantor of their futures decided to act before their man was removed from the succession and their own positions, which they expected to pass to their sons, came under threat. It was time for the Turks to remove the independently minded Mutawwakil with his new ideas and replace him with their preferred candidate, who would owe them his gratitude for saving him from being pushed aside in favour of his brother.
 Mutawwakil is struck down - Historie Islamique - actual attack was indoors at night
 On a winters’ evening in 861 the caliph was drinking late into the night with his favourite companions. His eldest son Muntasir had excused himself early once his father was well in his cups. While most of the palace slept, all the doors and gates were barred save one that led to the riverbank. Through this door a party of assassins, including four sons of Wasif, were admitted and made their way to the chamber where the caliph and his favourite were reclining, accompanied only by a few attendants. The commander of the caliph’s bodyguard was in on the plot and he joined the attackers as they burst in with drawn swords. The caliph and his favourite were cut down in moments and the bloody deed was done. The power of the Turks had been unmasked and there was no putting this particular genie back in the bottle. Having slain his father, the Turks oversaw the succession of Muntasir and faced with the fait accompli his brothers gave their oaths of allegiance to the new caliph. Four months later they were both arrested and forced to renounce their claims to the caliphate on the insistence of the Turks. Just two months after this Muntasir sickened and died. Perhaps he ate something that disagreed with him?
The conspirators installed a suitable puppet in the form of Muntasir's cousin Mustain. The power of the Turks was now absolute, they even saw a Turk appointed to the Vizierate - a position which had always been the preserve of Persian/Arab bureaucracy. Expectations amongst the rank and file were high however and their demands were insatiable. The Turks now held the keys to the caliphate but they were about to discover that taking power and holding onto it were two different things.
To be continued...
Nice page on the Great Mosque of Samarra
http://socks-studio.com/2014/02/11/the-field-and-the-wall-the-great-mosque-of-samarra/
This is part of my Getting Medieval series - enjoy from the beginning here
http://slingsandarrowsblog.blogspot.co.uk/p/getting-medieval.html
The Samarra Years - Part One
Brrrrghhh. After three posts on the Northwest Passage lets get back to the balmy medieval Middle East. This post follows on from Of War and Wisdom, which ended with the death of the caliph Mamun in 833. The new caliph Mutasim was an entirely different prospect to his cultured brother. He had little time for scientists and would rather go out for a vigorous ride than peruse a treatise on astronomy. He liked the military life and his primary diversion before coming to power had been the creation of his own private army. In the long term Mutasim’s actions in creating a new military class of powerful men would prove the undoing of the institution of the caliphate but in the short term it had made him a man to be reckoned with. Mutasim’s collection of imported Turkish slaves, known as ghulams, young men all, obtained from the markets of Khurasan grew from a bodyguard into a formidable force of several thousand mounted archers, who owed loyalty only to their master Mutasim. Their leaders, men of humble beginnings, were at a stroke amongst the most powerful in the caliphate with the ear of the caliph himself. The possession of this private army had strengthened Mutasim’s hand in claiming the caliphate and dissuading Mamun’s son Abbas and his supporters from mounting a challenge.
 Ghulam warriors doing their stuff As might be expected, the caliph’s swaggering new Turkish entourage did not make many friends in Baghdad, where they were sneered at by the bureaucrats as illiterate barbarians, hated by the existing military as new-comers and foreigners and feared by the populace as brutal enforcers of the caliph’s rule. There were many violent clashes and complaints to the caliph increased but in the end Mutasim preferred his loyal Turks and decided that if they were not welcome in the capital, then he would build a new one.
 In 835 the caliph decided to withdraw to a new purpose-built capital at Samarra. Large quantities of land were cheaply bought up on this virgin site on the east bank of the Tigris close to the Nahrawan canal eighty miles north of Baghdad. Much of this land was later sold on at a great profit as men of means looked to move north and obtain property close to the new seat of power. A new city of broad streets and open spaces took shape at Samarra, where the caliph settled down the following year, accompanied by his court and protected by his Ghulams.
Once ensconced in Samarra, Mutasim turned his mind to military matters. First on the agenda was the crushing of the rebel Babak, whose Khurramite followers had resisted the caliphs from their mountain strongholds for too long. The caliph entrusted the destruction of Babak to another outsider who had gained his trust. Far from being a nobody he was the former ruler of a small Soghdian principality named al-Afsin. Appointed as governor of Azerbaijan, al-Afsin would prove equal to the task of rooting the rebel out. He adopted a methodical approach and moved forward steadily into the mountains, taking control of one rebel stronghold at a time. Babak attempted to counter the invasion by targeting al-Afsin’s supply lines but al-Afsin succeeded in inflicting a series of significant defeats upon Babak who retreated back to his seemingly impregnable mountaintop fortress of Badd.
Babak's fortress still standsBabak’s revolt came to its bloody end in 837. Despite the difficulties of reaching the fortress of Badd which could only be approached in single file through a narrow defile, al-Afsin’s soldiers succeeded in storming the stronghold and overcoming its defenders. Babak and his few remaining followers slipped away into the forests but he was ultimately betrayed and run to ground. Paraded through the streets of Samarra on an elephant, Babak had his hands and feet cut off before being beheaded. His body was then publically displayed on a gibbet.
Whilst he had been consolidating his power, moving to his new capital and dealing with Babak, Mutasim had been intially receptive to Byzantine Emperor Theophilus’ overtures for peace that had fallen on the deaf ears of his brother. Theophilus had made use of the truce to renew hostilities with the Bulgars. Having achieved his objectives here however, the emperor had decided once more to go on the offensive. Theophilus had crossed the frontier in the summer of 837 at the head of an invading army. The former Khurramite rebel Theophobos and his Persian brigade marched with the emperor. Theophilus was eager to avenge his humiliation at the hands of Mamun and may also have been responding to a call for aid from Babak, although his intervention came too late to save the doomed rebel leader. The emperor’s forces reached the upper Euphrates and put the cities of Arsamosata and Zosopetra to the sack. Following this victory and in the aftermath of Babak’s defeat another sixteen thousand Khurramites fled to the empire and were both converted to Christianity and enrolled in Theophobos’ Persian brigade, bringing its total strength to thirty thousand men.
Mutasim vowed revenge upon Theophilus and in the following year led his armies in a campaign of reprisal, aimed at the destruction of the emperor’s ancestral hometown of Amorion. Whilst the caliph led his forces towards his target of Amorion, a second army under al-Afsin, fresh from his victory over Babak which had seen him showered with honours by the caliph, marched into Cappadocia.
Battle of Anzen - Madrid Skylitzes The armies of Theophilus and al-Afsin met in battle at Anzen. At first the battle went the way of the Byzantines as their right wing made progress and forced their enemies back. A well timed counterattack by Afsin’s Turkoman horse archers however threw the Byzantine right wing into chaos and, thinking themselves abandoned by their emperor, they routed. Theophilus found himself isolated and retreated to a hill top protected by those soldiers of the imperial Tagmata who had not fled along with some of the troops of Theophobos. Al-Afsin brought up his siege engines to batter at the defenders who were also showered by arrows by the horse archers. The wretched Byzantines were saved by the elements as it began to rain and at last night fell. In the night they slipped away.
Siege of Amorion from Madrid Skylitzes Mutasim meanwhile had advanced to his primary objective of Amorion, which he placed under siege. The victorious Al-Afsin joined him later. The city was well defended by a determined garrison and protected by a substantial moat. Mutasim ordered each soldier to kill a sheep and then stuff the skin with earth and rocks before hurling them into the moat. The soldiers enjoyed the roast mutton but were less keen on the barrage of missiles from the walls as they completed their task as swiftly as possible. The resultant filling in of the moat was somewhat haphazard and Mutasim’s siege engines sank into the ground when they attempted to approach the walls, to the delight of the defenders who promptly burned them. The caliph then received intelligence from a treacherous element within the city of a stretch of wall which had been poorly repaired with rubble and was not as solid as it appeared from the outside. Concentrating his artillery fire on this section, the caliph soon had his victory as the wall crumbled despite the defenders’ efforts to reinforce it. Amorion was brutally sacked, with some of the terrorised citizens burned alive in the church where they had sought refuge. On the long march home, laden down with booty and with the extra burden of thousands of captives taken as slaves from the populace, the army ran short of supplies, especially water. Six thousand low value captives are said to have been executed, whilst many more fell by the wayside and were abandoned. These poor buggers of little account were largely forgotten by posterity although another group of higher status prisoners who survived the death march but were later beheaded beside the Tigris for refusing to convert to Islam would be celebrated by the Byzantines as the 42 Martyrs of Amorion.
 The 42 martyrs are remembered by the Orthodox Church to this day
 As the army made its way back into Syria details emerged of a plot against the caliph and his Turkish favourites Itakh and Ashinas. The plan had been hatched amongst a number of commanders in the existing military to kill Mutasim and his Turkish commanders and to place Mamun’s son Abbas on the throne in his place. The conspirators took too long to act and their plot was betrayed to the caliph who took delight in having them all rounded up and given slow and unpleasant deaths; burying alive, drowning and starvation all featured. Abbas himself died of thirst in captivity. It was a bad business and the Turks, having had a narrow escape, appear to have resolved to get rid of anyone else who might pose a threat to them. This included Al Afsin; defeater of Babak, victor over the emperor himself. A rival of such standing and reputation could not be tolerated. A whispering campaign of rumours and accusations was started against him: He planned to murder the caliph, he planned to steal a vast sum of money and return to the east, he planned to overthrow the Tahirids in Khurasan and set himself up in their stead. In all likelihood none of it was true but the Turks finally turned the caliph against his best general. With no real evidence of any wrong-doing against him Al-Afsin was accused in 840 of apostasy; a capital crime. As a foreigner and recent convert to Islam it was an easy slur to make stick and Al-Afsin was found guilty despite demolishing the prosecution case. He died in custody and his body was exhibited on a gibbet outside the main gate of Samarra, another victim of poisonous intrigue at the Abbasid court.
A depiction of Afsin at the height of his powers Theophilus and Mutasim died just two weeks apart in January 842. Mutasim was aged forty six. He was succeeded by his thirty year old son Harun who as caliph Wathiq would rule isolated as from his subjects in the new capital, dependant for his security upon the Turks, who would grow ever more powerful. After a reign of only six years, Wathiq died from natural causes in 847. Affairs of state during Wathiq’s reign had been dominated by an alliance of senior bureaucrats and Turkish commanders and these men had decided amongst themselves to appoint his brother Jaffar, who took the caliphal name of Mutawwakil – ‘reliant upon God’. Jaffar had been an easy going character and was most likely seen by those who selected him as a suitable replacement puppet. If Caliph Wathiq had been the creature of his courtiers however then Caliph Mutawwakil was most certainly not and he soon moved against them, determined to assert the power that had been thrust upon him. The two most powerful, the vizier al Ziyyat and the Turkish general Itakh received comeuppances of poetic justice in keeping with their own vile deeds. Itakh had been enthusiastically involved in dishing out nasty deaths to those implicated in the plot against Mutasim and had subsequently had Mamun’s grandsons walled up and left to starve. His downfall was facilitated by the Tahirid governor of Baghdad, to whom the caliph had reached out as a powerful counter the Samarra cabal. Arrested in Baghdad on his way back from making the pilgrimage, Itakh had been loaded down with eighty pounds of chains like a Turkish Jacob Marley and left to die.  Uday's crude imitation left, the Nuremburg Maiden right The proudest possession of the vizier Muhammed ibn al Zayyat was a device known as atannur, used for persuading wealthy men who had fallen out of favour to part with their wealth. An oven-like wooden box with iron spikes, it featured a strangling cord which was placed around the prisoner’s neck to prevent him from wriggling around too much. In an ironic twist of fate, when al Zayyat fell from favour in 849 AD he was placed inside his own creation until he expired. Incidentally, the earliest surviving example of the medieval iron maiden was first used in Nuremburg in 1515 to extract a confession from a forger of coin. In a grim case of history coming full circle, a copy of the Nuremburg iron maiden was found amongst the possessions of Saddam Hussein’s sadistic son Uday. It was allegedly used as one of his motivational tools when in charge of the national football team. Whether Uday had ever heard of ibn al Zayyat is anyone’s guess.
Mutawwakil then, was a man determined to assert his own power and his agenda was truly sweeping. He embarked on a major shakeup of the political-religious landscape of the caliphate. The question of whether the word of God is eternal or created seems like an obscure point of theological debate to be mulled over by long bearded clerics in some shady corner of a mosque courtyard. Much like the monophysite and iconoclastic controversies across the border in the Byzantine Empire however, it had the capacity to mobilise large numbers of the populace onto the streets in riotous disorder. In reversing his official position from that of his predecessors, he appealed to many ordinary civilians who had resisted the imposition of the doctrine by his father and uncle. All at once those who the day before had been branded as heretics found themselves once more in tune with the establishment and vice versa with fortunes changing accordingly.
 Destruction of the tomb of Husayn
The new caliph went further still in 851 when he ordered the destruction of the shrine on the site of the tomb of Husayn, the martyred son of the fourth caliph Ali. The caliphs had maintained a tolerant attitude towards the Alids since Mamun’s murder of the eighth imam Ali al Ridha. Now that attitude hardened. Mutawwakil would no longer tolerate the Shia viewpoint of condemning the first three caliphs for usurping the rights of Ali and neither would he permit the veneration of Husayn’s memory. He ordered the site of Husayn’s tomb to be obliterated and the land to be ploughed. The schism in Islam had been there from the moment that the Prophet’s cousin had been passed over as his successor but with this act it yawned wider than ever. The monument would be restored shortly after the caliph’s death. A series of petty decrees against Jews and Christians followed, including requiring them to identify themselves by yellow patches on their clothing. Mutawwakil was perhaps courting the support of the orthodox masses but certainly he intended to fulfil his job description. He was the Deputy of God and he was going to Command the Faithful.
Mutawwakil’s true passion however was building on a Ramses-esque scale. A vast extension of Samarra including no less than twenty palaces and the largest mosque yet built failed to satisfy his ambitions and construction of a whole new capital bearing his own name was begun to the north. A surveying error ensured that the canal upon which twelve thousand workers toiled in order to bring water to the new city was ineffectual and the construction was doomed to be consumed by the desert. Mutawwakil has left posterity one monument. The fortress-like outer walls, bristling with forty four towers and unique spiral Malwiya minaret of his great mosque in Samarra still stand. The minaret is fifty two metres tall and remains an iconic piece of architecture. It survived a bomb blast in 2005 which damaged the upper storey.
 The Great Mosque at Samarra
 The caliph had made some bold decisions but in the matter of the succession he made the same mistake as Harun al-Rashid; the calamitous consequences of which would fall upon his own head. Quite why Mutawwakil failed to heed the lessons of his own family history is a mystery. Doubtless he intended to live for much longer than he did. He had three sons whom he considered worthy and like al-Rashid he determined that they would succeed each other in turn, with each taking control of large territories during their father’s lifetime, which they would hold onto thereafter. Each brother naturally swore to respect the rights of the others. It was, of course, a recipe for a repeat disaster and this time had the added factor of the rapacious Turks.
The caliph had done little in real terms to reduce the power of the Turks and they still controlled the military and the palace guard. In Samarra the caliph was dependent upon them for his safety and therefore also at their mercy. Mutawwakil’s father Mutasim had raised up his private army of Turkish former slaves safe in the knowledge that they would be fools to bite the hand that fed them and so he had been able to depend upon their loyalty and sleep well at night. Like the Praetorian Guard of old Rome however, the Turks would find it a short step from trusted guardians to kingmakers. The surviving member of the Turkish old guard Wasif had reason to fear that the caliph might move against him and Mutawwakil had by his succession arrangements created factions in his court which the crafty Turk could exploit. The caliph sealed his own fate when he began to change his attitude towards his eldest son and heir Muntasir who, for whatever reason, had fallen out of his father’s favour. Muntasir had been publically mocked by his father and when his younger brother Mutazz, whose mother was the caliph’s favourite and well placed to advance her son’s cause, was preferred to lead the Friday prayers the writing appeared to be on the wall. Mutazz was known to be closer to the anti-Turkish faction at court, who had also lobbied the caliph for his preferment. Those Turks who either feared losing the caliph’s favour or looked to Muntasir as the guarantor of their futures decided to act before their man was removed from the succession and their own positions, which they expected to pass to their sons, came under threat. It was time for the Turks to remove the independently minded Mutawwakil with his new ideas and replace him with their preferred candidate, who would owe them his gratitude for saving him from being pushed aside in favour of his brother.
 Mutawwakil is struck down - Historie Islamique - actual attack was indoors at night
 On a winters’ evening in 861 the caliph was drinking late into the night with his favourite companions. His eldest son Muntasir had excused himself early once his father was well in his cups. While most of the palace slept, all the doors and gates were barred save one that led to the riverbank. Through this door a party of assassins, including four sons of Wasif, were admitted and made their way to the chamber where the caliph and his favourite were reclining, accompanied only by a few attendants. The commander of the caliph’s bodyguard was in on the plot and he joined the attackers as they burst in with drawn swords. The caliph and his favourite were cut down in moments and the bloody deed was done. The power of the Turks had been unmasked and there was no putting this particular genie back in the bottle. Having slain his father, the Turks oversaw the succession of Muntasir and faced with the fait accompli his brothers gave their oaths of allegiance to the new caliph. Four months later they were both arrested and forced to renounce their claims to the caliphate on the insistence of the Turks. Just two months after this Muntasir sickened and died. Perhaps he ate something that disagreed with him?
The conspirators installed a suitable puppet in the form of Muntasir's cousin Mustain. The power of the Turks was now absolute, they even saw a Turk appointed to the Vizierate - a position which had always been the preserve of Persian/Arab bureaucracy. Expectations amongst the rank and file were high however and their demands were insatiable. The Turks now held the keys to the caliphate but they were about to discover that taking power and holding onto it were two different things.
To be continued...
Nice page on the Great Mosque of Samarra
http://socks-studio.com/2014/02/11/the-field-and-the-wall-the-great-mosque-of-samarra/
This is part of my Getting Medieval series - enjoy from the beginning here
http://slingsandarrowsblog.blogspot.co.uk/p/getting-medieval.html
December 28, 2015
Carry on up the Northwest Passage - Part Three
Happy New Year, Readers. Well here we are in 2016 and I'm going to kick off another year of blogging by concluding my Christmas Polar Special on the northwest passage. Parts One and Two here and here. We resume our tale in 1829 when, with the admiralty short of funds, the next assault on the passage came from an unlikely quarter in the form of John Ross, who had spent the last decade in obscurity trying to recover his reputation following the Lancaster Sound debacle.
Ross obtained funding from a private investor Felix Booth, whose family had made their fortune from supplying the Dickensian masses with gin. Through his patronage of Ross, Booth would gain respectability and ultimately end up as a baronet with a chunk of the Arctic named after him. Ross set out for the northwest passage aboard the Victory, a former whaler with the prerequisite robustness for the Arctic, which was fitted out with an experimental steam engine and paddles. The benefits of steam power in the tricky waters of the Arctic were self evident but the hopelessly unreliable engine would in the end be abandoned to rust on a distant shore when all aboard declared themselves sick of the thing.
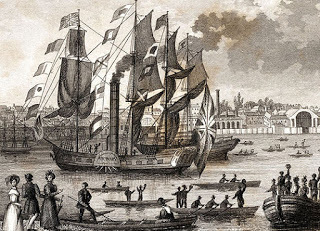 Victory on the Thames
Ross spent no less than four winters in the Arctic. Penetrating deep into Prince Regent Inlet he reached the body of water he named the Gulf of Boothia, hemmed in to its west by the peninsula he named Boothia Felix. Here too the Victory would ultimately also be abandoned. The Arctic had lured the Victory into its depths during the mild winter of 1829 and then trapped it as the gulf remained frozen through the next summer and the next and the next. In the end the ship had to be abandoned and the crew trekked overland, dragging boats behind them to reach the beach where Parry had dumped the supplies of the wrecked Fury. Here they spent the winter of 1832 in a cabin they named Somerset House, eking out their rations and catching what game they could. Only a single man, the carpenter, was lost to scurvy though all suffered its effects. Finally in the following spring they were able to make their way out through Lancaster Sound in small boats and were picked up by a passing whaler, which turned out ironically to be the Isabella, Ross' 1819 flagship.
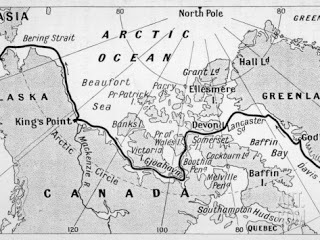 Map of NW Passage with Amundsen's successful 1903-6 route shown
There had been some successes. James Ross, who had accompanied his uncle, had led summer sledging expeditions which had crossed Boothia Felix and passed over the frozen sea on the far side to reach King William Island, although Ross believed himself to have been passing over land throughout. On his travels he discovered the North Magnetic Pole on the western coast of Boothia and sighted open water from Victory Point - his furthest west, on the northwest shore of King William Island.
Meanwhile, a search party organised by James' father George Ross sent Lt. George Back, veteran of Franklin's expeditions and a favourite of Barrow, down the Great Fish River to reach Chantry Inlet at the bottom of the Gulf of Boothia. By the time he got there, having upset numerous officers of the Hudson's Bay Company along the way, the Rosses had returned as grizzled heroes. The younger Ross in particular was covered with glory. His uncle, it was alleged, had lurked morosely in his cabin whilst young James had boldly ventured where no man had gone before with his sledging teams. Ross' arch enemy Barrow did much to perpetuate this version of events.
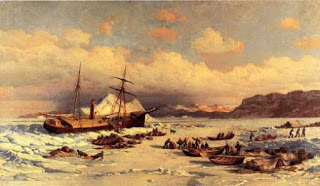 Abandonment of the Victory by William Bradford In the latter half of the decade the Hudson's Bay Company were finally stirred out of their torpor by their irritation at Back's high handed manner and a sense of frustration with what they saw as the admiralty's bungling and overcomplicated approach to what they saw as a straightforward problem. The company sent a number of successful expeditions in small boats to chart practically all of the northern coastline from the Mackenzie River to the Gulf of Boothia but they too made the same mistake as James Ross in presuming King William Island to be part of Boothia. This in turn informed misguided admiralty opinion that the northwest passage would be achieved by passing to the west of King William Island and thence, conditions allowing, towards the open water sighted by Ross and onwards to the Pacific. Alas in truth these waters were an icy deathtrap from which no ship could escape. The only safe route, such as it was, was to be accomplished by passing to the east of King William Island and through the strait between the island and the mainland. The trouble was, everyone assumed this to be dry land.
In an attempt to further illuminate this poorly understood and critical corner of the Arctic, George Back had been dispatched by Barrow in 1836 aboard the bomb ship Terror on a repeat of Lyon's failed expedition to reach the northern coast overland from Repulse Bay. He came back having failed in much the same manner as Lyon, having met with atrocious weather and with the Terror a virtual wreck.
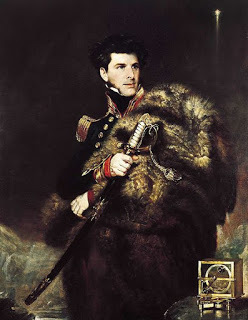 James Ross - polar hero - note the dipping needle used to locate the magnetic north pole Further attempts on the passage were once more put on hold and instead in 1838 a grand new venture to the Antarctic was in the offing, headed up by man of the moment James Ross. HMS Terror was patched up and would be commanded by Lt Francis Crozier, a veteran of Parry's expeditions, whilst Ross took over her sister ship HMS Erebus. The expedition was a tour-de-force and more blanks on the admiralty charts could be filled in with details of the Ross Sea, the Ross Ice Shelf, Mount Erebus etc. Ross returned in 1843 once more covered with glory though he himself was disappointed that he had not achieved more, in particular he had failed to locate the southern magnetic pole to complete the set. Ross would have been the obvious choice to command the next and hopefully final assault on the northwest passage but he was burnt out having spent much of the past twenty years in Arctic service. The honour therefore fell to Sir John Franklin, who had recently returned from a miserable tenure as governor of Van Diemen's Land.
So the stage was set for the disaster that was the Franklin expedition of 1845; the last to be sent out by Sir John Barrow. With high expectations and enough supplies for five years in the ice, Franklin set out in HMS Erebus with Crozier commanding HMS Terror. The ships were last seen by whalers at the entrance to Lancaster Sound and until 2014 when the wreck of the Erebus was dramatically discovered on the seabed off King William Island, that was the last anyone saw of them.
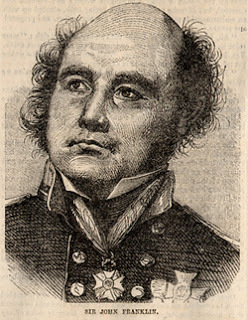 Franklin was 60 years old by the time of his last attempt at the NWP It was a few years before anyone started to worry, after all, Sir John Ross had been gone for four years and Trafalgar veteran and living legend Franklin was famous as 'the man who ate his boots'. Surely he was indestructible? Eventually however, with no sign of Erebus and Terror and with much agitation from Franklin's indomitable wife Lady Jane, the search began. Sir John Ross, now in his seventies, was the first to volunteer. Between 1848 and 1855 over twenty ships were sent in search of Franklin. Five were abandoned in the ice. Franklin's would-be rescuers could not be accused of not trying. Amongst the schemes attempted were the release of balloons carrying messages with details of the location of the search ships and of caches of supplies that were left behind. Similarly brass buttons with messages were given to any Inuit they encountered and inscribed collars were fitted to Arctic foxes which were captured and released in the hope that one of the Franklin party might bag one for dinner. Some of the rescuers did however lose sight of the primary mission.
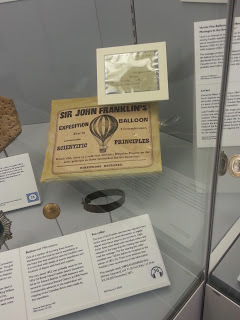 A balloon, button and fox collar from the Franklin search in the Polar Museum Cambridge - my pic.
In the course of the search, the crew of one ship, HMS Investigator under the tyrannical Captain McClure, completed the northwest passage after a fashion. The Investigator had entered through the Bering Strait and then attempted to pass through Prince of Wales Strait between Victoria Island and Banks Island. Failing here and almost being wrecked in a ferocious storm, McClure then tried to make it around the western coast of Banks Island, which had been sighted by Parry in 1820 but never explored, and became trapped in the ice. His sledging parties did reach Melville Island however, where Parry had overwintered. The search for Franklin was forgotten and McClure became fixated on the passage. When rescue finally arrived from the search parties to the east, McClure tried to convince them that all was well. One look at his crew, dying from starvation and scurvy, convinced the horrified medical officer from the rescue ship HMS Resolute, which had entered from the Atlantic side, that the situation was hopeless and the crew travelled by sledge to the Resolute, thereby becoming the first to travel from the Pacific to the Atlantic via the Arctic.
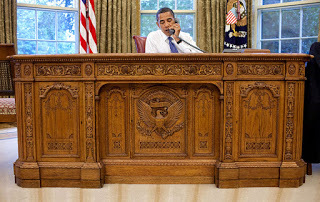 President Obama sits behind a piece of Arctic history - Wikipedia commons HMS Resolute would itself ultimately be abandoned off Melville Island and both crews made their escape eastwards. The Resolute was later salvaged and some of its timbers were made into a desk which was presented to President Hayes by Queen Victoria in 1880. It is still used by the President of the US today. After all that, no-one was any the wiser about what had happened to Franklin's expedition. His 1845 winter base on Beechey Island had been found along with the graves of three men but no message had been left and where Franklin had gone after that first winter remained a mystery.
The puzzle was at least partially solved by an overland expedition sent by the Hudson's Bay Company. They spoke with Inuit who had encountered a party of forty of Franklin's men who had dragged themselves inland to try to follow the Great Fish River northward to salvation. There was no game to be had at that time and according to the Inuit the desperate survivors had resorted to cannibalism before succumbing to starvation. A few items bearing the initials of crew members were handed over by way of proof. Lady Jane Franklin was having none of it and privately raised funds for another expedition led by Commander McClintock in the Fox.
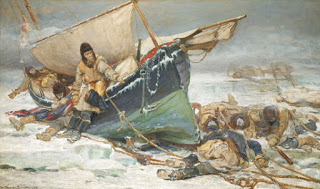 This 1895 Painting by Thomas Smith imagines the end of the Franklin expedition survivors
The Fox reached the eastern coast of Boothia in 1858 and McClintock reached King William Island by sledge the following year. Here they found heaps of abandoned supplies, the remains of three of Franklin's men and at James Ross' Victory Point they found the only message ever retrieved from the Franklin expedition. It had been left in 1848 by Crozier, written on the margin of an earlier message stating that all was well from the previous year. It confirmed that the ships had been abandoned off the west coast of King William Island after two years trapped in the ice. The message also recorded that 24 out of the 133 crew of Erebus and Terror had died and that Sir John Franklin had been amongst their number. It stated that the survivors were heading inland to follow the Great Fish River.
Two factors above all had most likely done for the expedition. Firstly they had sailed the wrong side of King William Island into an unescapable ice trap. Secondly, modern autopsies conducted on the well preserved corpses buried back on Beechey Island revealed lethally high levels of lead poisoning from the lead cans used for the storing the expedition's supplies. With no hope of escape and understanding perhaps that something in their supplies was slowly killing them, the crews had embarked on a desperate march southwards which none had survived. So had ended the dreams of a bold generation of explorers. Landseer's bleak 1864 painting of two polar bears tearing at wreckage summed up the glum mood surrounding the fate of Franklin and hinted at the dark rumours of cannibalism that had outraged Victorian sensibilities. Franklin himself was lauded as a fallen hero and posthumously promoted to Rear Admiral.
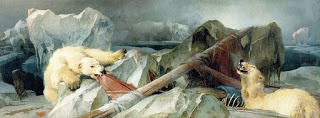 Man Proposes God Disposes by Landseer 1864
As for the northwest passage, it would remain unconquered for another half century until a certain Roald Amundsen finally succeeded in passing through it on the Gjoa expedition of 1903-06. It was primarily a scientific expedition in a small ship with a crew of just seven and Amundsen refused to be hurried. In mild conditions Amundsen had been the first man since Franklin to sail down Peel Sound to reach King William Island and set up base on the south-eastern coast at the point now known as Gjoa Haven. Here they spent the next two years in exploratory expeditions and diligent scientific observations. Amundsen succeeded in relocating the north magnetic pole in a different location to that in which James Ross had found it in 1830, proving that it was not fixed. In the summer of 1905 the Gjoa sailed westwards, following the passage along the northern coast to emerge on the Pacific side in the Beaufort Sea. Here he overwintered at Herschel Island, from where he was able to travel inland by dog sled to Eagle City, Alaska, from where he telegraphed the news that the northwest passage had at last been conquered - by a Norwegian - Sir John Barrow would have been turning in his grave.
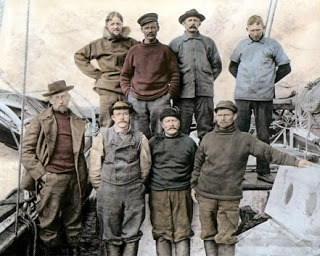 Amundsen and the crew of the Gjoa - eventual conquerors of the passage
The Gjoa expedition
http://www.frammuseum.no/Polar-Expedition/The-Northwest-Passage-(1903-1906).aspx
Erebus rediscovered
http://www.pc.gc.ca/eng/culture/franklin/index.aspx
Ross obtained funding from a private investor Felix Booth, whose family had made their fortune from supplying the Dickensian masses with gin. Through his patronage of Ross, Booth would gain respectability and ultimately end up as a baronet with a chunk of the Arctic named after him. Ross set out for the northwest passage aboard the Victory, a former whaler with the prerequisite robustness for the Arctic, which was fitted out with an experimental steam engine and paddles. The benefits of steam power in the tricky waters of the Arctic were self evident but the hopelessly unreliable engine would in the end be abandoned to rust on a distant shore when all aboard declared themselves sick of the thing.
 Victory on the Thames
Ross spent no less than four winters in the Arctic. Penetrating deep into Prince Regent Inlet he reached the body of water he named the Gulf of Boothia, hemmed in to its west by the peninsula he named Boothia Felix. Here too the Victory would ultimately also be abandoned. The Arctic had lured the Victory into its depths during the mild winter of 1829 and then trapped it as the gulf remained frozen through the next summer and the next and the next. In the end the ship had to be abandoned and the crew trekked overland, dragging boats behind them to reach the beach where Parry had dumped the supplies of the wrecked Fury. Here they spent the winter of 1832 in a cabin they named Somerset House, eking out their rations and catching what game they could. Only a single man, the carpenter, was lost to scurvy though all suffered its effects. Finally in the following spring they were able to make their way out through Lancaster Sound in small boats and were picked up by a passing whaler, which turned out ironically to be the Isabella, Ross' 1819 flagship.
 Map of NW Passage with Amundsen's successful 1903-6 route shown
 There had been some successes. James Ross, who had accompanied his uncle, had led summer sledging expeditions which had crossed Boothia Felix and passed over the frozen sea on the far side to reach King William Island, although Ross believed himself to have been passing over land throughout. On his travels he discovered the North Magnetic Pole on the western coast of Boothia and sighted open water from Victory Point - his furthest west, on the northwest shore of King William Island.
Meanwhile, a search party organised by James' father George Ross sent Lt. George Back, veteran of Franklin's expeditions and a favourite of Barrow, down the Great Fish River to reach Chantry Inlet at the bottom of the Gulf of Boothia. By the time he got there, having upset numerous officers of the Hudson's Bay Company along the way, the Rosses had returned as grizzled heroes. The younger Ross in particular was covered with glory. His uncle, it was alleged, had lurked morosely in his cabin whilst young James had boldly ventured where no man had gone before with his sledging teams. Ross' arch enemy Barrow did much to perpetuate this version of events.
 Abandonment of the Victory by William Bradford In the latter half of the decade the Hudson's Bay Company were finally stirred out of their torpor by their irritation at Back's high handed manner and a sense of frustration with what they saw as the admiralty's bungling and overcomplicated approach to what they saw as a straightforward problem. The company sent a number of successful expeditions in small boats to chart practically all of the northern coastline from the Mackenzie River to the Gulf of Boothia but they too made the same mistake as James Ross in presuming King William Island to be part of Boothia. This in turn informed misguided admiralty opinion that the northwest passage would be achieved by passing to the west of King William Island and thence, conditions allowing, towards the open water sighted by Ross and onwards to the Pacific. Alas in truth these waters were an icy deathtrap from which no ship could escape. The only safe route, such as it was, was to be accomplished by passing to the east of King William Island and through the strait between the island and the mainland. The trouble was, everyone assumed this to be dry land.
In an attempt to further illuminate this poorly understood and critical corner of the Arctic, George Back had been dispatched by Barrow in 1836 aboard the bomb ship Terror on a repeat of Lyon's failed expedition to reach the northern coast overland from Repulse Bay. He came back having failed in much the same manner as Lyon, having met with atrocious weather and with the Terror a virtual wreck.
 James Ross - polar hero - note the dipping needle used to locate the magnetic north pole Further attempts on the passage were once more put on hold and instead in 1838 a grand new venture to the Antarctic was in the offing, headed up by man of the moment James Ross. HMS Terror was patched up and would be commanded by Lt Francis Crozier, a veteran of Parry's expeditions, whilst Ross took over her sister ship HMS Erebus. The expedition was a tour-de-force and more blanks on the admiralty charts could be filled in with details of the Ross Sea, the Ross Ice Shelf, Mount Erebus etc. Ross returned in 1843 once more covered with glory though he himself was disappointed that he had not achieved more, in particular he had failed to locate the southern magnetic pole to complete the set. Ross would have been the obvious choice to command the next and hopefully final assault on the northwest passage but he was burnt out having spent much of the past twenty years in Arctic service. The honour therefore fell to Sir John Franklin, who had recently returned from a miserable tenure as governor of Van Diemen's Land.
So the stage was set for the disaster that was the Franklin expedition of 1845; the last to be sent out by Sir John Barrow. With high expectations and enough supplies for five years in the ice, Franklin set out in HMS Erebus with Crozier commanding HMS Terror. The ships were last seen by whalers at the entrance to Lancaster Sound and until 2014 when the wreck of the Erebus was dramatically discovered on the seabed off King William Island, that was the last anyone saw of them.
 Franklin was 60 years old by the time of his last attempt at the NWP It was a few years before anyone started to worry, after all, Sir John Ross had been gone for four years and Trafalgar veteran and living legend Franklin was famous as 'the man who ate his boots'. Surely he was indestructible? Eventually however, with no sign of Erebus and Terror and with much agitation from Franklin's indomitable wife Lady Jane, the search began. Sir John Ross, now in his seventies, was the first to volunteer. Between 1848 and 1855 over twenty ships were sent in search of Franklin. Five were abandoned in the ice. Franklin's would-be rescuers could not be accused of not trying. Amongst the schemes attempted were the release of balloons carrying messages with details of the location of the search ships and of caches of supplies that were left behind. Similarly brass buttons with messages were given to any Inuit they encountered and inscribed collars were fitted to Arctic foxes which were captured and released in the hope that one of the Franklin party might bag one for dinner. Some of the rescuers did however lose sight of the primary mission.
  A balloon, button and fox collar from the Franklin search in the Polar Museum Cambridge - my pic.
In the course of the search, the crew of one ship, HMS Investigator under the tyrannical Captain McClure, completed the northwest passage after a fashion. The Investigator had entered through the Bering Strait and then attempted to pass through Prince of Wales Strait between Victoria Island and Banks Island. Failing here and almost being wrecked in a ferocious storm, McClure then tried to make it around the western coast of Banks Island, which had been sighted by Parry in 1820 but never explored, and became trapped in the ice. His sledging parties did reach Melville Island however, where Parry had overwintered. The search for Franklin was forgotten and McClure became fixated on the passage. When rescue finally arrived from the search parties to the east, McClure tried to convince them that all was well. One look at his crew, dying from starvation and scurvy, convinced the horrified medical officer from the rescue ship HMS Resolute, which had entered from the Atlantic side, that the situation was hopeless and the crew travelled by sledge to the Resolute, thereby becoming the first to travel from the Pacific to the Atlantic via the Arctic.
 President Obama sits behind a piece of Arctic history - Wikipedia commons HMS Resolute would itself ultimately be abandoned off Melville Island and both crews made their escape eastwards. The Resolute was later salvaged and some of its timbers were made into a desk which was presented to President Hayes by Queen Victoria in 1880. It is still used by the President of the US today. After all that, no-one was any the wiser about what had happened to Franklin's expedition. His 1845 winter base on Beechey Island had been found along with the graves of three men but no message had been left and where Franklin had gone after that first winter remained a mystery.
The puzzle was at least partially solved by an overland expedition sent by the Hudson's Bay Company. They spoke with Inuit who had encountered a party of forty of Franklin's men who had dragged themselves inland to try to follow the Great Fish River northward to salvation. There was no game to be had at that time and according to the Inuit the desperate survivors had resorted to cannibalism before succumbing to starvation. A few items bearing the initials of crew members were handed over by way of proof. Lady Jane Franklin was having none of it and privately raised funds for another expedition led by Commander McClintock in the Fox.
 This 1895 Painting by Thomas Smith imagines the end of the Franklin expedition survivors
The Fox reached the eastern coast of Boothia in 1858 and McClintock reached King William Island by sledge the following year. Here they found heaps of abandoned supplies, the remains of three of Franklin's men and at James Ross' Victory Point they found the only message ever retrieved from the Franklin expedition. It had been left in 1848 by Crozier, written on the margin of an earlier message stating that all was well from the previous year. It confirmed that the ships had been abandoned off the west coast of King William Island after two years trapped in the ice. The message also recorded that 24 out of the 133 crew of Erebus and Terror had died and that Sir John Franklin had been amongst their number. It stated that the survivors were heading inland to follow the Great Fish River.
Two factors above all had most likely done for the expedition. Firstly they had sailed the wrong side of King William Island into an unescapable ice trap. Secondly, modern autopsies conducted on the well preserved corpses buried back on Beechey Island revealed lethally high levels of lead poisoning from the lead cans used for the storing the expedition's supplies. With no hope of escape and understanding perhaps that something in their supplies was slowly killing them, the crews had embarked on a desperate march southwards which none had survived. So had ended the dreams of a bold generation of explorers. Landseer's bleak 1864 painting of two polar bears tearing at wreckage summed up the glum mood surrounding the fate of Franklin and hinted at the dark rumours of cannibalism that had outraged Victorian sensibilities. Franklin himself was lauded as a fallen hero and posthumously promoted to Rear Admiral.
 Man Proposes God Disposes by Landseer 1864
As for the northwest passage, it would remain unconquered for another half century until a certain Roald Amundsen finally succeeded in passing through it on the Gjoa expedition of 1903-06. It was primarily a scientific expedition in a small ship with a crew of just seven and Amundsen refused to be hurried. In mild conditions Amundsen had been the first man since Franklin to sail down Peel Sound to reach King William Island and set up base on the south-eastern coast at the point now known as Gjoa Haven. Here they spent the next two years in exploratory expeditions and diligent scientific observations. Amundsen succeeded in relocating the north magnetic pole in a different location to that in which James Ross had found it in 1830, proving that it was not fixed. In the summer of 1905 the Gjoa sailed westwards, following the passage along the northern coast to emerge on the Pacific side in the Beaufort Sea. Here he overwintered at Herschel Island, from where he was able to travel inland by dog sled to Eagle City, Alaska, from where he telegraphed the news that the northwest passage had at last been conquered - by a Norwegian - Sir John Barrow would have been turning in his grave.
 Amundsen and the crew of the Gjoa - eventual conquerors of the passage
The Gjoa expedition
http://www.frammuseum.no/Polar-Expedition/The-Northwest-Passage-(1903-1906).aspx
Erebus rediscovered
http://www.pc.gc.ca/eng/culture/franklin/index.aspx
December 14, 2015
Carry on up the Northwest Passage - Part One
I'm not sure something can be called a tradition if you've only done it once but last Christmas I wrote a two part post about the Ross Sea expedition as a polar Christmas special. Yes I know Santa lives at the North Pole but you get the general idea. So as its nearly Christmas once more I thought I'd do another one and this time head north, so grab yourself a mince pie, turn up the heating and enjoy. This one's a three parter.
It baffles me to the point of incomprehension, how men of power in cosy English drawing rooms can have failed to grasp almost straight away after the first expeditions sent north to find it, the basic impracticability of the northwest passage as a trade route. Even if a route could be found through the ice clogged channels to reach the waters off the northern coast of Canada and if they were not found to be frozen solid, continue eastwards to emerge in the Pacific, it was never going to be an economic game-changer. Such an expedition would, if it were possible at all, only be accomplished during a short season and in most years would get nowhere near the fabled passage before being either repelled by the ice or finding itself trapped and forced to overwinter before trying again.
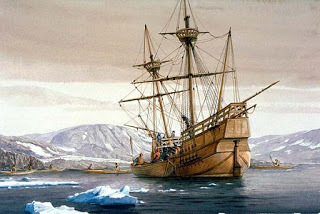 Frobisher's Gabriel 1576
With all this soon becoming apparent, it seems likely therefore that the repeated attempts at the conquest of the northwest passage were made with another primary motivation: That the passage should be completed as a feat of navigation in its own right and most importantly that the British should be the ones to do it.
The initial thrust into the unknown during the Age of Exploration gave rise to misplaced hopes that a new Eldorado lay in the frozen north. Explorer and dashing man about the Elizabethan court Martin Frobisher set out in search of the fabled passage in 1576 with three ships, of which only one, the Gabriel, made it to the southern end of Baffin Island, where five members of the crew put ashore only to be taken captive by the local Inuit. Frobisher failed to secure their release and they were never seen again. Undeterred by this encounter, Frobisher found some more friendly natives to serve as guides and returned to England with a mysterious piece of black rock, which was erroneously identified as gold ore. With riches in prospect, Frobisher formed the Cathay Company with the backing of Elizabeth I to return and collect more. Two further expeditions followed, establishing mines in Frobisher Bay. In all some 1300 tons of worthless ore was brought back to England where it was later identified as containing iron pyrites - fool’s gold. In the end it was used for surfacing roads.
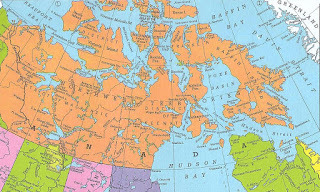 The north-west passage
Frobisher's fellow Devonian John Davis, who had the ear of Francis Walsingham, was the next to set out in search of the northwest passage in 1585. A thrust up Cumberland Sound found it to be merely an inlet of Baffin Island rather than a passage to the west. Two further expeditions followed in the next two years in which Davis sought to penetrate northward up the strait which now bears his name, reaching 72 degrees north before finding his way blocked by the ice. Davis mapped the western coast of Greenland and the southern extremities of Baffin island before discovering what would come to be known as Hudson Strait on his way back south. During his travels Davis developed his eponymous quadrant or back staff, for use in determining the angle of the sun above the horizon at noon and thereby one's latitude. This was a significant improvement on the existing cross staff which required the user to squint directly at the low polar sun in order to take a sighting, whereas the Davis Quadrant was used with one's back to the sun and aligned to the horizon whilst the shadow cast by the sun was used to obtain the angle required to calculate latitude. This not very exciting video sort of explains it.
 John Davis (left) holding his quadrant Davis, Frobisher and other stout hearted Englishmen were far too busy the following year giving a bloody nose to the Spanish Armada to worry about the northwest passage and it would be some thirty years before interest in the frozen north was rekindled. By this time James I was on the throne and the most accomplished explorer of the age was Henry Hudson. Hudson had been employed by the Dutch East India company in unsuccessfully trying to find a northeast passage around the northern coast of Russia and in probing the eastern coastline of North America, where he explored the river that now bears his name. In 1610 Hudson was somewhat forcibly persuaded to switch his allegiance to the English Muscovy Company and set out aboard the Discovery in search of the north-west passage. It would prove an ill fated voyage. Finding his way through the strait identified by Davis and into the large bay later named in his honour, Hudson began exploring and charting the coastline in search of a possible route westwards. As winter set in, the Discovery became trapped in the bay by the ice and Hudson and his crew became the first to overwinter in the Arctic. The ship was beached and the crew survived through the winter but when summer came around and Hudson declared his intention to continue searching for the passage he faced mutiny from a crew determined to return home rather than face further hardship. Hudson either was murdered in cold blood or set adrift in a small boat along with his son and a number of other loyal crew members as the mutineers maintained. None of them was ever seen again. The ship returned home with just eight crew, all of whom faced murder charges but all were acquitted and two even later returned to Hudson's bay on the Discovery in 1612, so common sense rather than cowardice must have been the motivation for their actions against Hudson as the court accepted. On its next mission Discovery explored much of the remainder of the bay and overwintered again. The accompanying ship Resolution was crushed in the ice and the scurvy-riddled survivors returned on the Discovery to announce that the bay contained no route to the west.
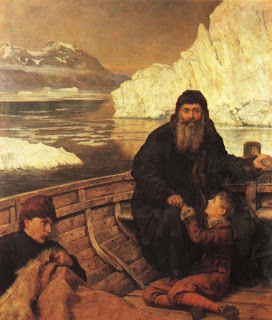 Hudson set adrift by John Maler Collier 1881 With Hudson's Bay seemingly a dead end, the Company of Merchants of London decided that the search for the passage should be directed further to the north and east. The Discovery was once more pressed into service and placed under the command of Hudson mutineer and now Arctic veteran Robert Bylot. He was joined by pilot William Baffin, who had been recently employed by the King of Denmark in searching for evidence of Danish Viking settlement on Greenland to strengthen that monarch's claim to the territory. In two summer expeditions in 1615 and 1616, avoiding overwintering, the Discovery probed first to the north of Southampton Island at the top of Hudson's Bay and then, believing the area to be entirely enclosed by land, forged up Davis Strait in the following summer, charting more of the west coast of Greenland before reaching a new landmark of 77 degrees north at Baffin Bay. They identified three ice clogged channels between the islands at its northern end, one of which, Smith Sound headed north and the other two, Jones Sound and Lancaster Sound, headed west. Baffin and Bylot considered the passages, which they had named in honour of their sponsors, unpromising and turned for home, charting the eastern coast of Baffin Island as they went. It would be another two centuries before an expedition ventured into such far-flung parts and when they did so they would be impressed by the accuracy of Baffin's observations, which included the earliest known determination of longitude by the lunar distance method.
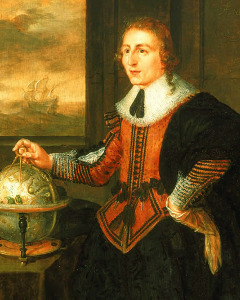 William Baffin The focus of efforts now returned to Hudson's Bay and its environs. As rival merchant companies in London and Bristol began to appreciate that the area might yield up profit in trade and petitioned the crown for rights to exploit whatever resources were found. Two rival expeditions set out in 1631. Luke Foxe of London set out in the Charles, named in honour of the new king whilst Thomas James of Bristol set out in the Henrietta Maria named in honour of his queen. Both explored the bay separately before Foxe probed to the north, sailing into the body of water now known as Foxe Basin to the west of Baffin Island. Having assessed the motion of the tides, Foxe concluded that they flowed in from the south-east and decided to go no further, assuming that no passage westwards would be found further into the bay. Following this he headed for home with all his crew alive and well. The Henrietta Maria meanwhile elected to remain in Hudson's Bay overwinter. The ship was deliberately sunk in shallow water and the crew built cabins on land. They endured a harsh winter and many died from the effects of cold and scurvy. Refloating the ship in the following spring they set out for home but the ice still abounded in their path and the ship struggled for twenty days through floes that threatened constantly to sink it. She was leaking badly and the men manned the pumps constantly. At night the ship was anchored to a large floe and would be battered through the night whilst the crew were in terror of being sunk. James' account of the ordeal would later inspire Coleridge's Rime of the Ancient Mariner.
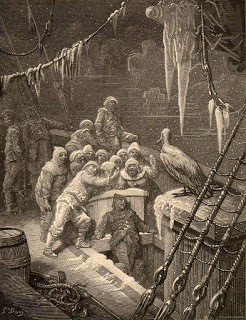 Gustav Dore illustration from the Rime of the Ancient Mariner
Sometimes when we had made her fast in the night to a great piece of ice we should have such violent storms that our fasting would break and then the storm would beat us from piece to piece most fearfully. Otherwhile we should be fast enclosed amongst great ice as high as our poop... Amongst these several and hourly dangers I heard men murmur and say that they were happy that I had buried and that if they had a thousand pounds they would give it, so they could lay fairly by them. For we, they say, are destined to starve upon a piece of ice.
From The Strange and Dangerous Voyage of Thomas James 1633.
Such tales of woe dampened enthusiasm for sending voyages of exploration into the uncharted, frozen north in search of the fabled passage but the lure of profits to be had from the fur trade ensured that Hudson's Bay was now firmly on the map. The Hudson's Bay Company was established by royal charter in 1670, building their headquarters at the mouth of the Hayes River. It was named York Factory in honour of the Duke of York and here native trappers traded furs in exchange for rifles, metal tools, glass beads and in particular, somewhat ironically given the locals' ready supply of furs, patterned woollen blankets. All of this was a great affront to the French who up until this point had dominated the fur trade from their outposts in Quebec and when war broke out between Britain and France following the Glorious Revolution the French began seizing the company's trading posts, which changed hands several times.
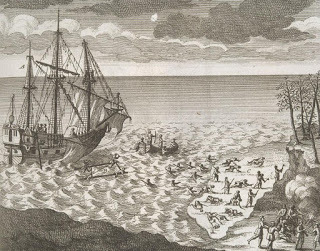 The wreck of the Pelican
The Battle of Hudson's Bay was fought in 1697 between French and British squadrons when the French attempted to capture York Factory. The French flagship Pelican lost its consorts in thick fog and found itself engaged by the three ship British squadron. Pelican was being pounded into submission with blood running from her scuppers when a lucky shot detonated the magazine of the British flagship Hampshire sending it straight to the bottom. The remaining British ships surrendered and fled respectively but Pelican was so badly damaged that it too sunk. The victorious French somewhat ignominiously waded ashore and took control of York factory. In 1713 it was ceded back to Britain at the conclusion of the War of the Spanish Succession with the Hudson's Bay Company having sole rights to the fur trade in the region.
Hudson's Bay may have been back in British hands but the company saw no profits to be had from exploration and showed no inclination to spend money sending ships and men off in search of the northwest passage. The quest for the passage was finally reignited in 1741 when it found a champion in the form of Arthur Dobbs; a member of the Irish landed gentry who became a major landowner in North Carolina and later served as its governor. Dobbs was both a man with an eye to a profit and an intellectual who wished to see the geographical secrets of the north unlocked. He felt the Hudson's Bay Company were not fulfilling their duties in the field of exploration and agitated in parliament for them to lose their monopoly unless they did more. Competition, Dobbs argued, would stimulate exploration.
 Arthur Dobbs
The result was a pair of bad tempered naval expeditions sent to scout the narrow passage known as Roe's Welcome Sound at the north-west corner of Hudson Bay passing between Southampton Island and the mainland and leading into Foxe Basin. Two ships, a converted collier named Discovery and a bomb vessel named Furnace were dispatched in 1742 under the command of two former Hudson's Bay Company men, cousins Christopher Middleton and William Moor. Having explored two ice-clogged inlets named Wager Bay and Repulse Bay and found their further progress blocked by ice the ships returned to report that neither offered a passage westwards. Dobbs was unimpressed and refused to accept expedition commander Middleton's findings. Moor at first supported Middleton and then came around to Dobbs' viewpoint when the command of a second expedition was proffered. Moor returned to Wager Bay in the Furnace in 1746-7 in company with the California under Francis Smith. Over a miserable winter iced in at York Factory the two fell out and several men died of scurvy. The following season the two ships explored separately, concluded that Wager Bay ended in two small, unnavigable rivers and returned home in disappointment. The Hudson's Bay Company's views on the futility of further exploration had been reinforced and the admiralty were inclined to agree. Moor remained a supporter of Dobbs but he was largely discredited and in 1749 a debate in parliament ended in a vote against Dobb's motion to repeal the company's monopoly.
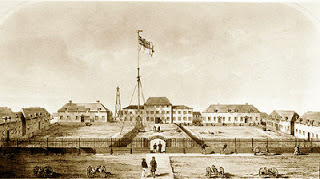 A 19th Century view of York Factory
If there was a north-west passage to found, everyone was now forced to admit, it lay further to the north and was probably impenetrable. For the time being there was no more appetite to search for it and it remained, if it existed at all, a blank on the map.
To be continued...
The Hudson's Bay Company
http://firstpeoplesofcanada.com/fp_furtrade/fp_furtrade3.html
It baffles me to the point of incomprehension, how men of power in cosy English drawing rooms can have failed to grasp almost straight away after the first expeditions sent north to find it, the basic impracticability of the northwest passage as a trade route. Even if a route could be found through the ice clogged channels to reach the waters off the northern coast of Canada and if they were not found to be frozen solid, continue eastwards to emerge in the Pacific, it was never going to be an economic game-changer. Such an expedition would, if it were possible at all, only be accomplished during a short season and in most years would get nowhere near the fabled passage before being either repelled by the ice or finding itself trapped and forced to overwinter before trying again.
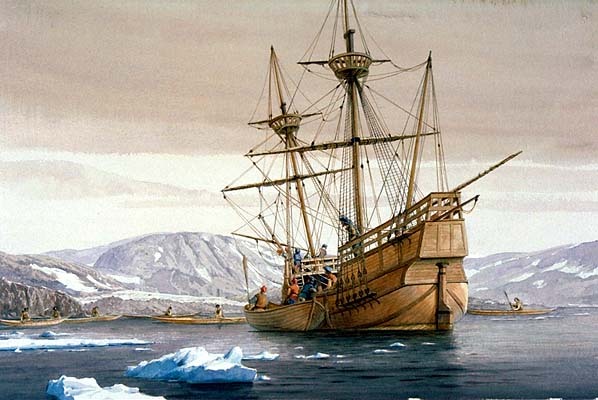 Frobisher's Gabriel 1576
With all this soon becoming apparent, it seems likely therefore that the repeated attempts at the conquest of the northwest passage were made with another primary motivation: That the passage should be completed as a feat of navigation in its own right and most importantly that the British should be the ones to do it.
The initial thrust into the unknown during the Age of Exploration gave rise to misplaced hopes that a new Eldorado lay in the frozen north. Explorer and dashing man about the Elizabethan court Martin Frobisher set out in search of the fabled passage in 1576 with three ships, of which only one, the Gabriel, made it to the southern end of Baffin Island, where five members of the crew put ashore only to be taken captive by the local Inuit. Frobisher failed to secure their release and they were never seen again. Undeterred by this encounter, Frobisher found some more friendly natives to serve as guides and returned to England with a mysterious piece of black rock, which was erroneously identified as gold ore. With riches in prospect, Frobisher formed the Cathay Company with the backing of Elizabeth I to return and collect more. Two further expeditions followed, establishing mines in Frobisher Bay. In all some 1300 tons of worthless ore was brought back to England where it was later identified as containing iron pyrites - fool’s gold. In the end it was used for surfacing roads.
 The north-west passage
Frobisher's fellow Devonian John Davis, who had the ear of Francis Walsingham, was the next to set out in search of the northwest passage in 1585. A thrust up Cumberland Sound found it to be merely an inlet of Baffin Island rather than a passage to the west. Two further expeditions followed in the next two years in which Davis sought to penetrate northward up the strait which now bears his name, reaching 72 degrees north before finding his way blocked by the ice. Davis mapped the western coast of Greenland and the southern extremities of Baffin island before discovering what would come to be known as Hudson Strait on his way back south. During his travels Davis developed his eponymous quadrant or back staff, for use in determining the angle of the sun above the horizon at noon and thereby one's latitude. This was a significant improvement on the existing cross staff which required the user to squint directly at the low polar sun in order to take a sighting, whereas the Davis Quadrant was used with one's back to the sun and aligned to the horizon whilst the shadow cast by the sun was used to obtain the angle required to calculate latitude. This not very exciting video sort of explains it.
 John Davis (left) holding his quadrant Davis, Frobisher and other stout hearted Englishmen were far too busy the following year giving a bloody nose to the Spanish Armada to worry about the northwest passage and it would be some thirty years before interest in the frozen north was rekindled. By this time James I was on the throne and the most accomplished explorer of the age was Henry Hudson. Hudson had been employed by the Dutch East India company in unsuccessfully trying to find a northeast passage around the northern coast of Russia and in probing the eastern coastline of North America, where he explored the river that now bears his name. In 1610 Hudson was somewhat forcibly persuaded to switch his allegiance to the English Muscovy Company and set out aboard the Discovery in search of the north-west passage. It would prove an ill fated voyage. Finding his way through the strait identified by Davis and into the large bay later named in his honour, Hudson began exploring and charting the coastline in search of a possible route westwards. As winter set in, the Discovery became trapped in the bay by the ice and Hudson and his crew became the first to overwinter in the Arctic. The ship was beached and the crew survived through the winter but when summer came around and Hudson declared his intention to continue searching for the passage he faced mutiny from a crew determined to return home rather than face further hardship. Hudson either was murdered in cold blood or set adrift in a small boat along with his son and a number of other loyal crew members as the mutineers maintained. None of them was ever seen again. The ship returned home with just eight crew, all of whom faced murder charges but all were acquitted and two even later returned to Hudson's bay on the Discovery in 1612, so common sense rather than cowardice must have been the motivation for their actions against Hudson as the court accepted. On its next mission Discovery explored much of the remainder of the bay and overwintered again. The accompanying ship Resolution was crushed in the ice and the scurvy-riddled survivors returned on the Discovery to announce that the bay contained no route to the west.
  Hudson set adrift by John Maler Collier 1881 With Hudson's Bay seemingly a dead end, the Company of Merchants of London decided that the search for the passage should be directed further to the north and east. The Discovery was once more pressed into service and placed under the command of Hudson mutineer and now Arctic veteran Robert Bylot. He was joined by pilot William Baffin, who had been recently employed by the King of Denmark in searching for evidence of Danish Viking settlement on Greenland to strengthen that monarch's claim to the territory. In two summer expeditions in 1615 and 1616, avoiding overwintering, the Discovery probed first to the north of Southampton Island at the top of Hudson's Bay and then, believing the area to be entirely enclosed by land, forged up Davis Strait in the following summer, charting more of the west coast of Greenland before reaching a new landmark of 77 degrees north at Baffin Bay. They identified three ice clogged channels between the islands at its northern end, one of which, Smith Sound headed north and the other two, Jones Sound and Lancaster Sound, headed west. Baffin and Bylot considered the passages, which they had named in honour of their sponsors, unpromising and turned for home, charting the eastern coast of Baffin Island as they went. It would be another two centuries before an expedition ventured into such far-flung parts and when they did so they would be impressed by the accuracy of Baffin's observations, which included the earliest known determination of longitude by the lunar distance method.
 William Baffin The focus of efforts now returned to Hudson's Bay and its environs. As rival merchant companies in London and Bristol began to appreciate that the area might yield up profit in trade and petitioned the crown for rights to exploit whatever resources were found. Two rival expeditions set out in 1631. Luke Foxe of London set out in the Charles, named in honour of the new king whilst Thomas James of Bristol set out in the Henrietta Maria named in honour of his queen. Both explored the bay separately before Foxe probed to the north, sailing into the body of water now known as Foxe Basin to the west of Baffin Island. Having assessed the motion of the tides, Foxe concluded that they flowed in from the south-east and decided to go no further, assuming that no passage westwards would be found further into the bay. Following this he headed for home with all his crew alive and well. The Henrietta Maria meanwhile elected to remain in Hudson's Bay overwinter. The ship was deliberately sunk in shallow water and the crew built cabins on land. They endured a harsh winter and many died from the effects of cold and scurvy. Refloating the ship in the following spring they set out for home but the ice still abounded in their path and the ship struggled for twenty days through floes that threatened constantly to sink it. She was leaking badly and the men manned the pumps constantly. At night the ship was anchored to a large floe and would be battered through the night whilst the crew were in terror of being sunk. James' account of the ordeal would later inspire Coleridge's Rime of the Ancient Mariner.
 Gustav Dore illustration from the Rime of the Ancient Mariner
Sometimes when we had made her fast in the night to a great piece of ice we should have such violent storms that our fasting would break and then the storm would beat us from piece to piece most fearfully. Otherwhile we should be fast enclosed amongst great ice as high as our poop... Amongst these several and hourly dangers I heard men murmur and say that they were happy that I had buried and that if they had a thousand pounds they would give it, so they could lay fairly by them. For we, they say, are destined to starve upon a piece of ice.
From The Strange and Dangerous Voyage of Thomas James 1633.
Such tales of woe dampened enthusiasm for sending voyages of exploration into the uncharted, frozen north in search of the fabled passage but the lure of profits to be had from the fur trade ensured that Hudson's Bay was now firmly on the map. The Hudson's Bay Company was established by royal charter in 1670, building their headquarters at the mouth of the Hayes River. It was named York Factory in honour of the Duke of York and here native trappers traded furs in exchange for rifles, metal tools, glass beads and in particular, somewhat ironically given the locals' ready supply of furs, patterned woollen blankets. All of this was a great affront to the French who up until this point had dominated the fur trade from their outposts in Quebec and when war broke out between Britain and France following the Glorious Revolution the French began seizing the company's trading posts, which changed hands several times.
 The wreck of the Pelican
The Battle of Hudson's Bay was fought in 1697 between French and British squadrons when the French attempted to capture York Factory. The French flagship Pelican lost its consorts in thick fog and found itself engaged by the three ship British squadron. Pelican was being pounded into submission with blood running from her scuppers when a lucky shot detonated the magazine of the British flagship Hampshire sending it straight to the bottom. The remaining British ships surrendered and fled respectively but Pelican was so badly damaged that it too sunk. The victorious French somewhat ignominiously waded ashore and took control of York factory. In 1713 it was ceded back to Britain at the conclusion of the War of the Spanish Succession with the Hudson's Bay Company having sole rights to the fur trade in the region.
Hudson's Bay may have been back in British hands but the company saw no profits to be had from exploration and showed no inclination to spend money sending ships and men off in search of the northwest passage. The quest for the passage was finally reignited in 1741 when it found a champion in the form of Arthur Dobbs; a member of the Irish landed gentry who became a major landowner in North Carolina and later served as its governor. Dobbs was both a man with an eye to a profit and an intellectual who wished to see the geographical secrets of the north unlocked. He felt the Hudson's Bay Company were not fulfilling their duties in the field of exploration and agitated in parliament for them to lose their monopoly unless they did more. Competition, Dobbs argued, would stimulate exploration.
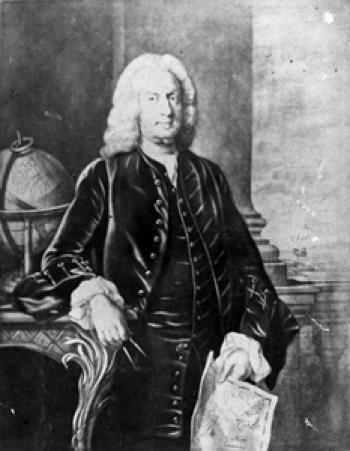 Arthur Dobbs
The result was a pair of bad tempered naval expeditions sent to scout the narrow passage known as Roe's Welcome Sound at the north-west corner of Hudson Bay passing between Southampton Island and the mainland and leading into Foxe Basin. Two ships, a converted collier named Discovery and a bomb vessel named Furnace were dispatched in 1742 under the command of two former Hudson's Bay Company men, cousins Christopher Middleton and William Moor. Having explored two ice-clogged inlets named Wager Bay and Repulse Bay and found their further progress blocked by ice the ships returned to report that neither offered a passage westwards. Dobbs was unimpressed and refused to accept expedition commander Middleton's findings. Moor at first supported Middleton and then came around to Dobbs' viewpoint when the command of a second expedition was proffered. Moor returned to Wager Bay in the Furnace in 1746-7 in company with the California under Francis Smith. Over a miserable winter iced in at York Factory the two fell out and several men died of scurvy. The following season the two ships explored separately, concluded that Wager Bay ended in two small, unnavigable rivers and returned home in disappointment. The Hudson's Bay Company's views on the futility of further exploration had been reinforced and the admiralty were inclined to agree. Moor remained a supporter of Dobbs but he was largely discredited and in 1749 a debate in parliament ended in a vote against Dobb's motion to repeal the company's monopoly.
 A 19th Century view of York Factory
If there was a north-west passage to found, everyone was now forced to admit, it lay further to the north and was probably impenetrable. For the time being there was no more appetite to search for it and it remained, if it existed at all, a blank on the map.
To be continued...
The Hudson's Bay Company
http://firstpeoplesofcanada.com/fp_furtrade/fp_furtrade3.html
Carry on up the Northwest Passage - Part Two
Merry Christmas Readers. Ready to take a break from all that festive excess for a second dose of hardship and deprivation? Grab yourself a cold turkey sandwich and let us return to the search for the northwest passage. Part One here. If one thing other than the sheer impenetrable hostility of the icy north had hampered the search for a navigable passage from the Atlantic to the Pacific around the Arctic coast of Canada, it was the Hudson's Bay Company's complacent disinterest in exploration for its own sake. Profit was their sole motivation and it was not until the prospect of such arose that they stirred themselves to action.
As Arthur Dobbs had predicted when trying to dismantle the company's monopoly in the 1740's, only commercial pressures would prompt the Hudson's Bay Company to broaden their horizons. When they were eventually threatened by the emergence of Montreal based fur traders, who would later coalesce into bitter rivals the Northwest Company, the company attempted to diversify their interests. They began by sending out overland expeditions in the company of native guides in search of copper deposits, whose presence had been indicated by a Dene Indian leader named Matonabbee.
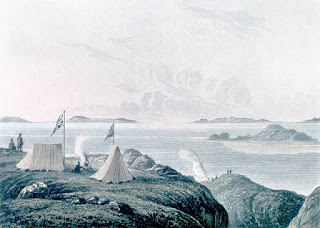 The mouth of the Coppermine River by George Back
In 1771 a former naval officer named Samuel Hearne, in company with Matonabbee, successfully descended the Coppermine River by canoe to reach the Arctic shore.
Hearne did not actually sight open sea but from the quantities of whale bone and seal skins he observed in the possession of the local Inuit it was clear that such existed. It was also clear from his journey that no navigable inland passage existed that could be accessed from the eastern or western coast. Hearne found no copper reserves worth the trouble and his journey is best known for his eye-witness account of the 'Massacre at Bloody Falls' of around twenty Inuit; men, women and children, by the Dene Indians accompanying him. The expedition set a template for future overland operations; following the rivers northward to the coast, living off the land and relying on the Indians' knowledge of the movements of game animals and hunting skills to keep the expedition supplied. Hearne had covered some five thousand miles and become the first European to reach the Arctic Ocean overland but in the view of the company there was little to be gained from any further expeditions.
The Northwest Passage
In 1775 the British government stepped in, offering a prize of twenty thousand pounds to any ship that could navigate the northwest passage. Of course, if there was such a thing as a northwest passage, then it had to be accessible from the Pacific as well as from the Atlantic. With this possibility in mind, the admiralty dispatched a two ship expedition to the Pacific in 1776. Naturally it was headed up by Britain's greatest exploring sailor; Captain James Cook aboard HMS Resolution, in company with HMS Discovery - always a popular name - under Lieutenant Charles Clerke. Once Clerke had extricated himself from a debtors' gaol, Discovery had joined Resolution in Cape Town and the expedition had proceeded through the Pacific at a leisurely pace; too leisurely in the view of some of Cook's officers. Having squandered the first Arctic exploration season tarrying in familiar waters, Cook finally departed newly discovered Hawaii in February 1778 and headed north. Having refitted on Vancouver Island, explored the Alaskan coast and penetrated the Bering Strait, Cook was finally stopped by a wall of ice at 70 degrees north on 18th August. The battered ships returned to Hawaii for the winter where Cook fell out with the natives with fatal consequences for himself. The nation mourned and interest in the existence of the passage was dampened.
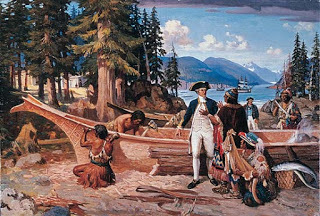 James Cook on Vancouver Island
A decade later George Vancouver, who had sailed as a midshipman under Cook, commanded HMS Discovery on a four year expedition to the Pacific northwest commencing in 1791. The Spanish had also been showing interest in the territory and the voyage was something of a flag planting exercise. Vancouver nevertheless charted and probed methodically and diligently but found little to excite believers in the existence of the passage. War with France thereafter occupied the navy for the next twenty years with little thought for such peacetime niceties as exploration.
Once Napoleon had embarked on his own one-way expedition to far-flung St Helena, the navy suddenly found itself with large numbers of ships and even larger numbers of officers lingering on half pay in need of employment. For a plucky few, such employment and opportunity for advancement was presented by a rekindling of interest in Arctic exploration. The renewed search for the northwest passage was the pet project of the Second Secretary of the Admiralty Sir John Barrow.
Barrow was a man with a burning desire to fill in the blanks on the map and dispatched men of vigour to the Arctic and the Sahara in an attempt to ensure that it was Britain that led the way in discovery. In both theatres unimaginable hardships and privations would be suffered by those Barrow entrusted with his often poorly conceived missions. For the African adventurers death from tropical disease or hostile natives was close to inevitable whilst the polar explorers faced the prospect of years trapped in the ice and land journeys of hundreds of miles surviving on pitifully inadequate rations. Barrow presided over this heroic age of British exploration with an all pervasive influence; producing innumerable publications on geographical matters and chairing committees of learned enthusiasts whilst being obstinately blind to any argument that contradicted his own, often misguided, theories. He championed the achievements of his favourites, who reaped the rewards of their fame with promotions and knighthoods, whilst being monstrously ungrateful and vicious to those who he felt had failed to achieve their sometimes unachievable objectives. Many of those Barrow sent off into the unknown did not come back at all.
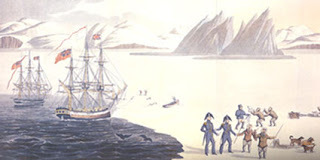 Ross and Parry meet the natives - painting by John Sackheuse The initial impetus for a new Arctic expedition came from Cook's old shipmate and Barrow's friend and mentor Joseph Banks. Following correspondence with experienced Arctic whaler William Scoresby, whose sound advice Barrow would cheerfully ignore throughout his tenure at the admiralty, Banks suggested that the passage should be attempted from the west once more. Scoresby had explained to Banks that a recent change in the ice conditions around Greenland, with open water to be found as far as 80 degrees north, presented a golden opportunity to penetrate into hitherto unexplored waters.
In the summer of 1818 Barrow's first Arctic expedition set out for the Davis Strait, under the overall command of Commander John Ross on HMS Isabella, ably supported by Lieutenant William Parry on HMS Alexander. Their volunteer crews were largely made up of experienced whalers. The two ships ventured up Davis Strait, leaving the whaling fleet behind them and making their way north into Baffin Bay, where no European had been since the man it was named after. Here the crews encountered Inuit who had been entirely cut off, even from their own kind. The ship's interpreter John Sackheuse, a Greenland native, was able to communicate with these 'Arctic Highlanders' as Ross termed them, and found that they believed themselves to be the only people on Earth. The natives were understandably nervous of the newcomers but curious and friendly enough, although to the dismay of the Anglo Saxons, they had no concept of property; helping themselves to any iron objects they could lay their hands on. The ships explored Smith and Jones Sounds and most controversially Lancaster Sound, all three of which were declared by Ross to be bays which terminated in high mountain ranges. This would turn out to be an optical illusion caused by atmospheric refraction. Parry on the Alexander, which had been lagging behind the Isabella, had seen no such thing. On the ships' return to England, Parry refused to support Ross' decision to turn back from Lancaster Sound without exploring further when it was questioned by a disappointed Barrow. The other young officers, including Ross' own nephew James, sided with Parry. Barrow would never forgive John Ross for his timidity.
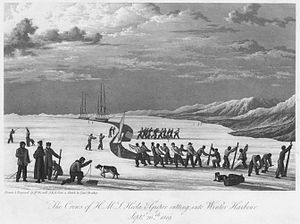 Hecla and Griper entering winter harbour by William Parry
The following summer HMS Hecla under Parry and HMS Griper under Lieutenant Matthew Liddon, which was so slow that it had to be towed most of the time, set out once more for Davis Strait, Baffin Bay and Lancaster Sound. After following the Greenland coast to the latitude of Lancaster Sound, the ships were laboriously towed and warped through the ice floes of the central pack, with their crews straining on nine foot long ice saws and hauling on hawsers all day long for three weeks to cover the eighty miles to the far side of the pack. It may not have felt like a shortcut but it was and their efforts were rewarded in August when Hecla and Griper sailed through the open water of Lancaster Sound to cheers from their assembled officers and men. The expedition's progress was triumphant. The ships explored Lancaster Sound until ice barred their way between two large islands which Parry named Devon and Somerset Islands, though the bleak, boggy terrain of the islands bore little resemblance to those English counties. Turning south, they then explored a promising passage between the northwestern coast of Baffin Island and Somerset Island which Parry named Prince Regent Inlet, turning back after 120 miles and returning to Lancaster Sound which they were now able to penetrate further. Ice conditions were exceptionally favourable and Hecla and Griper sailed on, through a body of water Parry christened Barrow Strait to ultimately reach a furthest west of 112 degrees in mid September.
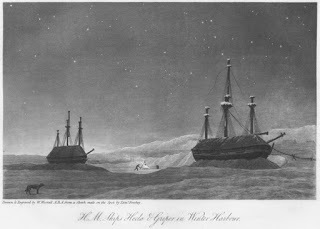 Hecla and Griper overwintering on Melville Island
With the onset of winter, Hecla and Griper settled in on the newly discovered Melville Island, named in honour of the First Sea Lord. Parry had prepared meticulously for this eventuality. The upper masts were removed and the ships were roofed over with timber and canvas. A network of pipes were installed to carry hot water from the galley stove all around the ships and keep the temperature at a reasonably comfortable level. Parry had brought plentiful stores including tinned meat, concentrated lemon juice and sauerkraut to ward off scurvy and in a particularly ingenious move he sowed mustard and cress seeds in trays arranged along the top of the hot pipes and soon they were covered with green shoots. The ptarmigan which populated the island were relentlessly hunted for fresh meat until the survivors migrated south. Along with scurvy, Parry viewed boredom as the greatest enemy and kept his men busy with daily chores. The decks were scrubbed and ice was scraped from the timbers. The officers were kept busy with scientific observations. Parry had also brought along a large barrel organ which played a reasonable range of tunes and provided both entertainment and music by which the men were encouraged to stomp around the deck when the weather was too grim to permit outdoor exercise. The organ can be seen today in the excellent Polar Museum in Cambridge and it is a thing of wonder. A weekly newspaper was produced and the officers put on theatrical productions with the midshipmen playing the female roles. Parry also ran a school so that all men of the crew who wished to learn to read and write could do so. Over the course of that dark winter, with temperatures reaching minus 75 Fahrenheit, Parry lost just one man to a lung complaint. It was a magnificent piece of leadership, providing the model for future expeditions and in Parry, the first great Arctic commander, one instantly recognises the qualities of Scott and Shackleton.
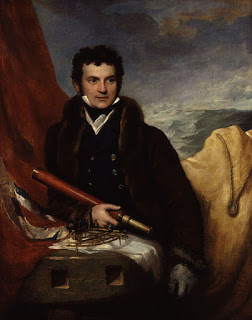 William Edward Parry
In the spring Parry began exploring the island by sledge and reached its northern coast. The summer however, brought no thaw. The ships remained frozen in their icy harbour and the prospect of a second winter in the Arctic threatened until on 31st July 1820 they were finally able to break out. Parry began once more pressing westwards but made it no further than the previous year when his ships were forced back by the encroaching ice. Parry gave up on 23rd August when it became clear that the only options were to retreat or endure another winter in the ice. They did not have the supplies for the latter and so Hecla and Griper sailed for home.
Parry's achievement was lauded by Barrow and he returned to a hero's welcome but privately he confided to Barrow that he thought the chances of making the passage so far to the north were slim to none. The focus therefore shifted once more to the north of Hudson's Bay. Parry set out again in 1821, this time commanding HMS Fury, sister ship to Hecla, which was commanded by the irrepressible George Lyon. Lyon had already had an eventful time going native in the Sahara in pursuit of Barrow's other Holy Grail - the Niger River. On this voyage Lyon would enjoy going native again, embracing the Inuit way of life; sleeping in an igloo, getting himself a traditional tattoo, sampling their food, learning their skills and bedding their women, whom he found to be most accommodating.
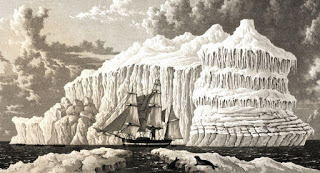 HMS Hecla by William Parry Hecla and Fury, as converted bomb vessels were ideal for Arctic conditions. The ships were of robust construction to withstand the stresses of firing enormous mortars and were further reinforced for Arctic service. They also had a relatively shallow draft to allow them to approach shore defences, which made them useful for probing bays and inlets. The two ships worked their way northwards along the western edge of Foxe Basin, taking turns to explore promising looking inlets so as to share the chance of making a momentous discovery and claiming glory. Hecla and Fury spent two winters in the Arctic, the second of which was spent within the strait that Parry named after the two ships, which passes between the extreme north-eastern tip of mainland North America and Baffin Island. Had it been passable, it would have led them through to the gulf at the bottom of Prince Regent Inlet, joining up the dots from Parry's previous expedition, but it remained impenetrably ice-clogged and the ships returned home.
 Making camp by George Back
The reception for Parry this time around was more muted, for the man of the hour was Lt. John Franklin, having led an expedition down the Coppermine River in emulation of Samuel Hearne with the reluctant and half-hearted assistance of the Hudson's Bay Company. Franklin's expedition, a mixture of naval officers, locally recruited trappers provided by the company known as voyageurs and Indian guides had reached the sea and proceeded eastwards along the coast for a distance of five hundred miles to a point south of Victoria Island which he named Point Turnagain. He had ventured too far and too late into the season however and the return journey overland was a nightmare of starvation with supplies exhausted and no game to be had, surviving on moss scraped from rocks. Abandoned by their Indian guides, over half of Franklin's party were lost. Six succumbed to starvation and three voyageurs and one British officer were killed by a voyageur driven to murder and cannibalism by the extremity of their situation. The killer was executed. Staggering back to their supply hut Fort Enterprise on the Coppermine, which should have been stocked with provisions, the desperate survivors found it empty and were reduced to eating the skin from their blankets and the leather from their boots. Just in time a party led by Midshipman George Back found the Indians charged with supplying them and help arrived. It had been a pretty disastrous enterprise but the sheer endurance of Franklin had seen him lionised rather than castigated.
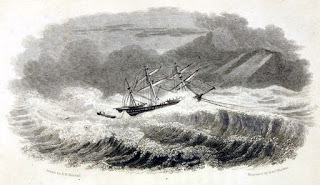
HMS Griper in Roe's Welcome Sound 1824
On the face of it there was little cause for optimism but somehow Barrow was convinced that the prize was almost within their grasp and prepared to throw more men and resources at the northwest passage than ever before. One last push was what was required and the glory would be Britain's.
Parry and Lyon were sent northwestwards again, although this time separately. Parry took Hecla and Fury under Lt Henry Hoppner once more to Prince Regent Inlet but the winter of 1824 proved to be exceptionally hard and the ice conditions were the worst Parry had ever encountered. Fury was wrecked in the ice and its supplies had to be abandoned on Somerset Island, providing a useful cache for future expeditions. The two crews returned home disconsolately aboard Hecla.
Lyon also endured a terrible voyage in the wretchedly slow and poorly handling HMS Griper which never should have been sent back to the Arctic. Lyon's mission had been to sail to Repulse Bay at the head of Roes Welcome Sound; a narrow passage which led from Hudson's Bay to Foxe Basin, and then head overland, investigating the northeastern coast as he went and hopefully encountering Parry as Hecla and Fury advanced southwards down Prince Regent Inlet, before ultimately reaching Franklin's Point Turnagain. Griper had to be towed across the Atlantic by its own supply ship and received such a terrible battering in reaching Repulse Bay that the expedition was abandoned and the Griper limped back again a virtual wreck, with all its anchors lost. Lyon fell out of favour with Barrow and his career was over.
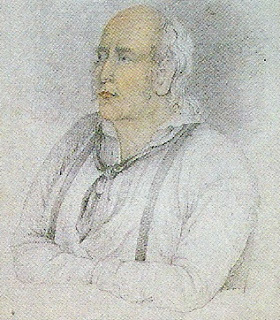 Beechey's 1825 portrait of John Adams, the last Bounty mutineer
After all his sufferings Franklin was nevertheless prepared to undertake another expedition, this time following the course of the Mackenzie River further to the west. This expedition was meticulously planned by Franklin, incredibly well supplied and equipped and the personnel were almost entirely British, with reliable tars replacing the flakey voyageurs. There would be no repeat of the horrors of his first trip and this would be a hugely successful enterprise which would map almost two thousand miles of the coastline of northern Canada and spend two winters in perfect comfort in warm, well stocked cabins. Meanwhile Capt. Frederick Beechey in HMS Blossom once more attacked the passage from the Pacific side; penetrating further eastwards than ever before using small boats to probe where the Blossom could not. At their closest point, Beechey and Franklin's parties had been just 160 miles apart. On his return voyage Beechey put in at Pitcairn Island where he discovered John Adams; the last surviving mutineer from the Bounty, along with the descendants of the other mutineers.
In 1827 all expeditions had returned and Barrow took stock. There had been successes and failures but rather than following up on any of them in particular he decided to sent Parry and James Ross to Spitsbergen in HMS Hecla from where they made an ill-considered attempt to reach the North Pole using wheeled boats pulled by reindeer. How splendid it would have been had it succeeded but it was sadly a dismal failure. Thereafter Barrow found his budget drastically cut as a result of political upheaval and could only survey his charts with their diminishing blank spaces and wait for better days to come around. For now the northwest passage was keeping its remaining secrets.
To be continued...
As Arthur Dobbs had predicted when trying to dismantle the company's monopoly in the 1740's, only commercial pressures would prompt the Hudson's Bay Company to broaden their horizons. When they were eventually threatened by the emergence of Montreal based fur traders, who would later coalesce into bitter rivals the Northwest Company, the company attempted to diversify their interests. They began by sending out overland expeditions in the company of native guides in search of copper deposits, whose presence had been indicated by a Dene Indian leader named Matonabbee.
 The mouth of the Coppermine River by George Back
In 1771 a former naval officer named Samuel Hearne, in company with Matonabbee, successfully descended the Coppermine River by canoe to reach the Arctic shore.
Hearne did not actually sight open sea but from the quantities of whale bone and seal skins he observed in the possession of the local Inuit it was clear that such existed. It was also clear from his journey that no navigable inland passage existed that could be accessed from the eastern or western coast. Hearne found no copper reserves worth the trouble and his journey is best known for his eye-witness account of the 'Massacre at Bloody Falls' of around twenty Inuit; men, women and children, by the Dene Indians accompanying him. The expedition set a template for future overland operations; following the rivers northward to the coast, living off the land and relying on the Indians' knowledge of the movements of game animals and hunting skills to keep the expedition supplied. Hearne had covered some five thousand miles and become the first European to reach the Arctic Ocean overland but in the view of the company there was little to be gained from any further expeditions.
The Northwest PassageIn 1775 the British government stepped in, offering a prize of twenty thousand pounds to any ship that could navigate the northwest passage. Of course, if there was such a thing as a northwest passage, then it had to be accessible from the Pacific as well as from the Atlantic. With this possibility in mind, the admiralty dispatched a two ship expedition to the Pacific in 1776. Naturally it was headed up by Britain's greatest exploring sailor; Captain James Cook aboard HMS Resolution, in company with HMS Discovery - always a popular name - under Lieutenant Charles Clerke. Once Clerke had extricated himself from a debtors' gaol, Discovery had joined Resolution in Cape Town and the expedition had proceeded through the Pacific at a leisurely pace; too leisurely in the view of some of Cook's officers. Having squandered the first Arctic exploration season tarrying in familiar waters, Cook finally departed newly discovered Hawaii in February 1778 and headed north. Having refitted on Vancouver Island, explored the Alaskan coast and penetrated the Bering Strait, Cook was finally stopped by a wall of ice at 70 degrees north on 18th August. The battered ships returned to Hawaii for the winter where Cook fell out with the natives with fatal consequences for himself. The nation mourned and interest in the existence of the passage was dampened.
 James Cook on Vancouver Island
A decade later George Vancouver, who had sailed as a midshipman under Cook, commanded HMS Discovery on a four year expedition to the Pacific northwest commencing in 1791. The Spanish had also been showing interest in the territory and the voyage was something of a flag planting exercise. Vancouver nevertheless charted and probed methodically and diligently but found little to excite believers in the existence of the passage. War with France thereafter occupied the navy for the next twenty years with little thought for such peacetime niceties as exploration.
Once Napoleon had embarked on his own one-way expedition to far-flung St Helena, the navy suddenly found itself with large numbers of ships and even larger numbers of officers lingering on half pay in need of employment. For a plucky few, such employment and opportunity for advancement was presented by a rekindling of interest in Arctic exploration. The renewed search for the northwest passage was the pet project of the Second Secretary of the Admiralty Sir John Barrow.
Barrow was a man with a burning desire to fill in the blanks on the map and dispatched men of vigour to the Arctic and the Sahara in an attempt to ensure that it was Britain that led the way in discovery. In both theatres unimaginable hardships and privations would be suffered by those Barrow entrusted with his often poorly conceived missions. For the African adventurers death from tropical disease or hostile natives was close to inevitable whilst the polar explorers faced the prospect of years trapped in the ice and land journeys of hundreds of miles surviving on pitifully inadequate rations. Barrow presided over this heroic age of British exploration with an all pervasive influence; producing innumerable publications on geographical matters and chairing committees of learned enthusiasts whilst being obstinately blind to any argument that contradicted his own, often misguided, theories. He championed the achievements of his favourites, who reaped the rewards of their fame with promotions and knighthoods, whilst being monstrously ungrateful and vicious to those who he felt had failed to achieve their sometimes unachievable objectives. Many of those Barrow sent off into the unknown did not come back at all.
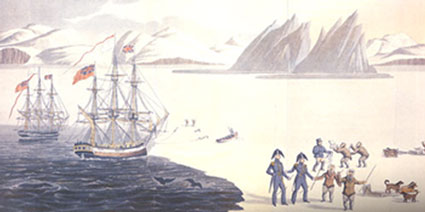 Ross and Parry meet the natives - painting by John Sackheuse The initial impetus for a new Arctic expedition came from Cook's old shipmate and Barrow's friend and mentor Joseph Banks. Following correspondence with experienced Arctic whaler William Scoresby, whose sound advice Barrow would cheerfully ignore throughout his tenure at the admiralty, Banks suggested that the passage should be attempted from the west once more. Scoresby had explained to Banks that a recent change in the ice conditions around Greenland, with open water to be found as far as 80 degrees north, presented a golden opportunity to penetrate into hitherto unexplored waters.
In the summer of 1818 Barrow's first Arctic expedition set out for the Davis Strait, under the overall command of Commander John Ross on HMS Isabella, ably supported by Lieutenant William Parry on HMS Alexander. Their volunteer crews were largely made up of experienced whalers. The two ships ventured up Davis Strait, leaving the whaling fleet behind them and making their way north into Baffin Bay, where no European had been since the man it was named after. Here the crews encountered Inuit who had been entirely cut off, even from their own kind. The ship's interpreter John Sackheuse, a Greenland native, was able to communicate with these 'Arctic Highlanders' as Ross termed them, and found that they believed themselves to be the only people on Earth. The natives were understandably nervous of the newcomers but curious and friendly enough, although to the dismay of the Anglo Saxons, they had no concept of property; helping themselves to any iron objects they could lay their hands on. The ships explored Smith and Jones Sounds and most controversially Lancaster Sound, all three of which were declared by Ross to be bays which terminated in high mountain ranges. This would turn out to be an optical illusion caused by atmospheric refraction. Parry on the Alexander, which had been lagging behind the Isabella, had seen no such thing. On the ships' return to England, Parry refused to support Ross' decision to turn back from Lancaster Sound without exploring further when it was questioned by a disappointed Barrow. The other young officers, including Ross' own nephew James, sided with Parry. Barrow would never forgive John Ross for his timidity.
 Hecla and Griper entering winter harbour by William Parry
The following summer HMS Hecla under Parry and HMS Griper under Lieutenant Matthew Liddon, which was so slow that it had to be towed most of the time, set out once more for Davis Strait, Baffin Bay and Lancaster Sound. After following the Greenland coast to the latitude of Lancaster Sound, the ships were laboriously towed and warped through the ice floes of the central pack, with their crews straining on nine foot long ice saws and hauling on hawsers all day long for three weeks to cover the eighty miles to the far side of the pack. It may not have felt like a shortcut but it was and their efforts were rewarded in August when Hecla and Griper sailed through the open water of Lancaster Sound to cheers from their assembled officers and men. The expedition's progress was triumphant. The ships explored Lancaster Sound until ice barred their way between two large islands which Parry named Devon and Somerset Islands, though the bleak, boggy terrain of the islands bore little resemblance to those English counties. Turning south, they then explored a promising passage between the northwestern coast of Baffin Island and Somerset Island which Parry named Prince Regent Inlet, turning back after 120 miles and returning to Lancaster Sound which they were now able to penetrate further. Ice conditions were exceptionally favourable and Hecla and Griper sailed on, through a body of water Parry christened Barrow Strait to ultimately reach a furthest west of 112 degrees in mid September.
 Hecla and Griper overwintering on Melville Island
With the onset of winter, Hecla and Griper settled in on the newly discovered Melville Island, named in honour of the First Sea Lord. Parry had prepared meticulously for this eventuality. The upper masts were removed and the ships were roofed over with timber and canvas. A network of pipes were installed to carry hot water from the galley stove all around the ships and keep the temperature at a reasonably comfortable level. Parry had brought plentiful stores including tinned meat, concentrated lemon juice and sauerkraut to ward off scurvy and in a particularly ingenious move he sowed mustard and cress seeds in trays arranged along the top of the hot pipes and soon they were covered with green shoots. The ptarmigan which populated the island were relentlessly hunted for fresh meat until the survivors migrated south. Along with scurvy, Parry viewed boredom as the greatest enemy and kept his men busy with daily chores. The decks were scrubbed and ice was scraped from the timbers. The officers were kept busy with scientific observations. Parry had also brought along a large barrel organ which played a reasonable range of tunes and provided both entertainment and music by which the men were encouraged to stomp around the deck when the weather was too grim to permit outdoor exercise. The organ can be seen today in the excellent Polar Museum in Cambridge and it is a thing of wonder. A weekly newspaper was produced and the officers put on theatrical productions with the midshipmen playing the female roles. Parry also ran a school so that all men of the crew who wished to learn to read and write could do so. Over the course of that dark winter, with temperatures reaching minus 75 Fahrenheit, Parry lost just one man to a lung complaint. It was a magnificent piece of leadership, providing the model for future expeditions and in Parry, the first great Arctic commander, one instantly recognises the qualities of Scott and Shackleton.
 William Edward Parry
In the spring Parry began exploring the island by sledge and reached its northern coast. The summer however, brought no thaw. The ships remained frozen in their icy harbour and the prospect of a second winter in the Arctic threatened until on 31st July 1820 they were finally able to break out. Parry began once more pressing westwards but made it no further than the previous year when his ships were forced back by the encroaching ice. Parry gave up on 23rd August when it became clear that the only options were to retreat or endure another winter in the ice. They did not have the supplies for the latter and so Hecla and Griper sailed for home.
Parry's achievement was lauded by Barrow and he returned to a hero's welcome but privately he confided to Barrow that he thought the chances of making the passage so far to the north were slim to none. The focus therefore shifted once more to the north of Hudson's Bay. Parry set out again in 1821, this time commanding HMS Fury, sister ship to Hecla, which was commanded by the irrepressible George Lyon. Lyon had already had an eventful time going native in the Sahara in pursuit of Barrow's other Holy Grail - the Niger River. On this voyage Lyon would enjoy going native again, embracing the Inuit way of life; sleeping in an igloo, getting himself a traditional tattoo, sampling their food, learning their skills and bedding their women, whom he found to be most accommodating.
 HMS Hecla by William Parry Hecla and Fury, as converted bomb vessels were ideal for Arctic conditions. The ships were of robust construction to withstand the stresses of firing enormous mortars and were further reinforced for Arctic service. They also had a relatively shallow draft to allow them to approach shore defences, which made them useful for probing bays and inlets. The two ships worked their way northwards along the western edge of Foxe Basin, taking turns to explore promising looking inlets so as to share the chance of making a momentous discovery and claiming glory. Hecla and Fury spent two winters in the Arctic, the second of which was spent within the strait that Parry named after the two ships, which passes between the extreme north-eastern tip of mainland North America and Baffin Island. Had it been passable, it would have led them through to the gulf at the bottom of Prince Regent Inlet, joining up the dots from Parry's previous expedition, but it remained impenetrably ice-clogged and the ships returned home.
 Making camp by George Back
The reception for Parry this time around was more muted, for the man of the hour was Lt. John Franklin, having led an expedition down the Coppermine River in emulation of Samuel Hearne with the reluctant and half-hearted assistance of the Hudson's Bay Company. Franklin's expedition, a mixture of naval officers, locally recruited trappers provided by the company known as voyageurs and Indian guides had reached the sea and proceeded eastwards along the coast for a distance of five hundred miles to a point south of Victoria Island which he named Point Turnagain. He had ventured too far and too late into the season however and the return journey overland was a nightmare of starvation with supplies exhausted and no game to be had, surviving on moss scraped from rocks. Abandoned by their Indian guides, over half of Franklin's party were lost. Six succumbed to starvation and three voyageurs and one British officer were killed by a voyageur driven to murder and cannibalism by the extremity of their situation. The killer was executed. Staggering back to their supply hut Fort Enterprise on the Coppermine, which should have been stocked with provisions, the desperate survivors found it empty and were reduced to eating the skin from their blankets and the leather from their boots. Just in time a party led by Midshipman George Back found the Indians charged with supplying them and help arrived. It had been a pretty disastrous enterprise but the sheer endurance of Franklin had seen him lionised rather than castigated.

HMS Griper in Roe's Welcome Sound 1824
On the face of it there was little cause for optimism but somehow Barrow was convinced that the prize was almost within their grasp and prepared to throw more men and resources at the northwest passage than ever before. One last push was what was required and the glory would be Britain's.
Parry and Lyon were sent northwestwards again, although this time separately. Parry took Hecla and Fury under Lt Henry Hoppner once more to Prince Regent Inlet but the winter of 1824 proved to be exceptionally hard and the ice conditions were the worst Parry had ever encountered. Fury was wrecked in the ice and its supplies had to be abandoned on Somerset Island, providing a useful cache for future expeditions. The two crews returned home disconsolately aboard Hecla.
Lyon also endured a terrible voyage in the wretchedly slow and poorly handling HMS Griper which never should have been sent back to the Arctic. Lyon's mission had been to sail to Repulse Bay at the head of Roes Welcome Sound; a narrow passage which led from Hudson's Bay to Foxe Basin, and then head overland, investigating the northeastern coast as he went and hopefully encountering Parry as Hecla and Fury advanced southwards down Prince Regent Inlet, before ultimately reaching Franklin's Point Turnagain. Griper had to be towed across the Atlantic by its own supply ship and received such a terrible battering in reaching Repulse Bay that the expedition was abandoned and the Griper limped back again a virtual wreck, with all its anchors lost. Lyon fell out of favour with Barrow and his career was over.
 Beechey's 1825 portrait of John Adams, the last Bounty mutineer
After all his sufferings Franklin was nevertheless prepared to undertake another expedition, this time following the course of the Mackenzie River further to the west. This expedition was meticulously planned by Franklin, incredibly well supplied and equipped and the personnel were almost entirely British, with reliable tars replacing the flakey voyageurs. There would be no repeat of the horrors of his first trip and this would be a hugely successful enterprise which would map almost two thousand miles of the coastline of northern Canada and spend two winters in perfect comfort in warm, well stocked cabins. Meanwhile Capt. Frederick Beechey in HMS Blossom once more attacked the passage from the Pacific side; penetrating further eastwards than ever before using small boats to probe where the Blossom could not. At their closest point, Beechey and Franklin's parties had been just 160 miles apart. On his return voyage Beechey put in at Pitcairn Island where he discovered John Adams; the last surviving mutineer from the Bounty, along with the descendants of the other mutineers.
In 1827 all expeditions had returned and Barrow took stock. There had been successes and failures but rather than following up on any of them in particular he decided to sent Parry and James Ross to Spitsbergen in HMS Hecla from where they made an ill-considered attempt to reach the North Pole using wheeled boats pulled by reindeer. How splendid it would have been had it succeeded but it was sadly a dismal failure. Thereafter Barrow found his budget drastically cut as a result of political upheaval and could only survey his charts with their diminishing blank spaces and wait for better days to come around. For now the northwest passage was keeping its remaining secrets.
To be continued...
November 15, 2015
Red Moon - the Soviet Lunar Programme
One of the most spectacular exhibits in the current Cosmonauts exhibition at London's Science Museum is the Soviet LK-3 lunar landing module. Needless to say it was never used. The exhibition, which by the way is awesome, is a celebration of all the Soviet Space Programme did achieve. It is interesting none the less to explore Soviet efforts in lunar exploration and reflect on how things could have been had the Soviets put a man on the moon first, as imagined in the painting below by Alexei Leonov, who would have been that man. In the early days of trying to reach the moon, the Soviets and the US were neck in neck.
 In the Ocean of Storms by Alexei Leonov - cosmonaut and artist
The success of Sputnik on October 4th 1957 sent a shockwave through America and brought an unbearable level of media scrutiny and public criticism onto its competing army and navy rocket programmes. Although both successfully launched satellites in the early months of 1958, the need for a joined up approach in response to the Soviets' relentless progress was clear and NASA came into being in July of the same year.
In the closing months of 1958, the newly formed NASA in conjunction with the US Army Ballistic Missile Agency, who, needless to say, did not come entirely in peace, began launching the Pioneer series of probes. These were intended as moon fly-by's but the first three launches all experienced technical failures. By January of 1959 the Soviets were ready to begin their own programme. Objective number one was to hit the moon. On 2nd January Luna 1 blasted off from the Baikonur Cosmodrome atop a Vostok rocket and headed into the heavens. To allow its progress to be tracked, the final stage of the rocket released a cloud of sodium vapour at a distance of 113,000km from Earth which was visible from Earth based telescopes. Suggestions to detonate a nuclear warhead on the surface of the moon itself to allow the impact to be seen had been sensibly shelved. The shiny silver sphere, similar in general appearance to Sputnik, carried equipment for detecting the presence of gasses in interplanetary space, for measuring the magnetic field of the earth and investigating whether the moon also had a magnetic field, as well as collecting vital data on radiation exposure during its journey. In the event Luna 1 missed the moon by 6000km and sailed on, transmitting until its batteries ran out, 600,000km from Earth. Thereafter it became an artificial planet, albeit a very small one, falling into a solar orbit.
 Image of dark side of the moon taken by Luna 3 1959 In March 1959 NASA's Pioneer 4 became the first US mission to escape Earth's gravity and flew by the moon at a distance of 60,000km before joining Luna 1 in solar orbit. The Soviets followed up later in the year with two more missions. Luna 2 was virtually identical in design and objectives to Luna 1 and succeeded in impacting the lunar surface on 13th September. Less than a month later Luna 3 was launched on a trajectory to sling-shot around the moon. Equipped with a camera activated by photo-electric cells which detected the sun-lit face of the moon as the craft passed behind it on 7th October, Luna 3 captured the first images of the dark side of the moon, which were transmitted back to Earth as the spacecraft headed back before probably burning up in Earth's atmosphere.
The next two years saw feverish activity from both superpowers on several fronts as they worked towards the major goal of getting a man into space and continued to launch ambitious exploratory missions. By the time the US probe Ranger 4 emulated Luna 2 and crashed into the dark side of the moon in April 1962, following the failure of the systems which should have ensured a softer landing, a great deal had happened. Dogs, chimps and men had orbited the Earth safely and returned as heroes. Probes had been dispatched into interplanetary space, the USSR had begun programmes to send exploratory probes to both Mars and Venus and JFK had thrown down the gauntlet and committed the US to landing a man on the moon and returning him safely to Earth by the end of the decade. It was game on.

Soviet poster celebrating manned spaceflight With both moon projects having successfully impacted an object on the lunar surface, the next objective was to set down a probe upon the moon in a more controlled manner. Luna 4 was the first Soviet attempt at a soft landing and also the first mission to use an earth parking orbit like the US Ranger missions before being propelled on a new course to the moon rather than a direct ascent trajectory as in previous Luna missions. Failure of the navigation system resulted in the spacecraft being incorrectly orientated for its mid-course correction burn and it missed the moon by 8000km on 5th April 1963. The headlines would nevertheless be seized by the USSR again in July of that year by Valentina Tereshkova becoming the first woman in space.
Meanwhile work on further developments was mired in political infighting. The complicated Soyuz A-B-V circumlunar complex was the brainchild of Soviet space-programme mastermind Sergei Korolev. The programme relied on the docking of a manned spacecraft termed Soyuz A with a second unmanned booster module in orbit, termed Soyuz B, which would propel it on its journey to the moon. Soyuz B would first have been filled with fuel by three unmanned tugs, termed Soyuz V. It sounded bloody complicated and Khruschev had been persuaded to back the rival programme of Vladimir Chelomei instead. Korolev was instructed to focus on developing a lunar lander and in the meantime continued with the manned spaceflight programme.
 Over the Black Sea by Alexei Leonov
On 12th October 1964 another first was achieved by the Voskhod 1 mission which took three cosmonauts into orbit in the first multi-crew flight. The spacecraft was little different from the Vostok capsules used in earlier missions. The crew were waved off by Khruschev but by the time they landed the Soviet premier had been ousted from power and they were welcomed back by Brezhnev. The change at the top saw a return to a joined up approach which would be overseen by Korolev, who combined Chelomei's Proton rocket with his own Soyuz L1 spacecraft.
1965 saw the space-race heat up. In March Alexei Leonov aboard Voskhod 2 carried out the first space-walk. The success of any Soviet moon landing would at some point require crew to transfer externally between spacecraft and so this was a critical development as well as being an outstanding moment in its own right. Five days later the US launched Gemini 3; their first multi-crew mission and the first manned flight of a new generation of spacecraft. In May Luna 5 became the second Soviet probe to impact the lunar surface. The US had achieved four further successful impacts with their Ranger missions which had returned good quality photographs of the lunar surface before crashing into it. In June Ed White emulated Leonov by carrying out a space walk on the Gemini 5 mission. A week later Luna 6 was all set to achieve the first soft landing on the surface of the moon but a system failure put the probe on the wrong trajectory. Nevertheless a full test of all systems for landing was carried out as the probe sailed past the moon and it appeared that had it been on course the landing would have been a success.
The honour of the first soft landing on the lunar surface was claimed by the Soviet Luna 9 probe on February 3rd 1966. Two more attempted landings in late 1965 had been on target but had experienced failures in their landing systems. This time everything worked. The retro rockets fired, the cushioning airbags inflated and the shiny sphere of Luna 9 was set down gently on the moon. Four petal shaped stabilisers opened out to hold the sphere steady and the communication antennae and TV camera popped up, allowing Luna 9 to send back the first pictures from the surface of the moon. In a devastating blow for the Soviet space programme however, Sergei Korolev had not lived to see it. The driving force behind all of the Soviet successes in space thus far had died following complications during a routine operation. His death was a disastrous setback for the programme and without his leadership the Soviet efforts floundered as trust between the cosmonauts, engineers and their political masters broke down over difficulties with the ongoing Soyuz programme.
 Vladimir Komarov became the first Soviet fatality of the space race in April 1967
Meanwhile the US programme was going well. In March Gemini 8, piloted by one Neil Armstrong, made the first successful docking with an un-manned Agena capsule, proving another essential manoeuver required for the US version of a manned moon mission. The Americans had further cause to celebrate when Surveyor 1 made a successful soft landing and transmitted from the surface of the moon in June 1966. The Soviets achieved their second successful soft landing with Luna 13 on Christmas Eve.
1967 was a black year in the story of the space race for both the US and Soviet Union. The tragic fire which broke out during crew training in the new Apollo 1 command module and claimed the lives of astronauts Gus Grissom, Ed White and Roger Chaffee saw the US suspend manned space-flight for twenty months while NASA investigated and made modifications. In April the Soviet programme suffered their own tragedy when cosmonaut Vladimir Komarov, who had successfully flown on the Voshkod 1 mission was killed on the first manned mission of the Soyuz spacecraft. When the parachute failed to deploy following re-entry Komarov died when the capsule hit the ground.
The cosmonauts involved in the Soyuz programme including Yuri Gagarin had been highly critical of the spacecraft's shortcomings and the unwillingness of the bureaucrats and engineers to take their safety concerns seriously. With Komarov's death, Gagarin was prepared to make his criticism public. For both nations lessons had to be learned for the show would go on.
 The mighty but complicated and unreliable N1 rocket
The Soviet plan to put a man on the moon, under the direction of Korolev's successor Vasili Mishin, differed somewhat from the ultimately successful US approach. The L3 Moon expedition complex comprising a Soyuz command module, an LK lander and a booster would be launched into earth orbit atop the new N1 rocket. With no need for docking manoeuvers in Earth orbit the two man crew would continue on their flight to the moon, where one cosmonaut would transfer to the landing module for descent to the lunar surface. Here the Soviet approach differed from the US Apollo design for there was no connecting tunnel between the command module and the landing module and so the cosmonaut would need to exit one and spacewalk to the other and then repeat the exercise on the way back. The lander would use the same engine for both descent and take off but in case of failure the plan was to land a spare unmanned LK module on the moon as well as a couple of remote controlled Lunokhod rovers to allow the cosmonaut to travel to the spare. It remained an ambitiously complicated scheme.
Testing of the technology for launch and propulsion continued through 1967 and into 1968 with a series of unmanned 'Zond' probes. Tests were bedevilled by unreliability of the rocket technology but the Soviet engineers soldiered on. In September 1968 they narrowly beat the Americans to another first with Zond V. The probe carried the first living things around the moon and returned them safely to Earth; two steppe tortoises, who splashed down in the Indian Ocean none the worse for wear. Zond V also carried a dummy fitted with radiation sensors, its face was modelled on Yuri Gagarin, who had tragically died in a plane crash in March of that year. The dummy incidentally is the last exhibit in the Cosmonauts exhibition. In October 1968 both nations returned to manned spaceflight. Apollo 7 completed the mission of the ill-fated Apollo 1 whilst two weeks later the Soyuz manned programme also resumed in order to perfect the docking manoeuvers required for the whole Soviet mission to work. Soyuz 3 attempted to dock with the unmanned Soyuz 2 but the pilot Georgi Beregovoi, who could be forgiven some nerves given the fate of Komorov, was unable to complete the manoeuver successfully due to an error of orientation which left insufficient fuel for a second attempt.
 Soviet engineers inspect the Zond 5 cosmo-tortoises ( pic credit Energia.) The next Zond launch in November '68 was an unmanned test for the planned Soviet manned circumlunar mission scheduled to take place the following month. Zond 6 successfully orbited the moon and returned to Earth but on re-entry suffered a depressurisation of the crew compartment which would have killed any cosmonauts on board. The decision was taken to delay the next mission and the Americans took full advantage, moving up their own manned lunar orbiting mission which would have been Apollo 9 and instead sending the crew of Apollo 8 successfully around the moon and returning them safely to Earth.
With the honours for a successful manned circumlunar mission going to the US, the Kremlin top brass decided not to bother with the Zond 7 mission, which would have taken Alexei Leonov and Oleg Makarov around the moon in March 1969. The propaganda value of achieving the feat second was not thought worthwhile. With their thunder stolen, the Soviets could at least celebrate the new year with the success of the Soyuz 4 & 5 missions. The two manned spacecraft had docked in orbit and transferred two out of the three crew members of Soyuz 5 to join the single cosmonaut in Soyuz 4, proving this vital element of the plan could be performed if the Soviet manned mission to the moon ever got underway. The mission was widely celebrated as another Soviet first but there had been much bitter argument over whether the spacecraft should dock automatically or under control of the cosmonauts. An automated docking between 2 unmanned spacecraft 'Cosmos 212 & 213' had been achieved over a year before and amongst the engineers this was felt to be the safer option. There had also been much argument over how many men should transfer due to worries of re-entering with three men on board. Would the parachute cope with the extra weight? In the end the benefits of two space walkers being able to assist each other should one get into difficulty outweighed the re-entry concerns. In the end all went smoothly but the delays had been costly. As Soyuz 4 pilot Vladimir Shatalov pointed out, whilst they had been arguing, the Americans had been orbiting the moon.
 Stamps from Cuba and Hungary celebrate Soyuz 4 & 5
The momentum of the US effort now appeared unstoppable with Apollo 9 fulfilling Apollo 8's original mission objectives in March, perfecting their own in-orbit docking manoeuvers and Apollo 10 carrying out a complete dry run of the moon landing all bar the landing part in May. Meanwhile the second planned Soviet lunar orbital mission Zond 8 was also cancelled. Zond 7 and Zond 8 would later be used as unmanned probes. On 3rd July a catastrophic failure of an N1 rocket test launch completely destroyed the N1 launch pad at Baikonur in a massive explosion and put paid to any chance the Soviets might have had of beating the US to the moon. It is believed to have been the largest man-made non-nuclear explosion of all time. The N1 was a mighty rocket and mighty complicated too. Its development had been dogged by problems. The first stage of the rocket had 30 separate engines whereas the US Saturn V had just 5. With so many engines all required to work at once, failures were almost inevitable. The Soviet lunar programme had literally gone up in smoke. Therefore it would be Neil Armstrong not Alexei Leonov who would finally set foot on the moon on July 20th 1969 and with one small step, it was game over.
 This Apollo lander mock-up takes pride of place in the Science Museum - IMHO the LK3 would have looked cooler!
Space-race Timeline
October 4th 1957 The Soviet Union launches Sputnik
November 3rd 1957 Laika becomes the first dog in space
January 3rd 1958 First US satellite Explorer 1 launched
March 17th 1958 Vanguard 1 becomes 2nd successful US satellite
May 15th 1958 Sputnik 3 launched
July 29th 1958 US establishes NASA
October 11th 1958 NASA launches Pioneer 1
January 2nd 1959 Luna 1 launched
September 14th 1959 Luna 2 hits the moon
October 6th Luna 3 takes first picture of dark side of the moon
August 19th 1960 Sputnik 5 takes 2 dogs into orbit and successfully returns them to Earth
October 10th 1960 USSR launches first attempted Mars probe.
November 3rd 1960 US Pioneer 5 becomes first probe to send back data from interplanetary space.
January 31st 1961 Ham the chimpanzee becomes the first passenger on a US space mission and returns safely.
February 12th 1961 USSR launch Venera 1 - 1st attempted Venus probe
April 12th 1961 Yuri Gagarin becomes first man in space
May 5th 1961 Alan Shepard makes sub-orbital flight
May 12th 1961 JFK Commits US to putting a man on the moon 'before the decade is out.'
February 20th 1962 John Glenn becomes first American to orbit the Earth
April 23rd 1962 US probe Ranger 4 impacts the moon
April 5th 1963 Luna 4 misses the moon
July 16th 1963 Valentina Tereshkova becomes the first woman in space
October 12th 1964 Voshkod 1 makes the first multi-crew orbital mission
March 18th 1965 Alexei Leonov makes the first space walk
March 23rd 1965 Gemini 3 becomes the first US multi-crew mission
June 3rd 1965 Ed White emulates Leonov and carries out first US space walk on Gemini 5 mission
January 14th 1966 Death of Sergei Korolev
February 3rd 1966 Luna 9 achieves first soft landing on the moon
March 16th 1966 Gemini 8 carries out the first docking with an unmanned Agena target vehicle
January 27th 1967 Apollo 1 fire kills 3 astronauts and leads to suspension of US manned missions for 20 months
April 24th 1967 Vladimir Komorov is killed when the Soyuz 1 parachute fails to deploy on landing
September 18th 1968 Zond V takes the first lifeforms around the moon - two tortoises.
October 11th 1968 US returns to manned spaceflight with Apollo 7
October 25th 1968 USSR returns to manned spaceflight with Soyuz 2 & 3 attempted docking in orbit
November 10th 1968 Zond 6 simulates a crewed circumlunar mission but failures raise concerns
December 24th 1968 Apollo 8 orbits the moon
January 16th 1969 Soyuz 4 & 5 become the first manned spacecraft to dock in orbit and transfer crews between them
March 13th 1969 Apollo 9 performs docking operations required for US moon landing
May 26th 1969 Apollo 10 returns from a successful dry run of the moon landing mission
July 3rd 1969 - Soviet N1 rocket explosion destroys launch facility
July 20th 1969 Apollo 11 lands on the moon
Some great links
http://www.zarya.info/Diaries/Luna/Luna.php
http://www.lpi.usra.edu/lunar/missions/
More space related posts on Slings and Arrows
http://slingsandarrowsblog.blogspot.co.uk/search/label/space
 In the Ocean of Storms by Alexei Leonov - cosmonaut and artist
The success of Sputnik on October 4th 1957 sent a shockwave through America and brought an unbearable level of media scrutiny and public criticism onto its competing army and navy rocket programmes. Although both successfully launched satellites in the early months of 1958, the need for a joined up approach in response to the Soviets' relentless progress was clear and NASA came into being in July of the same year.
In the closing months of 1958, the newly formed NASA in conjunction with the US Army Ballistic Missile Agency, who, needless to say, did not come entirely in peace, began launching the Pioneer series of probes. These were intended as moon fly-by's but the first three launches all experienced technical failures. By January of 1959 the Soviets were ready to begin their own programme. Objective number one was to hit the moon. On 2nd January Luna 1 blasted off from the Baikonur Cosmodrome atop a Vostok rocket and headed into the heavens. To allow its progress to be tracked, the final stage of the rocket released a cloud of sodium vapour at a distance of 113,000km from Earth which was visible from Earth based telescopes. Suggestions to detonate a nuclear warhead on the surface of the moon itself to allow the impact to be seen had been sensibly shelved. The shiny silver sphere, similar in general appearance to Sputnik, carried equipment for detecting the presence of gasses in interplanetary space, for measuring the magnetic field of the earth and investigating whether the moon also had a magnetic field, as well as collecting vital data on radiation exposure during its journey. In the event Luna 1 missed the moon by 6000km and sailed on, transmitting until its batteries ran out, 600,000km from Earth. Thereafter it became an artificial planet, albeit a very small one, falling into a solar orbit.
 Image of dark side of the moon taken by Luna 3 1959 In March 1959 NASA's Pioneer 4 became the first US mission to escape Earth's gravity and flew by the moon at a distance of 60,000km before joining Luna 1 in solar orbit. The Soviets followed up later in the year with two more missions. Luna 2 was virtually identical in design and objectives to Luna 1 and succeeded in impacting the lunar surface on 13th September. Less than a month later Luna 3 was launched on a trajectory to sling-shot around the moon. Equipped with a camera activated by photo-electric cells which detected the sun-lit face of the moon as the craft passed behind it on 7th October, Luna 3 captured the first images of the dark side of the moon, which were transmitted back to Earth as the spacecraft headed back before probably burning up in Earth's atmosphere.
The next two years saw feverish activity from both superpowers on several fronts as they worked towards the major goal of getting a man into space and continued to launch ambitious exploratory missions. By the time the US probe Ranger 4 emulated Luna 2 and crashed into the dark side of the moon in April 1962, following the failure of the systems which should have ensured a softer landing, a great deal had happened. Dogs, chimps and men had orbited the Earth safely and returned as heroes. Probes had been dispatched into interplanetary space, the USSR had begun programmes to send exploratory probes to both Mars and Venus and JFK had thrown down the gauntlet and committed the US to landing a man on the moon and returning him safely to Earth by the end of the decade. It was game on.

Soviet poster celebrating manned spaceflight With both moon projects having successfully impacted an object on the lunar surface, the next objective was to set down a probe upon the moon in a more controlled manner. Luna 4 was the first Soviet attempt at a soft landing and also the first mission to use an earth parking orbit like the US Ranger missions before being propelled on a new course to the moon rather than a direct ascent trajectory as in previous Luna missions. Failure of the navigation system resulted in the spacecraft being incorrectly orientated for its mid-course correction burn and it missed the moon by 8000km on 5th April 1963. The headlines would nevertheless be seized by the USSR again in July of that year by Valentina Tereshkova becoming the first woman in space.
Meanwhile work on further developments was mired in political infighting. The complicated Soyuz A-B-V circumlunar complex was the brainchild of Soviet space-programme mastermind Sergei Korolev. The programme relied on the docking of a manned spacecraft termed Soyuz A with a second unmanned booster module in orbit, termed Soyuz B, which would propel it on its journey to the moon. Soyuz B would first have been filled with fuel by three unmanned tugs, termed Soyuz V. It sounded bloody complicated and Khruschev had been persuaded to back the rival programme of Vladimir Chelomei instead. Korolev was instructed to focus on developing a lunar lander and in the meantime continued with the manned spaceflight programme.
 Over the Black Sea by Alexei Leonov
On 12th October 1964 another first was achieved by the Voskhod 1 mission which took three cosmonauts into orbit in the first multi-crew flight. The spacecraft was little different from the Vostok capsules used in earlier missions. The crew were waved off by Khruschev but by the time they landed the Soviet premier had been ousted from power and they were welcomed back by Brezhnev. The change at the top saw a return to a joined up approach which would be overseen by Korolev, who combined Chelomei's Proton rocket with his own Soyuz L1 spacecraft.
1965 saw the space-race heat up. In March Alexei Leonov aboard Voskhod 2 carried out the first space-walk. The success of any Soviet moon landing would at some point require crew to transfer externally between spacecraft and so this was a critical development as well as being an outstanding moment in its own right. Five days later the US launched Gemini 3; their first multi-crew mission and the first manned flight of a new generation of spacecraft. In May Luna 5 became the second Soviet probe to impact the lunar surface. The US had achieved four further successful impacts with their Ranger missions which had returned good quality photographs of the lunar surface before crashing into it. In June Ed White emulated Leonov by carrying out a space walk on the Gemini 5 mission. A week later Luna 6 was all set to achieve the first soft landing on the surface of the moon but a system failure put the probe on the wrong trajectory. Nevertheless a full test of all systems for landing was carried out as the probe sailed past the moon and it appeared that had it been on course the landing would have been a success.
The honour of the first soft landing on the lunar surface was claimed by the Soviet Luna 9 probe on February 3rd 1966. Two more attempted landings in late 1965 had been on target but had experienced failures in their landing systems. This time everything worked. The retro rockets fired, the cushioning airbags inflated and the shiny sphere of Luna 9 was set down gently on the moon. Four petal shaped stabilisers opened out to hold the sphere steady and the communication antennae and TV camera popped up, allowing Luna 9 to send back the first pictures from the surface of the moon. In a devastating blow for the Soviet space programme however, Sergei Korolev had not lived to see it. The driving force behind all of the Soviet successes in space thus far had died following complications during a routine operation. His death was a disastrous setback for the programme and without his leadership the Soviet efforts floundered as trust between the cosmonauts, engineers and their political masters broke down over difficulties with the ongoing Soyuz programme.
 Vladimir Komarov became the first Soviet fatality of the space race in April 1967
Meanwhile the US programme was going well. In March Gemini 8, piloted by one Neil Armstrong, made the first successful docking with an un-manned Agena capsule, proving another essential manoeuver required for the US version of a manned moon mission. The Americans had further cause to celebrate when Surveyor 1 made a successful soft landing and transmitted from the surface of the moon in June 1966. The Soviets achieved their second successful soft landing with Luna 13 on Christmas Eve.
1967 was a black year in the story of the space race for both the US and Soviet Union. The tragic fire which broke out during crew training in the new Apollo 1 command module and claimed the lives of astronauts Gus Grissom, Ed White and Roger Chaffee saw the US suspend manned space-flight for twenty months while NASA investigated and made modifications. In April the Soviet programme suffered their own tragedy when cosmonaut Vladimir Komarov, who had successfully flown on the Voshkod 1 mission was killed on the first manned mission of the Soyuz spacecraft. When the parachute failed to deploy following re-entry Komarov died when the capsule hit the ground.
The cosmonauts involved in the Soyuz programme including Yuri Gagarin had been highly critical of the spacecraft's shortcomings and the unwillingness of the bureaucrats and engineers to take their safety concerns seriously. With Komarov's death, Gagarin was prepared to make his criticism public. For both nations lessons had to be learned for the show would go on.
 The mighty but complicated and unreliable N1 rocket
The Soviet plan to put a man on the moon, under the direction of Korolev's successor Vasili Mishin, differed somewhat from the ultimately successful US approach. The L3 Moon expedition complex comprising a Soyuz command module, an LK lander and a booster would be launched into earth orbit atop the new N1 rocket. With no need for docking manoeuvers in Earth orbit the two man crew would continue on their flight to the moon, where one cosmonaut would transfer to the landing module for descent to the lunar surface. Here the Soviet approach differed from the US Apollo design for there was no connecting tunnel between the command module and the landing module and so the cosmonaut would need to exit one and spacewalk to the other and then repeat the exercise on the way back. The lander would use the same engine for both descent and take off but in case of failure the plan was to land a spare unmanned LK module on the moon as well as a couple of remote controlled Lunokhod rovers to allow the cosmonaut to travel to the spare. It remained an ambitiously complicated scheme.
Testing of the technology for launch and propulsion continued through 1967 and into 1968 with a series of unmanned 'Zond' probes. Tests were bedevilled by unreliability of the rocket technology but the Soviet engineers soldiered on. In September 1968 they narrowly beat the Americans to another first with Zond V. The probe carried the first living things around the moon and returned them safely to Earth; two steppe tortoises, who splashed down in the Indian Ocean none the worse for wear. Zond V also carried a dummy fitted with radiation sensors, its face was modelled on Yuri Gagarin, who had tragically died in a plane crash in March of that year. The dummy incidentally is the last exhibit in the Cosmonauts exhibition. In October 1968 both nations returned to manned spaceflight. Apollo 7 completed the mission of the ill-fated Apollo 1 whilst two weeks later the Soyuz manned programme also resumed in order to perfect the docking manoeuvers required for the whole Soviet mission to work. Soyuz 3 attempted to dock with the unmanned Soyuz 2 but the pilot Georgi Beregovoi, who could be forgiven some nerves given the fate of Komorov, was unable to complete the manoeuver successfully due to an error of orientation which left insufficient fuel for a second attempt.
 Soviet engineers inspect the Zond 5 cosmo-tortoises ( pic credit Energia.) The next Zond launch in November '68 was an unmanned test for the planned Soviet manned circumlunar mission scheduled to take place the following month. Zond 6 successfully orbited the moon and returned to Earth but on re-entry suffered a depressurisation of the crew compartment which would have killed any cosmonauts on board. The decision was taken to delay the next mission and the Americans took full advantage, moving up their own manned lunar orbiting mission which would have been Apollo 9 and instead sending the crew of Apollo 8 successfully around the moon and returning them safely to Earth.
With the honours for a successful manned circumlunar mission going to the US, the Kremlin top brass decided not to bother with the Zond 7 mission, which would have taken Alexei Leonov and Oleg Makarov around the moon in March 1969. The propaganda value of achieving the feat second was not thought worthwhile. With their thunder stolen, the Soviets could at least celebrate the new year with the success of the Soyuz 4 & 5 missions. The two manned spacecraft had docked in orbit and transferred two out of the three crew members of Soyuz 5 to join the single cosmonaut in Soyuz 4, proving this vital element of the plan could be performed if the Soviet manned mission to the moon ever got underway. The mission was widely celebrated as another Soviet first but there had been much bitter argument over whether the spacecraft should dock automatically or under control of the cosmonauts. An automated docking between 2 unmanned spacecraft 'Cosmos 212 & 213' had been achieved over a year before and amongst the engineers this was felt to be the safer option. There had also been much argument over how many men should transfer due to worries of re-entering with three men on board. Would the parachute cope with the extra weight? In the end the benefits of two space walkers being able to assist each other should one get into difficulty outweighed the re-entry concerns. In the end all went smoothly but the delays had been costly. As Soyuz 4 pilot Vladimir Shatalov pointed out, whilst they had been arguing, the Americans had been orbiting the moon.
 Stamps from Cuba and Hungary celebrate Soyuz 4 & 5
The momentum of the US effort now appeared unstoppable with Apollo 9 fulfilling Apollo 8's original mission objectives in March, perfecting their own in-orbit docking manoeuvers and Apollo 10 carrying out a complete dry run of the moon landing all bar the landing part in May. Meanwhile the second planned Soviet lunar orbital mission Zond 8 was also cancelled. Zond 7 and Zond 8 would later be used as unmanned probes. On 3rd July a catastrophic failure of an N1 rocket test launch completely destroyed the N1 launch pad at Baikonur in a massive explosion and put paid to any chance the Soviets might have had of beating the US to the moon. It is believed to have been the largest man-made non-nuclear explosion of all time. The N1 was a mighty rocket and mighty complicated too. Its development had been dogged by problems. The first stage of the rocket had 30 separate engines whereas the US Saturn V had just 5. With so many engines all required to work at once, failures were almost inevitable. The Soviet lunar programme had literally gone up in smoke. Therefore it would be Neil Armstrong not Alexei Leonov who would finally set foot on the moon on July 20th 1969 and with one small step, it was game over.
 This Apollo lander mock-up takes pride of place in the Science Museum - IMHO the LK3 would have looked cooler!
 Space-race Timeline
October 4th 1957 The Soviet Union launches Sputnik
November 3rd 1957 Laika becomes the first dog in space
January 3rd 1958 First US satellite Explorer 1 launched
March 17th 1958 Vanguard 1 becomes 2nd successful US satellite
May 15th 1958 Sputnik 3 launched
July 29th 1958 US establishes NASA
October 11th 1958 NASA launches Pioneer 1
January 2nd 1959 Luna 1 launched
September 14th 1959 Luna 2 hits the moon
October 6th Luna 3 takes first picture of dark side of the moon
August 19th 1960 Sputnik 5 takes 2 dogs into orbit and successfully returns them to Earth
October 10th 1960 USSR launches first attempted Mars probe.
November 3rd 1960 US Pioneer 5 becomes first probe to send back data from interplanetary space.
January 31st 1961 Ham the chimpanzee becomes the first passenger on a US space mission and returns safely.
February 12th 1961 USSR launch Venera 1 - 1st attempted Venus probe
April 12th 1961 Yuri Gagarin becomes first man in space
May 5th 1961 Alan Shepard makes sub-orbital flight
May 12th 1961 JFK Commits US to putting a man on the moon 'before the decade is out.'
February 20th 1962 John Glenn becomes first American to orbit the Earth
April 23rd 1962 US probe Ranger 4 impacts the moon
April 5th 1963 Luna 4 misses the moon
July 16th 1963 Valentina Tereshkova becomes the first woman in space
October 12th 1964 Voshkod 1 makes the first multi-crew orbital mission
March 18th 1965 Alexei Leonov makes the first space walk
March 23rd 1965 Gemini 3 becomes the first US multi-crew mission
June 3rd 1965 Ed White emulates Leonov and carries out first US space walk on Gemini 5 mission
January 14th 1966 Death of Sergei Korolev
February 3rd 1966 Luna 9 achieves first soft landing on the moon
March 16th 1966 Gemini 8 carries out the first docking with an unmanned Agena target vehicle
January 27th 1967 Apollo 1 fire kills 3 astronauts and leads to suspension of US manned missions for 20 months
April 24th 1967 Vladimir Komorov is killed when the Soyuz 1 parachute fails to deploy on landing
September 18th 1968 Zond V takes the first lifeforms around the moon - two tortoises.
October 11th 1968 US returns to manned spaceflight with Apollo 7
October 25th 1968 USSR returns to manned spaceflight with Soyuz 2 & 3 attempted docking in orbit
November 10th 1968 Zond 6 simulates a crewed circumlunar mission but failures raise concerns
December 24th 1968 Apollo 8 orbits the moon
January 16th 1969 Soyuz 4 & 5 become the first manned spacecraft to dock in orbit and transfer crews between them
March 13th 1969 Apollo 9 performs docking operations required for US moon landing
May 26th 1969 Apollo 10 returns from a successful dry run of the moon landing mission
July 3rd 1969 - Soviet N1 rocket explosion destroys launch facility
July 20th 1969 Apollo 11 lands on the moon
Some great links
http://www.zarya.info/Diaries/Luna/Luna.php
http://www.lpi.usra.edu/lunar/missions/
More space related posts on Slings and Arrows
http://slingsandarrowsblog.blogspot.co.uk/search/label/space
October 22, 2015
Of War and Wisdom
This post follows on from the previous Abbasid post Brothers up in Arms . It was originally written as one post but I felt it was a bit long so cut it in half and will conclude the life of the caliph Mamun here.
At the end of the last post we left the caliph Mamun back in control in Baghdad and engaged in reconciliation and rebuilding following the civil war with his brother and his failed attempt to rule the caliphate from distant Merv. In 821 an opportunity presented itself for Mamun to interfere in affairs in Byzantium with the appearance in northern Syria of Thomas the Slav, who was leading a rebellion against the incumbent emperor Michael II. Thomas' emissary to the caliph was sent with extravagant promises to make. Allowing for propaganda intended to blacken his name as a traitor to the empire, Thomas is variously credited with signing away frontier provinces or perhaps even undertaking to en-fief the entire empire to the caliphate in exchange for an alliance which would safeguard his rear whilst he turned his forces against Constantinople. The caliph accepted with alacrity and provided Thomas with a substantial contribution to his war chest. The rebel was even permitted to celebrate his coronation as Emperor of the Romans in the city of Antioch. Mamun would have been advised to remain sceptical of the bargain. Thomas, after all, was not the first Byzantine rebel commander to promise much and deliver nothing.
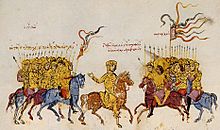 Thomas the Slav arrives in Syria - Madrid Skylitzes At any rate Thomas’ friendly overtures were well timed for the caliph had his hands full already with continuing unrest in Syria and Egypt and a rebellion by the Khurramite sect, centred on present day Azerbaijan, which had sprung up during the civil war. The Khurramites followed a belief system which fused ideas from the Zoroastrian cult of Mazdakism with Shia Islam and like earlier movements they revered the memory of Abu Muslim. The leader of the revolt was Babak, who claimed descent from Abu Muslim and also claimed rather interestingly to have inherited the soul of the previous Khurramite leader, which had fused with his own. In true guerilla style Babak had taken to the mountains and a succession of governors of Azerbaijan had failed to deal with him. By using the terrain to his advantage he had been able to win many victories over the Abbasid forces sent against him, falling upon and slaughtering his enemies in bad country and then melting away once more. His successes had brought more support for the revolt and pockets of Khurramite resistance were springing up all over the Persian territories of the Caliphate. More trouble on the north-western frontier therefore, was the last thing the caliph wanted. In the event however, Thomas' rebellion ended in failure, defeat and crucifixion. See here for more on this episode.
 By 826 Mamun had regained a firm grip on his territories with Syria and Egypt having been entirely pacified by the son of Tahir and returned to obedience. The rebellion of the Khurramites was still ongoing but the tide seemed to be turning. In 830 an army of Khurramite rebels holding out in the Zagros Mountains of western Iran led by a Persian nobleman by the name of Nasr was heavily defeated by the Caliph’s forces. Seeing the writing on the wall for the Khurramite cause, Nasr chose to lead his surviving troops through Armenia out of harm’s way and sought refuge within the Byzantine Empire.
The arrival of Nasr with some fourteen thousand armed followers who professed themselves willing to fight for the empire against the caliphate was greeted rapturously by the new emperor Theophilus, who had succeeded his father Michael II in 829. The new arrivals were given land and incorporated into the Byzantine military under the command of Nasr himself, upon whom the emperor bestowed Patrician rank. Nasr and his followers agreed in principle at least to embrace Christianity and were baptised. Nasr now took a new Christian name and became Theophobos. As Christians, the former Khurramites were now permitted to marry and Theophobos was given the emperor’s own sister-in-law as a bride. The fugitive rebel had landed on his feet.
 Embassy from Theophilus to Mamun - Madrid Sylitzes
 Good relations had previously been established between Theophilus and Mamun but this provocation was too much for the caliph, who decided that the time had come to lead an expedition against the infidel as his father had done. In the summer of 830 he launched a limited invasion of Anatolia, with his son Abbas also leading a column. Little was achieved aside from symbolism but in the following year Theophilus retaliated against the raid by invading Muslim held Cilicia and sacking Tarsus. Elated by his success, Theophilus returned to Constantinople and celebrated with an elaborate triumphal procession followed by races in the hippodrome in which he himself participated. Mamun meanwhile had retired to Damascus. The first Abbasid caliph to visit the city, he was making a point of showing his face in recently re-pacified Syria. Retaliating in turn to Theophilus’ campaign, Mamun once more led his forces across the border and captured the town of Heraclea, which his father had also successfully taken in a much celebrated victory.
In 832 a tenuous peace was negotiated between the two empires whilst Mamun, who must have been the most well travelled of all the caliphs, decided to visit Egypt and show his face there too. Whilst in the land of the pharaohs, the ever curious caliph decided to investigate the pyramids and had an exploratory tunnel dug into the side of the Great Pyramid. This tunnel intersected the interior passages within the pyramid and the caliph was able to venture inside and make his way up to the burial chamber of Khufu, only to find the sarcophagus empty and the tomb looted in distant antiquity.
With his Egyptian efforts frustrated, the caliph set out once again in the summer of 833 in what promised to be a more sizable campaign against the Byzantines. As he relaxed beside a stream during his advance from Tarsus however, the caliph suddenly took ill and his fever soon proved fatal. He had named no successor, realising perhaps the futility of such actions. His younger brother Qasim, who had been appointed third in line in the provisions of their father Harun al Rashid, moved swiftly to seize the reins of power as caliph Al-Mutasim. Mamun was laid to rest in Tarsus and his tomb survives to this day.
In overall assessment Mamun, for me at least, emerges as a more impressive figure than his more famous father Harun al Rashid. He had shown himself a good judge of character in the men he had chosen to trust and had displayed a willingness to accommodate, reconcile and compromise in his policies and his exercise of mercy where possible. He was nevertheless prepared to be utterly ruthless when a change of policy demanded it. He was, above all, a pragmatist.
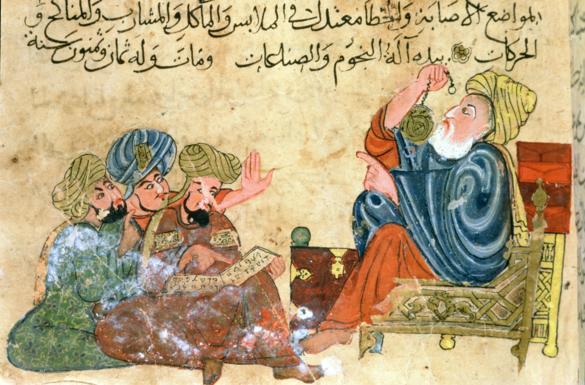
Muslim scholars discuss the use of the astrolabe
Mamun’s greatest legacy is as a patron of scientific enquiry. Whereas almost every anecdote about Harun seems to involve dancing girls and drunken poets, Mamun appears to have taken a serious interest in the scholarship being pursued in Baghdad under the auspices of the caliphs. The institution that would come to be known as the Bayt al-hikma or House of Wisdom was first established in Baghdad under the auspices of Mansur as a safe repository for his growing collection of scientific and philosophical manuscripts. This is imagined as a centrally organised and officially controlled research facility but in truth no such control or organisation existed and individual scholars carried out their work independently with funding from wealthy patrons amongst the caliphs' nadim. The term House of Wisdom is better thought of as an idea or a movement at this point in history rather than a place. The effort to translate works from Greek, Indian and Persian into Arabic had been given particular impetus by the Barmakids. Yahya the Barmakid is said to have commissioned the first Arabic translation of Euclid and he and his sons numbered many pet scholars amongst their clients.
Mamun of course was raised as the protégé of Jaffar the Barmakid and perhaps gained his eager curiosity and love of scientific enquiry from the scholars patronised by Jaffar. Under Mamun’s caliphate the pursuit of scientific knowledge received a massive boost from the personal interest that the caliph took in such matters. Mamun made enquiries as to his scholars’ needs and progress, sourced new manuscripts and scientific instruments during his visits to Damascus and Egypt and oversaw the construction of a new observatory in Baghdad. Stepping into the shoes of the Barmakids came three brothers known as the Banu Musa who had accompanied Mamun westwards on his return from Khurasan. Like the Barmakids they were an old Persian family, wealthy, cultured and well connected. Working for the Banu Musa, a good translator could earn five hundred dinars a month and they assembled an army of them.
Foremost of all the scholars of Baghdad during Mamun’s reign was Muhammad ibn Musa Al-Khwarizmi. This great polymath was another who had made his way westwards from Khurasan to the City of Peace. His contribution to modern mathematics, astronomy and geography is formidable. Even the Western corruption of his name is preserved in the term algorithm. Al-Khwarizmi was responsible for the production of three great works of translation and further scholarship, whose transmission to the west have cemented his reputation as the greatest of oriental sages. The first was a distillation of all Indian mathematical and astronomical knowledge which had been transmitted to the Arab world within a corpus of work called the siddhanta. To this Al-Khwarizmi added star tables known as the zij al sindhind whose accuracy would be unsurpassed for centuries and the earliest known description of the use of the astrolabe. Al Khwarizmi also needed to include an explanatory treatise on the Indian system of calculation using the numbers 1-9 along with the concept of zero.
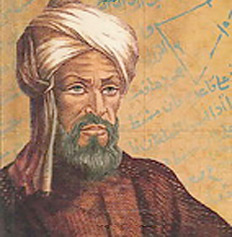 Muhammad ibn Musa Al-Khwarizmi
If like me you hated maths at school then you have reason to curse Al-Khwarizmi for his next work; the book of restoring and balancing, Kitab al jabr wa’l-muqabala, from which we take the term algebra. The book detailed the use of equations in solving the problems of the day; calculating tax or inheritance, partitioning land and regulating trade. His third great work the al-majisti was a translation and commentary on the works of Ptolemy, known as the Almagest in the West.
Upon perusing the Almagest, Mamun demanded a practical demonstration of the theory within. In a study commissioned by the caliph to determine the accuracy of Ptolemy’s estimate of the circumference of the Earth, a party of astronomers set out into a flat area of desert and measured the altitude of the pole star. Driving a pole into the ground they fixed a piece of cord of known length to it and then walked north in a straight line, taking measurements of the altitude of the pole star as they went, driving in more posts and running out the cord behind them. Once they had reached a point at which the altitude of the pole star had risen by one degree, they retraced their steps along the posts they had driven into the ground and measured their distance travelled from the length of cord they had paid out. I can only assume that someone was following on behind on the way out to recycle the cord already used, unless they were carrying 66 miles of cord with them, for that was the measured distance travelled; 66.6 miles to be precise. Proceeding south from their original start point they then continued until they had covered the same distance at which point they observed that the altitude of the pole star was one degree lower than at their start point. The entire experiment was then repeated in a second area of desert and the measurements found to be the same, at which point the caliph declared himself satisfied with their observations. The distance corresponding to a degree of latitude was found to be 32.2 farsakhs or 66.6 miles. From this it was concluded that the circumference of the Earth was eight thousand farsakhs, or 24,000 miles, impressively close to the modern figure.
Such was the standard of intellectual enquiry taking place on Mamun’s watch. It would be three centuries before anyone in the West even started to catch up. None of his successors would match his passion but the touch paper had been well and truly lit and would continue to burn brightly.
Mamun and the pyramids
http://www.ancient-origins.net/ancient-places-africa/tunnel-vision-mysterious-forced-entry-caliph-great-pyramid-giza-001812
October 12, 2015
Brothers up in arms
This post follows on from Harun al Rashid Part Two - Fall of the Barmakids
If Al Amin the son of the Commander of the Faithful should attempt to remove Al Mamun the son of the Commander of the Faithful from his right of succession after himself or if he should attempt to remove Al Mamun from the governorship of Khurasan, or if he should attempt to dismiss any of his military commanders whom the commander of the faithful attached to al Mamun’s side, or if he should attempt to deprive him of either a small or a great part of what the Commander of the Faithful has granted to him, in any manner whatsoever or by any stratagem whatsoever, be it insignificant or momentous, then the Caliphate shall pass directly to Al Mamun and he shall come before Al Amin and be the one invested with power after the Commander of the Faithful.
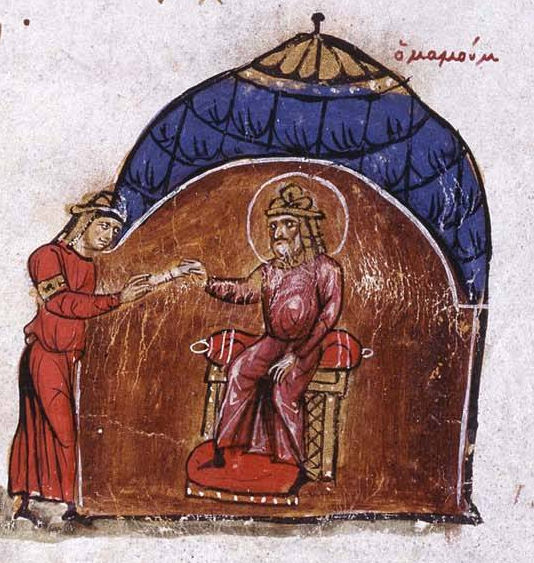 The Caliph Al Mamun as depicted in the Madrid Skylitzes
Harun al Rashid could not have made it clearer. His dispensations regarding the succession were inviolable. If his heir Al Amin interfered in any way with the rights of his brother either in regard to the succession or to the governance and control of the eastern provinces then his right to the caliphate was forfeit. All military commanders and indeed all Muslims in general would be released from their oaths of loyalty to Al Amin and would be expected to support the claim of Al Mamun. His sons had both written out declarations, swearing to uphold their obligations to each other and to the their younger brother Qasim, who was third in line. These were displayed on the walls of the Kabaa in Mecca. The caliph had written to every governor in the caliphate with a proclamation to be read out to all the people so that they understood what had been agreed and solemnly sworn to in Islam’s most sacred space. The oaths were awesome, binding and permanent. Those who broke even the smallest part of them would suffer the righteous anger of the Almighty himself. They were unfortunately, also not worth the paper they were written on. Incidentally, the oaths probably were written out on paper as the knowledge of paper production had by this time made its way from China to the Arab world, brought westwards from Khurasan with the Abbasids.
Harun, who died in March 809, was not long in his grave before the two brothers began moving inexorably towards conflict. Responsibility for the war must be laid at the door of Al Amin, the ruling caliph, who soon demanded the handing over of territory and revenues from his brother in direct contravention of the terms of the succession. As was his right, Mamun refused his brother’s demands. From their respective courts in Baghdad and Merv the increasingly strained diplomatic correspondence flew back and forth by the efficient state postal service known as the Barid, whose riders could carry messages along the Khurasan highway at a rate of 400km a day. If there is a true villain of the piece it is Fadl ibn Rabi, likely architect of the downfall of the Barmakids, who had found himself in Baghdad as Amin’s chamberlain. With a eye to his own and his family’s fortunes, Fadl had no stake in a future with Mamun as the next caliph. From the first he worked to remove Mamun from the succession and encouraged Amin to this end. Having successfully provoked disagreement between the brothers, Fadl continued to raise the stakes until war was inevitable.
Mamun meanwhile, taking advice from the hawks in his own court, decided to test the extent of his brother’s hostility. He wrote to request that his sons and their mother be sent to him in Khurasan along with a large sum of his own money. Both were refused and the worst fears of Mamun and his supporters were confirmed further when news arrived that his brother had excluded his name from the Friday prayers in Baghdad. Towards the end of 810 Amin took the final fateful steps. The proclamations were torn down from the sacred walls of the Kabaa and brought to Baghdad, where the caliph publically ripped them up, before declaring that his own son Musa would succeed him as caliph.
 Modern Tehran in the shadow of the Elburz Mountains - picture by Hansueli Karpf
Soon moves were afoot to depose Mamun from the governorship of Khurasan by force and a large army of some fifty thousand men was assembled. The commander of this force was none other than the formally disgraced governor of Khurasan, Ali ibn Isa, whose misconduct had prompted Harun al Rashid to take his last fatal journey east. Ali was a key member of Amin’s inner circle but his appointment was a double edged sword. In Khurasan he was a hated figure from his years of corrupt administration and the prospect of his return at the head of a conquering army encouraged the people of the region to throw their support firmly behind Mamun against his brother the caliph.
On paper, of which as mentioned there were plentiful supplies, Mamun did not have much of a chance. A small force of just five thousand men was all that could be mustered for the defence of the east and was dispatched to the city of Rayy which stood in the path of Ali’s advance. Rayy, situated close to modern Tehran, presented a formidable bastion guarding the only route to Khurasan between the Elburz mountains and the Iranian desert. In command of the defenders was one Tahir ibn Husayn, a young aristocrat from the Afghan city of Herat. Mistrusting the citizens of Rayy to remain loyal if he garrisoned the city and allowed himself to be besieged, Tahir instead elected to face Ali in the field. If the numbers given for the respective forces are correct then Tahir faced odds of ten to one. On a sandy plain a day’s march from Rayy, which offered no advantages of terrain to the defending force, the two armies met. Tahir must have either had a yearning to enter paradise or supreme confidence in the quality of his small force but if it was the latter then his faith was not misplaced. An initial cavalry assault by Ali’s army was seen off by the defenders before they made an attempt to negotiate by citing the late Harun al Rashid’s now defunct proclamations. Ali’s response was to put a price on the negotiator’s head. Battle was rejoined and in the furious fight that ensued, the hated Ali was a marked man. He was cut down and beheaded and with the death of their commander his army’s morale and discipline collapsed despite their superior numbers and they were routed.
 The city of Hamadan saw Tahir's second victory
Most commanders would have remained on the defensive following such a fortunate victory but once he had dispatched the news of his victory to Merv, Tahir immediately once again showed his exceptional boldness and initiative by marching westwards along the Khurasan highway with his small force. The army of Ali had broken up in disarray and offered no further resistance and a new force had been hastily assembled and sent out from Baghdad when news of the defeat had arrived. Tahir was able to defeat this force outside Hamadan and marched on to seize the town of Hulwan, which lay on the far side of the Paytak pass through the Zagros mountains. Having cleared the mountains, Tahir was now just a hundred miles from Baghdad and now he waited. The odds were still stacked against him but following the two shock defeats, things were falling apart for Amin. Having lost both the moral high-ground and the strategic initiative the caliph’s stock was falling and only large payments and promises of rewards in Khurasan when the war was won served to keep the army of Baghdad (Abna) and the tribal chiefs of Iraq onside. Tahir was showing himself to be a strategist of genius, dispatching agents to sow dissension amongst his enemies and circulating derogatory rumours of a homosexual relationship between Amin and Fadl on the streets of Baghdad. A new force of some forty thousand made up of the soldiers of the Abna and Arab tribesmen was dispatched towards Hulwan but such were the divisions and jealousies between the two groups, encouraged by Tahir's agents who had infiltrated their ranks, that they fell to fighting each other before they were able to bring Tahir to battle.
Just as Caesar had crossed the Rubicon and swept down upon a panic stricken Rome with just a single legion and plenty of audacity, so Tahir now capitalised on the chaos and marched at the head of his tiny army into Iraq. His position in Hulwan was taken over by Harthama; Harun al Rashid’s most trusted general who had pledged his loyalty to Mamun. Harthama had arrived from Khurasan with reinforcements, allowing Tahir to go back on the offensive. Avoiding Baghdad for the time being, Tahir marched into the south and met with minimal resistance. Basra surrendered without a fight. In the holy cities of Mecca and Medina where there had been shock and dismay at Amin’s disregard for the sacred oaths that had been sworn, the people declared their allegiance to Mamun, as the wronged party, keeping to the letter of Harun al Rashid’s instructions.
 Medieval depiction of Mecca
In the summer of 812 Tahir and Harthama laid siege to Baghdad, where Amin remained holed up, now deserted by the majority of his troops and dependent upon the ordinary citizens for the defence of his capital. Despite having only rudimentary weapons and makeshift armour, the civilian militia raised from the poorest inhabitants, known as the ‘naked ones’ due to their lack of proper military equipment, put up a fierce resistance and the siege dragged on for a whole year whilst conditions in the city became increasingly worse. Vicious fighting ensued as the war for control of the city was fought street by street. Siege artillery was brought up and whole districts of the city of peace were battered into rubble. Law and order broke down as supplies ran low in the city and criminal gangs roamed the shattered streets. Many innocents were caught in the cross fire of arrows, stones and flaming missiles that rained down upon the stubborn defenders. The middle classes meanwhile tried to keep their heads down and protect their property as best they could.
Finally the attackers fought their way to the Eternity Palace where Amin was hiding, deserted by all but a few loyal supporters. Even Fadl ibn Rabi had abandoned his caliph and gone into hiding. As the palace crumbled and burned from the bombardment of Tahir’s siege artillery, Amin fled first to the old round city and then took to the river in a desperate attempt to avoid capture or at the very least surrender to Harthama, who he believed would spare his life. His escape failed when the boat sank in the Tigris and the bedraggled caliph was taken prisoner by Tahir’s men as he made his way to the bank. Locked in a store room in a nearby house, Amin was attacked by a mob of soldiers on Tahir’s orders later that same night. Wrestled to the floor, his throat was cut and his head was then struck off and taken to Tahir. His body was unceremoniously dumped. The caliphate belonged to Mamun, but its capital was in ruins and untold misery had been brought upon its people.
For the next six years, Mamun attempted to run the caliphate from his base in Merv. In 816, in what may have been a cynical gesture to garner a new base of support in Iraq or a genuine attempt to heal the breach in the Muslim community, Mamun declared that his successor as caliph would be not his younger brother Qasim nor any member of his family but the Alid imam Ali al-Ridha. Directly descended from the Prophet in the eighth generation, Ali’s pedigree was unquestionable. He was also the focus of pro-Alid rebellion. A revolt against Abbasid rule led by al-Ridha’s brother had broken out in Kufa, that perennial nest of troublemakers, in the previous year and been put down only with difficulty by the ever-loyal Harthama. Appeasement of the Alids made political sense therefore and Ali had joined the caliph in Merv and had even publically chastised his brother for the blood that had been shed on his account. In the erstwhile corridors of power in Baghdad however, there was deep consternation at the thought of the Abbasid dynasty being replaced by an Alid one and all of the privileges of the incumbent ruling elite being stripped away. Mamun’s absentee rule had caused disquiet but this latest move provoked outright rebellion and Ibrahim, the hedonistic poet brother of Harun al Rashid was thrust somewhat unwillingly into power in Baghdad as a rival caliph.
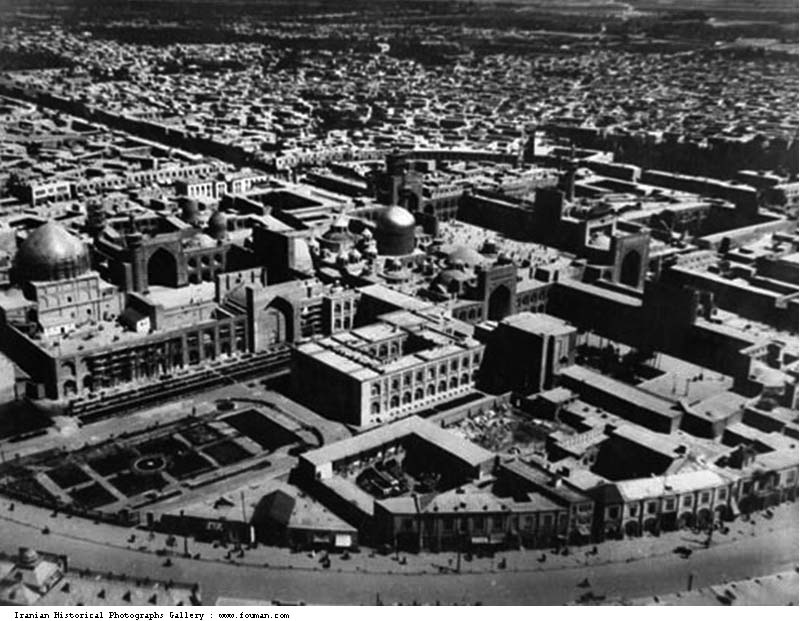 Shrine of Ali al Ridha - Tus Iran
Enough was enough and Mamun now moved decisively and ruthlessly to regain control. It was time to move to Baghdad with his entire entourage. In his policies he had been guided from the beginning by his vizier Fadl ibn Sahl. Ibn Sahl accompanied the caliph as he finally made his way westwards to Baghdad but along the way he was murdered in his bath. When he reached Tus, Mamun paused to visit the grave of his father Harun al Rashid. Whilst here, perhaps with thoughts turning towards matters of succession, he also rid himself of Ali al Ridha, abandoning his policy of appeasement of the Alids. Almost certainly poisoned on Mamun’s orders, Ali was buried in the same garden beside Harun al Rashid Today a magnificent shrine complex marks the burial place of this Shia martyr, whilst the grave of the famous caliph is entirely forgotten.
Mamun finally reached Baghdad in 819 and was rapturously received by the populace. Tahir rode at his side and would be richly rewarded with a palace in Baghdad and the governorship of Khurasan which he and his descendants would rule over as a virtual fiefdom for the next half century. It was no less than this brilliant general deserved. His son was raised to high command and given charge of bringing Syria and Egypt, which had descended into rebellious chaos, back into the fold.
In ditching his pro-Alid policy, coming west and taking his proper place in his capital the caliph was quickly able to silence the dissenters. He had adopted green as his official colour in accordance with his new Alid alliance but dropped this within days of his return to the capital in the face of widespread disapproval and resumed the traditional Abbasid black. Reconciliation was the order of the day and even Fadl ibn Rabi, the principle architect of the civil war, was forgiven and reinstated. Zubayda, mother of the murdered Amin, was reconciled with the caliph and was treated with honour for her remaining years. Fearing the worst, Mamun’s uncle Ibrahim had gone into hiding when his supporters had cast him aside and pledged their loyalty to the approaching Mamun. He was arrested in Baghdad whilst trying to escape disguised as a woman and brought before Mamun. In a scene remembered in the Arabian nights, the poet did his best to excuse himself in florid verse and Mamun spared him, accepting that Ibrahim had in truth had no desire to usurp him, although he was kept under house arrest.
With all set to rights, Mamun set about the process of rebuilding his city and he would see it become the cultural and intellectual powerhouse of the age. In the remainder of his reign Baghdad would reach its apogee. In a grand gesture symbolising the return of the good times Mamun married Buran, the niece of his murdered Vizier Fadl ibn Sahl, in the most expensive wedding perhaps of all time. The celebrations were truly magnificent and the occasion is said to have cost 50 million dirhams with members of the ruling family spending millions more on additional ostentation. Zubayda, taking centre stage as the grand dowager of the dynasty, spent 35 million and poured a thousand pearls over the bride by way of expensive confetti. The wedding favours were balls of musk, each of which contained a slip of paper with the details of a magnificent gift written thereon, with the star prizes including estates and palaces. If Carlsberg did weddings, they would be just like this one. It was a particularly good day for Mamun's Uncle Ibrahim who won his freedom at the bride's request and was restored to a place of honour. For the ruling elite happy days were here again, but for how long would they last?
The shrine of Ali al-Ridhahttp://www.al-islam.org/history-shrines/history-shrine-imam-ali-b-musa-al-ridha-peace-be-upon-him-history-mashad
September 16, 2015
Here Come the Men in Black
Ka mate, ka mate! ka ora! ka ora! Ka mate! ka mate! ka ora! ka ora!Tēnei te tangata pūhuruhuruNāna nei i tiki mai whakawhiti te rāĀ, upane! ka upane!Ā, upane, ka upane, whiti te ra! New Zealand 1820. The conflict known to posterity as the Musket Wars is in its early stages. This was an escalating cycle of increasingly bloody tribal warfare, fuelled by the arrival of Europeans who had revolutionised the traditional practice of raiding parties or taua through the introduction of both firearms and the humble potato. Better armed and better fed through these two innovations, obtained from European settlers, who had short-sightedly traded guns in exchange for land, the Maori had been able to launch ever more ambitious raids upon their neighbours.
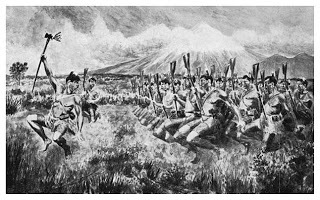 A musket wielding Maori war party It was whilst fleeing from one such bloody encounter on the North Island that the leader of a war party of the Ngati Toa tribe named Te Rauparaha sought to evade his pursuers by hiding in a food storage pit. He waited in the darkness and then at last the covering of the pit was pulled away. Blinking in the sunlight, Te Rauparaha did not know if it was a friend or an enemy who had discovered his hiding place. Were these his last moments or was he saved? It turned out that it was his ally who had found him, Te Whareangi; the hairy man. After clambering up gratefully into the sunlight to be greeted by his friend, Te Rauparaha decided to immortalise his deliverance in the words of a haka or ceremonial war dance, which are at the top of this post. It translates as: It is death, it is death, it is life, it is life,It is death, it is death, it is life, it is life,It is the hairy man,Who brought the sun and caused it to shine,A step upwards, another step upwards,A step upwards, another step upwards, the sun shines.
Rise! Fast forward to 1888 and the natives had developed a taste for rugby as well as guns and potatoes. There had been touring parties of rugby players to Australia endorsed by some or all of the New Zealand unions since 1883 but this latest undertaking was more ambitious in scope. After an eleven match warm up in New Zealand and Australia the 26 man squad, known as the 'Natives', comprising 21 players of Maori descent and 5 New Zealand born players of European descent, set out for Britain. On the way they played the first recorded match on Egyptian soil during a stop-over in Suez. The Natives seem to have been as much of a curiosity for the British spectators as a sporting spectacle. Before each match the Maori were to perform a haka in their native dress for the entertainment of the crowd. The dressing up element was soon abandoned and the players instead performed the haka in their kit before getting stuck into the opposition. A tradition had been born. The Ka Mate haka is believed to have first been performed by an All Black side in 1906 and has been the favourite ever since with occasional variants. 1888 Natives XV in Queensland The Natives' tour was a great success. They won 49 out of 74 games played on British soil including a victory over an Ireland national side, although they lost their matches against England and Wales and were also defeated by both Oxford and Cambridge Universities. There was controversy in the match against England when the English player Andrew Stoddart lost his shorts. In the interests of decency the New Zealand players stopped playing whilst Stoddart recovered his attire, but an enterprising England player picked up the ball and ran in for a try. Three of the New Zealand players left the pitch in protest yet the referee, George Rowland Hill, who also happened to be the secretary of the RFU, so was not exactly impartial, both allowed the try and allowed play to continue whilst the three players were being persuaded to return. After leaving British shores, the Natives went on to win another 25 out of 32 matches played in Australia upon their return. The Natives were not considered a true national team and so the first match considered to be a full international featuring a team representing New Zealand was played in 1903. The New Zealand team defeated the Australian national side 22-3 at Sydney cricket ground. Before the match the New Zealand team performed a haka with the words Tupoto koe, Kangaroo - Watch out Kangaroo! In the following year they inflicted a defeat on the Great Britain touring side in Wellington. See here for post on early Lions tours.
 Punch cartoon 1905 - the unlicked cub 1905 saw the first true international New Zealand touring side set out for a grand tour of Europe and North America. Known simply as 'The Originals' their exploits have become the stuff of legend. It was this team who were the first to play in all black strip and so were quickly dubbed the 'All Blacks' by the British press. Arriving in Plymouth in September 1905 the New Zealanders first faced the Devon county side whom they swept aside in a 12 try demolition to win 55-4. Some of the stunned newspapers reported the score-line the wrong way around. The New Zealanders followed up with an 11 try 41-0 drubbing of Cornwall and then continued in the same vein as they toured the country, dishing out humiliation wherever they went. By the time they reached Scotland for their first international in mid November they had won 19 straight matches. 15 of these had been won without conceding a point. In Edinburgh they received a snooty reception from the gentlemen of the Scottish RFU who refused to socialise with the colonials. Un-phased, the All Blacks beat the Scots 12-7. The superior professionalism of the New Zealanders; a dirty word amongst many in the British establishment, was the key to their success. They trained hard and they practiced their set piece drills. Unlike the British opposition, who simply piled in to the scrum in the order they arrived, each forward had a set position in the scrum. They scrummaged differently to the British teams who adopted the 8 man formation we are familiar with today. The All Blacks played with just 7 men in the scrum and only 2 players in the front row. This mismatch actually worked to the New Zealanders' advantage since by applying pressure to only one side of the scrum they were generally able to drive their opponents off the ball and this was an area in which they dominated. As well as being more organised, the All Blacks played with more attacking verve. The sight of the New Zealand full back actually counter-attacking rather than playing an entirely defensive role was considered highly novel. There was also much grumbling that the All Blacks played a little too rough, although there was less complaint amongst the workmanlike northern clubs than amongst the more genteel southern clubs.
 All Blacks vs England 1905 - note the NZ scrummaging
The All Black steamroller continued. Ireland and England were both beaten 15-0. It was down to Wales to salvage some British pride. The Welsh had been doing their homework on the New Zealanders' unique scrummage and had come up with an innovation of their own. When the two sides met in Cardiff the Welsh also formed up with a seven man scrum but with four men in the front row. Only three would engage however and the spare man would then run around the back of the scrum and join in the second row on the loose head side, (explained better in the link at the bottom). The All Blacks were beaten at their own game and the Welsh dominated the scrum throughout. The only score of the game was a brilliantly worked try for Wales and the All Blacks suffered their only defeat of the tour. An equalising score by New Zealand was judged to have been short of the line and controversy continues to this day. The history books record however that it was Wales 3 New Zealand 0.
 1906 Cartoon by NZ artist Trevor Lloyd celebrating the success of the All Blacks
That one loss was the only defeat in an otherwise incredible run of success. The All Blacks won their remaining four games on British soil, crossed the channel to crush France 38-0 and then crossed the Atlantic to tour America before heading home in triumph to a heroes' welcome. And they have never really looked back have they? No doubt we can look forward to some more of the same as the Rugby World Cup rolls into Blighty, albeit with less diverse tactics. Hopefully someone can give them a run for their money.
The Natives and the Originals - all the stats http://www.rugbyfootballhistory.com/allblacks.html
Wales vs NZ 1905
http://www.rugbyrelics.com/Museum/exhibits/WvNZ.htm
 A musket wielding Maori war party It was whilst fleeing from one such bloody encounter on the North Island that the leader of a war party of the Ngati Toa tribe named Te Rauparaha sought to evade his pursuers by hiding in a food storage pit. He waited in the darkness and then at last the covering of the pit was pulled away. Blinking in the sunlight, Te Rauparaha did not know if it was a friend or an enemy who had discovered his hiding place. Were these his last moments or was he saved? It turned out that it was his ally who had found him, Te Whareangi; the hairy man. After clambering up gratefully into the sunlight to be greeted by his friend, Te Rauparaha decided to immortalise his deliverance in the words of a haka or ceremonial war dance, which are at the top of this post. It translates as: It is death, it is death, it is life, it is life,It is death, it is death, it is life, it is life,It is the hairy man,Who brought the sun and caused it to shine,A step upwards, another step upwards,A step upwards, another step upwards, the sun shines.
Rise! Fast forward to 1888 and the natives had developed a taste for rugby as well as guns and potatoes. There had been touring parties of rugby players to Australia endorsed by some or all of the New Zealand unions since 1883 but this latest undertaking was more ambitious in scope. After an eleven match warm up in New Zealand and Australia the 26 man squad, known as the 'Natives', comprising 21 players of Maori descent and 5 New Zealand born players of European descent, set out for Britain. On the way they played the first recorded match on Egyptian soil during a stop-over in Suez. The Natives seem to have been as much of a curiosity for the British spectators as a sporting spectacle. Before each match the Maori were to perform a haka in their native dress for the entertainment of the crowd. The dressing up element was soon abandoned and the players instead performed the haka in their kit before getting stuck into the opposition. A tradition had been born. The Ka Mate haka is believed to have first been performed by an All Black side in 1906 and has been the favourite ever since with occasional variants.
 1888 Natives XV in Queensland The Natives' tour was a great success. They won 49 out of 74 games played on British soil including a victory over an Ireland national side, although they lost their matches against England and Wales and were also defeated by both Oxford and Cambridge Universities. There was controversy in the match against England when the English player Andrew Stoddart lost his shorts. In the interests of decency the New Zealand players stopped playing whilst Stoddart recovered his attire, but an enterprising England player picked up the ball and ran in for a try. Three of the New Zealand players left the pitch in protest yet the referee, George Rowland Hill, who also happened to be the secretary of the RFU, so was not exactly impartial, both allowed the try and allowed play to continue whilst the three players were being persuaded to return. After leaving British shores, the Natives went on to win another 25 out of 32 matches played in Australia upon their return. The Natives were not considered a true national team and so the first match considered to be a full international featuring a team representing New Zealand was played in 1903. The New Zealand team defeated the Australian national side 22-3 at Sydney cricket ground. Before the match the New Zealand team performed a haka with the words Tupoto koe, Kangaroo - Watch out Kangaroo! In the following year they inflicted a defeat on the Great Britain touring side in Wellington. See here for post on early Lions tours.
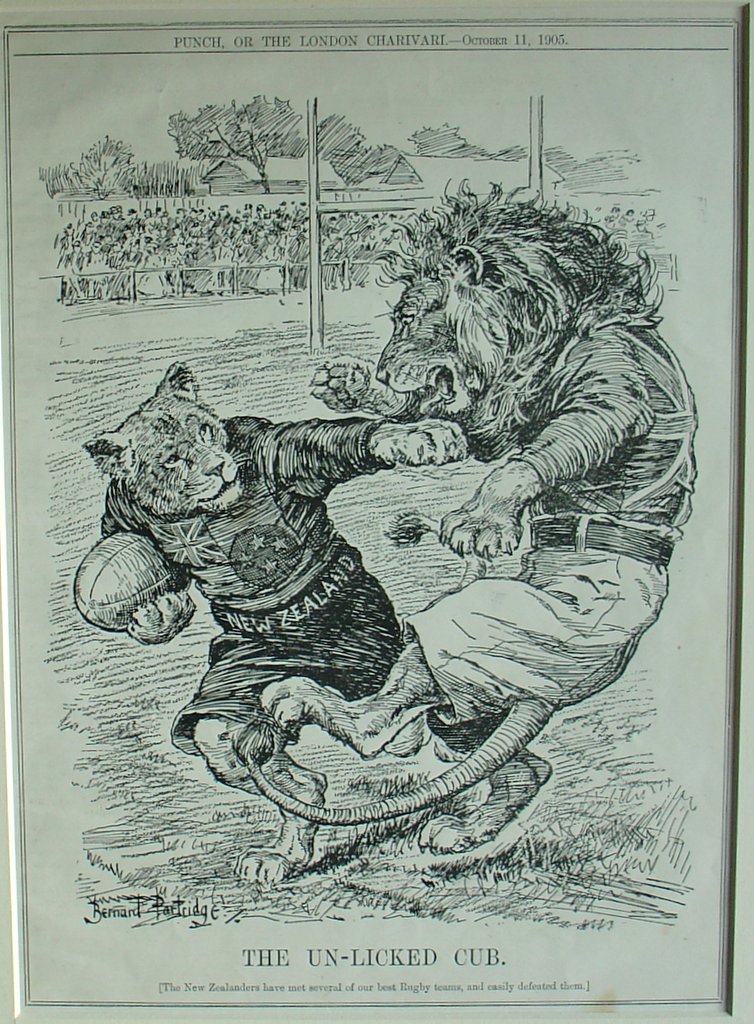 Punch cartoon 1905 - the unlicked cub 1905 saw the first true international New Zealand touring side set out for a grand tour of Europe and North America. Known simply as 'The Originals' their exploits have become the stuff of legend. It was this team who were the first to play in all black strip and so were quickly dubbed the 'All Blacks' by the British press. Arriving in Plymouth in September 1905 the New Zealanders first faced the Devon county side whom they swept aside in a 12 try demolition to win 55-4. Some of the stunned newspapers reported the score-line the wrong way around. The New Zealanders followed up with an 11 try 41-0 drubbing of Cornwall and then continued in the same vein as they toured the country, dishing out humiliation wherever they went. By the time they reached Scotland for their first international in mid November they had won 19 straight matches. 15 of these had been won without conceding a point. In Edinburgh they received a snooty reception from the gentlemen of the Scottish RFU who refused to socialise with the colonials. Un-phased, the All Blacks beat the Scots 12-7. The superior professionalism of the New Zealanders; a dirty word amongst many in the British establishment, was the key to their success. They trained hard and they practiced their set piece drills. Unlike the British opposition, who simply piled in to the scrum in the order they arrived, each forward had a set position in the scrum. They scrummaged differently to the British teams who adopted the 8 man formation we are familiar with today. The All Blacks played with just 7 men in the scrum and only 2 players in the front row. This mismatch actually worked to the New Zealanders' advantage since by applying pressure to only one side of the scrum they were generally able to drive their opponents off the ball and this was an area in which they dominated. As well as being more organised, the All Blacks played with more attacking verve. The sight of the New Zealand full back actually counter-attacking rather than playing an entirely defensive role was considered highly novel. There was also much grumbling that the All Blacks played a little too rough, although there was less complaint amongst the workmanlike northern clubs than amongst the more genteel southern clubs.
 All Blacks vs England 1905 - note the NZ scrummaging
 The All Black steamroller continued. Ireland and England were both beaten 15-0. It was down to Wales to salvage some British pride. The Welsh had been doing their homework on the New Zealanders' unique scrummage and had come up with an innovation of their own. When the two sides met in Cardiff the Welsh also formed up with a seven man scrum but with four men in the front row. Only three would engage however and the spare man would then run around the back of the scrum and join in the second row on the loose head side, (explained better in the link at the bottom). The All Blacks were beaten at their own game and the Welsh dominated the scrum throughout. The only score of the game was a brilliantly worked try for Wales and the All Blacks suffered their only defeat of the tour. An equalising score by New Zealand was judged to have been short of the line and controversy continues to this day. The history books record however that it was Wales 3 New Zealand 0.
 1906 Cartoon by NZ artist Trevor Lloyd celebrating the success of the All Blacks
That one loss was the only defeat in an otherwise incredible run of success. The All Blacks won their remaining four games on British soil, crossed the channel to crush France 38-0 and then crossed the Atlantic to tour America before heading home in triumph to a heroes' welcome. And they have never really looked back have they? No doubt we can look forward to some more of the same as the Rugby World Cup rolls into Blighty, albeit with less diverse tactics. Hopefully someone can give them a run for their money.
The Natives and the Originals - all the stats http://www.rugbyfootballhistory.com/allblacks.html
Wales vs NZ 1905
http://www.rugbyrelics.com/Museum/exhibits/WvNZ.htm
Slings and arrows

Nuggets of history from the author of 'The Battles are the Best Bits'.
...more
- Simon B. Jones's profile
- 22 followers

