
Rinku Bhattacharya's Blog, page 9
March 13, 2022
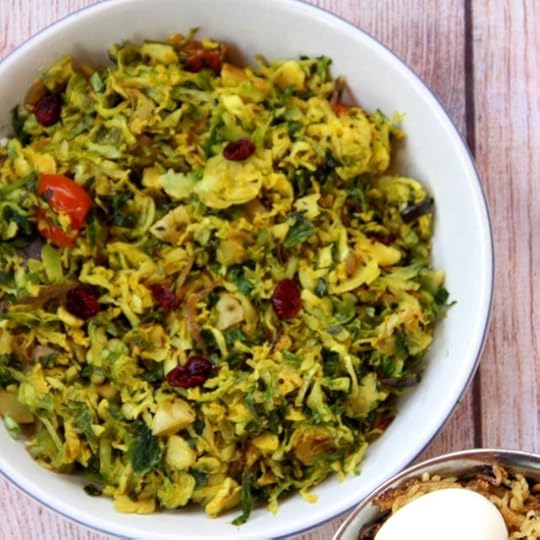
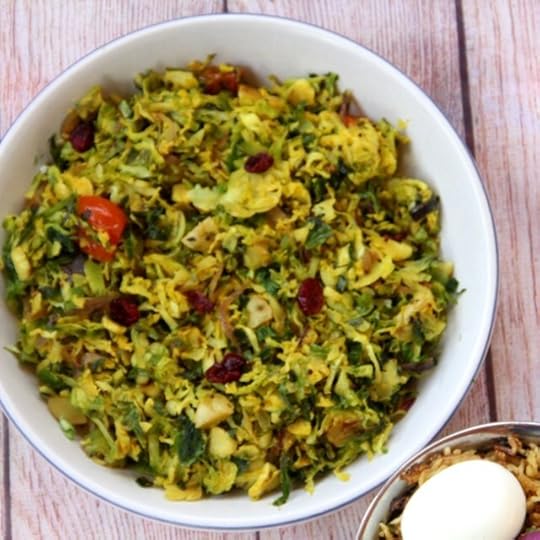
Stir Fried Brussels Sprouts with Ginger
 Original Post updated from December 3rd, 2013.
This brussels sprouts recipe has a lot of ginger and a few key ingredients. It has converted many people. Honestly just the ginger and toasted mustard seeds give these Stir Fried Brussels Sprouts a huge brightness. However, add in the dried fenugreek, mint, orange juice and dried cranberries take this to a different level. My friend Susan Thaler can never stop raving about them. And they are versatile, taking you from holidays to just an everyday weeknight meal. And they are done in about 20 to 25 minutes. Prepping and all.
Honestly I do not understand the fuss about Brussels sprouts. I think they are a perfectly loveable vegetable. But then again, I love broccoli (another controversial vegetable), the tender young variety. As with all vegetables you want to find young and tender Brussels Sprouts. Outside of farmers markets, organic varieties from either Costco’s or Trader Joes are good options. In season, I love bringing in a large inflorescence of sprouts. It is fun to pull them of one by one.
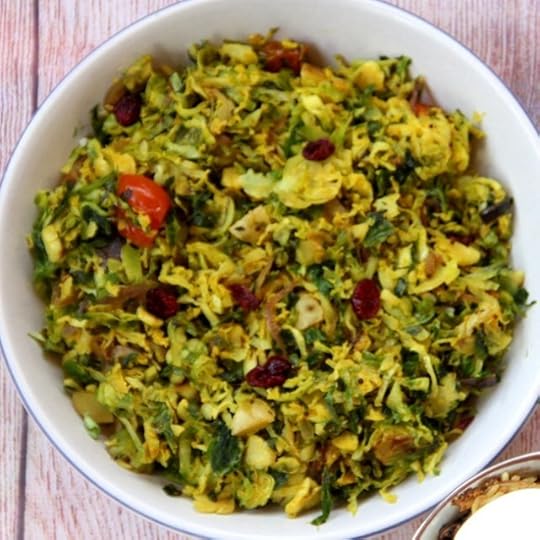
In this recipe, I treat the Brussels Sprouts like cabbage. I do a few things to compensate for their slightly bitter taste. Add in the orange juice and the cranberries. And the fenugreek or mint boosts the flavor profile a lot. The tiny diced potatoes are optional, but add body and softness to the dish.

We had loads of rain last week, looks like the storm had a name as well. BOREAS, took with it our telephone and internet service for the weekend. If you are still not convinced, feel free to use cabbage for this recipe. The results will be similar. A brussels sprout is a mini cabbage with character.

Try these whenever you have Brussels Sprouts handy. A little different and guaranteed to become a favorite. At least they are in my household. And just made a good batch to tide me through the week.
PrintStir Fried Brussels Sprouts with Ginger
Prep Time: 10 minutes
Cook Time: 15 minutes
Total Time: 25 minutes
A simple Indian transformation for the wintery Brussels Sprouts, that will brings color and spark to your table.
Ingredients
1-pound young Brussels sprouts2 tablespoons olive oil
1 teaspoon whole mustard seeds
1/2 teaspoon whole cumin seeds
1 tablespoon minced ginger
1 medium sized onion, thinly sliced
1/2 teaspoon turmeric
4 small potatoes, diced (can be skin on) (optional)
1 medium tomato, diced
1 tablespoon dried fenugreek leaves (kasuri methi)
1/2 teaspoon dried mint
1/4 cup fresh orange juice
1 and 1/2 teaspoons salt
1/4 cup dried cranberries
Chopped cilantro or mint
Instructions
Remove the tops of the Brussels sprouts, cut them into half and then into fine slices. Set them aside.Heat the oil in a large pan on medium high heat for about a minute.
Add in the ginger and the black mustard seeds and wait until the mustard seeds crackle. Add in the whole cumin seeds and ginger.
Add in the onion and sauté for 2 minutes. Stir in the turmeric and potatoes and cover for 2 minutes.
Add in the tomatoes and the brussels sprouts and cook for 5 minutes until the sprouts wilt.
Add in the dried fenugreek leaves and the mint and orange juice. Add in the salt and the dried cranberries and cook for 3 to 4 more minutes.
Sprinkle with the cilantro or mint and serve
Notes
The ingredients are flexible, if you do not have dried fenugreek handy, feel free to sub with 1 tablespoon chopped thyme.
3.1https://spicechronicles.com/stir-fried-brussels-sprouts-ginger-curry-leaves/
The post Stir Fried Brussels Sprouts with Ginger appeared first on Spice Chronicles.


March 12, 2022
Ricotta, Spinach and Tomato Tart
 This Ricotta, Spinach and Tomato tart is super easy and super good. Not in any order. All because I had a lot of ricotta cheese on hand. And I made a quick and easy short crust pastry as well. A wholewheat version. A little wholegrain to compensate for the butter. But seriously, this really is very good. It will cover your Sunday brunch goals. In my case, today it took care of Saturday breakfast today!
So, this tart is a quiche in disguise. However, it is lighter and does a good job of incorporating a lot of spinach in the mix. In terms of cheese, ricotta is balanced out with some extra sharp cheddar. This combination balances out the sharp with the mild. And like with all my other recipes, we are talking flexible flavors. Parmesan cheese would also be a good idea.

Organic baby spinach is a staple in my kitchen and refrigerator. It works beautifully is dishes like this saag alu, it can be thrown into a good bowl of red lentils. Last but not the least, it works magically in a salad. Today has been a long day, as it started so much earlier than usual. Need to catch in a little bit of extra napping power, before the clocks change out on me.
The has been nothing spring like about today’s weather. Raining or snowing into my first live event after maybe forever. But somewhere along the line, I am getting a sense that things are reaching a bit of normalcy. A couple of things that I did and do recommend are,
Make the short curst and let it chill. If you want to do the breakfast thing, let this rest overnight. Easy and actually helps with the process.To boost the amount of spinach in the recipe, I actually wilt the spinach before mixing it in.

A point worth noting is that my short crust recipe makes enough for 2 small (9-inch) tarts. Since I do add in an egg, I am not quite sure how to halve that. And feel free to sub the spinach with your favorite spring greens.
PrintRicotta, Spinach and Tomato Tart
Prep Time: 2 hours, 30 minutes
Cook Time: 40 minutes
Total Time: 3 hours, 10 minutes

An easy to prepare tart that is great for breakfast or an anytime snack.
Ingredients
For the Pastry1 stick (8 tablespoons) salted butter
1 and 1/2 cups of whole wheat flour (feel free to use all-purpose flour)
1 egg
2/3 cup cold water
For the filling
2 tablespoons olive oil
1 small onion, chopped
4 cloves of garlic minced
3 cups of baby spinach leaves, coarsely chopped
3/4 cup ricotta cheese
1/2 cup grated sharp cheddar
1/2 cup finely chopped fresh herbs (I used a mixture of fresh basil and oregano
1 teaspoon salt or to taste
3 eggs
2 medium sized tomatoes, thinly sliced
Instructions
Grease a shallow 9-inch pie dish.In the bowl of a food processor add in the flour and butter and run for a minute or so to allow the butter and flour to mix well.
Add in the egg and run for another minute. Gradually add in enough water to form a ball. Remove from the food processor. Give it a light knead. It should be a smooth dough.
Divide into half. Place one half into a storage container and set aside for future use, it can be frozen.
Roll out the other half and press this into the pie dish and place in the refrigerator to chill for at least 2 hours or longer.
When ready to bake, turn the oven onto 350 degrees.
Add in the prepared pie shell and bake for about 12 minutes.
Heat the oil and add in the onion and the garlic and sauté lightly. Add in the spinach and cook until just wilted.
Place in a mixing bowl. Add in all the ingredients except the tomatoes and mix well.
Pour this into the prepared pie shell. Arrange the sliced tomatoes over the top. Place back into the oven and bake for about 35 to 40 minutes.
Sprinkle with some freshly ground black pepper if desired before serving.
Notes
While you do need to plan sometime around the chilling, most of the actual hands-on time for this dish is under 30 minutes.
3.1https://spicechronicles.com/ricotta-spinach-and-tomato-tart/
The post Ricotta, Spinach and Tomato Tart appeared first on Spice Chronicles.
March 5, 2022
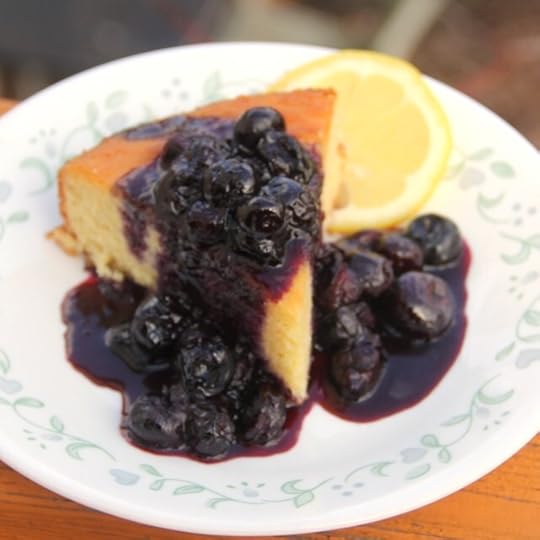
Flourless Lemon Cake with Blueberry Compote
 There is something magical about a lemon cake in spring. I set my heart of getting one that is super lemony. Rich with almonds. About 3 delicious tries later, I have settled for this lovely flourless lemon cake with a blueberry compote. It is a very lemony, slightly dense and rich affair. And since I also made a chocolate cake I ate most of this myself. And it was so good! Yes, I am a fruit dessert lover in a chocolate loving household. Which is really why you have so many chocolate desserts on this blog. Like this insanely good chocolate cake.
One of lemon’s favorite cohorts is blueberries. Some about about the two of them that work like a match made in heaven. After I nailed the texture of the cake, the way I like it. I wanted something just a little bit more. I did not want the sweetness of a glaze. And so I settled for this compote. Essentially in this I cook a whole bunch of blueberries until they are soft and jam like. My blueberries were sweet enough, so I did not need any added sugar. And with all the eggs and almond action going I convinced myself that this cake is good enough for breakfast.
All, I will confess, I did indeed eat a lot of cake this week. It has thrown all my healthy behavior of the past few weeks out of the window. What can I say? Stuff happens. And looks like this week the clock seems to be ready to turn up the warm weather dial. And just like that it is right into March. My daughter has her first birthday without us. She actually like me does like citrus desserts. And another favorite for you lemon lovers is this Bengali style baked Sandesh I had made a little while ago.
This week I have been thinking of homey favorites. And here is to a great weekend and a lovely week ahead.
A few things with flourless baking, that I have found useful.
PrintFlourless Lemon Cake with Blueberry Compote
Prep Time: 10 minutes
Cook Time: 40 minutes
Total Time: 50 minutes
Yield: Serves 6 to 8
[image error]
A beautiful cake with lots of lemon topped with a vibrant blueberry compote.
Ingredients
1/2 cup softened butter, plus more for greasing the pan3/4 cup sugar
3 eggs separated
1 large lemon, zested, seeded and juiced
1/3 cup ricotta cheese or sour cream
2 cups of almond meal
1 and 1/4 cup of whole blueberries
2 tablespoons maple syrup (optional, depending on the sweetness of the berries)
Instructions
Pre-heat the oven to 325 degrees.Grease a round cake 9-inch cake pan and set aside.
In a mixing bowl add the butter and sugar and beat until pale and creamy.
Add in the egg yolks and beat well until incorporated.
Add in the lemon zest and juice and mix well.
Stir in the almond meal using a good wooden spoon.
Finally beat the egg whites until they are nice and stiff. Fold this well into the cake batter.
Pour this into the cake pan. Place in the oven and bake for about 40 minutes until the cake is pale golden and just set.
Turn off the oven and remove the cake after 10 minutes.
Unmold the cake.
To make the compote, place the blueberries with 3 tablespoons of water in a saucepan and cook on low heat for 6 to 8 minutes, stirring occasionally. The blueberries will soften and come to a gentle simmer. Add in the maple syrup if desired.
The sauce has a jam like consistency but has plenty of texture.
To serve, cut the cake and serve with the sauce spooned over the cake.3.1https://spicechronicles.com/flourless-lemon-cake-with-blueberry-compote/
The post Flourless Lemon Cake with Blueberry Compote appeared first on Spice Chronicles.
February 27, 2022
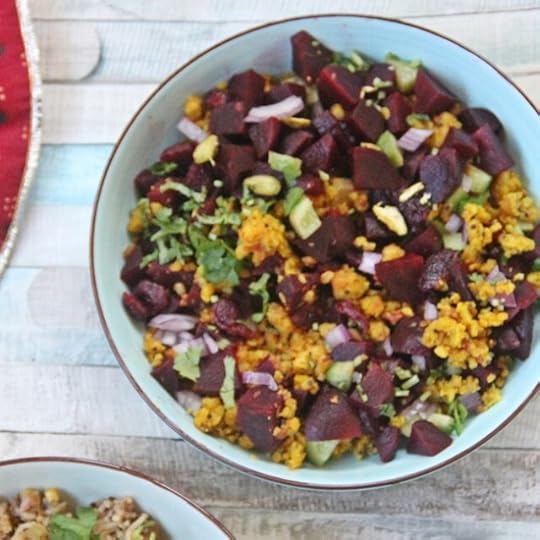
Spiced Lentil Salad with Beets and Pistachios
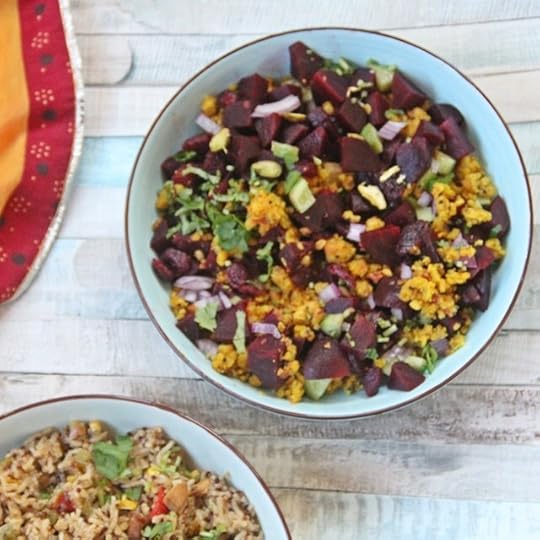 This Spiced Lentil Salad with Beets and Pistachios is serious business. As in seriously good business. It is healthy, protein rich and nutri dense and made with everyday staples. The lentils are a mixture of yellow moong and red masoor lentils. The cook in the instant pot while the rest of the salad gets done. I have been on a warm salad kick lately. Like this warm carrot salad. The secret to getting just the right lentil texture is using the rice mode in the instant pot. At least that is how I did it.
The inspiration for this salad was two rather disappointing salads that I ate, while in Phoenix, AZ. One of these being a lentil salad. I have a mini-obsession with lentils. They have so much potential. Using them to make a lack luster salad seemed unfair. I felt like I needed to correct this injustice right away. At least in my neck of the woods. And this experiment is simple, the results are quite magical. I suddenly find myself with lots of odds and ends of stuff. Including lentils. So next up, I will try to cook down some of my simple things.
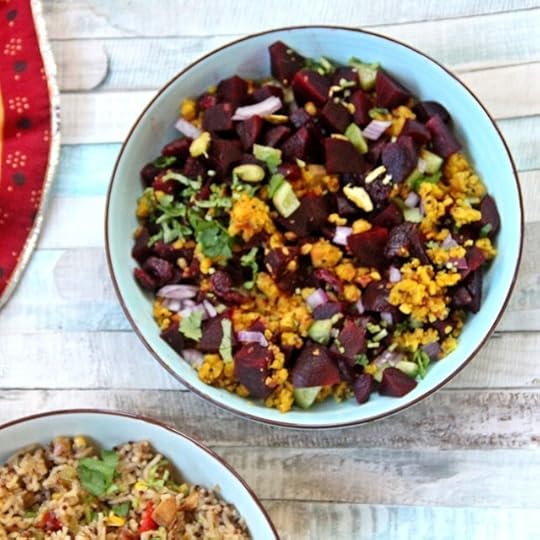
So what you need here are a handful of spices, beets, pistachios, lemon/lime and cilantro. This gorgeous salad uses about 1 tablespoon of oil. For the tarka or tempering of spices to make the lentils. As for the beets, you can make them as a PIP. Or use pre-cooked beets, if you have some that you are dying to use up.
Additional ingredients can be a handful of cranberries. My version today is simple. I have a feeling that this has potential for a lot of customization. Crumbled feta, maybe a poached egg on top. You get the idea. Crushed red pepper flakes for an extra kick.
The lentils use the spice profile for my Dal Tarka from the Instant Indian cookbook. Which is also a great idea. But for today, let us stick to this salad. Which can be enjoyed warm, cold, or at room temperature. It needs maybe 10 minutes of hands-on time.
If you like this recipe and want more ideas, do join my Indian Instant Pot and Air Fryer Facebook group.
Pick up a copy of my I nstant pot cookbook Instant Indian here, along with The Bengali Five Spice Chronicles and Spices and Seasons.
Do not forget to get social with me, Facebook , Twitter , Instagram , Pinterest. And of course, sharing is caring!
PrintSpiced Lentil Salad with Beets and Pistachios
Prep Time: 10 minutes
Cook Time: 25 minutes
Yield: Serves 4 to 6
A warm and cozy well-seasoned lentil salad with Indian spices and beets.
Ingredients
1 tablespoon oil (such as olive oil)1/2 teaspoon black mustard seeds
1/2 teaspoon cumin seeds
3 to 4 curry leaves
1 tablespoon minced ginger
1 teaspoon minced garlic
1 and 1/2 teaspoons minced fresh turmeric or 1 teaspoon powdered
1 teaspoon salt or to taste
3/4 cup moong lentils or a mixture of mung and red lentils
2 medium sized beets
1 lemon
1 teaspoon black salt
1/2 teaspoon red pepper flakes (optional)
1/4 cup pistachios (unsalted) (chopped)
Chopped cilantro
Instructions
Turn the instant pot onto sauté mode. Add in the oil and heat.Add in the mustard seeds and wait for them to pop. Add in the cumin seeds, curry leaves, ginger, garlic, salt and turmeric.
Add in the lentils and stir well. Turn off the heat. add in 3/4 cup of water.
Place a trivet and add a container with enough water to cover the beets. Cover and set to rice mode and let it cook and do a natural release.
Remove the cover. Remove the beets, rinse in cold water, peel and dice.
Place in a mixing bowl.
Fluff the lentils and mix into the beets.
In a small bowl juice the lemon. Stir in the salt and red pepper flakes. Drizzle over the beet and lentil mixture.
Top with the pistachios and cilantro.
Enjoy warm
Notes
For stove top
Cook the lentils in a heavy bottomed pot with 1 and 1/2 cups water for 25 minutes.
Cook the beets separately.
Proceed with the rest of the recipe.
The post Spiced Lentil Salad with Beets and Pistachios appeared first on Spice Chronicles.
February 24, 2022
Perfect Roasted Frozen Broccoli
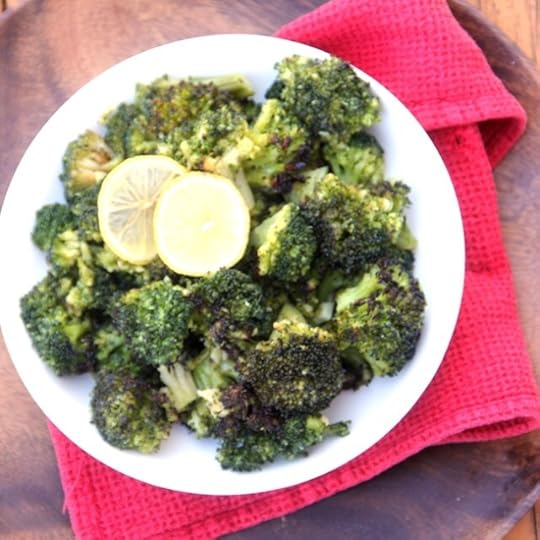 I never thought I would be making let alone posting about frozen roasted broccoli. But never say never. An accidental order left me with a large amount of frozen instead of fresh broccoli. And so, I had to do three rounds of roasted broccoli. And voila, I offer you the perfect roasted frozen broccoli.
A few things that frozen broccoli has going for it. It is pre-cut, cooks faster and generally it does a great job retaining its green color. Now the only problem with frozen broccoli or for that matter any frozen vegetable is that it tends to be watery. And this is where a little bit of technique comes it. This is all about the temperature. You need HOT!
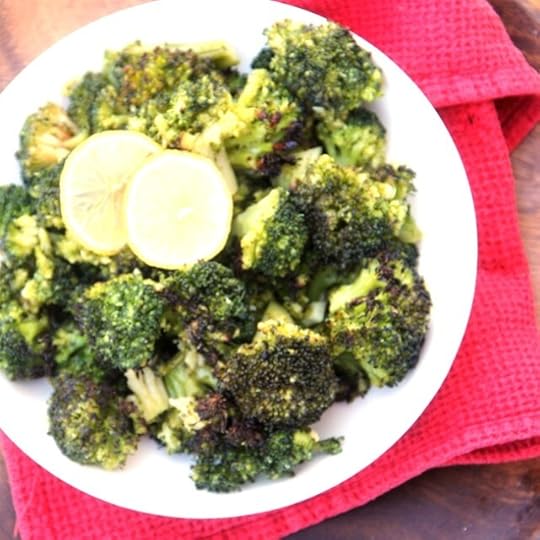
An air fryer or even a convection over is a good idea. If neither of these are available as options, get your oven nice and hot. The deal here is you want that extra moisture to get evaporated quickly. And then we are in business! About 25 minutes or so will get you a decent amount of nicely crisped edges. Give it about 5 to 7 minutes more if you want more charring action.
As for the flavoring, I keep this simple. Olive oil, salt, lots of garlic and lemon juice. And some red pepper flakes. Honestly, considering I put this together after a decent amount of travel for a hungry family it is a good quick fix. Well, definitely very quick in terms of tossing and throwing into your oven or air fryer. The hands-off cooking time rocks. And you know what if you hang on, I will tell you what I did with the extras. So yes, check back soon!
And of course, almost everything tastes great with parmesan, but I just keep it lighter. It is fun as is. Perfect for a busy week ahead, when there really is no time to plan. Pantry staples are my salvation.
PrintPerfect Roasted Frozen Broccoli

Ingredients
1 pound of frozen broccoli3 tablespoons olive oil
1 tablespoon (about 4 to 6 cloves fresh garlic, minced)
1 teaspoon (or to taste) red pepper flakes
Salt (sea salt or kosher salt are good ideas)
I large lemon
Instructions
Pre-heat the oven to 400 degrees. Alternately use an air-fryer.Line a large baking sheet with parchment paper. Spread the broccoli pieces uniformly across the pan. You do not want them together.
Drizzle well with olive oil.
Place the pan into the oven. If using an air fryer, you might need to do this in batches.
Cook for 15 minutes and remove and give it a good stir and add in the garlic and red pepper flakes. Cook this for another 10 minutes.
In the meantime, zest and juice the lemon.
Remove the broccoli from the oven, it should be nicely crisped at spots. Sprinkle with the salt, lemon zest and lemon juice.
Enjoy!
3.1https://spicechronicles.com/perfect-roasted-frozen-broccoli/
The post Perfect Roasted Frozen Broccoli appeared first on Spice Chronicles.
February 13, 2022
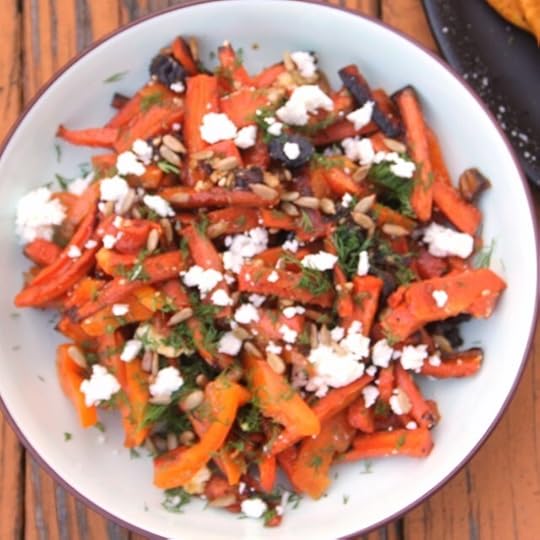
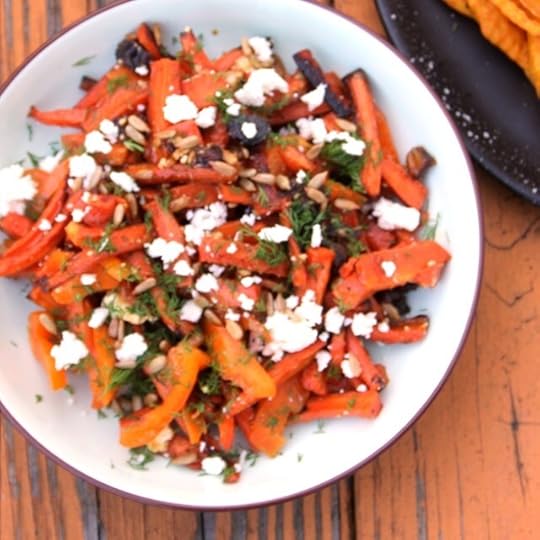
Roasted Carrot Salad with Dates and Feta
 This Roasted Carrot Salad with Dates and Feta is a case of necessity being the mother of all inventions. I always have carrots on hand. A recipe to balance all my onion ring eating was needed. I decided this to throw in some dates while the carrots were roasting. And then scrounging around my refrigerator I found some Feta Cheese and magic happened. The result is a sweet and salty creature.
I call this a salad since I did throw in a dressing. A very light drizzle of lime juice and a small hint of soy sauce. No oil here. The carrots are drizzled with a good dose of olive oil and that is plenty for this purpose. I happened to have dill on hand. So that is what I used to finish the salad and the flavors are spot on.
As for the roasted dated. They softened, turned almost candy like. Just a small amount did the trick. And just like that I had something for dinner. Especially since we have been eating these onion ring pakoras by the boatful. I have a hunch that this will work with other dried fruit such as prunes or figs. But let us save that for a different day.
So this is a warm salad. This salad is a perfect meal by itself It does have most of the food groups. However, if you want to add on you might consider something light like a simple everyday salmon.
Well salmon is such a go to in my house that I think of it as an option whenever I am out of ideas. The carrots are soft with just a little bit of char. About 20 minutes in the oven or an air fryer is enough for this. And just like that it looks like spring might be on its way.
PrintRoasted Carrot Salad with Dates and Feta
Prep Time: 15 minutes
Cook Time: 25 minutes
Total Time: 40 minutes
Yield: Serves 4
A simple and easy to put together warm salad that is a great meal by itself.
Ingredients
6 medium to large carrots2 tablespoons Extra Virgin Olive Oil
1 tablespoon minced ginger
8 to 10 dates diced
1 fresh lemon zested and juiced
1 or 2 tablespoons pomegranate molasses
1 tablespoon miso or soy sauce
1/4 cup toasted sunflower seeds
2 tablespoons chopped dill
1/4 cup crumbled feta
Instructions
Peel the carrots and remove the tops. Cut the carrots into quarters lengthwise and then into 2 inch sticks.Pre-heat the oven to 450 degrees or air fryer to 400 degrees. Drizzle the carrots with the olive oil and stir in the ginger. Place the carrots on a pan or in the air fryer basket and cook for 10 minutes. Pull them out, stir well add in the dates and cook for another 10 minutes. Remove from the oven or air fryer and place in a large mixing bowl.
In the meantime in a small mixing bowl, add the lemon juice, pomegranate molasses and miso or soy sauce and mix well.
Pour this over the carrots. Sprinkle with sunflower seeds, dill and Feta and enjoy warm.
Pour 3.1https://spicechronicles.com/roasted-carrot-salad-with-dates-and-feta/
The post Roasted Carrot Salad with Dates and Feta appeared first on Spice Chronicles.
February 12, 2022
Bengali Onion Rings – Gol Piyanji
 This is one of favorite recipes for anytime snacking. I cannot believe that I do not have this on my site. Just because I have it in my cookbook does not count. And to correct this, I am posting this recipe here. It needs to be posted here. So here is my recipe for Bengali Onion Rings or what I call Gol Pijanji. And in the name of recipe testing, I have eaten at least 20 of these today to ensure that I consistently reached that super crisp texture. Expect that I always eat a lot of these whenever I make them. But can you blame me? They are soo good!
And well, I have them all sliced up and stuff so that we can all enjoy them tomorrow. That my friends is the extent of my connection with the Superbowl. I do not understand much. However, I use it as an excuse or all things snackable. And for some reason my husband suggested that I try to air fry these. Now seriously?? There is a place for air-frying, and it is not with these crisp and seriously addictive onion rings. No way!

The rings have a few simple spices and I have done a video on the overall technique. With this post and the video you should have absolutely no reason not to get this going for you. And honestly, this is just perfect for anytime snacking. All you needs is a large onion, chickpea and rice flour. The spices just use them as a guide and play with them as you see fit.

In order to ensure a very crisp shell and batter you need a few things to watch,
Test the oil and make sure that it is hot.Cook on uniform medium high temperatureDo not skip the rice flour in the batter.Serve them hot.And it does not matter if your team wins or not, these onion rings are always a winner.
PrintBengali Onion Rings – Gol Piyanji
Prep Time: 15 minutes
Cook Time: 25 minutes
Total Time: 40 minutes
Yield: Serves 4 to 6

An easy to make and absolutely addictive take on onion rings.
Ingredients
1 large, sweet Vidalia or 2 medium onions, tops removed and peeled3.4 cup chickpea flour or besan
2 tablespoons rice flour
1 tablespoon cornstarch
1 teaspoon turmeric
1 teaspoon red cayenne pepper
1 teaspoon nigella needs
1 teaspoon salt
Water to mix
Oil for frying
Instructions
Cut the onions into circles about 1/4 inch in thickness and separate the layers.In a mixing bowl, whisk together the chickpea flour, rice flour and the cornstarch.
Stir in the turmeric, red cayenne pepper, nigella seeds and salt and mix well
Add in about 1/2 cup to 3/4 cup water (enough to make a nice batter) this should be a little thinner than pancake batter.
Heat the oil to smoking hot. Test with a little batter, the batter should rise and float right away.
Dip the onion rings one at a time in the batter, using a fork to coat and shake of excess batter.
Place 2 or 3 rings into the oil depending on the size of the onion and the skillet. Allow them to cook for about 2 minutes on one side and turn. The batter cooks quickly, so you need to be careful not to burn the rings.
Drain on paper towels and serve hot.3.1https://spicechronicles.com/bengali-onion-rings-gol-piyanjee/
The post Bengali Onion Rings – Gol Piyanji appeared first on Spice Chronicles.
February 6, 2022
Chinese Style Steamed Whole Fish in the Instant Pot
 I am a huge fan of the Steamed whole fish that you will find on most Chinese Restaurant Menus. It is delicate, soft, and dreamy. The problem though is that I have been terrified of making it. Until yesterday that is. And I did not use a wok. I used my instant pot to steam the fish. I prepared the sauce while the fish was cooking. So, all in about 30 minutes, I had this dish that I think looks and tastes pretty fancy. If you want to use a wok, you can check out this pot from the woks of life.
So, let’s talk steamed fish. I have pictured a whole fish and indeed that is what I used today. It can be done with largish pieces of fish fillet. You will just need to steam for a slightly shorter time. And here is the deal. While white fish looks visually stunning and does have a milder taste. This works beautifully with salmon two. Why am I saying that, well because I first tried this with salmon as I did not want to ruin a whole fish. Seriously good! I went to the fish market and came back with this. I will I promise update with salmon pictures when I make it next time.

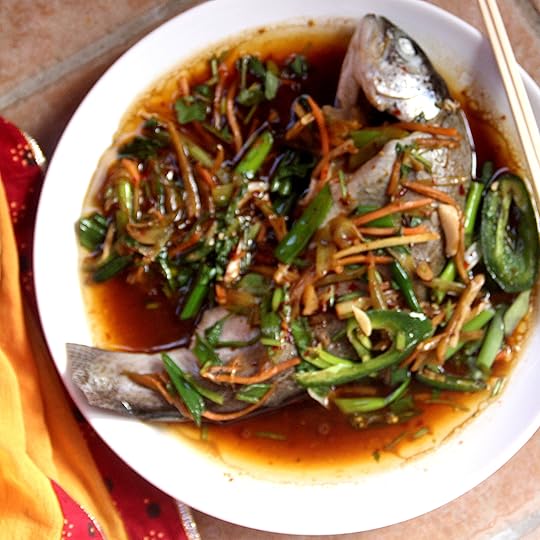
My version had a jalapeno pepper sliced into the mix. It gave it a kick but not anything with off the wall heat. And, ok another slightly wild card thing, I add one teaspoon of molasses into the mix. It is just enough to add a tiny bit of nuance into the mix. Not enough to make it sweet. But enough to make you wonder what is that ingredient in the sauce?

So here is to a fancy looking, ridiculously simple recipe.
Quick, impressive and done in just about 30 minutes!
If you like this recipe and want more ideas, do join my Indian Instant Pot and Air Fryer Facebook group.
Pick up a copy of my I nstant pot cookbook Instant Indian here, along with The Bengali Five Spice Chronicles and Spices and Seasons.
Do not forget to get social with me, Facebook , Twitter , Instagram , Pinterest. And of course, sharing is caring!
PrintChinese Style Steamed Whole Fish in the Instant Pot
Prep Time: 10 minutes
Cook Time: 20 minutes
Total Time: 30 minutes
Yield: Serves 4

An easy and flavorful take on restaurant style steamed Chinese fish.
Ingredients
1 small to medium sized whole fish (I have used a 2-pound rainbow trout)1 lemon, halved
1 teaspoon salt
Water for Steaming
For the sauce and serving
2-inch piece of fresh ginger peeled and julienned
2 scallions, greens and whites separated
3/4 cup cilantro
1 jalapeno, thinly sliced
1 small carrot, peeled and shredded
1 tablespoon cooking oil
1/4 cup soy sauce
1 tablespoon toasted sesame oil
1 teaspoon molasses
Instructions
Wash and pat the fish dry and cut 2 to 3 deep gashes uniformly. Rub the fish with half the lemon and sprinkle with salt and set aside.Add 2 cups of water into the instant pot. Place a trivet into the instant pot. Carefully place the fish on the trivet. Set on steam mode, without any pressure, so either no pressure setting in ultra or leave the vent off.
Set to steam for 10 minutes.
In the meantime, place the ginger in a bowl. Cut the scallion whites into halves and then into 1- and 1/2-inch pieces. Cut the greens into the same size. Add in the jalapeno
Roughly chop the cilantro and add to the mixture with the carrots. Remove about 1/4 of the mixture and set aside.
Carefully remove the fish and place on a serving platter.
Reserve 1 cup of the poaching water.
Heat the oil on a skillet and add in the cooking oil. When heated add in the aromatic mixture and give it a quick stir. Add in the soy sauce, sesame oil, molasses, and the reserved liquid.
Bring to a simmer and cook for about 2 to 3 minutes. Turn off the heat.
Pour the sauce over the plated fish, spooning to cover. Garnish with the reserved green mixture and serve.
3.1https://spicechronicles.com/chinese-style-steamed-whole-fish-in-the-instant-pot/
The post Chinese Style Steamed Whole Fish in the Instant Pot appeared first on Spice Chronicles.
February 4, 2022
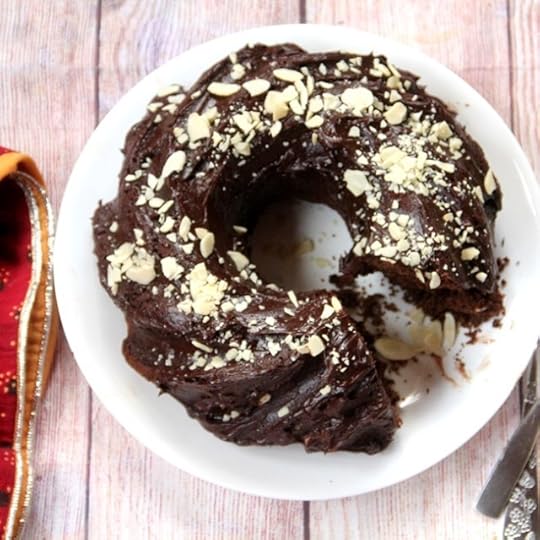
Insanely Good Chocolate Cake
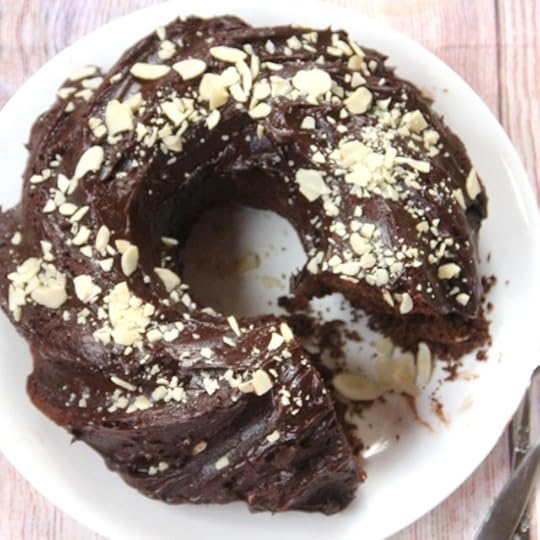 My son insisted on a treat today. I revived this cake that I call Insanely good chocolate cake. It is an olive oil cake, with whole wheat flour. It is rich and tender with a dose of sour cream. When time and mood permit it gets a light ganache topping. Perfect as a loaf or Bundt cake. This is up to you. Cake done; I feel I am a good mama. This cake has chocolate in three forms – cocoa, dark chocolate and chocolate chips. It emerged originally from the leftovers from a chocolate fountain. After much playing around, I have a recipe I stand by.
The chocolate fountain happed during a kid’s birthday party. Back when my son’s favorite song was Dynamite.
The challenge anytime I make this cake, I keep humming. I Throw My Hands Up In The Air Sometimes Saying Ayo, baby let’s go and eat some Insanely Good Chocolate Cake.
This cake once I nailed it also is my go-to festive occasion cake. However, today I made it just to celebrate a weekend. A simple Saturday can also be a celebration. Gratitude and just happy that we have each other.
 Memories of the first time I made this cake are here.
Made as a surprise birthday cake for my brother who polished most of it.
Well, ganache and all, this cake still comes together quickly. The bonus of using olive oil is that it can be done on easy demand as there is no need to soften any butter. Chocolate desserts are prolific in my house. Thanks to my brood. There is a flourless chocolate cake and gluten frees brownies and marbled banana bread bars just to name a few.

And with valentine’s day around the corner consider giving this a try. Or get a pot of coffee brewing and make this cake just because you want a treat.
A visual note, instead of the almonds you might want to consider pistachios.
PrintInsanely Good Chocolate Cake
Prep Time: 15 minutes
Cook Time: 45 minutes
Total Time: 1 hour
A pretty good chocolate cake that now makes its name as the basic chocolate cake in our household.
Ingredients
For the cake6 ounces dark chocolate
1/2 cup chocolate chips
1/2 cup milk
1 cup olive oil (can be extra virgin)
1 cup sugar
3 eggs
1 cup sour cream
1/2 cup cocoa
2 cups whole wheat flour
1 teaspoon baking powder
1/2 teaspoon baking soda
For the ganache
3/4 cup semi-sweet chocolate chips
1/4 cup milk
3/4 cup sour cream
crushed almonds to finish (optional)
1/2 teaspoon salt
1.5 sticks of unsalted butter softened
2 eggs
3/4 cup low fat sour cream
1.5 teaspoons vanilla extract
For the ganache
1 cup grated dark chocolate
1/2 cup cream
2 tablespoons butter
2-3 tablespoons sugar
Instructions
Pre-heat the oven to 350 degrees, prepare a cake pan of your choice, I have had good results with both Bundt pans and loaf pans.Place the dark chocolate and the milk in a microwave safe bowl and microwave for 2 minutes. Stir well. This may not be completely melted. Add in the chocolate chips and microwave for another minute or two. Stir the mixture well.
In a large mixing bowl, beat the oil and the sugar until well incorporated using an electric mixer. Add in the eggs and beat until pale and creamy. Mix in the sour cream and beat until well mixed. Add in the melted chocolate and beat for 1 or two minutes.
Sift in the cocoa, flour, baking powder and baking soda and stir well.
Pour into the well-greased cake pan and bake for about 30 to 35 minutes, until the cake is done. Turn off the oven and let the cake rest for about 10 minutes, remove from the oven and cool for at least an hour.
To make the ganache, melt the chocolate chips and milk in the microwave for about 2 minutes. Stir well and cool slightly. Stir in the sour cream.
Gently spread over the cake in a thin uniform layer. Sprinkle with crushed almonds if using.
3.1https://spicechronicles.com/insanely-good-chocolate-cake/
The post Insanely Good Chocolate Cake appeared first on Spice Chronicles.
January 31, 2022
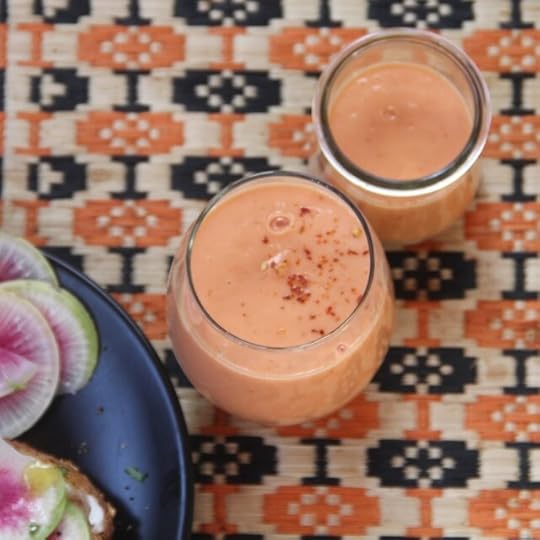
Spiced Papaya Lassi
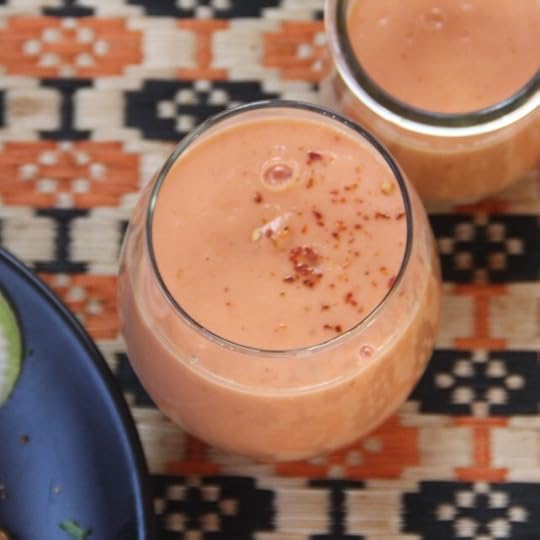 There are many joys to summertime, including of course the rich bounty of fruit. One of my favorite fruit is Papaya. Now you can also find good papaya around winter. Imported of course. This helps me enjoy one of my favorite breakfasts all year round. The breakfast being Papaya Lassi. I love all kinds of lassi and mesh them with slightly different spices. And my go to now for papaya is cayenne and ginger. And no sugar needed.
Actually, we have a local lassi bar, They are a sister enterprise run by the folks at Little Kabab Station. Lassi is my favorite all time non-alcoholic beverage. I shall not insult it by calling them mocktails, since somehow the word seems a little fake, almost suggestive of an imposter.
A lassi folks, is a quintessential Indian drink and contrary to popular believe is not always made with mango. In fact, the best lassis are light and made with a mixture of whipped yogurt and sweetened as an optional choice. In fact, most restaurants in India offer a choice of sweet or namkeen (savory) lassi. I love fruit lassis.
You will find my recipe for,
Mango Lassi and a
And for a tested and tried recipe for yogurt, which I make in the instant pot, check out this post.
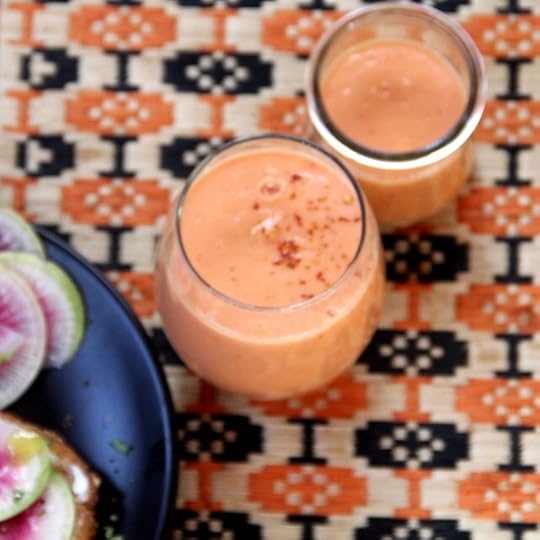
A note on the color, yes, it is beautiful. However, I have made this with the yellow papayas as well. This blush variety is found more often in the colder months is from the Caribbean. Honestly, I love everything about the Islands. I associate all things vibrant and colorful with the islands, so it does not surprise me that this vibrant papaya is from the islands.
And this sunny cheerful lassi is a great start to any morning.
PrintPeach and Papaya Lassi
Prep Time: 20 minutes

A locally inspired summer version of a peach lassi.
Ingredients
2 cups of ripe papaya, peeled and cubed3/4 cup natural yogurt
1/4 teaspoon red cayenne pepper
1 teaspoon minced fresh ginger
1/2 cup water
Instructions
Place the papaya, yogurt, cayenne pepper, ginger and water in a blender and blend until smooth.Serve over ice if desired. And for a vegan variation use soy or coconut yogurt.3.1https://spicechronicles.com/spiced-papaya-lassi/
The post Spiced Papaya Lassi appeared first on Spice Chronicles.


