
Rinku Bhattacharya's Blog, page 6
November 29, 2022
Classic South Indian Coconut Chutney and that one essential ingredient
 For all my love of South Indian tiffin dishes like dosa and idly, I have been unable to find a coconut chutney I could stand by. I have made versions. Some that have found favor with others at home. My mother loves my mint and peanut coconut chutney. Yes, I will post that sometime. But what is the point of good variations if I am not happy with the original. And then it happened. I have a version I can stand by. It tastes just like my memories of the dosa and idly shops in India. A good coconut chutney is fragrant, creamy and just a little bit nutty. And for that nuttiness there is an essential ingredient.
What you might ask is the deal breaker. What kept me from nailing such a simple dish at home? The lack of roasted split pea lentils. The varieties in the Indian stores are not fresh enough. And then I realized that I could roast my own Channa dal. Duh! And so yes, this essential ingredient is a deal breaker. To get the perfect roasted channa dal at home, you need to toast the dal on a skillet on low heat stirring frequently, until the lentils turn crisp and fragrant. There is a big difference in flavor. Roasted lentils or Channa Dal tastes nutty and fragrant.
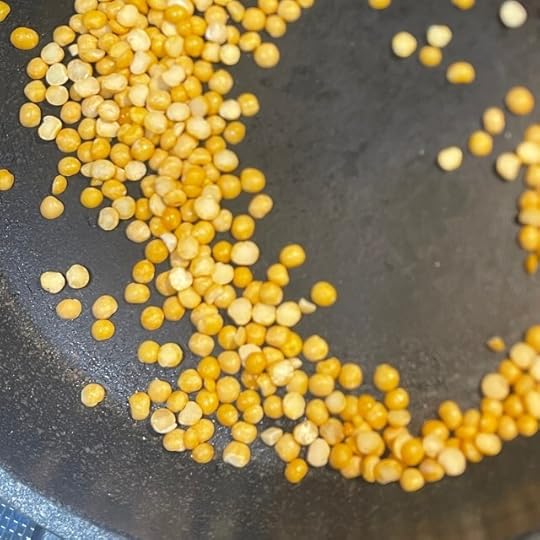
You can sub with peanuts, but you end up with a good chutney with a slightly different texture and flavor. Pretty good, but not the stuff my memories are made off. Those memories they are quite the pesky thing. They get in the way and nudge you to pursue their direction.
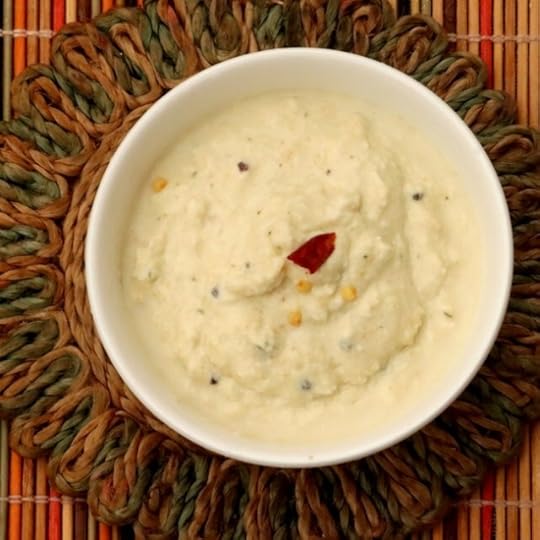
The coconut chutney is finished with a final tempering, or tarka. A simple pop of flavor without which most South Indian chutneys are incomplete. Something magical about asafetida, mustard seeds and chilies in hot oil and makes the air smell magical.

In case you have made extra, this chutney freezes beautifully. I would recommend freezing the chutney into small containers and bringing them out as needed. And in addition to tiffin dishes, the chutney makes a great dip for all you can fancy or a marinade for grilled chicken.
PrintClassic South Indian Coconut Chutney and that one essential ingredient
Prep Time: 15 minutes
Cook Time: 20 minutes
Total Time: 35 minutes
Yield: Makes 1 cup

A recipe for a classic coconut chutney that is easy to make and is bursting with flavor.
Ingredients
2 tablespoon channa dal or split chickpeas1 cup chopped coconut (fresh or frozen) see note
1 green Serrano Chili
1 tablespoon ginger, peeled and chipped
1 teaspoon salt
3/4 cup water
For the tempering
1/2 tablespoon coconut or other oil
1 teaspoon black mustard seeds
1/4 teaspoon hing or asafetida
5 to 6 curry leaves
1 dried red chili
Instructions
In a skillet place the channa dal or split pea lentils and toast the lentils until crisp and well roasted. This process will take about 8 to 10 minutes on low to medium heat, the lentils will darken and smell aromatic and fragrant. The toasted lentils are actually edible and taste very different from their raw version.Place the roasted lentils in a blender with the coconut, serrano chili, ginger, salt and the water. Pulse a few times and then blend until smooth. The chutney should have the texture of a dip. Something that you can dunk a cracker into.
Pour the chutney into a bowl.
In a small skillet, heat the oil and add in the mustard seeds and wait until the seeds begin to crackle. Add in the hing or asafetida, curry leaves and the dried red chili.
Pour the seasoned oil over the chutney and gently stir in.
Serve right away or keep in the refrigerator until it is ready to use.
Notes
For this chutney either fresh or frozen coconut works well, I would stay away from desiccated coconut.
3.1https://spicechronicles.com/classic-south-indian-coconut-chutney-and-that-one-essential-ingredient/The post Classic South Indian Coconut Chutney and that one essential ingredient appeared first on Spice Chronicles.


November 24, 2022
Dosa- Crispy Rice and Lentil Sourdough Crepes
This post is updated from April 2015
Dosa is a ubiquitous item in the universe of South Indian cooking. Dosas usually popular for breakfast or a snack called tiffin. It is such a common treat in my house, I make them so many ways. Over the years, I have acquired some tested and tried tips, so I wanted to update and share them with you. There are essentially two layers to a good dosa, a well fermented batter and a good dosa pan.
Dosas are traditionally made with a naturally fermented batter of rice (preferably parboiled) and white lentils called urad dal. After this baseline there are several variations to the dosa, I have a quick ferment variation and mixed lentil version. But, for the purposes of a how to let us stick to the basic rice and lentil variation as I make it and then you can work on making it your own. An interesting element to note is that the dosa uses a process of natural sourdough fermentation, something that is healthy and has loads of good bacteria that aids in digestion.

I dabbled in dosa making along with other traditional Indian cooking and got the baseline hang of the dosa, however when my 2-year old (now 10 17) tried it, it was a very different story altogether. he fell in love with this crispy crunchy crepe. There was something about those little hands mangling bits of crisp dosa while putting it into his mouth, that became part of a bonding ritual and has continued since.
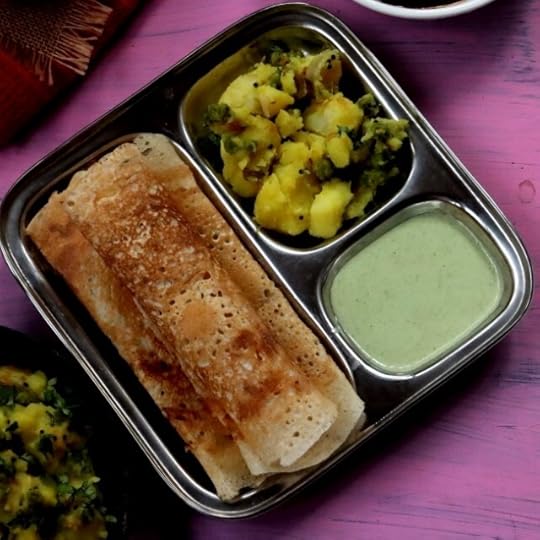
And now Dosas are an important part of any holiday weekend ritual. Dosas needs some cohorts, usually a chutney and sambhar a spiced lentil stew.
 Essentials and why we ferment the dosa
let us talk a little bit about the essentials that make the dosa. A well fermented dosa batter is essential for good dosas. This a well risen batter that gives the dosa it’s characteristic slightly sour taste, and the frothy batter allows for a frothy mixture that quickly adheres to the surface.
When the weather is warm (more than 80 degrees, you do not need to worry about fermenting your Dosa. The hot weather does the job. If you have a nice warm spot, such as a boiler room, this works too. An oven with a pilot light works and lastly the instant pot with the yogurt setting works. The last method is my favorite way of doing it. In any event, you are looking at 12 to 15 hours of hands-off time for the batter to ferment. So yes, like any other sourdough your dosa needs a little bit of planning.
Also, soaking the grains for an extra day, kick starts the process and guarantees quick fermentation. Your dosa batter is ready when it is bubbly, smells fruity and yeasty. A well fermented dosa batter also doubles considerably in size.
 Making the Dosa and the Dosa Pan
A good dosa pan, retains heat well and should be even and well-seasoned. Some people like the convenience of a non-stick pan. A cast iron skillet does the job for me. I have found it works best for me. I sometimes use an electric skillet for Dosa demonstrations.
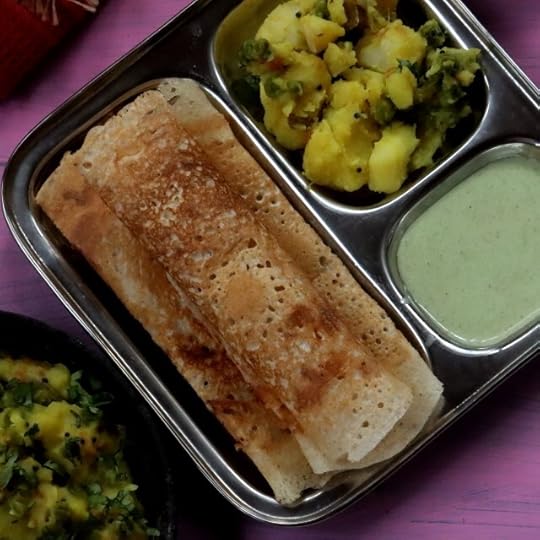
Your dosa pan should be hot, but not too hot. Test this with a little bit of water, it should gently form a ball and sizzle off.When spreading your batter, do not spread to the edges, leave a little room to manipulate your dosa.In between dosas, clean your pan thoroughly. You can use a cut onion or a moist paper towel for this.When your dosa is ready, it is very easy to lift off the skillet.Your first dosa is much like a pancake, it can be used to season and set the temperature for your skillet. Some of the pictures here are from a class that I did with dosas. The filling for the dosa is placed in the center of the dosa before folding. I am doing this above with one of my young students.
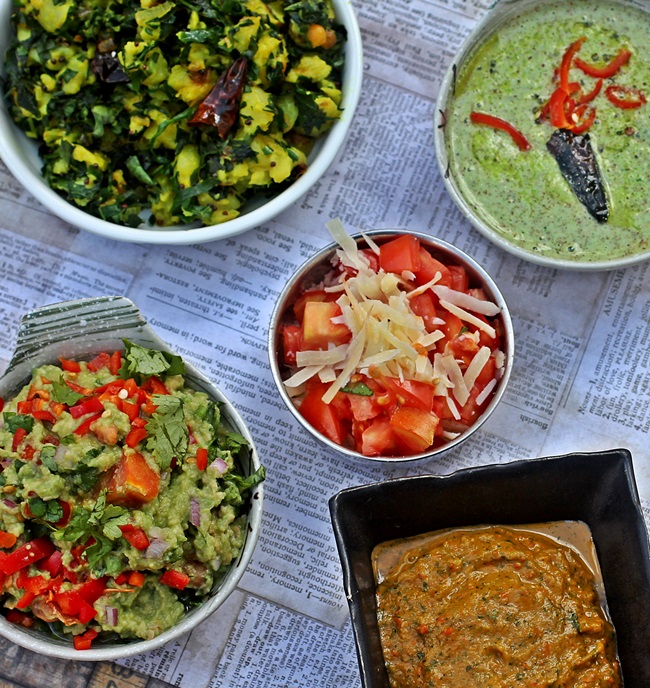
 My daughter Deepta, the guacamole addict, likes her dosa with well, guacamole and my son Aadi likes his with tomato and cheese, so we have what we call the Deepta and Aadi dosa, and here are the demo versions from my class. I will tell you that the traditional potato ones were quite popular while most of the children leaned towards the Aadi.
And for the record, the dosa batter is very versatile. It can be used for making steamed rice buns called idlies, savory pancakes called oothapams and crispy fluffy rounds called paniyarans.
PrintDosa – Rice and Lentil Crepes -The event, how to and musings
Prep Time: 24 hours
Cook Time: 30 minutes
Total Time: 24 hours, 30 minutes
Dosa or Masala Dosas are a naturally fermented, gluten-free sour dough crepe from South India.
Ingredients
For the Dosa2 cups of parboiled rice (use Uncle Ben's parboiled rice or the Idli rice from an Indian store)
3/4 cup of split white lentils (urad dal)
1 teaspoon fenugreek seeds
1.5 teaspoons salt
Water as needed
Instructions
Soak the rice and lentils in separate containers with 11/2 cups of water in each overnight, at least 12 hours. (See my notes on soaking)Add the fenugreek seeds to the white lentils while soaking.
Once the grains are done soaking, place the white lentils with the fenugreek seeds in the blender, with minimal water (if these are soaked properly, they do not need much water to grind). Grind them into a fluffy soft paste. Remove and place in the container for fermenting. This container should be large enough to allow room for the rice and lentil mixture to ferment and double.
Place the rice in the blender with the soaking water to grind into a smooth paste, please note this needs to be done with considerable patience, you need to test the mixture with your hands a few times to ensure that you have a smooth texture, a grainy texture will not result in thin crepes.
Add the rice mixture to the white lentil mixture. Mix the mixtures until well mixed, this can be done either with your hand or with a spoon.
Place in a large non-reactive container, a stainless steel or plastic container with a lid is perfect, make sure there is enough room to let the batter double, after the addition of the lentils.
If you have an instant pot, place the batter in the steel insert, cover and set this on the yogurt mode for about 12 hours.
Alternately, find a warm spot in your house, and set aside for 12 to 15 hours.
To make the dosas, you need to heat a heavy bottomed skillet of your choice, I like a cast iron skillet. Test the skillet with a few drops of water, when ready the water should form beads and dance off the surface. Keep a moist cloth to cool the skillet as needed.
Gently brush the skillet uniformly with oil. I use a paper towel for this.
Stir the batter once to mix, it should be fairly light and frothy. Take a ladleful and pour into the center of the skillet. Spread the batter as thinly as possible using circular or oval movements. This is to spread the batter evenly and smoothly. This needs to be done pretty quickly with an even hand.
Let the dosa cook for about 3 to 4 minutes, you can add a little extra oil around the edges, I am fairly minimalistic with the oil,
When the dosa is ready, you should be able to remove it from the pan fairly easily.
Fold your dosa into half and remove from the pan. If you are adding a filling, place this in the center of the dosa prior to removing the dosa.
Notes
Most of the time for the dosa is in the fermentation, so it needs some planning but not necessarily a lot of hands on work.
3.1https://spicechronicles.com/dosa-crisp-ruce-lentil-sourdough-crepes/
The post Dosa- Crispy Rice and Lentil Sourdough Crepes appeared first on Spice Chronicles.
October 7, 2022
Jorda – Sweet Rice Pilaf
Saffron and Orange Scented Bengali Pilaf
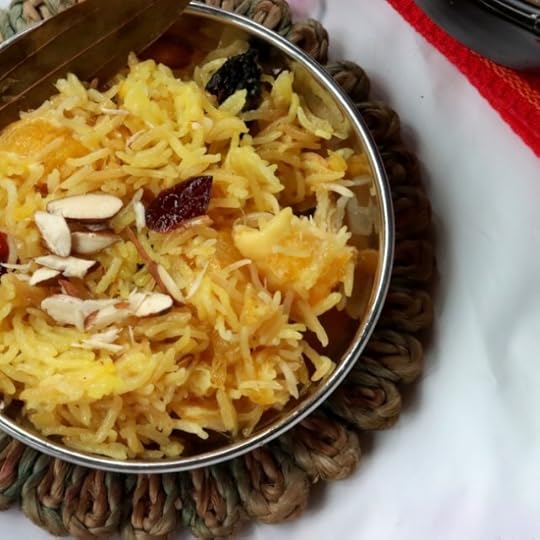
This is a time of holidays and festivities. Mindful ones such as Yom Kippur. And, if you are Bengali like me chances are you are celebrating even if in your heart, Bijoya Dashami. The tenth day of the Durga Puja, that is celebrated with sweets to indicate the victory of good over evil. I made a quick and really flavorful version of Jorda. This is essentially a sweet rice pulao very popular in Bangladeshi tables. You will find versions that are bright orange in color. My version has all the delicate flavors of oranges and saffron.
Jorda is essentially a rice-based dessert, that is closer to a North Indian semolina sheera rather than a milky rice pudding. You can make this as elaborate as you would like. Loads of dry fruit, nuts, even things like khoya or solidified milk. Again, this version that I offer is my recipe from The Bengali Five Spice Chronicles. This and many other Bangladeshi recipes are included in the expanded edition. The reason is fairly simple, I wanted to make sure that this bigger and better version showcased the diversity of Bengali food further. My version is easier, somewhat more delicate and if I might add a little more refined.
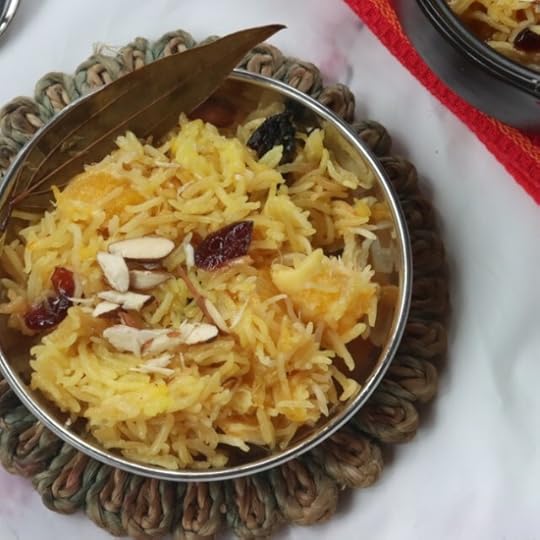
You can make this in the instant pot or stovetop, almost the same way. As always, the stove top needs a little bit of watching around, but in either instance of the stovetop or the instant pot the results are festive and satisfying. A few familiar ingredients, nothing fancy gets you some mega elegant stuff. With the colors of saffron and notes of orange and cranberry this is also a great dish for a holiday table.
Sweet Orange and Saffron Scented Bengali Pilaf
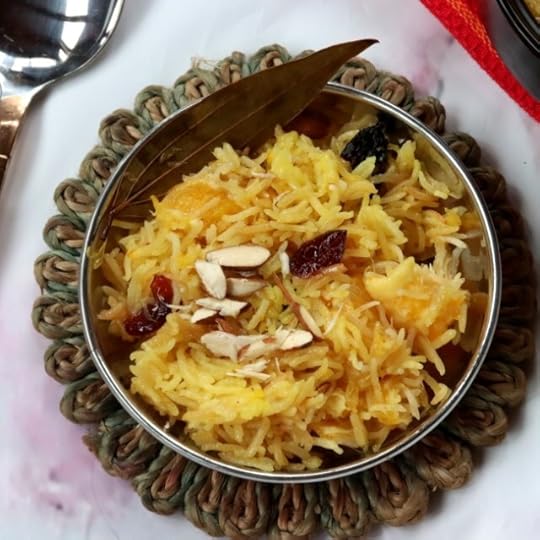
Some variations worth noting before I send you off to make some glistening, delicate and fragrant Jorda is as follows.
Make the same dish with just a smidge of sugar and some salt to double up as a festive pulao accompanying other savory dishes on your table.Add a whole load of nuts and dry fruits – pistachios, cashews and raisins they are all good.Add chopped pineapple along with the dried cranberries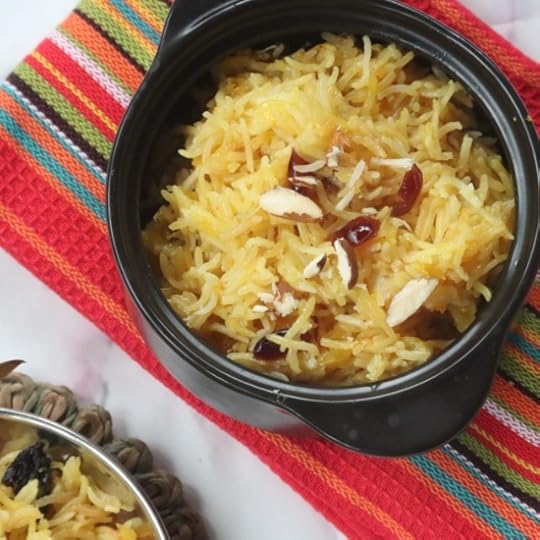
A fragrant and festive orange and saffron scented rice dish.
And then like with all my recipes, feel free to come up with a variation of your choice. We enjoyed this with this with an equally simple Broiled Thai Curry Fish. Perfect and happy to cobble something together after being out of commission for two days.
And this was my semi-festive meal. With the holiday now gone, it
is certainly still festive enough for a Friday evening.
PrintJorda – Sweet Rice Pilaf
Prep Time: 5 minutes
Cook Time: 25 minutes
Yield: Serves 4 to 6

A fragrant and festive rice dish, usually a part of a larger festive meal, served as dessert.
Ingredients
2 tablespoons clarified butter or ghee (see note)1 cup of basmati rice
Zest and chopped segments of 2 oranges
1/3 cup sugar
1 or 2 black cardamoms
1 bay leaf
1/3 cup coconut milk
1/2 teaspoon saffron strands
1 tablespoon dried cranberries or raisins
Chopped nuts such as almonds or cashews to finish
Instructions
Set the instant pot onto sauté mode. Add in the clarified butter or ghee (see note for vegan substitution)Add in the rice and stir lightly to coat the grains with the ghee.
Add in the orange zest and segments. Add in the sugar.
Add in the black cardamoms, bay leaf, coconut milk, saffron strands and the cranberries or raisins.
Turn off the sauté mode and add in 3/4 cup of water.
Set to rice mode and allow a natural release. Enjoy this warm or chilled.
Notes
To keep this dish vegan, you can use coconut oil instead of the ghee.
Stovetop Instructions
Continue the process as described above in a heavy bottomed pot. At the end, add in 1 and half cups of water instead of the 3/4 cup used for the instant pot. Bring to a simmer, cover and cook for 20 minutes. Turn off the heat and let the rice rest for 10 minutes before serving.
3.1https://spicechronicles.com/jorda-sweet-rice-pilaf/The post Jorda – Sweet Rice Pilaf appeared first on Spice Chronicles.
October 5, 2022
Broiled Thai Coconut Curry Fish

A simple Thai curry marinated fish, cooked with vegetables
We love Thai Food! Probably the next most popular kind of food on my site. And I often make my own simplified version of Thai Curry Pastes. Such as this, red curry pastes and then sometimes it is yellow curry paste. And, when I have a little bit extra left over I make this Coconut Curry Fish. It is ridiculously simple. Curry paste, coconut milk and 15 minutes usually on salmon steaks or wedges. To get things even simpler, I steam or cook some broccoli on the same pan. Served with rice or not, you have an almost fancy dinner of sorts. Okay, a pretend fancy dinner of sorts. An old recipe that has served me well over the years. It has seen some variations. Overall, the coconut and curry has remained the same.
This recipe for Coconut Curry Fish works well with any kind of Thai Curry that you have on hand. My hunch is that it probably will work well with other kinds of curry pastes, as long as they are fresh and robust. I like to use salmon for this because, it is a fish that I often have on hand. Adding a generous dose of Thai Basil if you have some on hand, intensifies the flavor beautifully. I recently did a class and taught Thai Pineapple Basil Fried Rice. So, yes, I had a lot of basil on hand. In fact, am blessed to have a neighbor that actually grows Thai Basil. Speaking of which, the Fried makes a great complement to this Coconut curry fish. And yes, that is how I enjoyed it.
Since it grows happily in abundance. I get the benefits of his labor. As a rule, you can make this a single sheet pan meal, with broccoli or another vegetable if you wish. I recommend starting that out on one side of the pan and roasting it for about 15 minutes (this is for broccoli) and then pulling the pan out and adding the fish and continuing.
The fish needs about 15 minutes for the flavors to settle, 30 minutes if you have the time and then you have a meal that is satisfying and full of sweet, savory and spicy.
.
PrintBroiled Thai Red Curry FishPrep Time: 30 minutes
Cook Time: 15 minutes
Total Time: 45 minutes
Yield: Serves 4
A simple easy cook fish recipe brimming with Thai flavors, coconut, curry and Thai basil bringing you the perfect Coconut Curry Fish.
Ingredients
For the Fish1.5 pounds of fish (I used salmon)
3-4 tablespoon yellow or red curry paste
1 tablespoon brown sugar
1/3 cup coconut cream
Zest and juice of a lime
2 tablespoons fish sauce (depends on the saltiness of your curry paste)
2 tablespoons chopped Thai Basil
Extra Lime or lemon to garnish
Instructions
Pat the fish dry and set aside in a large mixing bowl.In a smaller bowl, add the Thai curry paste, brown sugar, coconut cream, lime juice or zest, fish sauce and mix well.
Pour this mixture over the fish and stir and toss well to coat. Set aside for 15 minutes to 30 minutes.
Place the fish on a sheet pan, with the skin side down. Place in the oven and broil on low, for 7 minutes.
Turn and broil for another 6 to 7 minutes.
Garnish with Thai Basil and serve with additional lime or lemon wedges
3.1https://spicechronicles.com/broiled-thai-coconut-curry-fish/
The post Broiled Thai Coconut Curry Fish appeared first on Spice Chronicles.
October 3, 2022
Spinach and Collard Green Pachadi
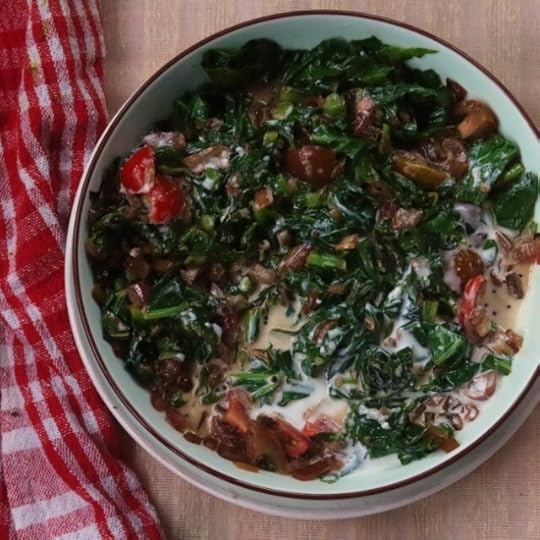 Pachadi’s are a lightly spiced combination of vegetables, usually finished with yogurt and a final tempering. It is almost a cross between a raita and gentle curry. But, then like all essentials in Indian cooking, it is so much more. I love greens. Bitter greens like collards, kale, spinach and everything in between. In fact, they are probably one of my very few healthy obsessions. This weekend, I fit in a good amount of cooking. Which keeps everyone sustained through the week. I feel less rushed. And tossing in a dish like this into the mix is perfect. It is warm, comforting and works beautifully for these sudden cold days that we have been having.
I always tend to spinach and broccoli around. They make a great healthy side for your dinner equation. However, this week I find some collard greens that are begging to be used. They were not as crisp as the spinach. Also, not quite as plentiful. Pairing them with spinach turned out to really great.
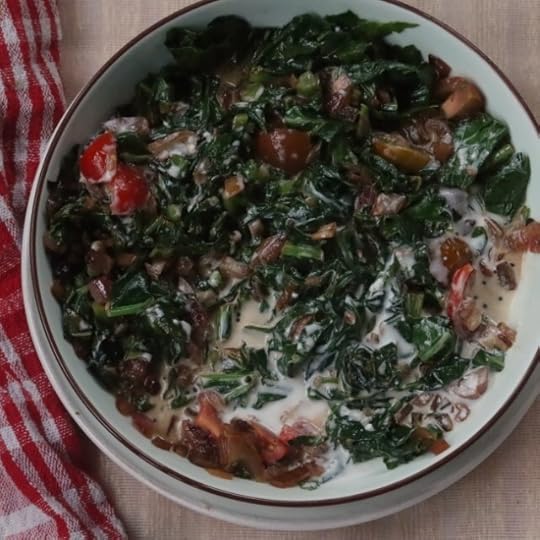
The bitterness of collards add character to the milder spinach. With just enough spices and the some great homemade yogurt, all is good with this recipe. Eat a bowl plain, serve it with a side of steaming rice and lentils.
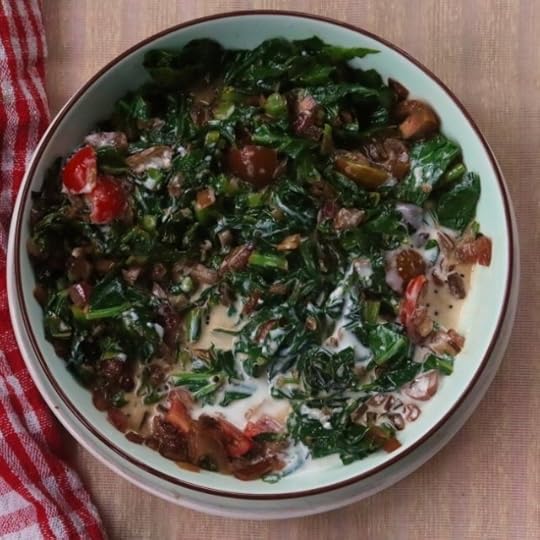
As they say, it’s all good. In fact, typically pachadis are part of a larger meal. Usually essential in a vegetarian feast known as Sadya. Not all pachadis have yogurt, however most the ones with greens do. When I make this dish, I do not overcook the greens. Also, let the yogurt retain some integrity. I feel that the texture keeps the dish interesting. It also makes this great as a salad own its own if that is what you are in the mood for.

And yes, this dish is also great without the yogurt, and if you want to keep this vegan skip the yogurt. I do add in a small tomato, again optional but add a nice pop of color.
PrintSpinach and Collard Green Pachadi
Prep Time: 10 minutes
Cook Time: 10 minutes
Total Time: 20 minutes
Yield: Serves 4 to 6

A pachadi or gently seasoned South Indian dish made with mixed greens and yogurt.
Ingredients
For the base2 tablespoons oil
1 tablespoon minced ginger
1 red onion finely chopped
1 green chili such as a serrano, finely chopped
3/4 cup collard greens tough stems removed, finely chopped
3/4 cup chopped spinach
1 teaspoon salt or to taste
1 small tomato, diced (optional)
1 cup of natural yogurt (not Greek), well beaten
For the finish
1 tablespoon oil or ghee
1 teaspoon black mustard seeds
1/2 teaspoon whole cumin seeds
6 to 8 curry leaves
Instructions
In a medium sized pan, heat the oil add in the ginger and the onion. Sauté for about 4 minutes until the onion softens and turns gently fragrant.Add in the green chili and stir well.
Add in the collard greens and spinach with the salt. Cook for 3 minutes and add in the tomato.
Cook until the greens are wilted, and the tomato softens, just a little.
Turn off the heat and add in the yogurt, mixing it in lightly.
Heat the oil or ghee in a small pan, add the mustard seeds and cumin seeds and wait until the mustard seeds pop. Add the curry leaves and quickly pour this mixture over the spinach and collard mixture.
Enjoy this warm or at room temperature.
3.1https://spicechronicles.com/spinach-and-collard-green-pachadi/
The post Spinach and Collard Green Pachadi appeared first on Spice Chronicles.
September 24, 2022
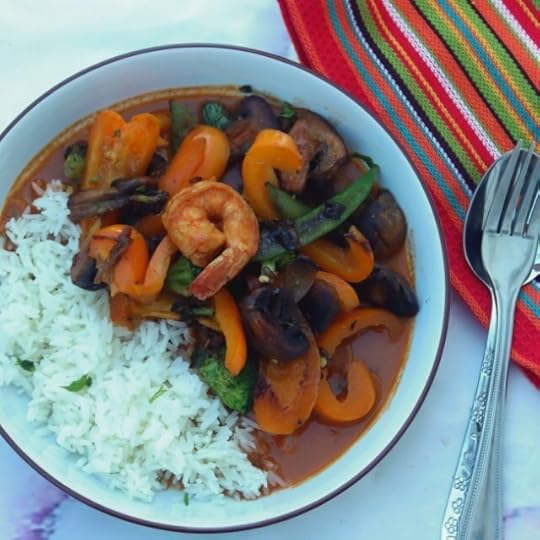
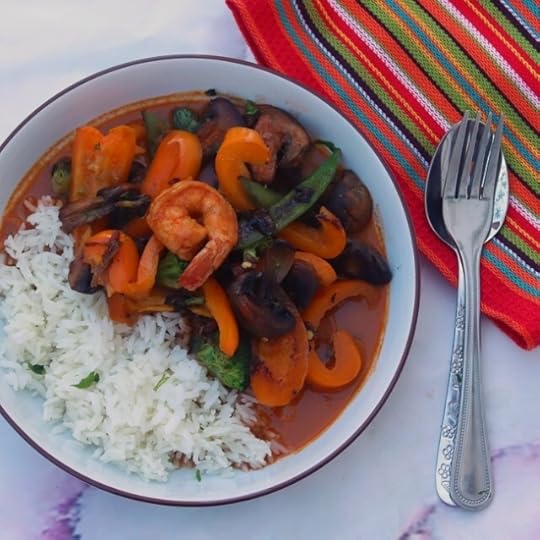
Flexible Thai Red Curry
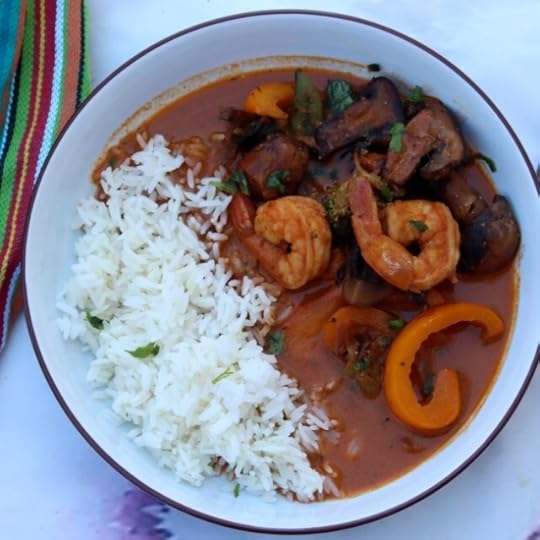 This recipe is aptly named Flexible Thai red curry, because other than the flavor base the vegetables and protein are quite flexible. I often make this with shrimp as featured here. It is just as good with tofu, chicken or even chickpeas. As for the vegetables, go find what you have on hand. Mushrooms, eggplants, peppers, broccoli are all good. But there are few things that are essential. Not a lot, but enough to make this Red Curry Worthy.
So we start out with some red curry paste, your favorite variety or my easy recipe all sound good. And then there is coconut milk, ginger, garlic, lime and brown sugar and a little extra fish sauce if you must. And like I said the rest is up to you. Add loads of veggies, like I do. Skip them all together. And then add some basil and cilantro like I do, or just don’t. I think you get the idea.
Wow, fall has decided to land on us with a gusto. Erasing the memories of that strange and super-hot summer that was. A little cooler than expected, but I will take this over those well into ninety-degree temperatures that we had. After all, this feels like Autumn in New York. It is perfect curry season, fresh, crisp and vibrant. I guess the fact that the leaves are still green does not quite mesh with the weather we have been having. But like I said I will take.
Nothing says cozy and warm like some good well-seasoned curry. Red tends to the most popular of the essential Thai curries in our household. Usually because, I don’t even have to worry about looking for fresh chilies. You can modify the heat balance in this curry by modifying the amount of curry paste that you are using. If you are using my red curry recipe, you can expect something on the medium level of heat.
PrintFlexible Thai Red Curry

Ingredients
3 tablespoons vegetable oil such as grapeseed oil divided1 cup vegetables cut into smaller pieces, such as broccoli, mushrooms and peppers
1 teaspoon minced ginger
1 teaspoon minced garlic
3/4 pound of shrimp shelled and deveined (can be substituted with a protein of your choice)
1 tablespoon fish sauce or soy sauce
1 and 1/2 tablespoons of Thai Red Curry Paste
1 tablespoon brown sugar
1/2 can of coconut milk
3 tablespoons fresh lime juice (about 1 lime)
Optional chopped cilantro and basil.
Instructions
Heat one tablespoon of the vegetable oil and add in the vegetables and sauté for 5 to 6 minutes until mostly cooked.Remove and set the vegetables aside.
In the same pan heat the remaining oil and add the minced ginger and garlic. Stir in the shrimp and cook for 2 to 3 minutes until the shrimp is well coated with the ginger and garlic.
Add in the fish or soy sauce and the red curry paste.
Stir in the brown sugar and coconut milk and bring to a simmer. Allow this to simmer for 6 to 7 minutes. Add in the vegetables and simmer for another minute or two.
Sprinkle with the lime juice.
Finish with chopped cilantro and basil if desired.3.1https://spicechronicles.com/flexible-thai-red-curry/
The post Flexible Thai Red Curry appeared first on Spice Chronicles.
September 22, 2022
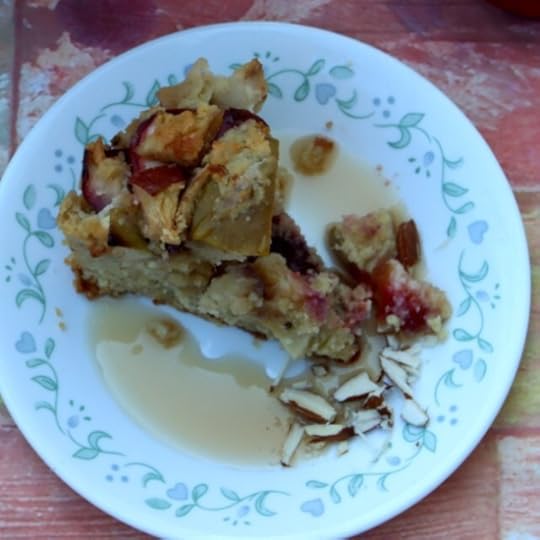
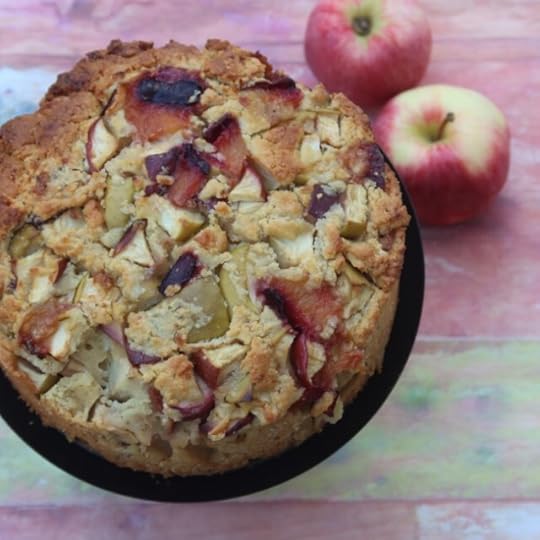
Honey Apple Almond Cake
F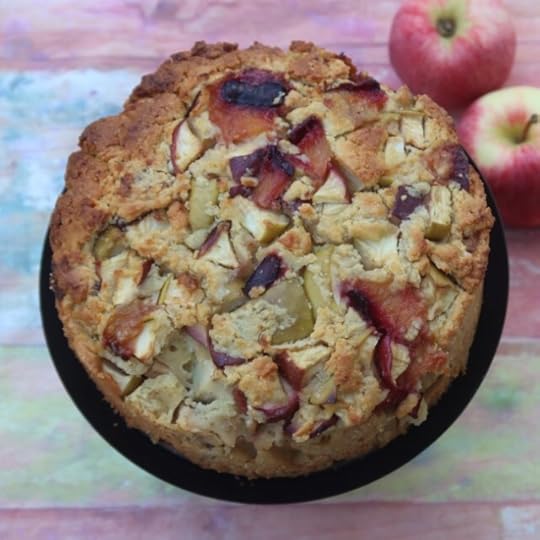 all is finally here! This year and for that matter every year, I welcome Fall with open arms. As if in sync with the season, I baked this luscious Honey Apple Almond Cake. This could be considered an almond lover’s version of my Apple Yogurt Cake. This one is loaded with chopped apples, sweetened with honey and includes just a whisper of chai spices. Enough to remind of all things fragrant and all things fall. The texture is very gently crumbly and loaded with apples. There is just enough batter to put together the apples, but not too much.
You can make this with only almond meal. I adapted this Apple Almond Cake from an Amy Riolo recipe with just almond meal. Adding in just a little bit of flour and baking powder gives this a little bit of lift. But still retains the original dense texture. With apples and honey this might be a good idea for Rosh Hashanah. So much bright and beautiful things to celebrate for the next several weeks. The biggest looming celebration is that I will be visiting Indian in less than a month. Much needed, it has been way too long.

Honey Apple Almond Cake
I have been trying to work down a lot of the different things that I have on hand. First thing on had was an assortment of apples, so for this cake I used 4 apples – a combination of Granny Smith and Honey Crisp varieties. Giving the cake a good robust assortment of flavors. This cake is perfect,
Drizzled with a little more honey.Great served plain at room temperature.And absolutely magical served warm with some ice cream on the side.

About the ice cream, you can experiment with a variety of flavors, vanilla, salted caramel to start with. The cake crumbles gently when you cut it. It is a lot of fun popping it little pieces off the plate.  All things considered; it is a perfect cake to welcome a perfect fall day.
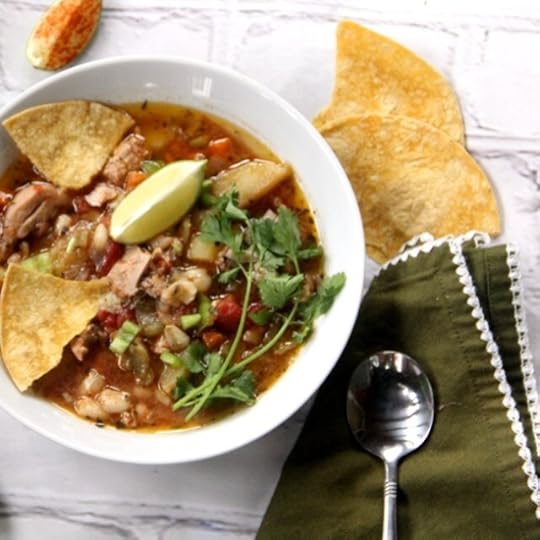
Life has otherwise been going through a busy with everything and yet nothing at all phase. We did manage to sneak in a few fun things. Last weekend a leisurely Sunday at the White Plains Jazz Festival. On the agenda was Ice Cream, Tacos and Music.
PrintHoney Apple Almond Cake
Prep Time: 10 minutes
Cook Time: 50 minutes
Total Time: 60 minutes
Yield: Serves 10
A beautiful and fragrant apple cake loaded with almonds, honey, and a hint of chai spices.
Ingredients
4 assorted apples (large or medium sized apples)3 eggs
1/2 cup honey
1/2 cup olive oil
2 cups almond meal
1 cup all-purpose flour
1 teaspoon baking powder
Powdered cloves, black pepper, cinnamon and cardamom (1/8 teaspoon each)
1 teaspoon vanilla extract
Instructions
Core the apples, and chop into small chunks, with the skin on, and set aside.Grease and prepare a round 8-inch-deep baking pan.
Pre-heat the oven to 350 degrees.
In a large mixing bowl, break in the eggs, honey and olive oil and beat until nice and smooth.
Add in the almond meal. Sift in the all-purpose flour and the baking powder.
Stir in the spices and the vanilla extra. Stir in the apples and pour the mixture into the cake pan.
The pan will be quite full, but this cake does not rise much so you do not run the risk of it overflowing.
Bake for about 50 minutes, until the cake is golden brown and gently set. Turn of the oven and let it finish it baking in the warm oven.
Serve warm or cool.
3.1https://spicechronicles.com/honey-apple-almond-cake/
The post Honey Apple Almond Cake appeared first on Spice Chronicles.
September 8, 2022
Eggs in Purgatory – Uova in purgatorio

Eggs in Purgatory
Wait, isn’t this shakshouka? Well, not quite but a close cousin. Eggs in Purgatory is the Italian variation. With just a few minor twists, this dish is just as comforting and show stopping. Perfect for a quick, satisfying and comforting meal on a busy weeknight. Well, nothing says this cannot be a weekend brunch. As they say it is all good. It has fewer ingredients than Shashouka, so we need to make them count. Use good quality olive oil and cheese and of course fresh eggs.
My version is adapted from Amy Riolo’s cookbook, Italian Recipes for Dummies. Actually, the only change I made to this was to add in a little diced carrot while making the sauce. This did two things for the sauce. It made me cook it longer, allowing the flavor to deepen. And, it added just a little sweetness to the mixture. Just a hint. Sometimes in life it just that little bit that makes a difference.

Eggs in a Spicy Tomato Sauce
So how exactly is this different from Shakshouka? Firstly, no cumin. A good amount herbs, depending on the recipe being used. And then there is Parmesan. I have a feeling that this would also work well with Pecorino Romano. Given that Parmesan barely lasts in my house for more than a few days courtesy my son, the next time I make this it will be with Pecorino Romano. This week I am trying to weed through a very full pantry. Trying to cook my way through what I have in store. I go through those phases sometimes. It usually serves me well. As I often have way more things on hand than I need to have. This is especially relevant in light of my shrinking at home family.

Sad to think that I will be losing my culinary muse (aka my son) in a years’ time. However, for now we were able to happily savor this wholesome and very delicious dish. That is as you can see quite show stopping. And bonus, the basil and the some of the tomatoes were grown by yours truly.
PrintEggs in Purgatory – Uova in purgatorio
Prep Time: 5 minutes
Cook Time: 35 minutes
Total Time: 40 minutes
Yield: Serves 4
Eggs in Purgatory or Eggs in a spicy fragrant tomato sauce.
Ingredients
3 tablespoons EVOO1 teaspoon crushed red pepper flakes
1 medium onion, diced
4 cloves of garlic, minced
1 red bell pepper, diced
1 small carrot, peeled and diced
1 tablespoon tomato paste
2 cups chopped very ripe tomatoes or jarred tomatoes such as Pomi
1 teaspoon fresh chopped oregano
1/4 cup finely chopped basil, plus more to garnish
1 teaspoon salt or to taste
Freshly ground black pepper
1/4 cup shaved or grated parmesans cheese
Instructions
Heat the olive oil in a medium sized skillet over medium heat. Add in the chili flakes and season the oil.After a few seconds add in the onion, garlic, bell pepper and carrots. Lower the heat and cook the mixture stirring occasionally until the carrots are very soft. This will take about 10 to 15 minutes.
Add in the tomato paste, tomatoes, oregano and basil with the salt and bring to a simmer. Allow the sauce to thicken all while cooking on low heat. This will take about 7 to 8 minutes.
Carefully crack the eggs and add them in one by one and cook for 6 to 7 minutes allowing the eggs to set, with slightly runny yolks. This is somewhat up to you. We do not like very runny yolks.
Add in a generous amount of freshly ground black pepper. Garnish with basil and the parmesan and serve with some good crusty bread. 3.1https://spicechronicles.com/eggs-in-purgatory-uova-in-purgatorio/
The post Eggs in Purgatory – Uova in purgatorio appeared first on Spice Chronicles.
September 4, 2022
Instant Pot Plum and Cardamom Fruit Compote
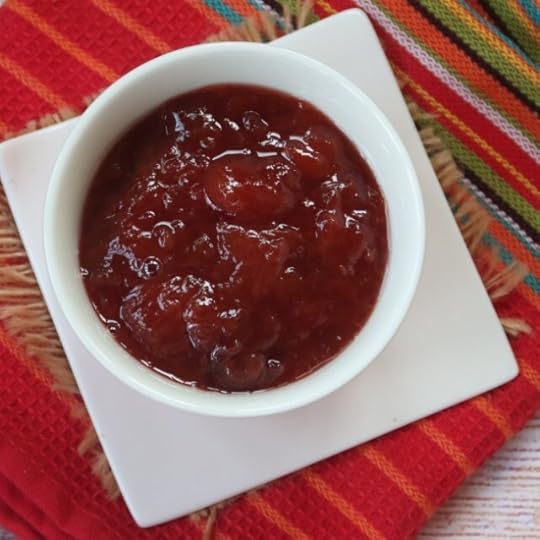
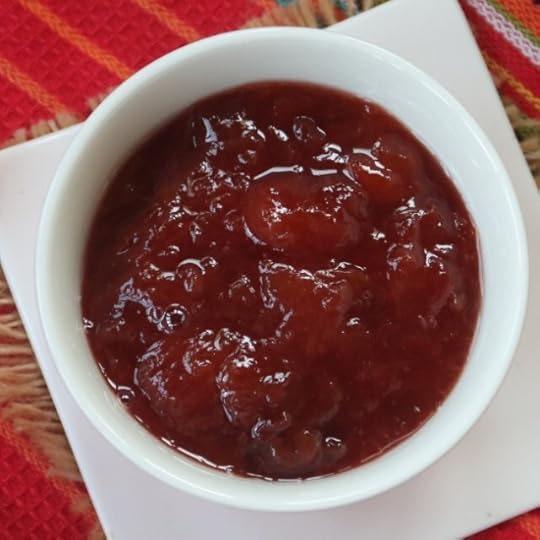 Whatever is a compote? To me a great way to use up fruit on hand. This time of the year, there is a lot of preserving the harvest on everyone’s minds. Hopefully this easy plum compote will give you an idea of what to do with anything on hand. This easy recipe will work with peaches, berries and possibly any soft and fleshy fruit you have around. And it cooks for under a minute of pressure in the instant pot. About a total of fifteen minutes. Making this on a stove top is just as easy, so no excuse really to make this recipe your own.
This recipe is inspired by the Spring and Summer collection from Lucis Morsels. I am always happy when I have a new cookbook or cookbook collection to review. I always am left with new ideas for my table and of course recipe repertoire. Mixing up cardamom instead of the suggested cinnamon gives this compote a somewhat earthy fragrance.

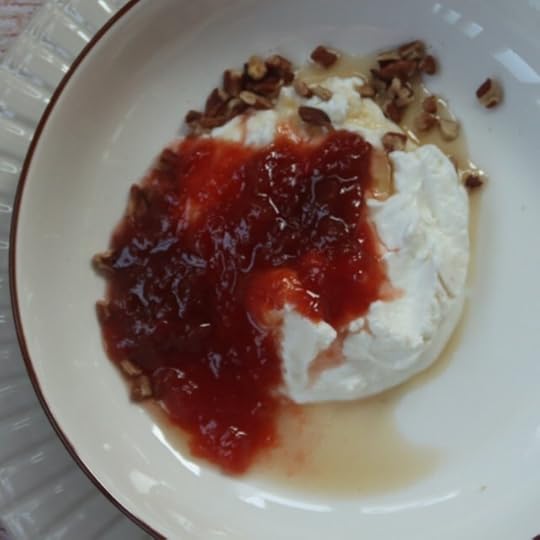
You want the fruit to have some texture. I have been enjoying this with yogurt, pecans and a little extra honey. Can you say that I am ready for fall. I tolerate summer in the best of cases, and this year has been too hot and dry for me to even tolerate it. And please weather gods do not mix this up with a super cold winter.
However, if the weather this year is not a wakeup call for the fact that we need a little more awareness about the world around us, I am not sure what will convince people. The drought in New York is just one of the many around the world. There is a heat wave in the west coast and a drought in Europe. With rising food prices, all of this is a wake up to live a little more responsibly. And so instead of getting rid of that excess fruit make compote. I have been sneaking in a couple of spoons of this whenever I can.
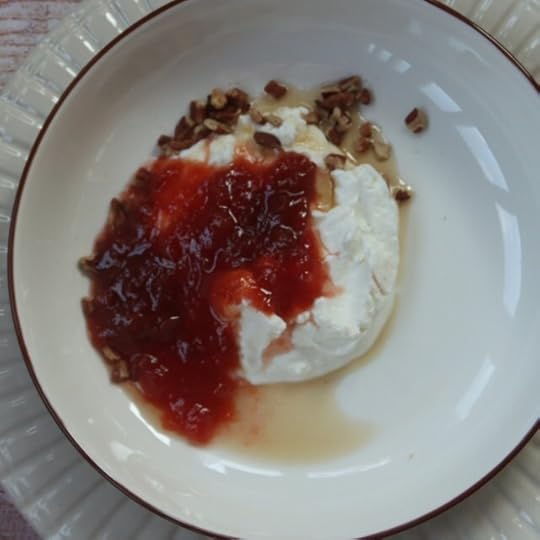
I think it is perfect any and all times of the day, spooned over toast or pancakes for breakfast and with yogurt or cake as a dessert. Here is a nice touch of sweetness for a busy week ahead.
PrintInstant Pot Plum and Cardamom Fruit Compote
Prep Time: 5 minutes
Cook Time: 15 minutes
Total Time: 20 minutes
Yield: Makes about 1 cup of compote
A quick and easy way to use seasonal plums for a quick everyday dessert.
Ingredients
1 pound of plums (can be substituted with any ripe stone fruit of your choice)1/2 cup brown sugar
1 teaspoon freshly ground cardamom
Instructions
Cut the plums into half and remove the seeds. Then quarter if desired.Add in the brown sugar, cardamom and 2 tablespoons of water.
Set the instant pot on 1 minute of low pressure. Release the pressure after 3 minutes.
Stir the mixture well to mix in. There should be some texture. Allow the compote to chill and use as your favorite dessert sauce.
If you want to do this on the stove top, add the plums, sugar and water in a heavy bottomed pot and bring to a simmer. Continue cooking for about 15 minutes to allow the mixture to break down and form a sauce. That is, it!3.1https://spicechronicles.com/instant-pot-plum-and-cardamom-fruit-compote/
The post Instant Pot Plum and Cardamom Fruit Compote appeared first on Spice Chronicles.
August 29, 2022
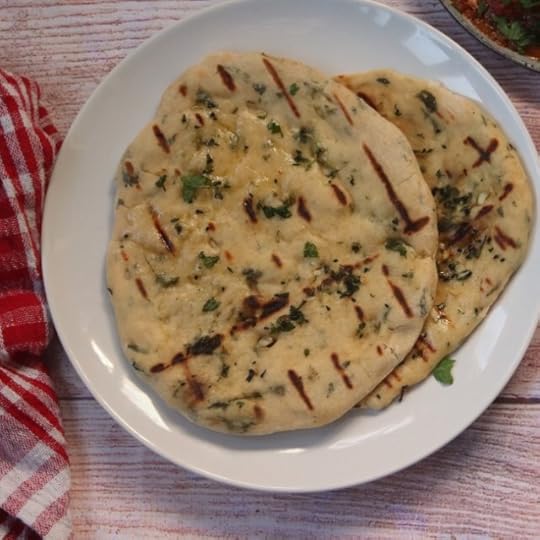
Grilled Garlic Naan
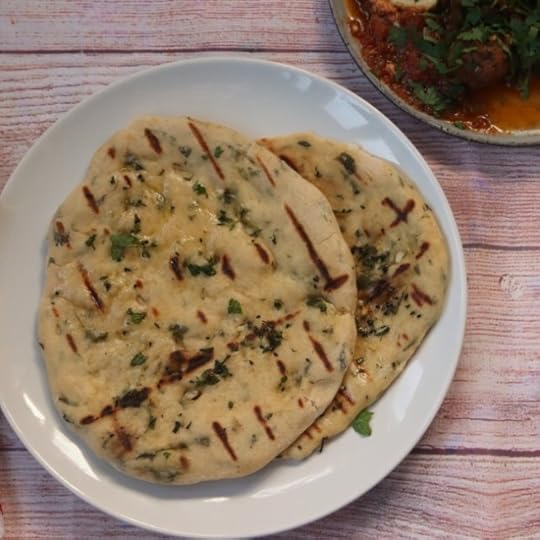 An old tested and tried recipe is like a best friend. It is reliable, it brings with it good memories and you love its company. This grilled garlic naan that comes my way in summer is one such. Simple to put together. The dough comes together easily. If you make a big batch, it can develop complex flavor with a nice slow rice. This year, my son has given this his seal of approval. Yeah! Essentially there is more grilled naan happening in my upcoming future.
This recipe is not difficult, but for best results you want to allow 10 to 12 hours for the dough to rise nicely.
And this post is updated from June 2016
And I have officially rocked the grilled naan. Not bad for a Saturday morning. Trying this on the grill is new for me. With some trial and error, I have nailed this verion. A few things about this.
You need to make sure that you roll out your dough well in advance. Essentially you want to allow this to rest.Grill needs to be pre-heated to 500. This will take a little time. Or you can finish your other grilling and then make the naan.The naan cooks up quickly and offers a soft and fluffy texture, complete with lots of garlic action.
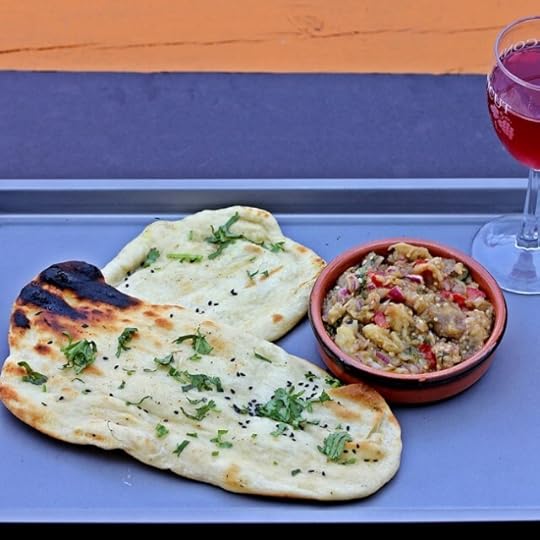
Last night, I cooked with abandon after a long time. A long peaceful sleep has fixed the cold. And I completed naan action with gusto. The dough uses 50% whole wheat flour. It is absolutely perfect with something simple like this Baigan Bhartha.

One of the key things, I realized is that warming the grill for a while makes a world of difference. Who knows I just might be ready for chapatis ala Bitman next.
As with all cooking, life is often about these little details, the warming, the stretching, the puffing and in this case the resting.
The state of our household is surprisingly relaxed today, Dad is out at a conference, the kids are reading in cool shaded rooms.

I am of doing what I love doing, playing around on this site. Sharing my latest idea of fun or in this case my very exciting well perfected recipe for grilled naan. Who knew that a piece of warm fluffy flatbread could bring someone so much happiness.
I have a vegan recipe for naan on the grill here. I will retest that one as well soon.
Brush the naan with additional olive oil and garlic. And if you are like my son add some cheese and you will be in cheesy garlic indulgence.
PrintGrilled Naan
Prep Time: 6 hours
Cook Time: 15 minutes

A light, fluffy and super easy recipe for Naan on the grill.
Ingredients
1/2 cup low fat milk or almond milk1 tablespoon rapid rise yeast
1 and 1/2 cups of all-purpose flour
1 and 1/2 cups of whole wheat flour (atta)
2 tablespoon minced garlic
1 and 1/2 teaspoon salt
2 tablespoon olive oil
4 tablespoons yogurt
For topping
Butter, ghee or olive oil for brushing
1 teaspoon extra chopped garlic
1 teaspoon cracked black pepper
Instructions
In a small bowl add the milk at room temperature (I usually microwave it for a few seconds since I use it from the fridge)Sprinkle the yeast on the milk and let is rest for about 5 minutes.
In the meantime, sift the flour into the mixing bowl and add in the minced garlic, salt and olive oil and rub into the flour mixture.
By this time, the milk mixture should be frothy. Make a well in the center of the dough, add in the milk mixture and yogurt and work into the dough. This will result in a shaggy mixture, add about 1/4 cup of water to bring it all together. You should end up with a soft moist but not wet.
Gather the dough into a large container and cover loosely with plastic wrap. Let the rest outside the refrigerator for at least 3 to 4 hours.
I personally like to let this rest overnight in the refrigerator, give it a good knead at let it rise for another couple of hours outside the refrigerator. But the first option works file too!
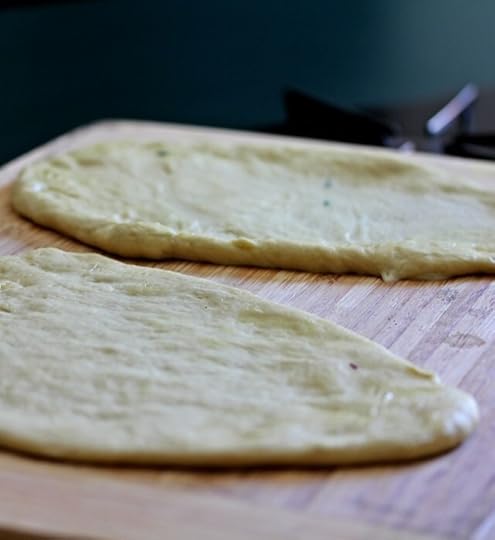
Break off walnut sized balls, stretch them with your hand into oval loafs. You can do a final rolling if needed to get it nice and thin.
Place these on a floured surface and allow them to rest for another hour.
Mix the oil/butter or ghee for brushing with the chopped garlic and cracked black pepper. And gently brush the surface of the naan.
Pre-heat the grill to up to 500 degrees.
Carefully, place the naan breads over the grate, ungreased side up, close the grill and let it cook for about 2 minutes, grab the bread firmly but deftly, it comes off easily, but it is delicate.
Turn and cook for a couple of more minutes, you will have a pale fluffy bread, that is flecked gently golden.
Brush with a little more olive oil and serve hot.
Notes
The prep time is mostly to let the bread rise.
3.1https://spicechronicles.com/grilled-garlic-naan/The post Grilled Garlic Naan appeared first on Spice Chronicles.


