
Rinku Bhattacharya's Blog, page 3
October 11, 2023
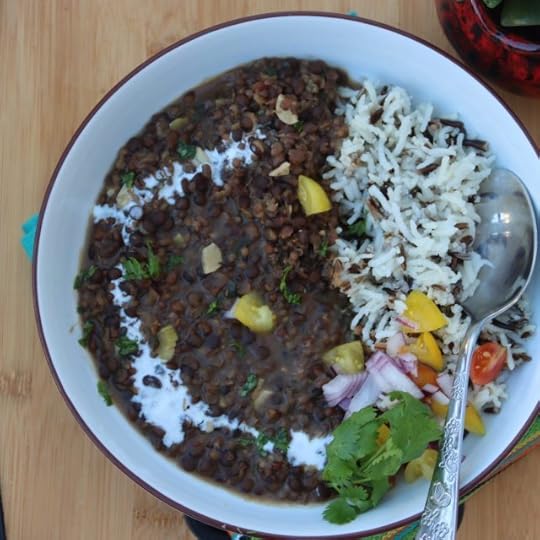
Sabut Masur Dal – Wholesome Brown Lentils (Instant Pot)
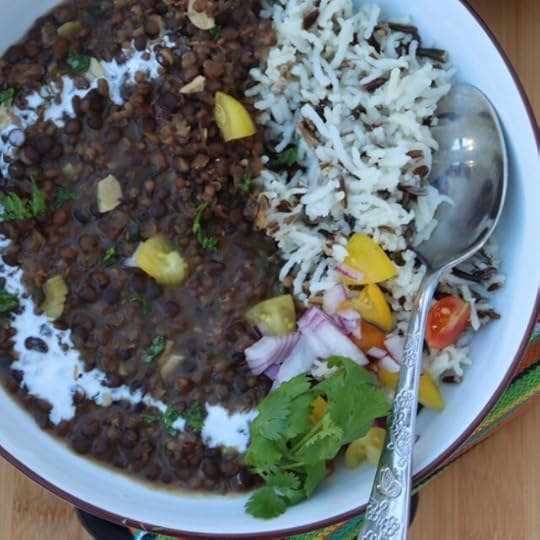 This week has been all about fall weather. And just like that in craving comfort food, I remembered comforting brown lentils. These lentils are the wholesome version of red lentils. Known as Masur dal on the Indian table. Sabut means whole and pairing these with rice results in a good comforting meal. The signature North Indian Dal Chawal.
Truth be told, what unites all of India is the love of lentils, and they can be savored with a choice of flatbread or rice. Since, flatbreads tend to be the preferred carbohydrate of choice in North India, hot steaming Basmati Rice is that indulgence reserved for cozy and comforting meals. And it is those meals that we crave when we long for that extra dose of comfort.
This particular lentil or even lentil variation is not something I have grown up with. In a Bengali household, the lentils of choice usually are red lentils or yellow moong dal.
However, for some reason when I was expecting my son, this was something I enjoyed. In fact, with severe nausea there was not a lot that I could keep down. Simple, wholesome and comforting bowls of these brown lentils seemed to by pass the nausea.
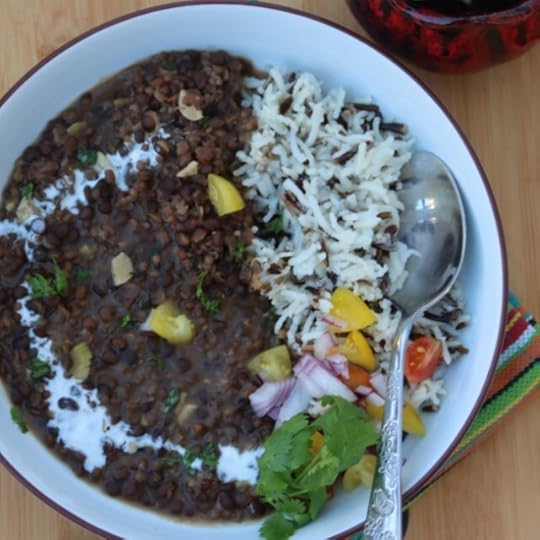
My recipe today is a little more complex. With garlic and dried fenugreek leaves adding a good dose of flavor. If you do not have fenugreek leaves on hand, work with something like dried mint or anything else that suits your fancy. Enjoy this with perfectly steamed Basmati Rice, and a little yogurt. To get more fancy and boost the flavor, you can try this with cumin scented rice.
Bottom line, if you have brown lentils on hand, this recipe should be a part of your fall repertoire right away. If you don’t have any on hand, you might want to get some, maybe not tonight but just add this to your weekend shopping or whenever shopping list.
PrintSabut Masur Dal – Wholesome Brown Lentils (Instant Pot)
Ingredients
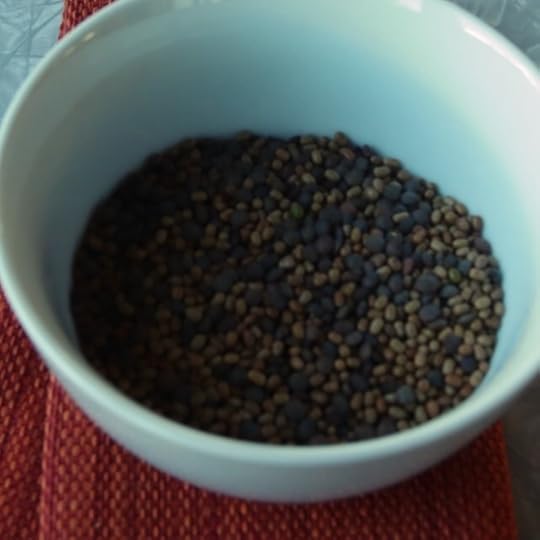
1/4 cup black lentils1/4 cup brown lentils (note you can use just one kind of lentils if you wish)
1 clove of garlic, minced
1 teaspoon minced ginger
1 and ½ teaspoons freshly ground coriander
1 teaspoon red pepper flakes
½ teaspoon salt or to taste
1 tablespoon coconut oil
1 teaspoon whole cumin seeds
1 tablespoon dried fenugreek leaves
1 or 2 tablespoons fresh lime juice
Instructions
Rinse and wash the lentils. Place the lentils in the instant pot. Add in the garlic, ginger, freshly ground coriander, red pepper flakes and salt. Add in 1 and ½ cups of water. Set the instant pot on high pressure for 10 minutes and allow a natural release.Remove the lid and check the lentils for consistency. The lentils should be thick and creamy. You should be able to mash the lentils with the back of a wooden spoon.
Heat the coconut oil in a small pan. When the oil is very hot, add in the whole cumin seeds and allow the seeds to sizzle. Pour this over the lentils.
Stir in the dried fenugreek leaves and the fresh lime juice and enjoy!
3.1https://spicechronicles.com/sabut-masur-dal-wholesome-brown-lentils-instant-pot/
The post Sabut Masur Dal – Wholesome Brown Lentils (Instant Pot) appeared first on Spice Chronicles.


October 7, 2023
Blondies with Oats and Chickpea Flour
 I first tasted a blondie when working at my first job. And for this less than chocaholic, it was love at first taste. Back then for a long time this used to be an afternoon treat. Since then thanks to the children, I tend to make brownies and everyone is happy. I have both classic and gluten free variations on this site. Today however I am making and talking blondies. I have made them with low gluten and no gluten. You can follow along to see how I did them.
In case, you do not know, a blondie is a moist and rich bar cookie with chocolate chips and a generous dose of vanilla. Usually made with brown sugar offering an almost butterscotch like flavor. Depending on your preference, there can be other add-ins like walnuts and even toasted coconut.

Gluten Free Variation
The Story of My BlondiesThese blondies are inspired by my desire for taking a treat with substance for my son. It has been nice to focus on something that I like doing. The past week and the one before having still been uneven and will probably be that way for a while. But down to the blondies. Now I make these in an 8 by 8-inch cake pan. They work out a little bit thicker than your typical blondie. So, if you want, you can use a quarter sheet pan to get something with a more conventional thickness.

I am generally cooking down stuff I have out and about. I started with loosely following this recipe. I tested out two variations. In the first variation, I added 1/2 cup each of whole wheat flour, chickpea flour and rolled oats. In the second variation, I used all chickpea flour, thus making it gluten free. They both tasted just fine. The gluten free variation actually was moister than the other one. It works out a little bit darker and tends to be somewhat crumbly. I think however, it definitely is a version that I can stand behind.

I am waiting for my son’s verdict on this. Until then, I can happily offer you the recipe as my verdict on this is definitely something I think should grace your table before fall runs itself out.
A few dos and don’tsThese blondies take about 22 minutes to cook through. The center still remains just a little soft, you do not want to dry out the blondies. The gluten free variation turns out a little darker and needs about 24 minutes to cook through. You need them to cool thoroughly before you can cut them.
PrintBlondies with Oats and Chickpea Flour
Prep Time: 15 minutes
Cook Time: 22 minutes
Total Time: 40 minutes
Yield: 16 pieces
Serving Size: 1 piece

A whole take on a classic blondie with a gluten free variation.
Ingredients
1/2 cup whole wheat or all-purpose flour (see notes for gluten free variation)1/2 cup chickpea flour
1/2 cup rolled oats.
1 and 1/2 teaspoon baking powder
1 and 1/2 sticks salted butter softened, (12 tablespoons)
1 and 1/4 cup brown sugar.
1 whole egg plus 1 egg yolk
1 and 1/2 teaspoons vanilla extract
1 cup dark chocolate chips
1/4 cup whole milk
Instructions
Pre-heat the oven to 350 degrees. Grease an eight-by-eight-inch square pan.Mix the whole wheat flour, chickpea flour and the rolled oats with the baking powder and set aside.
In a mixing bowl add the butter and the brown sugar and beat until very well mixed and the mixture is smooth, and toffee colored.
Add in the eggs and the vanilla extract and mix very well.
Stir in the flour mixture until well mixed.
Stir in the chocolate chops. You will get a smooth mixture. Add in the whole milk.
Pour this into the cake pan and bake for 22 minutes until set and the center is just a little soft. Turn off the heat and remove the pan after 5 minutes. Allow the blondie to cool and cut into small squares before serving.
Notes
For the gluten free variation use 1 cup chickpea flour and eliminate the wheat flour.
Cook for 2 more minutes before serving.
The post Blondies with Oats and Chickpea Flour appeared first on Spice Chronicles.
September 20, 2023
Congee Comfort
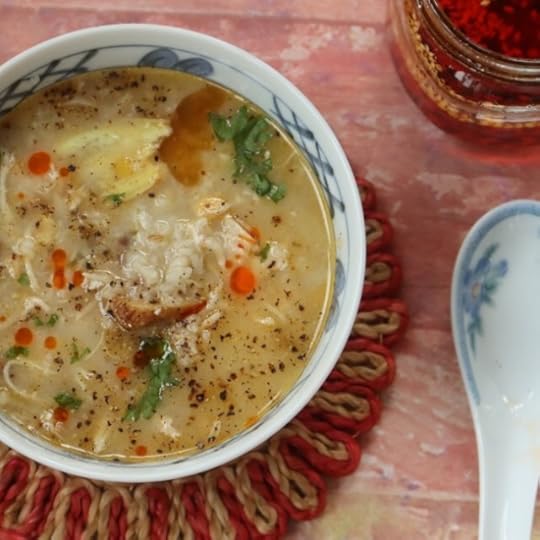
 It is difficult to believe that this is now a household of one. I will be sharing more about that journey on this substack, I hope that you will follow me there. Today I found solace in making a simmering pot of congee. A classic rice porridge with so many variations. This one is mine. It is not completely made with rice, rather a mixture of rice and oatmeal. In addition to boosting the nutritional value it offers a nice dose of toothiness. So let us talk through my congee journey.
In its simplest form congee is a rice soup or porridge. Rice is cooked for a long time with ginger and chicken stock. The soft soothing white mass is pure comfort at its best. A cross between porridge and soup in my opinion. Topped with a variety of savory condiments such as chili oil, sausage and the like it is flavorful and mild all at once. Congee is a classic Chinese dish.
The heart is trying to find its new beat. It is hurt and will need some time to feel itself again. It is funny how when we crave comfort, we reach out to age old time tested comfort foods. Congee might not be a part of my childhood memories, however it soothes and offers coziness nonetheless. There is something universal about a dish like this. It finds all the nooks and crannies that need some healing and gets right there.
In this recipe, I cook rice and oatmeal along with some bone-in chicken, I really used one chicken drumstick and some rice, oatmeal and just a tiny bit of fresh turmeric. I do serve this with the chili oil and actually a generous squeeze of lime juice. Before serving I removed the chicken from the bone and shredded it into the congee. All in all maybe a little more flavorful that the original but still pretty good.
Simple comforting ideas can include, yogurt rice or red lentil soup chickpea soup.
PrintCongee Comfort

Ingredients
3 cups water1/4 cup jasmine rice
1/4 cup steel cut oatmeal
2-inch knob of ginger, thinly sliced
1 small piece of fresh turmeric, thinly sliced (optional)
1 chicken drumstick
Salt or soy sauce to taste
Chili oil, lime juice, black pepper and cilantro to serve
Instructions
Place the water, jasmine rice, oatmeal, ginger, turmeric and chicken drumstick and salt or soy sauce in the instant pot.Set to porridge mode for 20 minutes and let it cool naturally.
Remove the lid and remove the chicken drumstick. Stir the congee well and check for seasonings.
Remove the obvious pieces of ginger and turmeric.
Shred the chicken and return to the congee.
Serve with chili oil, lime juice, black pepper and cilantro to serve.3.1https://spicechronicles.com/congee-comfort/
The post Congee Comfort appeared first on Spice Chronicles.
August 28, 2023
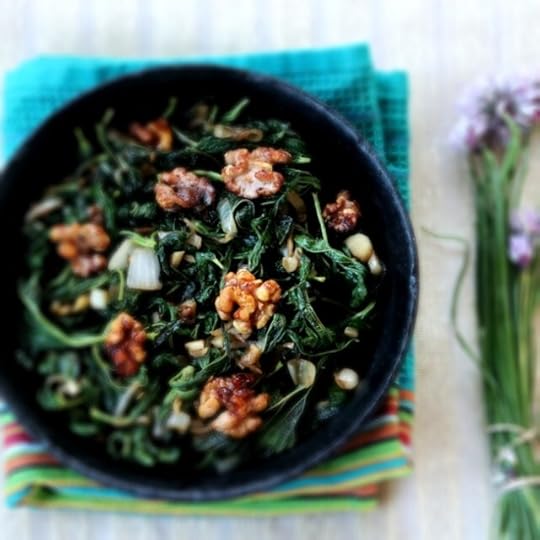
Chinese Garlic Green/ Yellow Beans
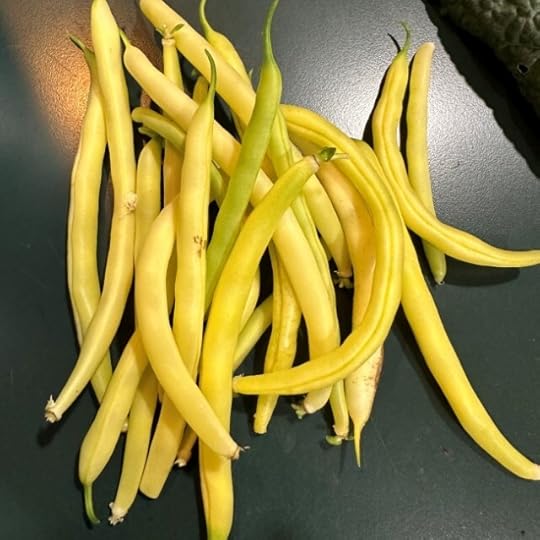
Yellow Beans from the garden
The past few weeks have been somewhat momentous. All of August, that dreaded moment of my youngest leaving haunted me, and finally it happened. This weekend is my first weekend without either of them. In an empty house to boot. The garden has been bringing in all kinds of offerings to boot. The most prolific of these have been the bush beans, low maintenance and predictable. They are yellow rather than green, however the brightness is a fun thing. I have been getting close to a pound of these every week. So I decided to try cooking them the Chinese Way.
I looked at a variety of recipes, like this one and then this one with added pork. Looking through all of this, I generally got the technique of “Dry Frying”. It is different, not too taxing giving me enough to distract myself from life. I keep telling myself, you will find a new normal.

I came up with a vegetarian substitute for the meat. I use a combination of minced mushrooms and walnuts for this. It adds texture and a deep Umami. It also gives you a good protein balance with the added fat. In short, guilt free flavor.
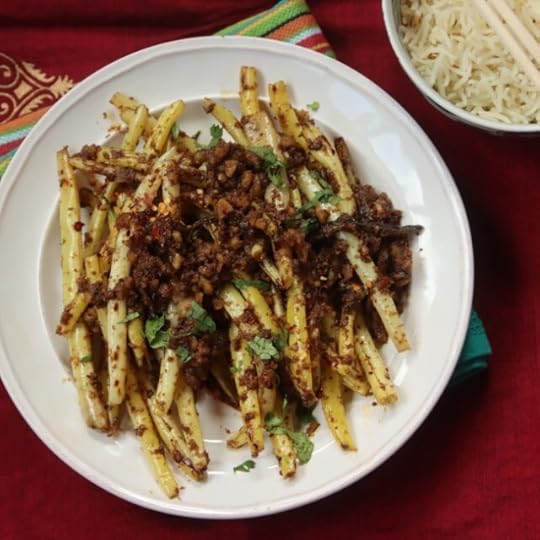
I use a very hot skillet sprayed with cooking spray, and cook the beans for a good 10 minutes, stirring occasionally to allow uniform blistering. The rest of the recipe is all about the garlic and a handful of flavoring ingredients like garlic (yes, lots of garlic), soy sauce, sesame oil, vinegar and some sugar.
It makes for a perfect balanced dish.
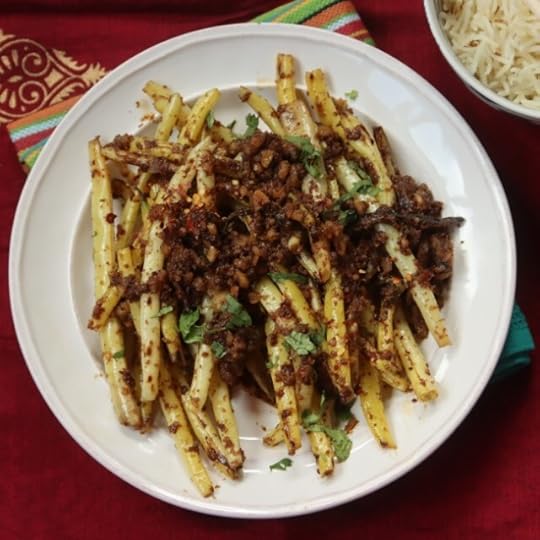
Frankly, you can enjoy them just as is. Serve them with a side of steamed rice or other grain. Go all fancy and enjoy them with your favorite fried rice, make it more elaborate by pairing it with this Chinese Style Chicken with Black Beans. As they say, it is all good.
Just as a note, I have tried this with broccoli and it works out pretty well too!
PrintChinese Garlic Green/ Yellow Beans
Prep Time: 10 minutes
Cook Time: 20 minutes
Total Time: 30 minutes
Yield: Serves 4

A flavorful take on restaurant style Chinese Green beans.
Ingredients
The Mushroom Walnut Mixture (aka vegetarian Meat)1/2 cup quartered mushrooms
1/4 cup walnuts (about 6 pieces
For the Beans
Cooking spray
1 pound of Beans trimmed
For the seasoning
2 tablespoons soy sauce or coconut aminos
1 tablespoon rice vinegar or balsamic
1 tablespoon sesame oil
1/2 tablespoon sugar
2 tablespoons peanut oil
1 and 1/2 tablespoons minced garlic (about 8 cloves)
1/2 teaspoon red pepper flakes
Instructions
Place the mushrooms and the walnuts in a food processor and process until pureed, remove and set aside.Heat a large skillet or wok until very hot, spray with cooking spray. Add the beans and let them wilt and start blistering, stir occasionally to allow uniform blistering.
In the meantime, mix the soy sauce or coconut aminos, rice vinegar, sesame oil and sugar until uniformly mixed. Set this aside.
Remove the beans from the wok or skillet.
Add in the garlic and cook for about 3 to 4 minutes, until the garlic is fragrant and toffee colored.
Add in the mushroom mixture and cook for about 5 to 6 minutes, to allow the mixture to release the water and cook through, it will shrink to about half the volume.
Add in the beans and mix well, stirring for 2 to 3 minutes.
Add in the seasoning mixture, stirring well. Allow the mixture to come to a simmer and cook for 2 minutes. Sprinkle with red pepper flakes and serve immediately.3.1https://spicechronicles.com/chinese-garlic-green-beans/
The post Chinese Garlic Green/ Yellow Beans appeared first on Spice Chronicles.
August 7, 2023
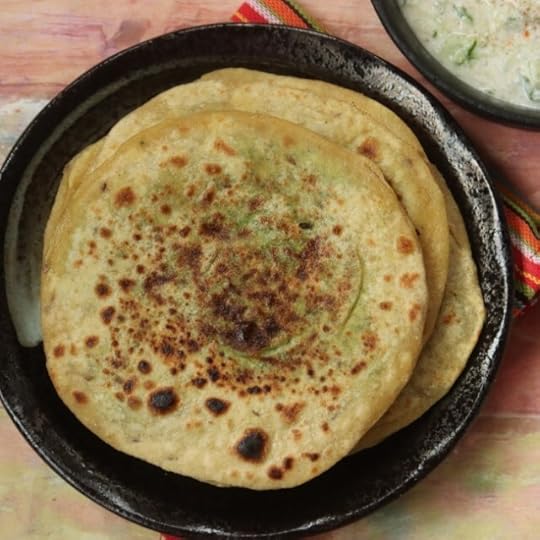
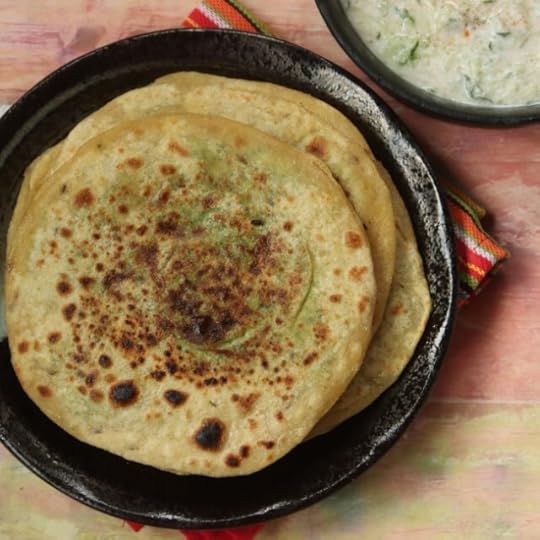
Kale and Paneer Parathas
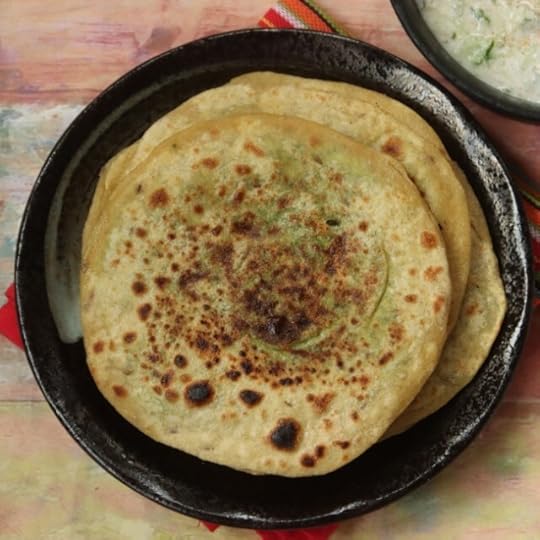 On a calming rainy Monday, these Kale and Paneer Parathas are what I pulled together. This serving to break my silence and hiatus from this blog for a hot minute. Kale has been growing happily in the yard. Kale unlike purslane is cultivated. In general hardier than spinach it is the green of choice. I love working with flatbreads, they are calming and generally good for you. Well, it is another thing that most people in the house seem to have gone low carb. I am firmly sticking on.
Whole grains actually do provide a good amount of fiber and in my opinion the good carb way to go. Well, long story short, I do not think I will be going sans carbs anytime soon. Parathas are a plenty on this site, there are recipes for
Adding some added superfood power to the paneer parathas, I bring you today’s kale and paneer parathas. Truth be told, the paneer parathas have been on my radar as I have been working on a USDA project with these parathas. And I had some paneer on hand, so combining the two these parathas come by.
I do like the richness and soft composition of paneer. Especially since I make the paneer at home, you can see how I do this here. This said, you can use tofu. To use tofu, please make sure that you are using firm tofu and that the tofu is pressed to remove excess water. This is very important or you will end up with soggy parathas.
Boosting the Fiber in the DoughYou can replace the some of the flour with chickpea flour or besan. This makes for a slightly softer but more nutritious dough. I think this essentially gets you to a lot of options. And for me, it is absolutely essential to serve the parathas with raita. Today I served them with this cucumber and mint raita. Yes, putting the cucumbers in the yard to good use.
PrintKale and Paneer ParathasIngredients
IngredientsFor the dough
2 cups of whole wheat flour (plus more for rolling)
2 tablespoons oil plus more for pan frying
salt to taste for the dough and the filling
For the filling
3/4 cup paneer
1/2 pound of fresh coarsely chopped kale
1/2 cup chopped cilantro
2 tablespoon dried fenugreek
1 small Serrano Pepper
1 teaspoon garam masala powder
1 teaspoon salt or to taste
1 teaspoon powdered ginger
Place the flour in a mixing bowl and add in the two tablespoons of oil, work this in with the salt. Gradually add in the water to form a smooth supple dough. Gather into a ball and cover and let it rest for 30 minutes to an hour.
In the meantime crumble the paneer into a bowl, stir in the thyme and cilantro. Mix in the bell pepper, salt, garam masala powder, and the red cayenne pepper.
Shape the dough into small even numbered balls. I made 6 parathas so twelve balls from this mixture.
Take a ball roll out to about 6 inch in diameter, set aside. Do the same with the second piece of the dough. Spread the filling evenly out into the dough. Cover with the first piece. Seal the edges and pat to seal gently.
Roll out to smoothen the paratha and seal shut.
Roll out all the parathas in this manner.
Heat a skillet and place a paratha on the skillet. Roast one side for about 2 to 3 minutes, turn and roast the second side.
Flip, gently add a little oil on the edges and smear the top. Fry until it is filled with golden spots. Turn and allow the second side to cook.
Continue all the parathas in this manner.
Instructions
Place the flour in a mixing bowl and add in the two tablespoons of oil, work this in with the salt. Gradually add in the water to form a smooth supple dough. Gather into a ball and cover and let it rest for 30 minutes to an hour.In the meantime crumble the paneer into a food processor. Add in the kale, cilantro, dried fenugreek, small Serrano pepper, garam masala powder, salt and the powdered ginger and process until everything is blended. The mixture should be smooth and green.
Shape the dough into small even numbered balls. I made 6 parathas so twelve balls from this mixture.
Take a ball roll out to about 6 inch in diameter, set aside. Do the same with the second piece of the dough. Spread the filling evenly out into the dough. You can pack in a good amount of filling as the paneer is soft and is easy to roll without popping out.
Cover with the first piece. Seal the edges and pat to seal gently.
Roll out to smoothen the paratha and seal shut.
Roll out all the parathas in this manner.
Heat a skillet and place a paratha on the skillet. Roast one side for about 2 to 3 minutes, turn and roast the second side.
Flip, gently add a little oil on the edges and smear the top. Fry until it is filled with golden spots. Turn and allow the second side to cook.
Continue all the parathas in this manner.3.1https://spicechronicles.com/kale-and-paneer-parathas/
The post Kale and Paneer Parathas appeared first on Spice Chronicles.
July 3, 2023
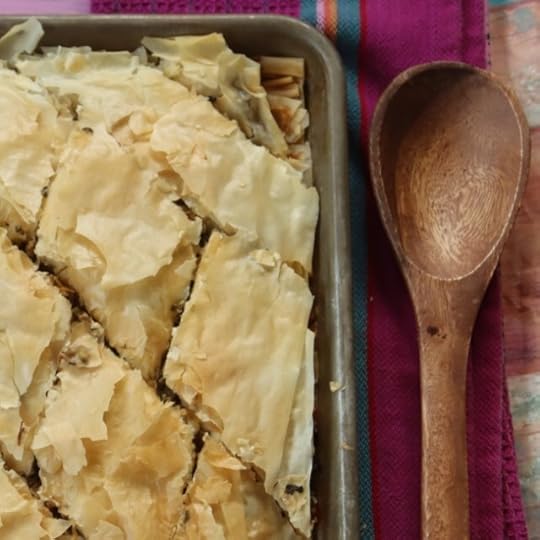
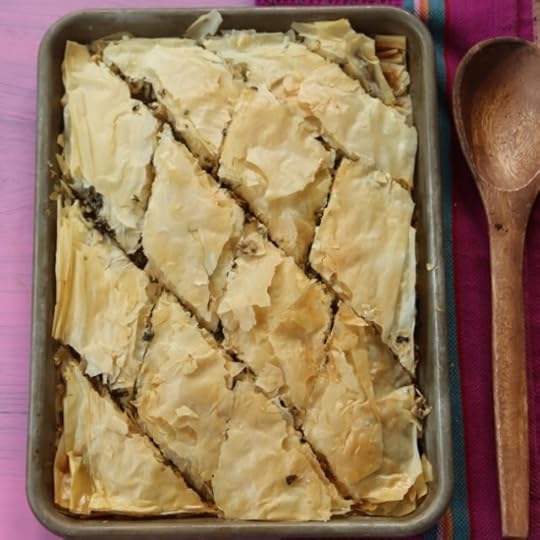
Purslane Spanakopita
 It is hot, somewhat wet and humid. This also means that it is purslane season in the curry garden. If you follow this site, you probably know that purslane loves our garden. And this morning I picked bunches of it of make this easy and forgiving sheet pan spanakopita. Except, I used purslane. A perfect use of bunches of purslane. As of now there is a lot of promise in the garden. Lots of tomatoes emerging as we speak. The cucumbers seem to be flowering so I might see cucumbers soon, The squash has giant leaves and tiny buds that are threatening to bloom one of these days.
This spanakopita or purslane pie is made simply. Usually when making this with spinach dill is used. Purslane has a lovely tangy taste. This offers enough flavor as is. Of course, if you have lots of mint, dill or other herb on hand you
 can certainly toss it in.
  So onion, garlic, purslane, egg, feta cheese and a little red pepper and we are in business. With a few sheets of phyllo pastry we are in business.
Initially working with phyllo can seem a little intimidating. Over time I have learnt that phyllo can be forgiving. A tear here and there can be easily covered up with the next sheet. And in this recipe I use olive oil for brushing rather than butter, It crisps up nice and easy and makes for a comforting and satisfying meal without a lot of fuss and
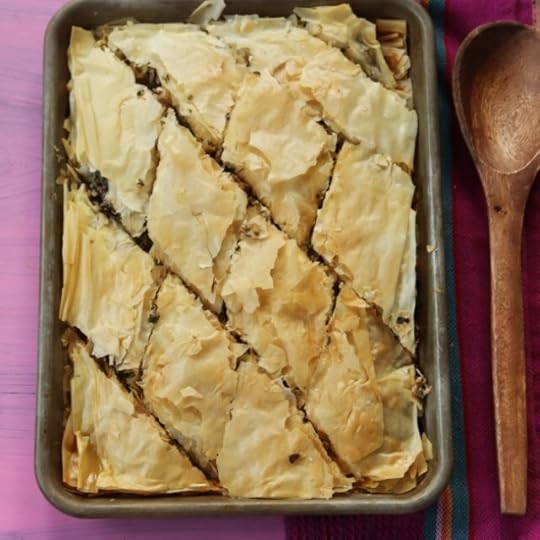
fanfare. In a couple of weeks we will be taking a much needed break. Upon returning, I want to start some fall crops in the garden, or indoors at least.
I use a quarter sheet pan for this recipe and have found that this makes plenty for 4 people for a meal. Perfect brunch or lunch.
Other ways to use purslane include this purslane and potato salad and purslane tzatziki.
PrintPurslane Spanakopita
Ingredients
For the filling3 tablespoons olive oil
1 teaspoon whole cumin seeds
1 medium sized red onion,
2 tablespoons minced garlic (5 cloves)
4 cups of finely chopped purslane
1 teaspoon crushed red pepper flakes
2 eggs
1 cup crumbled feta cheese
For the Phyllo Sheets
8 oz phyllo sheets (about 1 standard package)
1/3 cup olive oil
Pastry brush for brushing
Instructions
Heat a large skillet and add in the olive oil and heat until smoking. Add in the whole cumin seeds and wait until the seeds crackle.Add in the red onion and garlic and sauté for 5 minutes until wilted and fragrant.
Add in the purslane and sauté for 15 to 20 minutes until wilted and cooked and all the water is mostly absorbed.
Stir in the eggs and cook until all the water is absorbed.
Add in the feta cheese. Allow the filling to cool.
Pre-heat the oven to 375 degrees.
Brush the sheet pan.
Line with about 8 to 9 sheets of the phyllo dough, brushing with olive oil in between the sheets.
Place all the filling over the sheets.
Cover with another 7 to 8 sheets in the same matter.
Place in the oven and bake for 15 to 20 minutes, turning around occasionally to allow a uniform golden brown color.
Turn off the heat, let it rest for about 10 minutes and then cut into wedges and serve.
3.1https://spicechronicles.com/purslane-spanakopita/
The post Purslane Spanakopita appeared first on Spice Chronicles.
June 28, 2023
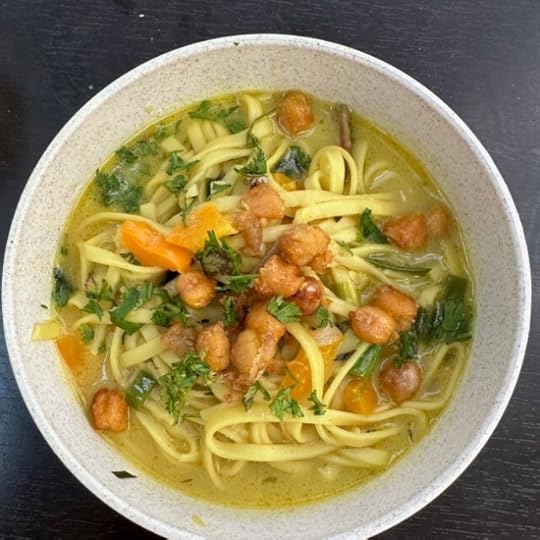
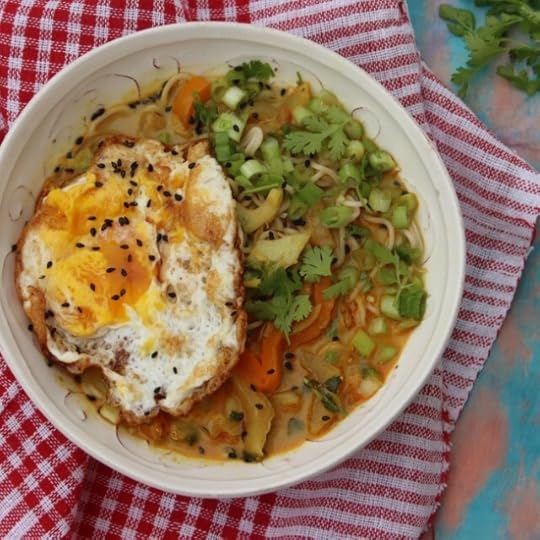
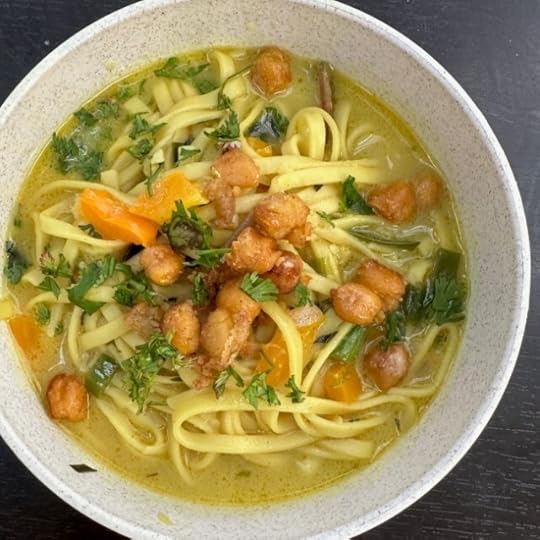
Vegetarian Khao Soi-Thai Coconut Curry Soup
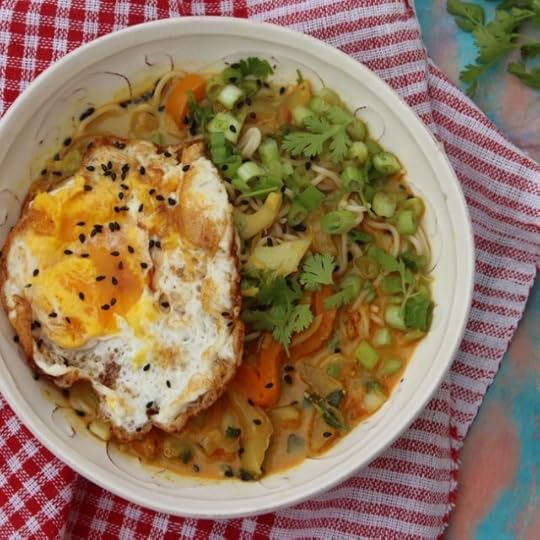 This vegetarian Khao Soi, is my take on the classic recipe from Northern Thailand. It is vegetarian, instead of being based with chicken. I also use gluten-free noodles although regular noodles are fine. Lately I have been upping my noodle soup game. Lastly, instead of topping them with crispy noodles, I use a crisp fried egg or crisp chickpeas. So bottom line, it might not be super authentic. But it yields the same cozy comfort with some upcycled ingredients.
I am enjoying cooking through a seasonal CSA box, as well as the offerings of the learning garden this summer. Right up my alley. This Khao Soi is what I made today! A full class, a large potful and all kinds of slurp able magic. This might not be the most authentic version of the recipe, but it sure is delish.
 What exactly is Khao Soi
It is a traditional coconut and curry-based soup from Northern Thailand. It is flexible and usually topped with pickled mustard stems. In my plant forward version, I use pickled chard stems. Some curry magic would work too. But this version uses practical spices that you will have on hand.
Pre-heat the oven to 400 degrees. Grease a large baking sheet. Spread the chickpeas and rub with turmeric, paprika, salt and cayenne. Coat with 2 tablespoons of cornstarch. Pop into the oven and cook for about 20 minutes. There it is ready for your edible consumption.
The plant-based broth simmers while you complete the rest of the prep. Now the vegetables are flexible, I have used peppers, chard, ginger, garlic and onions.
Everything in this recipe can be made ahead, and the noodles can be simmered and assembled at the end. Bottom line do not get intimidated by the long list of ingredients. It does take a little time, but if you follow the sequence you will have a gorgeous meal for a crowd.
Another noodle soup that offers coconut goodness in generous doses includes this Khao Suey and for protein packed vegetarian goodness consider this red lentil soup.
PrintVegetarian Khao Soi-Thai Coconut Curry Soup
Prep Time: 25 minutes
Cook Time: 40 minutes
Total Time: 1 hour, 5 minutes
Yield: Serves 6 to 8
A gorgeous one pot bowl of comfort that brings loads of vegetables in a slurp worthy bowl to your table.
Ingredients
For the Broth and Noodles4 cups of water
2 tablespoons grated ginger
2 tablespoons grated garlic
¼ cup nutritional yeast
1 teaspoon turmeric
1 teaspoon freshly ground cumin
1 teaspoon paprika
1 teaspoon red cayenne pepper or to taste
¼ cup soy sauce
6 to 8 ounces dried noodles of your choice
2 tablespoons honey
1 and ¼ cup coconut milk
For the vegetables
4 tablespoons oil
1 red onion, thinly sliced
2 tablespoons scallion whites, finely chopped (greens are used for topping)
1 tablespoon (about 5 cloves of garlic) minced garlic
1 tablespoon minced ginger
2 bell peppers, thinly sliced
6 to 8 ounces fresh chard (or other greens)
1 tablespoon curry powder
1 tablespoon soy sauce
1 teaspoon sesame oil
Toppings to finish
¼ cup fresh lime juice
Fried eggs or crisp chickpeas (see details in the post)
Chopped basil
Chopped cilantro
Chopped scallions
Sesame seeds
Instructions
In a large soup or stock pot add in the water, ginger, garlic, nutritional yeast, turmeric, cumin, paprika and cayenne pepper and bring to a boil and simmer for 15 to 20 minutes.It should reduce by about a quarter of the volume. If you wish you can strain the broth at this point. It is not needed, but offers a somewhat smoother texture.
While this is simmering, finish prepping and chopping your vegetables.
In a skillet, heat the 4 tablespoons of oil and add in the red onion, scallion whites, minced garlic and minced ginger and the bell pepper. Cook for about 6 to 8 minutes until the vegetables soften and release their juices.
Add in the fresh chard and allow it to wilt, stir in the curry powder, soy sauce and the sesame oil.
Turning your attention back to the broth, allow it to simmer and add in the noodles and allow them to cook for 4 to 5 minutes (they should be still firm). Add in the coconut milk, honey and bring to a simmer.
Stir in the vegetables and turn off the heat and stir in the lime juice,
Place in bowls and sprinkle with the herbs, top with chickpeas or a fried egg. Sprinkle with the scallions and sesame seeds (if desired) and enjoy!
3.1https://spicechronicles.com/vegetarian-khao-soi-thai-coconut-curry-soup/
The post Vegetarian Khao Soi-Thai Coconut Curry Soup appeared first on Spice Chronicles.
May 14, 2023
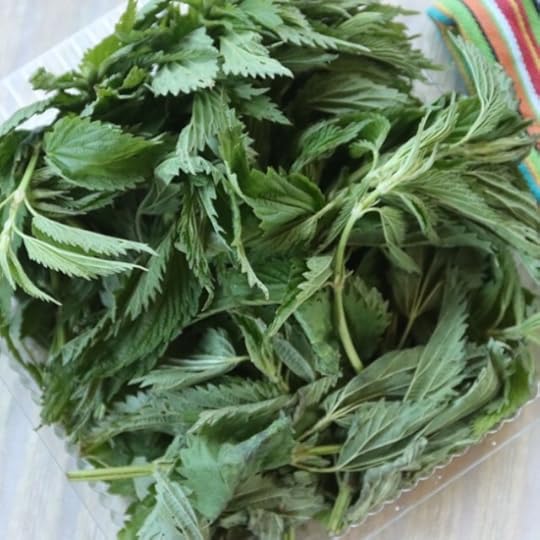
Sauteed Nettles with Smokey Sweet Walnuts
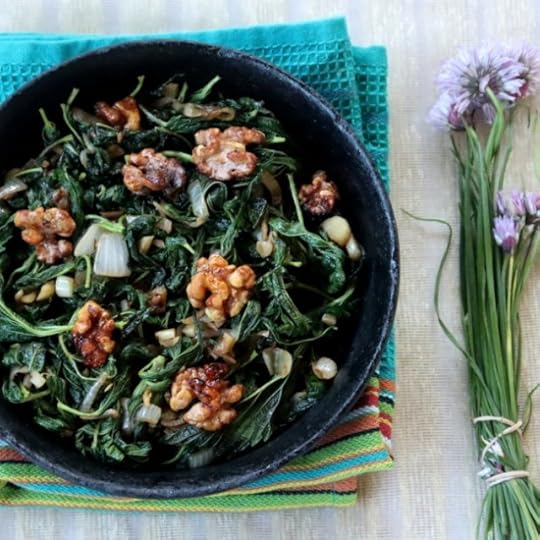 To offer myself some inspiration and to support local, I am doing a CSA this year. One of my goodies from week one is nettles. This one is new to me. But of course, I love my greens. So, after some back and forth this is my recipe. Sauteed Nettles with Smokey Sweet Walnuts. This particular recipe is good with any seasonal green and or alliums.
Now, chances are that I would have never picked up nettles on my own, so that alone is a score.
A Little Bit About Cooking with NettlesFor starters, there is a reason they are called stinging nettles. Either use gloves, or place in a colander and then pour some boiling water over them. That is all that is needed to be dealing with the stinging part of things. After that, this can be used like any other seasonal green. So Saag Alu, Saag tofu are all possibilities. And then something like this.
So, in short, nettles are just another sustainable and nutritious green for your green cooking arsenal. It is finding new things for your culinary repertoire that makes the process of joining a CSA or visiting a farmers’ market worthwhile.
What really makes my recipe interesting is the walnuts add on. I spend about 5 minutes, baking maple syrup and paprika coated walnuts. The result is something quite magical. You can make a large batch of these and sprinkle some red pepper flakes for a snack. I mean why should cashews have all the party fun. But, the rest is just sautéing the greens.

I think that you could stir this into noodles. Top this with a crispy egg, like I have done here, and you will have a dish fit for kings.
PrintSauteed Nettles with Smokey Sweet Walnuts
Prep Time: 10 minutes
Cook Time: 10 minutes
Total Time: 20 minutes
Yield: Serves 2
An easy and interesting take on stinging nettles, this is a flavorful and vibrant recipe that can be adapted to work with all greens.
Ingredients
IngredientsFor the Walnuts
½ cup of walnuts
1 tablespoon maple syrup
½ teaspoon smoky paprika
½ teaspoon red cayenne pepper (adjust to taste)
For the nettles
1 tablespoon extra-virgin olive oil
1 teaspoon whole cumin seeds
2 small white onions, thinly sliced (can be substituted with ramps, leeks, shallots or scallions)
2 cloves of garlic minced
3 cups of cleaned stinging nettle leaves (can be substituted with any green of your choice)
¼ cup of cooking wine, such as Shaoxing wine
Salt if needed
Instructions
Method of preparationPre-heat the oven to 375 degrees.
In a small mixing bowl, toss the walnuts with the maple syrup and the smoked paprika and cayenne pepper.
Place on a sheet pan and bake for 3 to 4 minutes. The walnuts will turn golden and fragrant. Be careful as they burn easily.
Remove from the oven and set aside.
In a pan or skillet heat the olive oil until smoking. Add in the cumin seeds and wait until the seeds crackle. Stir in the onions and garlic and cook for 3 to 4 minutes on low heat.
Mix in the nettles and stir well to mix for about a minute.
Add in the cooking wine and salt if needed and cook until all the cooking liquid is absorbed.
Stir in the walnuts and enjoy.
Notes
This recipe can be adapted for any greens of your choice/
3.1https://spicechronicles.com/sauteed-nettles-with-smokey-sweet-walnuts/The post Sauteed Nettles with Smokey Sweet Walnuts appeared first on Spice Chronicles.
May 12, 2023
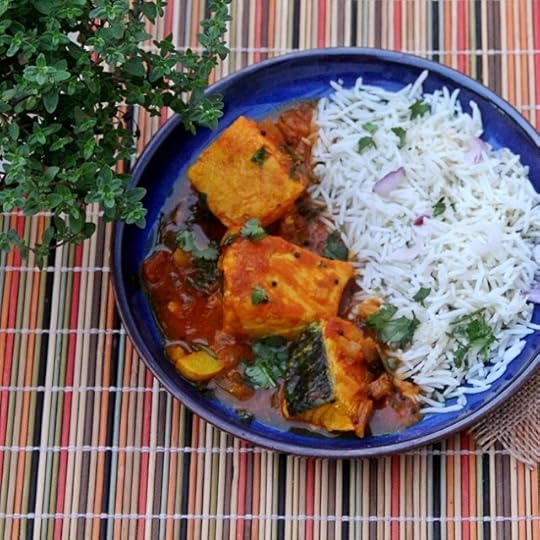
Easy and Flavorful Weeknight Fish Curry
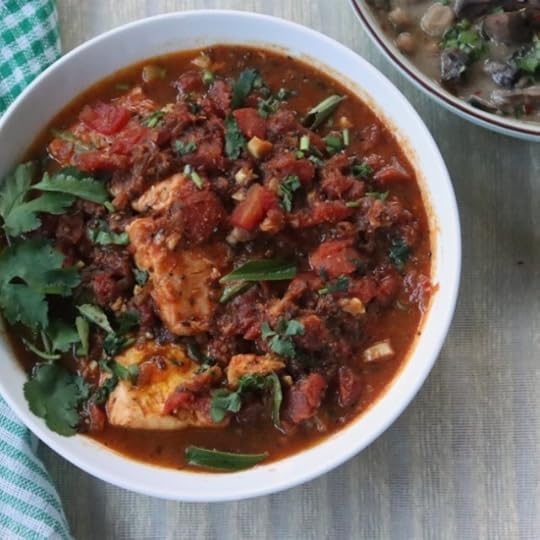 This week has been about lots of essential cooking. Like this easy and flavorful weeknight fish curry. This is an old and staple family recipe. Mostly with a few staple ingredients. As they say, pantry staples. Every household has their share of these everyday recipes. The kinds that you make without thinking.
The beauty of these dishes is that they are guaranteed to delight everyone in your household. My weeknight fish curry is something I enjoy year-round. Yes, even in winter I make this with my stash of stored tomatoes. With mom visiting, fish is in. Lots of fish. This weeknight fish curry works well with almost any fish on hand. Most popularly done with salmon in my household.

A note on salmon, I tend to use it a fair amount in my cooking as it is one of the few fishes my son is not allergic to. I have had friends who question how and whether this fish fits into the Indian table. Well folks, take it from a fish eating Bengali this fish with its rich oily texture works very well with a lot of Indian cooking. in fact, its rich flesh is well suited to robust seasoning or mustard based sauces.
Simple and Essential SeasoningsThe seasonings are very simple but pack a rich depth of flavor. Toasted mustard seeds, cumin seeds, onion, ginger, garlic, cumin and coriander seeds. The wild card for some is the use of curry leaves. Otherwise, this is seriously good stuff. 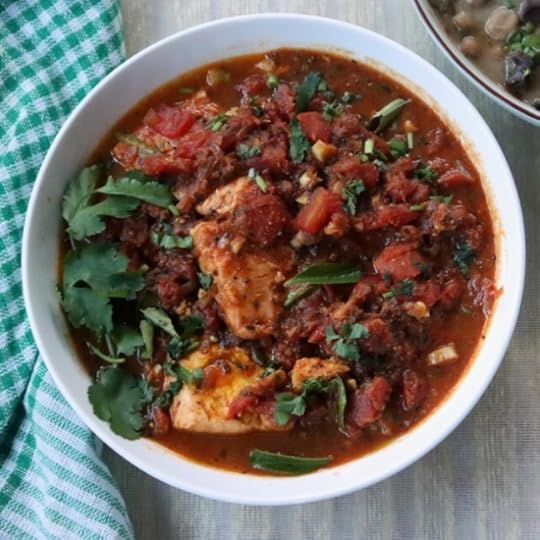 Some other simple fish recipes, include this pan cooked salmon with fenugreek, and a simple Thai Style Fish with Red Curry. These recipes tide use through the crazy days, calm days and everything in between. This Mother’s Day, I am grateful to have my mother with me. As I grow older, I learn to cherish the simplicity of just having loved ones around.
A
PrintWeeknight Fish Curry with Mustard and Curry LeavesPrep Time: 15 minutes
Cook Time: 20 minutes
Total Time: 35 minutes
Yield: Serves 4 to 6
An exceedingly simple weeknight fish curry that is healthy, pretty and flavorful.
Ingredients
11/2 pounds of salmon, cubed3/4 teaspoon turmeric
1/2 teaspoon red cayenne pepper (more or less to taste)
1 teaspoon salt plus 1/2 teaspoon extra
2 to 3 tablespoons fresh lime juice
2 tablespoons oil
1 teaspoon black mustard seeds
10 to 20 curry leaves
1 small onion, finely diced
1 tablespoon freshly grated ginger
2 cloves garlic, minced.
4 ripe tomatoes, very finely chopped (think food processor) or 3/4 cup jarred tomatoes
2 tablespoons freshly chopped cilantro
Instructions
Place the salmon in a mixing bowl and sprinkle with the turmeric, cayenne pepper, teaspoon of salt and lime juice and set aside for 10 to 15 minutes. I usually do this and do the rest of the prepping and sorting.Heat the oil and add in the black mustard seeds and wait until the mustard seeds begin to crackle. Add in the curry leaves and in a few minutes add in the onion, ginger and the garlic and sauté well.
Stir in the tomatoes and cook until soft and saucy, add in about a half cup of water and bring to a simmer.
Add in the salmon and let it simmer for 8 to 10 minutes until cooked through. Serve with rice or your choice of accompaniment.
3.1https://spicechronicles.com/easy-and-flavorful-weeknight-fish-curry/
The post Easy and Flavorful Weeknight Fish Curry appeared first on Spice Chronicles.
May 7, 2023
Spicy Avocado Toast with Fried Eggs
 This recipe is one of our favorite weekend brunches. Usually whenever the household is full, Spicy Avocado Toast with Fried Eggs shows up. Today, I made this just for us (as in me and the husband). Much as I like to avoid the inevitable, there are more and more such meals looming in our future, as the next gets empty in fall.
Well, at the moment the house is very full. My mother is here for her summer visit. This though is not her kind of food. I did make an interesting salmon curry, that I will share as soon as time permits. So yes, there is lots of hectic looming on the horizon. Interestingly for me good meal inspiration happens when life is at its busiest.
So I remembered about this after a stay in the city catching up with my brother. The hotel breakfast included avocado toast. It was acceptable, but for $20 a piece, I want more than acceptable. It does not take a lot to pull together a simple dish like this and make it delicious.

A little bit of Indian
Now, this version that I make, uses chaat masala mixed into the avocado. And the eggs have their share of flavor. The fried eggs have a little bit of parmesan and are fried until the edges are crisp. I think, the flavoring in the avocado mixture can be adjusted to your liking and taste.

Today I found absolutely perfect avocadoes, and really good fresh eggs. Served on perfect sourdough bread, this results in a simple and perfect meal. Right along with the perfect weather outside, it offered me calming comfort in a the form of a reasonable wholesome and balanced meal. Protein, carbs and vegetables. Yes, the proportions could be different, but for today I will take what I can get.
Each avocado works for 2 servings, with the rest of the fixings. And of course allow one egg per person.
PrintSpicy Avocado Toast with Fried Eggs
Prep Time: 15 minutes
Cook Time: 15 minutes
Yield: Serves 2

A well seasoned take on avocado toast with crisp fried eggs, this offers a possibility for any meal of the day.
Ingredients
1 ripe avocado2 tablespoons fresh lime juice
2 tablespoons finely chopped red onion.
1/2 cup finely diced tomatoes.
1/4 cup chopped cilantro.
1/2 teaspoon chaat masala
2 large slices wholegrain sourdough bread
2 organic eggs
1 tablespoon oil
1 oz parmesan cheese, grated.
Crushed red and black pepper to finish.
Instructions
Cut the avocado into half and remove the seed. Scoop out the flesh into the mixing bowl.Sprinkle with the lime juice and add in the chopped onion, diced tomatoes, cilantro and mash will. Set this aside for a few minutes.
Toast the bread to you desired crispness.
Spread uniformly with the avocado mixture.
Heat the half the oil in a pan. Break in an egg and allow it to cook on medium low heat for 4 minutes. As the sides start turning pale golden, sprinkle with half the parmesan and allow the cheese to melt and turn crisp around the edges.
Place over the toast.
Complete the second egg in the same manner. Sprinkle with black and red pepper to taste and enjoy!3.1https://spicechronicles.com/spicy-avocado-toast-with-fried-eggs/
The post Spicy Avocado Toast with Fried Eggs appeared first on Spice Chronicles.


