
Claire Akin's Blog, page 26
June 21, 2020
How To Upload Your Contact Lists To LinkedIn & Grow Your Network In Seconds
If you’re looking for an effective way to increase your online following, it doesn’t get any easier than LinkedIn. All you need is an exported contact list from your CRM, email marketing platform, or a spreadsheet of clients and prospects you created yourself. You can even use the CSV file you exported in Step 1 (see our previous article, “How To Grow Your Email List (Exporting Your Contacts & Importing To Mailchimp,” here).
Once you have that list in hand, you can easily add hundreds (or thousands) of new connections on LinkedIn in less than two minutes.
Tammy, our Director of Operations, walks you through exactly how to upload your contact lists to LinkedIn in the following video:
To recap what Tammy says, all you need to do is follow these simple steps:
Log in to your LinkedIn account.
From your LinkedIn home dashboard, click the My Network tab at the top of the screen.
Choose More Options from the left-hand navigation menu.
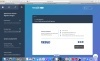
You’ll see several upload methods appear on the screen. Click the Upload a File option (the last one in the list).
Browse for your contact list and click Upload.
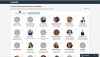
You’ll then see a grid of all the people from your contact list who are on LinkedIn. Click the Select All checkbox, then select Add Connections.
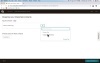
The next screen asks you if you want to send an invite to the people on your list who aren’t on LinkedIn. We recommend clicking Skip for this step.
Once you’ve gone through these seven steps, your connection invites are officially sent. Your prospects, clients, and colleagues will begin seeing your posts as soon as they accept your invitation.
If you’re stuck at home due to COVID-19, it’s the perfect time to invest in your marketing so you come out of this crisis poised for more success than ever. Take this step today and let us know if you get stuck, we’re happy to help.
Stay tuned for our next post where we’ll discuss another step to supercharge your marketing from home!
Looking for more ways to improve your financial advisor marketing? Find more information on our blog . Or learn more about how we help financial advisors just like you grow their businesses with our Total Marketing Package .
The post How To Upload Your Contact Lists To LinkedIn & Grow Your Network In Seconds appeared first on Indigo Marketing Agency.


June 20, 2020
How To Grow Your Email List (Exporting Your Contacts & Importing To Mailchimp)
Financial advisors across the country are now working from home due to the coronavirus pandemic. Even if you can’t meet with prospects face-to-face, there are steps you can take to beef up your online presence and attract your ideal clients—without even leaving your couch.
Over several posts, I’m going to share with you five simple things you should do today to improve your digital appearance as a financial advisor. These tips build off of each other, so you’ll have the most success if you do them in sequential order.
And just a heads-up: We show you exactly how to complete each tip, so feel free to follow along and complete each task as you read through the article and watch the videos.
Let’s get started by discussing Step 1.
Grow Your Email List (Export Your Contacts From Outlook Or Gmail & Import To Mailchimp)
The first step to growing your business is to have a solid email list in place. Why? Because email is still the bread and butter of marketing. It drives traffic to your website, builds trust, helps people understand what you do best, and turns prospects into lifelong clients.
So, for this tip, we’re going to show you how to export your email list from Gmail or Outlook and import it into Mailchimp. This way you can keep on winning over prospects even while you’re stuck at home.
First up, you need to export your current email list from Gmail or Outlook. This part is pretty easy thanks to Google’s and Microsoft’s clear instructions. If you use Gmail, follow these steps to export your contact list as a CSV file. If you use Outlook, follow these steps. (This part should take no more than 5 minutes.)
Once you have your exported email list, it’s time for the fun part. We’re going to import them into Mailchimp. To complete this step, watch the video or follow the instructions below.
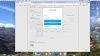
Log in to your MailChimp account and navigate to the Audience tab at the top of the screen.
Click the Manage Audience drop-down menu and select Import Contacts.
Make sure CSV or tab-delimited text file is selected (it should be by default), and click Continue to Setup.
Browse to find the CSV file you exported and click Continue to Match.
Check to make sure the fields match. Then click Continue to Review.
Organize your contacts by creating a tag for them. You could label them as current clients, prospects, COIs, event participants, or whatever you’d like. Then click Continue.
You’ll see a You’re all set to import! message if you’re ready to import. If you get an error message instead, follow the steps to correct any mistakes. Then click Import.
The next screen will tell you how many contacts were successfully imported and how many were invalid.
Quick tip: MailChimp doesn’t let you import role-based email addresses that start with words like admin or info. If you have any role-based addresses in your list, see if you can get a better email address for that person. Then you can manually add them as a contact in MailChimp.
Here’s how to do that:
Log in to MailChimp and click on the Audience tab at the top of the screen.
Hover over the Add Contacts section and click Add a subscriber.
Enter your contact’s email address, first name, and last name.
Tick the two checkboxes at the bottom of the screen. The first box confirms that the person gave you permission to email them. The second tells MailChimp to update this person’s profile if they’re already on your list (which helps prevent duplicate contacts).
Click Subscribe.
That’s it! Now you can send personalized emails to your newly imported contacts whenever you like.
Do you use Constant Contact instead of MailChimp? Here are instructions on how to add people to your Constant Contact email list.
If you’re stuck at home due to COVID-19, it’s the perfect time to invest in your marketing so you come out of this crisis poised for more success than ever. Take this step today and let us know if you get stuck, we’re happy to help.
Stay tuned for our next post where we’ll discuss another step to supercharge your marketing from home!
Looking for more ways to improve your financial advisor marketing? Find more information on our blog . Or learn more about how we help financial advisors just like you grow their businesses with our Total Marketing Package .
The post How To Grow Your Email List (Exporting Your Contacts & Importing To Mailchimp) appeared first on Indigo Marketing Agency.
Staying Home? Step 1 of 5 Easy Steps To Supercharge Your Marketing (Video)
Financial advisors across the country are now working from home due to the coronavirus pandemic. Even if you can’t meet with prospects face-to-face, there are steps you can take to beef up your online presence and attract your ideal clients—without even leaving your couch.
Over several posts, I’m going to share with you five simple things you should do today to improve your digital appearance as a financial advisor. These tips build off of each other, so you’ll have the most success if you do them in sequential order.
And just a heads-up: We show you exactly how to complete each tip, so feel free to follow along and complete each task as you read through the article and watch the videos.
Let’s get started by discussing Step 1.
Step 1: Grow Your Email List (Export Your Contacts From Outlook Or Gmail & Import To Mailchimp)
The first step to growing your business is to have a solid email list in place. Why? Because email is still the bread and butter of marketing. It drives traffic to your website, builds trust, helps people understand what you do best, and turns prospects into lifelong clients.
So, for tip #1, we’re going to show you how to export your email list from Gmail or Outlook and import it into Mailchimp. This way you can keep on winning over prospects even while you’re stuck at home.
First up, you need to export your current email list from Gmail or Outlook. This part is pretty easy thanks to Google’s and Microsoft’s clear instructions. If you use Gmail, follow these steps to export your contact list as a CSV file. If you use Outlook, follow these steps. (This part should take no more than 5 minutes.)
Once you have your exported email list, it’s time for the fun part. We’re going to import them into Mailchimp. To complete this step, watch the video or follow the instructions below.
Log in to your MailChimp account and navigate to the Audience tab at the top of the screen.
Click the Manage Audience drop-down menu and select Import Contacts.
Make sure CSV or tab-delimited text file is selected (it should be by default), and click Continue to Setup.
Browse to find the CSV file you exported and click Continue to Match.
Check to make sure the fields match. Then click Continue to Review.
Organize your contacts by creating a tag for them. You could label them as current clients, prospects, COIs, event participants, or whatever you’d like. Then click Continue.
You’ll see a You’re all set to import! message if you’re ready to import. If you get an error message instead, follow the steps to correct any mistakes. Then click Import.
The next screen will tell you how many contacts were successfully imported and how many were invalid.
Quick tip: MailChimp doesn’t let you import role-based email addresses that start with words like admin or info. If you have any role-based addresses in your list, see if you can get a better email address for that person. Then you can manually add them as a contact in MailChimp.
Here’s how to do that:
Log in to MailChimp and click on the Audience tab at the top of the screen.
Hover over the Add Contacts section and click Add a subscriber.
Enter your contact’s email address, first name, and last name.
Tick the two checkboxes at the bottom of the screen. The first box confirms that the person gave you permission to email them. The second tells MailChimp to update this person’s profile if they’re already on your list (which helps prevent duplicate contacts).
Click Subscribe.
That’s it! Now you can send personalized emails to your newly imported contacts whenever you like.
Do you use Constant Contact instead of MailChimp? Here are instructions on how to add people to your Constant Contact email list.
Stay tuned for our next post where we’ll discuss Step 2 of supercharging your marketing from home!
The post Staying Home? Step 1 of 5 Easy Steps To Supercharge Your Marketing (Video) appeared first on Indigo Marketing Agency.
June 3, 2020
How To Set Up A YouTube Channel For Your Advisory Firm
At Indigo, we’re constantly searching for innovative ways to improve financial advisor digital marketing. Over the past few years, we’ve seen a surge in advisors wanting to use a YouTube channel to advertise their services—so much so that we’ve decided to offer YouTube channel setup and optimization as part of our onboarding process for advisors who already have video content or want to add it.
At the same time, we understand that some tech-savvy advisors would rather set up a YouTube channel for their firm themselves. If that’s you, you’re in luck! Our team has put together this handy step-by-step guide on how to do it (along with examples of good and not-so-good financial advisor YouTube channels—so you know what to do and what not to do).
Steps For Setting Up Your Own Financial Advisor YouTube Channel
Setting up your own financial advisor YouTube channel shouldn’t take more than an hour. Here’s how to do it:
Log in to YouTube with your Google account. If you don’t have a Google account for your business, take 5 minutes to set one up.
Once logged in, select the drop-down menu from the top right and choose Your Channel.
Select the button to Customize Channel.
Hover over the Profile Photo space and an Edit Pencil icon will appear in the top right corner. Upload your square logo.
Hover over the Cover Photo space and an Edit Pencil icon will appear in the top right corner. Upload a nice background image. If you’d like to create a branded background image, you can find an easy template to do so on Canva.com
Once these two images are added, click on the About tab of your channel.
Click the Edit Pencil icon in the Description Section, then copy and paste the text from the About page and contact info page from your website.
In the Links section, click the Edit Pencil icon and add your links for your website, Facebook company page, LinkedIn profile, LinkedIn company page, Twitter profile, and any social media links that your company has. Then click Done. This will make your social media links appear over the cover image on your channel.
Now that you’re done customizing your channel, it’s time to change a few of your YouTube settings.
Go back to the YouTube homepage by clicking the upper left corner logo.
Go back to your YouTube channel by selecting Your Channel once again from the top right drop-down menu.
Select the button for YouTube Studio.
Near the bottom of the left menu, select Settings.
Select the Upload Defaults tab.
In the Description section, add your bio from your website, as well as your website link and a call-to-action sentence stating how viewers should contact you if they would like to take the next steps (e.g., schedule a call here) with a hyperlink that sends them to your contact page.
Change the Visibility default to Private so you can send an individual link to your compliance officer to review before the video goes live, if applicable. (Once approved, you can change the video status to Public in YouTube Studio’s Videos tab.)
The last default to change on this tab is to add any tags relevant to your services and industry. For example, if you specialize in 401(k) planning, or estate plans, or Roth conversions—list all services that apply here. Make sure to hit Enter after each separate phrase.
Next, go to the Community tab on the pop-up screen, then select Defaults. Select Disable Comments from both drop-down options, if required by your compliance officer.
Remember to click Save on this Settings pop-up before closing.
There you have it! Once you’ve followed these steps, you’re ready to start uploading your videos. To do so, you can simply use the Upload icon at the top of your screen (it looks like a video camera with a plus sign). We suggest adding a few more sentences to the top of the description (above the default text we added) that describe what the viewer will learn in the video.
Bonus Tip: Once you pass 100 subscribers on your YouTube channel, you’re then eligible to claim your “Vanity URL”—meaning a custom YouTube URL that includes your business name.
If you’re eligible for a custom URL, here’s how to add it to your YouTube channel:
Select Settings in the bottom left corner of the main YouTube screen.
In the center, find View Advanced Settings.
Find the entry for Custom URL and follow the steps to claim.
We suggest replicating your main website URL. For example, our website is indigomarketingagency.com, so our custom YouTube URL is youtube.com/c/IndigoMarketingAgency.
Examples Of Financial Advisor YouTube Channels
Looking for some inspiration on what to do—and what not to do—when setting up your financial advisor YouTube channel? Let’s run through some examples.
Good Example 1: Indigo Marketing Agency
We just finished overhauling our Indigo Marketing Agency YouTube channel. As you can see from the screenshot below, we have an eye-catching cover photo that runs across the top of the page, along with links to our other social media profiles. 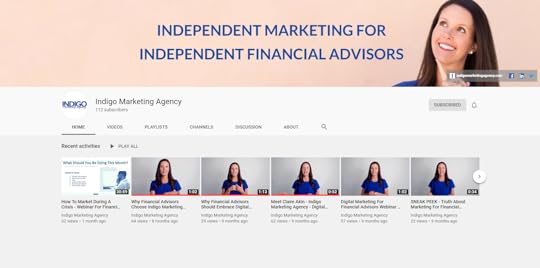
If you navigate to our About tab, you find more information about who we are and what we do. There are also several calls to action inviting visitors to sign up for our free webinars, connect with us on social media, take our exclusive online courses, and email us questions.
 Good Example 2: Chancellor Wealth Management
As I mentioned earlier, Indigo now offers YouTube channel setup and optimization for financial advisors who don’t want to do it themselves. Here’s an example of a YouTube channel we recently set up for a financial advisory firm, Chancellor Wealth Management.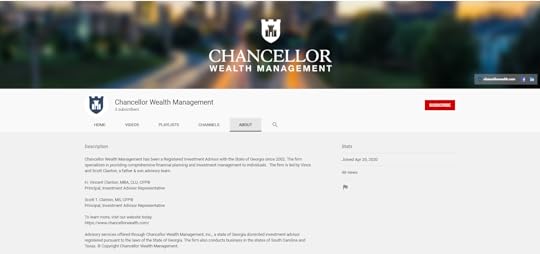
We created an attention-grabbing cover photo that showcases their logo, as well as links that go out to their Facebook and LinkedIn profiles. When you navigate to the firm’s About section, you get a quick snapshot of who they are and what they do, along with a call to action on where visitors can go if they want to learn more.
“Needs Work” Example 1: Community Foundation of Central Georgia
Wondering what not to do when setting up your YouTube channel? Some firms make the mistake of creating a channel but not taking the extra steps to make it marketable. Here’s an example of what I mean.

This YouTube channel was set up by someone who only did the bare minimum. As you can see in the screenshot, the channel is missing several key pieces of information:
It doesn’t have a cover photo.
There aren’t any navigation links at the top to send you to the firm’s website or other social media profiles.
The name of the firm isn’t spelled out; It’s only abbreviated, so you’re not quite sure whose page you’re on.
When you click on the About tab, the only thing listed is a link to the firm’s website (as seen in the screenshot below). There’s no context or background information on why the visitor should click the link.
 “Needs Work” Example 2: American Financial Advisors
Here’s another example of someone who created their own financial advisor YouTube channel. At first glance, it looks like they did a decent job. They have a cover photo. The About tab gives information on what they do.
 But when you dig a little closer, there are two key pieces missing:
They don’t have navigation links at the top of their page, so visitors can’t readily visit their website or connect with them on Facebook or LinkedIn.
When you click over to their About tab, there’s no call to action. Visitors don’t know where to go if they have questions or want to schedule an appointment.
These examples are proof that a few small changes can put your financial advisor YouTube channel heads above the competition. Whether you decide to set up a YouTube channel yourself or outsource it to a financial advisor marketing agency like ours, we hope you enjoyed this article! Simply follow the steps outlined above, and you’ll be on your way to having a professional YouTube channel that establishes you as an industry expert and hooks visitors into learning more.
Want to find out how you can create stellar content at home? Check out these tips for recording your own videos .
The post How To Set Up A YouTube Channel For Your Advisory Firm appeared first on Indigo Marketing Agency.
May 14, 2020
Staying Home? Take These 5 Easy Steps To Supercharge Your Marketing (Video)
Financial advisors across the country are now working from home due to the coronavirus pandemic. Even if you can’t meet with prospects face-to-face, there are steps you can take to beef up your online presence and attract your ideal clients—without even leaving your couch.
I’m going to share with you five simple things you should do today to improve your digital appearance as a financial advisor. These tips build off of each other, so you’ll have the most success if you do them in sequential order.
And just a heads-up: we show you exactly how to complete each tip, so feel free to follow along and complete each task as you read through the article and watch the videos.
Let’s get started.
1. Grow Your Email List (Export Your Contacts From Outlook Or Gmail & Import To Mailchimp)
The first step to growing your business is to have a solid email list in place. Why? Because email is still the bread and butter of marketing. It drives traffic to your website, builds trust, helps people understand what you do best, and turns prospects into lifelong clients.
So, for tip #1, we’re going to show you how to export your email list from Gmail or Outlook and import it into Mailchimp. This way you can keep on winning over prospects even while you’re stuck at home.
First up, you need to export your current email list from Gmail or Outlook. This part is pretty easy thanks to Google’s and Microsoft’s clear instructions. If you use Gmail, follow these steps to export your contact list as a CSV file. If you use Outlook, follow these steps. (This part should take no more than 5 minutes.)
Once you have your exported email list, it’s time for the fun part. We’re going to import them into Mailchimp. To complete this step, watch the video or follow the instructions below.
Log in to your MailChimp account and navigate to the Audience tab at the top of the screen.
Click the Manage Audience drop-down menu and select Import Contacts.
Make sure CSV or tab-delimited text file is selected (it should be by default), and click Continue to Setup.
Browse to find the CSV file you exported and click Continue to Match.
Check to make sure the fields match. Then click Continue to Review.
Organize your contacts by creating a tag for them. You could label them as current clients, prospects, COIs, event participants, or whatever you’d like. Then click Continue.
You’ll see a You’re all set to import! message if you’re ready to import. If you get an error message instead, follow the steps to correct any mistakes. Then click Import.
The next screen will tell you how many contacts were successfully imported and how many were invalid.
Quick tip: MailChimp doesn’t let you import role-based email addresses that start with words like admin or info. If you have any role-based addresses in your list, see if you can get a better email address for that person. Then you can manually add them as a contact in MailChimp.
Here’s how to do that:
Log in to MailChimp and click on the Audience tab at the top of the screen.
Hover over the Add Contacts section and click Add a subscriber.
Enter your contact’s email address, first name, and last name.
Tick the two checkboxes at the bottom of the screen. The first box confirms that the person gave you permission to email them. The second tells MailChimp to update this person’s profile if they’re already on your list (which helps prevent duplicate contacts).
Click Subscribe.
That’s it! Now you can send personalized emails to your newly imported contacts whenever you like.
Do you use Constant Contact instead of MailChimp? Here are instructions on how to add people to your Constant Contact email list.
2. Upload Your Contact Lists To LinkedIn & Grow Your Network In Seconds
If you’re looking for an effective way to increase your online following, it doesn’t get any easier than LinkedIn. All you need is an exported contact list from your CRM, email marketing platform, or a spreadsheet of clients and prospects you created yourself. You can even use the CSV file you exported in Tip #1.
Once you have that list in hand, you can easily add hundreds (or thousands) of new connections on LinkedIn in less than two minutes.
Tammy, our Director of Operations, walks you through exactly how to import your contact list to LinkedIn in the following video:
To recap what Tammy says, all you need to do is follow these simple steps:
Log in to your LinkedIn account.
From your LinkedIn home dashboard, click the My Network tab at the top of the screen.
Choose More Options from the left-hand navigation menu.
You’ll see several upload methods appear on the screen. Click the Upload a File option (the last one in the list).
Browse for your contact list and click Upload.
You’ll then see a grid of all the people from your contact list who are on LinkedIn. Click the Select All checkbox, then select Add Connections.
The next screen asks you if you want to send an invite to the people on your list who aren’t on LinkedIn. We recommend clicking Skip for this step.
Once you’ve gone through these seven steps, your connection invites are officially sent. Your prospects, clients, and colleagues will begin seeing your posts as soon as they accept your invitation.
3. Create A Professional Email Signature (Using HubSpot’s Free Generator)
Want to create an eye-catching email signature for free? HubSpot’s simple online tool lets you generate a professional email signature that’s brand cohesive and includes all your important contact information (a win-win in our book).
Watch the following video to see Tammy create her free Indigo Marketing Agency email signature in less than 10 minutes:
Or, follow these steps:
Step 1: Choose Your Template
Go to HubSpot’s free email signature generator.
Uncheck the Created With HubSpot button at the top of the screen. (If left selected, this generates an ad in your email signature that invites others to create a free signature.)
Then choose your email signature template. We chose Template 6 in the video above, but feel free to use whichever style suits your preference.
Step 2: Add Your Signature Details
Go to the next tab and enter your signature details. This includes information such as your name, job title, company name, phone number, website, social media profiles, and more.
If there are any pieces of information you don’t need—such as a physical address—leave those fields blank. But we highly recommend adding your social links for LinkedIn, Facebook, and Twitter, so prospects can connect with you online.
Step 3: Add Your Brand Colors
Now it’s time to move on to the stylized tab, which is where you’ll customize your signature’s theme, text, and link colors to match your brand.
If you don’t know your brand colors, that’s okay. You can upload your logo to Pine Tool’s Image Color Picker, and the free tool will generate codes for the colors used in your logo. You can then copy and paste these codes into HubSpot.
Quick tip: If you’re leaving your text color black as default, we recommend changing it to a dark gray (try #555555) so it doesn’t look as stark against the white background.
Step 4: Add Your Custom Images
Click over to the last tab to add custom images to your signature, such as your profile picture, firm logo, and a call-to-action button.
Adding a profile picture is optional. Some advisors like to do it because it adds a level of trust to their communications and makes them more recognizable. But this part is up to you.
If you’d like to add a profile picture:
Go to your website.
Right-click on your photo, and select Copy Image Address.
Paste it into the Profile Picture section of the generator.
Next, you’ll want to add your financial advisory firm’s logo. The generator doesn’t let you upload an image of your logo, so you’ll need to grab the logo link from your website. If you don’t have it, ask your admin or website developer to get it for you. Then copy and paste the link into the Company Logo section.
Lastly, you’ll want to add a call-to-action button so prospects can schedule an appointment with you directly from your email signature.
Quick tip: If you create a Calendly account in #4 (below), you can use that as your call-to-action button link.
Step 5: Add The Signature To Your Email
You’re almost finished! Now it’s time to generate your signature and add it to your email. Here’s how you do it:
Once you’ve gone through all four tabs, click the Create Signature button. Then click Copy Signature.
Go to your email account and navigate to the settings. Look for the spot to change your signature and paste the information into the box.
Save your changes.
After you generate your free signature, you’ll get emails from HubSpot inviting you to try their CRM. If you’re not interested in this service, click Unsubscribe in the footer of the email; this way you’ll stop receiving communications from them.
4. Set Up Calendly So Prospects Can Schedule A Call Online 24/7
An appointment scheduler allows prospects to schedule a call with you at any time. Instead of having to go back and forth with you via email to set something up, they can instantly look at your availability and choose a time slot that works for them.
There are dozens of appointment schedulers out there, but our personal favorite is Calendly. It’s free, easy to use, and looks professional. Plus, Calendly syncs to your calendar, so it automatically knows if you have a dentist appointment, a meeting, or any other scheduling conflicts.
Watch the following video to learn how to set up your Calendly account and configure it for your website.
Or, follow these steps:
Go to the Calendly website, enter your email address, and click Sign Up.
Log in with Google and follow the prompts to finish creating your account.
Create a URL that has your name or your firm’s name in it. (For example, Claire’s Calendly link is calendly.com/claireakin.)
Now it’s time to configure your Calendly account. You can customize one of the default event types or you can create your own. To create a new event type, click the Event Types tab at the top of the page.
Click + New Event Type, go to the One-on-One section, and click Create.
Give your event a name (such as Get Started Now), and click Next.
Customize your event by changing your time zone, your availability, the duration (I usually go with 15-minute introductory meetings), and how far in advance someone can schedule an appointment (I usually do 24 hours).
By default, Calendly requires each person to enter their full name and email address when they schedule an appointment. But you also need to know their phone number. To add a required line for phone number, go to the Invitee Questions section.
Click the + Add A New Question button, and enter Phone Number into the Question field.
Check the Required box, and click Apply.
Next, you’ll want to personalize your notifications. To do this, click on the Invitee Notifications section and turn on Email Reminders.
Click the View live page button to make sure everything looks good.
That’s all you need to do to set up Calendly. If you want to customize your account even further (which I recommend doing), I have some favorite tips and tricks. Go ahead and click on the Advanced tab under the When can people book this event? section. Then follow these steps:
Don’t want to have back-to-back calls? Go to the Availability Increments section and use the drop-down menu to choose how often you want your availability to show.
For example, if your prospects are scheduling 15-minute meetings, you could change your availability increment to 30 minutes. That way someone can only schedule a call with you every half hour (and you have a 15-minute buffer in case a phone call runs over).
Next up is the Event Max Per Day section. This lets you limit the number of calls that can be scheduled in a day. So, if you only want to have a maximum of four introductory calls a day, you could set that limit in this section. Then, once four calls are booked, that day becomes unavailable on your calendar.
The last tip can be found in the Minimum Scheduling Notice section. As it sounds, this section lets you limit how soon someone can schedule a call with you. By default, this is set to 4 hours, which means someone could potentially schedule a call the same day. I always change this to 24 hours so I don’t have an appointment sneak up on me. But you can adjust it depending on your needs.
Once your advanced settings are how you like, don’t forget to hit Save & Close.
5. Add A Calendly Floating Button To Your Website (So Prospects Can Schedule A Call From Any Page On Your Site!)
Now that you have Calendly set up, it’s time to add it to your website. We recommend adding it as a floating Schedule A Call button that remains in the bottom right corner of your website at all times. Here’s an example of what we mean:

A floating button is beneficial because it allows prospects to quickly schedule a call with you—no matter where they are on your website. It also serves as a gentle reminder that you’re available to chat with them whenever they’re ready.
Adding the floating button to your site is easy, but it’s not intuitive. To figure out how to do it, watch the following video:
https://indigomarketingagency.wistia.com/medias/jrwya8l2ft
Or, follow these steps:
Log on to your Calendly account and click the drop-down carrot next to the Account section at the top of the screen.
Click Share Your Link from the drop-down menu, and click the blue box next to Add to Your Website.
You’ll see three options for adding your link to your website: inline embed, pop-up widget, and pop-up text. Click Popup Widget, then Continue.
Click Copy Code.
Log in to the back end of your website.
Navigate to the header section, which is where you can add code to every web page all at once.
Quick tip: Every website platform has the header section located in a different area. But just look for the word “header” in the back end of your website and you’ll know you’ve found the right place.
Paste the code into the HTML header section and save it.
Publish your website.
View your live site to confirm that the floating button is at the bottom of every page.
The floating button has Calendly branding on it by default. If you want this removed, you can buy a Premium subscription to Calendly, which costs $8 per month. The paid version lets you create more than one event type, which could be worth the price depending on your situation.
If you’re stuck at home due to COVID-19, it’s the perfect time to invest in your marketing so you come out of this crisis poised for more success than ever. Take these five steps today and let us know if you get stuck, we’re happy to help.
Looking for more ways to improve your financial advisor marketing? Find more information on our blog . Or learn more about how we help financial advisors just like you grow their businesses with our Total Marketing Package .
The post Staying Home? Take These 5 Easy Steps To Supercharge Your Marketing (Video) appeared first on Indigo Marketing Agency.
May 5, 2020
How To Grow Your Retirement Business In The 2020 Economic Crisis (Webinar)
In The 2020 Economic Crisis
If you’re like most advisors, you’re likely starting to come up for air after the shock of the coronavirus pandemic. Now that you’ve contacted your clients, rebalanced accounts, and communicated your plans, it’s time to think about growing your business during this crisis. We’ve partnered with the experts at The Retirement Learning Center to update advisors on how the retirement plan landscape has been altered by the 2020 economic crisis. We’ll review:– How has the retirement landscape been affected by COVID-19?– How can advisors grow their retirement business in the current crisis?– Where are the biggest opportunities as a result of the CARES Act?– How to become the go-to expert on a specific employer plan– How advisors can use retirement plans to create marketing campaigns At the end of the presentation, we’ll give you ideas for a few marketing campaigns you could create to grow your retirement plan business as well as the resources to get started now. Save your spot today!
About Your Presenters:

Claire Akin, MBA
Claire Akin runs Indigo Marketing Agency, a full-service marketing firm serving top independent financial advisors. She works closely with several of Barron’s Top 100 Financial Advisors to grow their AUM using digital marketing.

John Carl, Founder & CEO, Retirement Learning Center
John Carl is Founder and President of Retirement Learning Center, the nation’s preeminent thought leader on retirement issues. He is also the Executive Director of the PLANSPONSOR Institute, the education and training arm of PLANSPONSOR, as well as founding lecturer for The Retirement Advisor University (TRAU) at UCLA Anderson School of Management Executive Education. John serves on the Government Affairs Committee for the National Association of Plan Advisors. As the “advisor to the advisors,” John is a highly sought after industry insider who travels the country educating groups of financial professionals on the very latest in retirement legislation, forecasts, and developments affecting the industry.
The post How To Grow Your Retirement Business In The 2020 Economic Crisis (Webinar) appeared first on Indigo Marketing Agency.
April 26, 2020
Calamos: Marketing In A Crisis For Financial Advisors (Webinar)

The hardest part of getting new clients as a financial advisor is the lack of urgency that people have when it comes to their financial plan. But thanks to coronavirus and the recent market decline, there is more urgency today than ever!
The question is, how do you best take advantage of this situation? How can you market in a crisis to multiply your best clients, grow your business, and help more people?
Join this exclusive webinar to learn:
1. How to use the current crisis to multiply your best clients
2. Becoming the “Go-To Expert” in your niche
3. Making it easy to work with you virtually
4. Creating urgency for prospects to act today
Download your free “Marketing In A Crisis” checklist to learn exactly what you should be doing each week to retain your best clients, get more referrals, and get in front of new prospects.
Space is limited for this time-sensitive webinar, so save your seat today!
The post Calamos: Marketing In A Crisis For Financial Advisors (Webinar) appeared first on Indigo Marketing Agency.
April 25, 2020
Our Team’s Top Tips For Working From Home
At Indigo Marketing Agency, our team has been fully remote for over five years now, so we’ve compiled a list of our top tips for working from home. We’re mostly made up of work-from-home moms with young kids and hectic schedules. Thanks to our already-remote nature, we’ve been able to run at full capacity without any service interruptions—even in the midst of a global pandemic.
If you’re new to remote work and are wondering how to stay productive and maintain balance (especially if you have kiddos), then buckle up! We’ve got some noteworthy tips for working from home.
Here’s what our team members had to say…
Claire, Owner & CEO of Indigo Marketing Agency
Tip #1: Focus on hitting a home run only with the single task you’re working on.
Tip #2: Write down the three most important items to get done each day and do those before emails.
Tip #3: Never open an email unless you have the time to respond to or address it.
Tammy Hawkins, Director of Operations at Indigo Marketing Agency
Tip #1: Use focus music to boost concentration. I recommend Brain.FM, which is a mobile app that uses music waves to encourage focus and remove distractions.
Tip #2: Try the Pomodoro method to set scheduled breaks. This method breaks your work into 25-minute sections with a 5-minute break in between. It helps you maintain focus and feel more relaxed about your workday. Focus Keeper is a free app that uses this technique. It helps!
Tip #3: Set up recurring home and work routines using Home Routines—a paid app that’s worth every penny. It gives me a lot of good routine structure and has a fun little chime sound when you check off the stars as complete.
Lisa Gaines, Content Manager at Indigo Marketing Agency
Tip #1: Have a set routine for you and your kids that allows you several hours of work time, so you can stay focused. For me it’s during the kids’ nap time (or quiet time for my daughter), and after they’re in bed. We’ve had a strict routine their whole lives that allows me to rely on those specific times during the day.
Tip #2: Leave room for error and give yourself grace. With kids, there are going to be disruptions with even the best-laid plans and routines. Kids have appointments, get sick, just have a bad day, etc.
Tip #3: Set specific yet realistic goals for the day. This can obviously include things other than work. But I try to make mental goals of what I need to get done each day, leaving some things that I can do the next day so I’m not overloading myself.
Lori Koepke, Content Coordinator at Indigo Marketing Agency
Tip #1: Create time blocks for working. For me, I wake up early to work for a short time before my kids are awake. Then I have a chunk of time in the afternoon when my youngest is napping and my older three are in their rooms for quiet time. I sometimes have a chunk of time at night to work a bit more and answer emails, but I really try to avoid that.
Tip #2: Never delete an email—even if you’ve completed the task. I label each email I get so I can search my inbox more easily and have past information at my fingertips.
Tip #3: Keep organized and detailed logs of the work you’re doing. I have multiple sheets open where I log information about articles and their current status. Everything I do is recorded so if I forget to do a task, it’s there for me!
Anna Hilbish, Writer at Indigo Marketing Agency
Tip #1: Use a time-blocking schedule instead of a task list when you have certain projects that are hard to get through and you’re tempted to put off.
Tip #2: Depending on your work, give yourself a process or template for all the mundane tasks you have to do in your position. Do them in the exact same order every time for maximum efficiency and accuracy.
Tip #3: Get ready for the day as if you were going to be seen in public. It’s something so small, but it can be so helpful.
Jennifer Farrior, Editor at Indigo Marketing Agency
Tip #1: Be extremely organized. This sounds obvious, and should be a must in any work environment. But since working from home can be hectic—especially with kids interrupting often—it’s better to “overdo” the organization so nothing falls through the cracks. I have multiple task lists, and use different highlighting to keep track of “in progress” tasks and “completed tasks.” (This goes for billing as well!)
Tip #2: Don’t be afraid to over-communicate. When you’re not face-to-face with coworkers, there can be misinterpretations and confusion. It always helps to communicate even a simple “Got this!” to let someone know you’ve seen their email. If you have questions or need clarification, ask!
Tip #3: Schedule breaks. This can sound obvious as well, but sometimes we can get so comfy on the couch that hours later our legs are numb and we haven’t had a sip of water. I also try to squeeze in some simple stretches and exercises during breaks.
Kelli McLeod, Account Manager at Indigo Marketing Agency
Tip #1: Maintain a routine. For me, I wake up early and work during my son’s nap time—in addition to any other time I can carve out during the day (especially if he’s playing nicely).
Tip #2: Communication is key. If you can’t get to a task right away, set realistic expectations for when you can complete something.
Tip #3: Enlist help if you have it. My husband is home every other day during this social distancing period, so we have been able to tag-team entertaining our kiddo while the other makes a call, completes a task, etc. Sometimes “help” may also be in the form of screen time! No shame in this mom-game (especially for those of us with little toddlers who can’t seem to sit still for anything but Disney!).
Ellie Hubbard, Content Scheduler at Indigo Marketing Agency
Tip #1: I work before my kids get up, and again during nap time. I’ve found that a lot can get done if the time is dedicated and focused. I try not to work with my kids running around (or while they’re awake) because it takes longer and I’m more prone to make mistakes due to interruptions. As they’ve gotten older and play more independently, I’ve ventured into working a tad while they’re awake, but I try to keep it minimal.
Tip #2: Adjust schedules as necessary. I used to start work at 6:00 a.m. But some days the work wouldn’t be finished when my kids woke up, so I’d power through while my husband did morning snuggles and fed them breakfast. I missed this time and began struggling with what to do. So we decided to adjust the schedule so that I could be present during snuggles and breakfast and resume any tasks afterward before my husband had to leave for work. It’s okay to recognize that a schedule isn’t working for you and adjust it (as many times as necessary) to figure out what works for you and your family.
Tip #3: Ask for help. Some busier seasons I have hired a babysitter one day a week to give me space to catch up. Obviously, that won’t work during a quarantine. But if there’s another adult in the house, ask for dedicated work time If you’re having a hard time getting all the tasks accomplished in the allotted time you have.
Amy Lanci, Writer at Indigo Marketing Agency
Tip #1: Get up early so you can work before your kids wake up. I usually get up around 4:00 a.m. to get a solid 3 to 4 hours of work in before my five-year-old daughter wakes up.
Tip #2: Come up with activities ahead of time for your child to do so they can keep busy while you work.
Tip #3: If you’re married, coordinate work schedules with your spouse. I usually fit in my business stuff in the afternoon around my husband’s meeting schedule.
Pamela Hubbard, Lead Writer at Indigo Marketing Agency
Tip #1: I try not to check my work email unless I’m sitting down to work.
Tip #2: My work time is completely dedicated to work—I don’t try to multitask. I clear distractions, put piano music on my phone (then put my phone across the room), minimize other windows on my computer, and get to work.
Tip #3: If I miraculously get a longer chunk of time to work, I set my timer and take breaks every so often to get up, stretch, and rest my eyes.
Tip #4: At the end of every week, I make a tentative plan for my work time the following week, taking into account what articles will take longer to write, what days I have more time to work, what tasks are priority, and so on.
Tip #5: BE FLEXIBLE! I try not to beat myself up if I can’t get as much done as I wanted or if a babysitter cancels. I know I’ll get the work done eventually and it’ll all work out. In this oh-so-fun time of being home with the kids every minute of every day, my husband and I have been experimenting with staggering our work “shifts” so I still have as much time to work as I did with childcare. We’ve tweaked it these past couple of weeks and I’m sure we’ll tweak it again!
Cassidy Horton, Webinar Manager at Indigo Marketing Agency
Tip #1: Get ready for work each day. Every morning I wake up at 6:00 a.m., take a shower, get dressed, eat breakfast, and then head to my computer desk for work. I keep the same routine as I did in my previous 9-to-5, which helps me get into “work mode” and stay focused.
Tip #2: Leave emails unread until you can respond. If I happen to read an email on my phone, I mark it as “unread” as a reminder to answer it when I have time.
Tip #3: My favorite time management tool is www.marinaratimer.com, which encourages you to be productive with what little time you have. I usually customize the timer to do 45-minute sessions with 5-minute breaks when I’m working on longer writing assignments. I’ve found that I’m much more productive when my brain knows it only has to work hard for a short period of time.
Amy Artiga, Lead Technical Writer at Indigo Marketing Agency
Tip #1: Understand your rhythms and when you work best. I write best in the morning while my brain is fresh, so I do that first thing and save other tasks for later. I also know that checking email scatters my brain, so I make sure to do anything that requires a lot of concentration before opening my email. With kids, I know which of their activities allows me the most uninterrupted time, so I plan my work accordingly. I save my writing for while they’re reading (we’re a family of bookworms), and I don’t even try to do it while they’re doing things that require my input.
Tip #2: Have a schedule, but be flexible. When my kids were in school, I’d plan out my week and block time for everything that needed to get done. But then I would almost always end up moving things around based on my brain power. But the blocks never got deleted, just moved around, so everything got done. Now with the kids we have a “school schedule.” The times on the schedule are just ideas, but it lets the kids know what’s next and what they can look forward to (and it keeps them from getting bored).
Tip #3: Start with the hardest thing first. Then everything else is easier as the day goes on. When I was in college, that meant I did my Spanish classes first thing in the day because everything else is easier when it’s in your native language. Now for both me and my kids it’s writing.
Did you find our tips for working from home helpful? For more helpful information regarding marketing virtually, visit our blog here!
The post Our Team’s Top Tips For Working From Home appeared first on Indigo Marketing Agency.
April 23, 2020
Marketing In A Crisis For Financial Advisors (Webinar)
The question is, how do you best take advantage of this situation? How can you market in a crisis to multiply your best clients, grow your business, and help more people?
Join this exclusive webinar to learn:
1. How to use the current crisis to multiply your best clients
2. Becoming the “Go-To Expert” in your niche
3. Making it easy to work with you virtually
4. Creating urgency for prospects to act today
Download your free “Marketing In A Crisis” checklist to learn exactly what you should be doing each week to retain your best clients, get more referrals, and get in front of new prospects.
Space is limited for this time-sensitive webinar, so save your seat today!
The post Marketing In A Crisis For Financial Advisors (Webinar) appeared first on Indigo Marketing Agency.
April 16, 2020
The #1 Most Important Marketing Strategy for Financial Advisors
Some things never change. In marketing, we hear a lot about social media, YouTube, Instagram, and Facebook ads. Marketing companies may try to sell you on fancy marketing funnels or new secrets. But really, how do we know what’s the most important marketing strategy for financial advisors?
The reality is that marketing hasn’t changed much in the last few decades.
The #1 most important marketing strategy for financial advisors is staying in front of your network with content marketing sent by email.
It’s that combination that outperforms other strategies every single time.
What I mean by that is regularly communicating to:
Remind people what you do
Explain who you serve and the problems you solve
Stay top-of-mind so people turn to you with their questions
Share valuable, relevant information with your target market
Be the “go-to” expert in the area you serve
You can accomplish this in a variety of ways, but the most common platform is a blog post that is shared by email and social media—just like this blog post that you’re reading, which was likely sent to you via email or found on social media.
If you’re not regularly staying in front of your clients, network, and referral partners with your own content, I can guarantee you’re missing out on referrals.
It is an old-school marketing technique. But even with the rise of social media and other digital marketing tools, content marketing still reigns supreme. The proof is in the statistics.
Here are 9 reasons why every digital marketing expert (including myself) swears by content and email marketing as the most important marketing strategy.
1. Email Outperforms Social Media Every Time
Engagement rates for social media are shockingly low compared to email. Facebook, Instagram, and Twitter have an overall engagement rate of 0.58%, while emails have a 22.86% open rate and a 3.71% click-through rate. (1)
These statistics show us that someone is 6x more likely to click a link in an email than they are in a social media post. Why? Because emails get delivered directly to your prospect’s inbox. It’s kind of like showing up in their virtual living room.
When they open an email from you, you have their undivided attention. They don’t have to fight through social media algorithms, ads, and other noise to hear what you’re trying to say.
The takeaway? An intentional, relevant email means more to your prospects and clients than a social media post they will more than likely never see.
2. Email Marketing Has An ROI Of Up To 440%
No—that’s not a typo. Studies show that for every dollar you spend on custom email marketing, you can expect to see a return of up to $44. (2)
Despite all the financial advisor digital marketing tools cropping up today, email marketing is still one of the biggest drivers of revenue—and it will be for years to come.
3. Everyone Uses Email
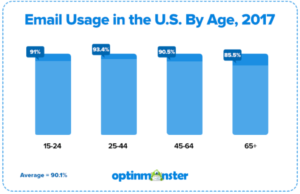
In today’s digital age, it’s nearly impossible to find someone that doesn’t have an email address. Over 90% of people aged 15 and older use email on a regular basis. Of those 90%, 99% check their email at least once a day, while some check their email as much as 20 times a day.
As you can see from the graph below, nearly every age group sends and receives emails—even retirees over age 65. No matter what age group your financial advisory firm is targeting, you can rest assured that they’re using email.
 Source:
OptinMonster
Source:
OptinMonster
4. You Can Instantly Measure Email Performance
With most digital marketing tools—like ad campaigns and webinars—you have to let time pass before you can measure progress. But not with email marketing.
Email marketing is one of the only tools that lets you gauge your performance in real time. That means you can kick off a financial advisor email marketing campaign and immediately track key factors such as:
Open rate (how many people opened your email)
Click-through rate (how many people clicked on a link in your email)
Delivery rate (how many emails were successfully delivered to your subscribers)
Bounce rate (how many emails failed to be delivered)
Email sharing (how many recipients forwarded your email to their friends or shared it on social media)
Unsubscribes (how many people opted out of future emails)
All this data shines a light on what’s working for your campaign now, so you can improve future campaigns. For example, a high open rate may show that your prospects really like your subject line. But a low click-through rate may mean you need to adjust your call to action.
Most email marketing engines have A/B split testing tools, which let you try out various subject lines, calls to action, images, and more to see what your prospects like and don’t like.
If you’re looking for an email marketing engine, I recommend Mailchimp along with six other financial advisor technology tools for 2020.
5. Companies With Blogs Generate 67% More Leads
Especially in a locked-down society, blogging is the new networking. Sharing original blog posts allows you to start conversations and inform your network on important issues. Blogs are a great way to showcase your services to clients and prospects, establish yourself as an industry leader, and improve your online presence. All these factors help you generate more leads. In fact, studies show that businesses who actively blog generate 67% more leads than those who don’t. (3)
6. Blogs Boost Your SEO
Every financial advisor wants their firm to rank on the first page of Google. It’s how clients find you. It’s how you get more traffic to your website. But how do you get there? Search engine-optimized blog posts are one way to make that happen.
Google loves websites that are regularly updated with relevant content. So if you’re really trying to win the Google battle for keywords like “financial planning for medical device reps,” creating content on related subjects each week can catapult you to the top of the list.
If you’re looking for more tips on how to boost SEO, check out How to Improve Your SEO for Financial Advisors.
7. Blogs Are Evergreen
Ads go away the moment you stop paying for them. But blogs stick around forever and show up in search results. With custom blog posts, your prospects and clients will still find your words helpful five years from now.
Plus, blogs are a tried-and-true way of increasing website traffic. Studies show that one in 10 blog posts compound over time—meaning traffic increases as the post ages. Over time, these compounding blog posts can account for as much as 38% of your financial advisory firm’s website traffic. (4)
8. Blogs & Emails Keep You Top-Of-Mind
Did you know that the average time between when someone becomes aware of you and when they actually become a client is a full year? It takes a long time to build trust and create rapport with prospects online.
But blogging on a regular basis can speed up this process. It establishes you as an industry expert and keeps you top-of-mind. The next time a client or prospect has a question, they’ll be more likely to reach out to you (or your blog) for an answer.
9. Blogs & Emails Work For Every Stage Of The Sales Funnel
The moment someone hears of your financial advisory firm, they become part of your sales funnel. Whether someone is in the awareness stage, the interest stage, or the decision stage, you can use blogs and emails to nudge them through the buyer’s journey and speed up the process.
Here’s a breakdown of how your content may vary by stage:
Awareness stage (This is the introductory stage where you explain to prospects who you are and what you do.)
Interest stage (Now that your prospects are aware of your financial advisory firm, you can drive home what makes your firm unique.)
Decision stage (This is where you offer complimentary consultations, free reports, or anything else that will call them to action.)
The Most Important Marketing Strategy Bottom Line
Content marketing and email marketing are the two most powerful tools every financial advisor should invest in to attract quality clients and increase their AUMs. The key is to create a personalized message that resonates with your prospects and keeps you top-of-mind. So ignore all the noise about social media, and focus on these tools as the most important marketing strategy for financial advisors.
If you’re looking to boost your digital marketing game this year, I invite you to check out our webinar, The Truth About Marketing for Financial Advisors. In this webinar we break down the only two ways advisors really get new clients, how much you should budget for marketing, and more.
__________________
(1) https://optinmonster.com/is-email-marketing-dead-heres-what-the-statistics-show/
(2) https://www.campaignmonitor.com/company/annual-report/2016/
(3) https://www.stateofinbound.com/?__hstc=20629287.6b54d625a84dc9939482923b8f3a14d5.1472206093678.1490182003805.1490213202871.5&__hssc=20629287.2.1490213202871&__hsfp=2010045186
(4) https://blog.hubspot.com/marketing/compounding-blog-posts-what-they-are-and-why-they-matter
The post The #1 Most Important Marketing Strategy for Financial Advisors appeared first on Indigo Marketing Agency.


